- TrackMania
- 04 March 2013 at 13:46 UTC
-

- 1/2
This tutorial will allow you to install a TrackMania dedicated server manager records (Xaseco). This server can either be hosted by you on a VPS (virtual machine on the Internet).
Note :
- We created a new tutorial on how to install the new "2.2" version of WAMP because there is a problem if C ++ 2010 libraries are not installed before hand.
Click here to see the tutorial on WAMP 2.2.
- Install the Web server (Required if you want to use Xaseco)
- Install a text editor with syntax highlighting
- Install the official TrackMania dedicated server
- Test the dedicated server
- Install and configure XAseco
- Test Xaseco
- Widgets display records and menu button : Fufi Widgets and Fufi Menu
- Test the server from the Internet
1. Install the Web server (Required if you want to use Xaseco)
For this, you have 2 solutions :
- Automatic method : "[Apache / PHP / MySQL] WAMP - Installing WAMP 2.2 and its add-ons"
- The manual method is more professional : "Simultaneous installing PHP 5 and PHP 4 on a Windows computer" (one version of PHP and Apache is sufficient)
Once installed WAMP, Xaseco can save local records (Records made ​​by people playing on your TrackMania server) in a MySQL database.
2. Install a text editor with syntax highlighting
For the configuration files of the dedicated server and Xaseco is clearer, we recommend that you install a text editor that supports syntax highlighting.
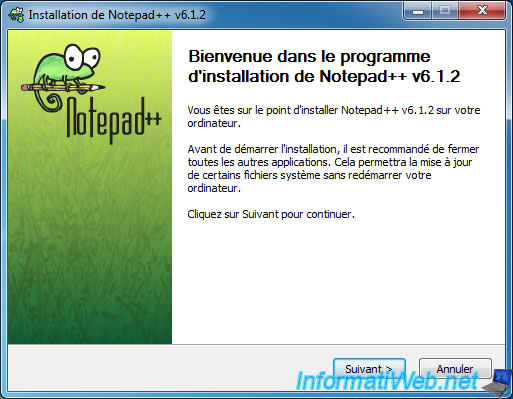
In this tutorial, we will use the "Notepad++" which is well known and easy to use program.
3. Install the official TrackMania dedicated server
Download the official TrackMania dedicated server : TrackmaniaServer_2011-02-21.zip (Nadeo) (Check for updates here).
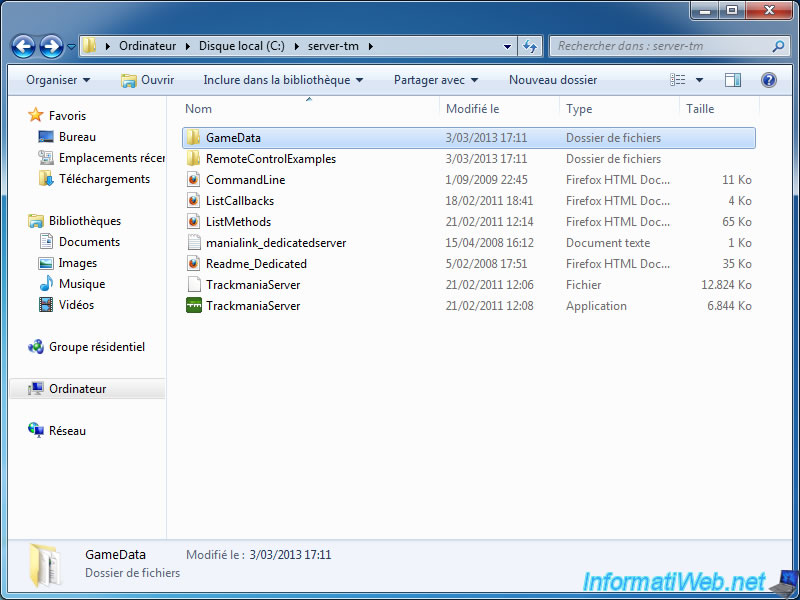
Create a "server-tm" folder at the root of a partition. For example : the "c" partition. Then, unzip the contents of the downloaded file in the folder you just created.

You get this. Now, go to the "GameData --> Config" folder.
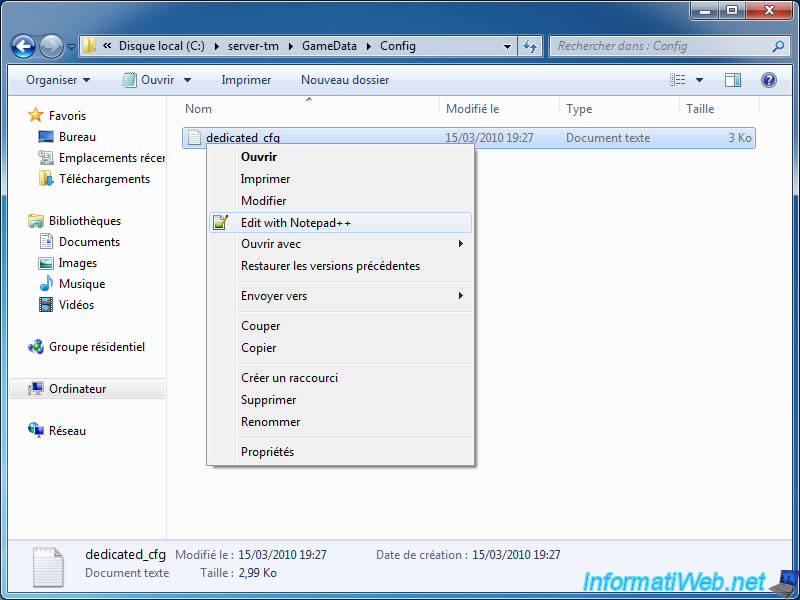
Right click on the "dedicated.cfg" file and click "Edit with Notepad ++".
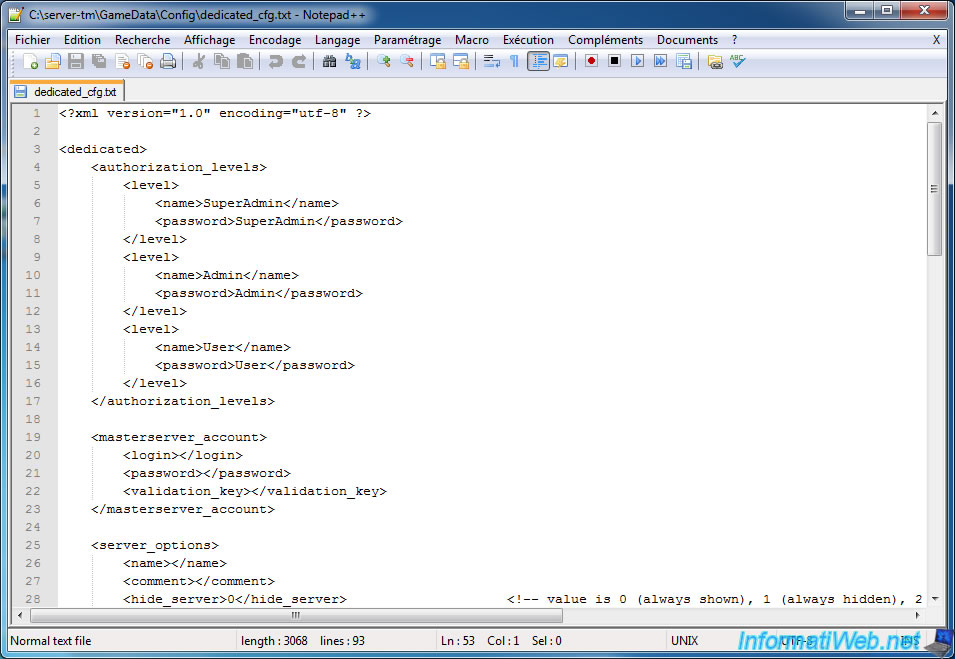
Here are the contents of this file and what to change.
<?xml version="1.0" encoding="utf-8" ?>
<dedicated>
<authorization_levels>
<level>
<name>SuperAdmin</name>
<password>SuperAdmin</password> * Change the password of the SuperAdmin account.
</level>
<level>
<name>Admin</name>
<password>Admin</password> * Change the password of the Admin account.
</level>
<level>
<name>User</name>
<password>User</password> * Change the password of the User account.
</level>
</authorization_levels>
<masterserver_account>
<login>informatiweb</login> * Specify the user name of TrackMania account to use to host your TM server. This account can be a TMNF account or dedicated Server TMUF. See note 1
<password>LE_MOT_DE_PASSE</password> * Enter the password associated with this TrackMania account.
<validation_key></validation_key> * If it's a TrackMania United (Forever) account, enter the last 3 letters of the serial number of TMUF. If you have a TMNF account, leave it empty.
</masterserver_account>
<server_options>
<name>InformatiWeb</name> * Specify a server name that will appear in the list of online servers and / or local network.
<comment>InformatiWeb Server</comment> * Enter a description for your server.
<hide_server>0</hide_server> <!-- value is 0 (always shown), 1 (always hidden), 2 (hidden from nations) -->
<max_players>32</max_players> * Change, if you want, the maximum number of players (to avoid slowdowns).
<password></password> * Provide a password for the server if you want, otherwise leave blank.
<max_spectators>32</max_spectators> * Change, if you want, the maximum number of spectators.
<password_spectator></password_spectator> * Specify a password for spectator mode or leave it blank.
<ladder_mode>forced</ladder_mode> <!-- value between 'inactive', 'forced' (or '0', '1') -->
<ladder_serverlimit_min>0</ladder_serverlimit_min> <!-- Those values will be clamped to the limits authorized on http://official.trackmania.com/tmf-ladderserver/ -->
<ladder_serverlimit_max>50000</ladder_serverlimit_max>
<enable_p2p_upload>True</enable_p2p_upload> * Allows for custom avatars and custom cars. Warning : this may slow down the server.
<enable_p2p_download>True</enable_p2p_download> * Allows for custom avatars and custom cars. Attention : this may slow down the server.
<callvote_timeout>60000</callvote_timeout>
<callvote_ratio>0.5</callvote_ratio> <!-- default ratio. value in [0..1], or -1 to forbid. -->
<callvote_ratios>
<voteratio command="Ban" ratio="0.65"/>
<!-- commands can be "Ban", "Kick", "ChallengeRestart", "NextChallenge", ... -->
</callvote_ratios>
<allow_challenge_download>True</allow_challenge_download>
<autosave_replays>False</autosave_replays>
<autosave_validation_replays>False</autosave_validation_replays>
<referee_password></referee_password>
<referee_validation_mode>0</referee_validation_mode> <!-- value is 0 (only validate top3 players), 1 (validate all players) -->
<use_changing_validation_seed>False</use_changing_validation_seed>
</server_options>
<system_config>
<connection_uploadrate>512</connection_uploadrate> <!-- Kbps (kilo bits per second) -->
<connection_downloadrate>8192</connection_downloadrate> <!-- Kbps -->
<force_ip_address></force_ip_address>
<server_port>2350</server_port> * If you are hosting the server on the same pc as you play with TMNF or TMUF, change the port to 2352.
<server_p2p_port>3450</server_p2p_port> * If you are hosting the server on the same pc as you play with TMNF or TMUF, change the port to 3452.
<client_port>0</client_port>
<bind_ip_address></bind_ip_address>
<use_nat_upnp></use_nat_upnp>
<p2p_cache_size>600</p2p_cache_size>
<xmlrpc_port>5000</xmlrpc_port> * If you are hosting the server on the same pc as you play with TMNF or TMUF, change the port to 5002.
<xmlrpc_allowremote>False</xmlrpc_allowremote> <!-- If you specify an ip adress here, it'll be the only accepted adress. this will improve security. -->
<blacklist_url></blacklist_url>
<guestlist_filename></guestlist_filename>
<blacklist_filename></blacklist_filename>
<packmask>stadium</packmask> * Let stadium if you use TMNF otherwise leave this value blank to create a TMUF server (which allows you to use any existing environment).
<allow_spectator_relays>False</allow_spectator_relays>
<!-- <minimum_client_build>2009-10-01</minimum_client_build> -->
<!-- <disable_coherence_checks>laps</disable_coherence_checks> -->
<use_proxy>False</use_proxy>
<proxy_login></proxy_login>
<proxy_password></proxy_password>
</system_config>
</dedicated>
Note 1 : When a TrackMania account is used to host the dedicated server, the same account can't be used to play the game. In this case, you get an error message "You are already connected".
Solution for TMNF accounts :
Just run the game and create a new account to use it to host the server.
Solution pour les comptes TMUF :
TrackMania a prévu une fonctionnalité pour créer des logins spécialement conçus pour les serveurs dédiés. Pour cela, connectez-vous sur votre page joueur "player.trackmania.com" et cliquez sur "Dedicated servers". Entrez votre numéro de série TMUF pour pouvoir gérer vos logins "Dedicated servers".
Il ne vous reste plus qu'a indiquer un nom d'utilisateur, un mot de passe et le Pays / Ville de votre serveur.
Attention : Vous êtes limité à 10 logins dedicated server.
Solution for TMUF accounts :
TrackMania has provided a feature to create logins specially designed for dedicated servers. To do this, log on to your player page "player.trackmania.com" and click on "Dedicated servers". Enter your serial number of TMUF to manage your logins "Dedicated servers".
There remains only to give you a user name, a password and Country / City of your server.
Warning : You are limited to 10 dedicated server logins.
Once the dedicated server configured, we will now create a batch file that will allow you to run the dedicated server configuration and desired playlist.
To do this, go to the "File" menu and click "New".
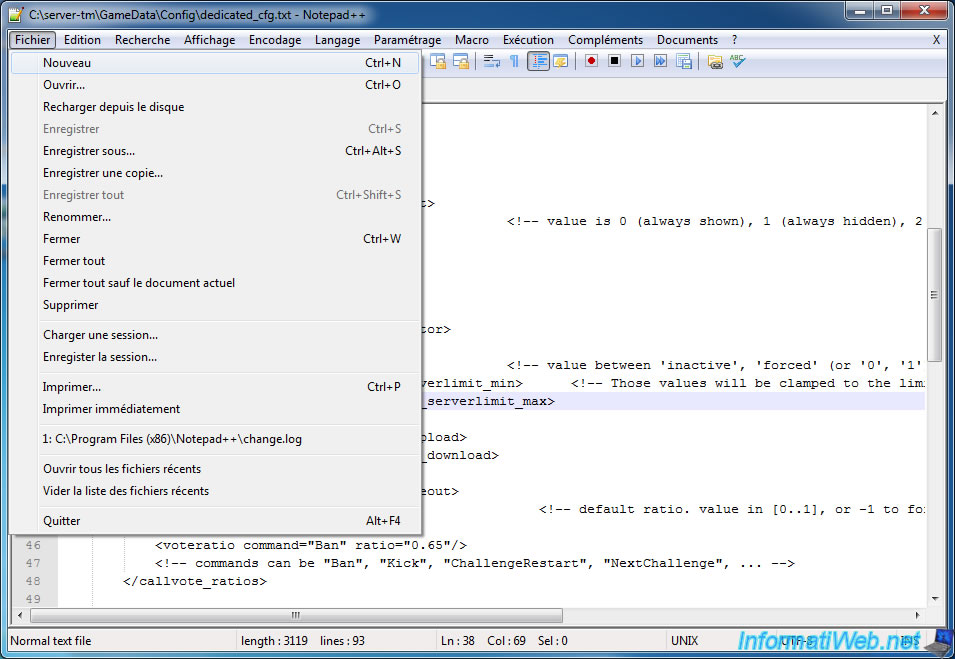
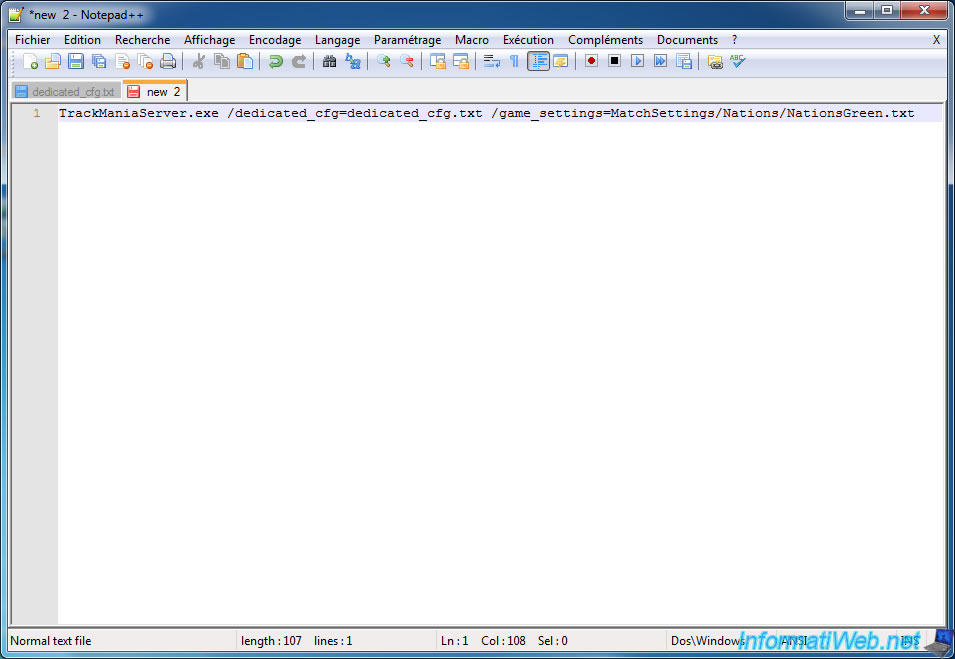
Then paste this inside :
TrackManiaServer.exe /dedicated_cfg=dedicated_cfg.txt /game_settings=MatchSettings/Nations/NationsGreen.txt
This command will tell the dedicated server to :
- Load the configuration dedicated server "dedicated_cfg.txt" located in the "GameData\Config" folder
- Load playlist "NationsGreen.txt" located in the "GameData\Tracks\MatchSettings\Nations" folder.
Notes :
- By default, the server is started in Internet mode. This means that your dedicated server connects to the official server of TrackMania and it's added to the list of online servers.
If you don't want your server to appear online, then you need to run it in LAN mode. To do this, just add "/lan" (without "") after "TrackManiaServer.exe".
Command lines are explained in the "CommandLine.html" file in the dedicated server folder.
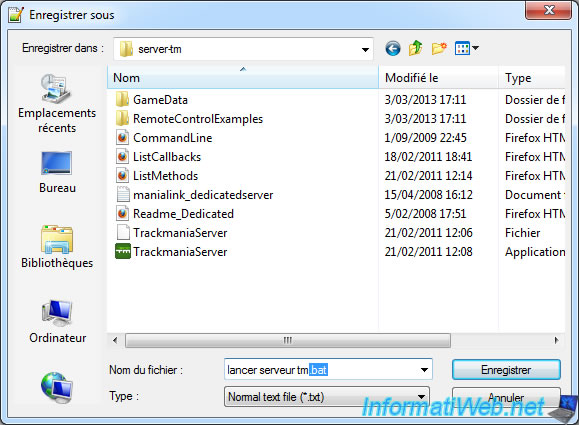
Then, save this file with the name : "start tm server.bat"
4. Test the dedicated server
We'll test our dedicated server to verify that the configuration is correct. At first launch, your firewall will ask for permission. Click "Allow Access".
If he doesn't, we'll have to configure it manually. To do this, read our tutorial "Configuring Windows Firewall and the Firewall of Internet Security solutions".
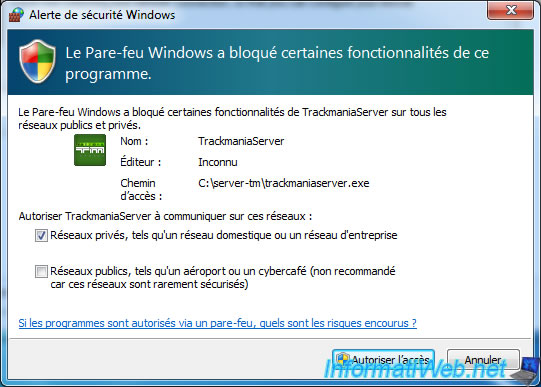
TrackMania first checks the network to trigger this firewall alert and avoid later connections problems. Click "OK".

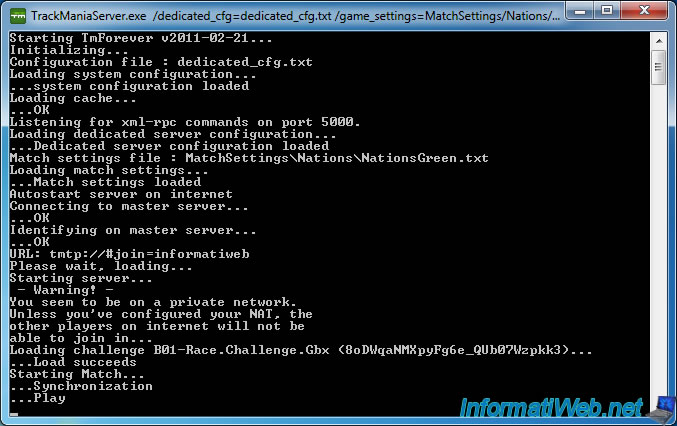
If all goes well, your server will look like this.
The following describes the steps :
- Starting TmForever v2011-02-21 : Launch of the server program
- Initializing : Initialization program
- Configuration file : Name of the configuration file that will be loaded by the server. The file to be modified in the ".bat" file.
- Loading system configuration / system configuration loaded
- Loading cache : Loading cache server
- Listening for xml-rpc commands on port 5000 : The server starts listening on port 5000 to receive the xml-rpc commands (used by Xaseco controls and others)
- Loading dedicated server configuration / server configuration loaded
- Match settings file : Name of the playlist file which is loaded by the server. The file to be loaded can be changed in the ".bat" file.
- Loading game settings / game settings loaded : Load the playlist / Loading performed.
- Autostart server on Internet : By default, the server is running in Internet mode. This can be changed in the ".bat" file by adding the /lan parameter.
- Connecting to master server : Connection to TrackMania Master Server (Official server).
- Identifying on master server : Dedicated server identifies itself on the master server with the credentials of TrackMania account configured in the configuration file "dedicated_cfg.txt".
- URL (tmtp://#join=login) : tmtp URL to connect to your dedicated server.
- Starting server : Start TrackMania server itself.
- Warning. You seem to be on a private network. Unless you've configured your NAT, the others players on internet will not be ables to join in...
The server notifies you that you are on a router so it will require forwarding ports (2350, 3450 and 5000 by default) so that people on the Internet can connect to your server.
IMPORTANT : This warning doesn't disappear even when the ports are routed correctly. Wait point "8) Routing (NAT)" of this tutorial for your server to be accessible from the outside .
- Loading ... challenge / Succeeds Load : Load the first circuit of the playlist / Loading performed .
- Starting Match : Launching the game.
- Synchronization : The server synchronizes the players that they start at the same time. This step corresponds to the message please wait displayed at the beginning of each circuit.
- Play : The server sending the top customers and they see the counter 3, 2, 1 ... GO appear.
Note : This description is intended to help you in the diagnosis of the problems you may encounter with your dedicated server.
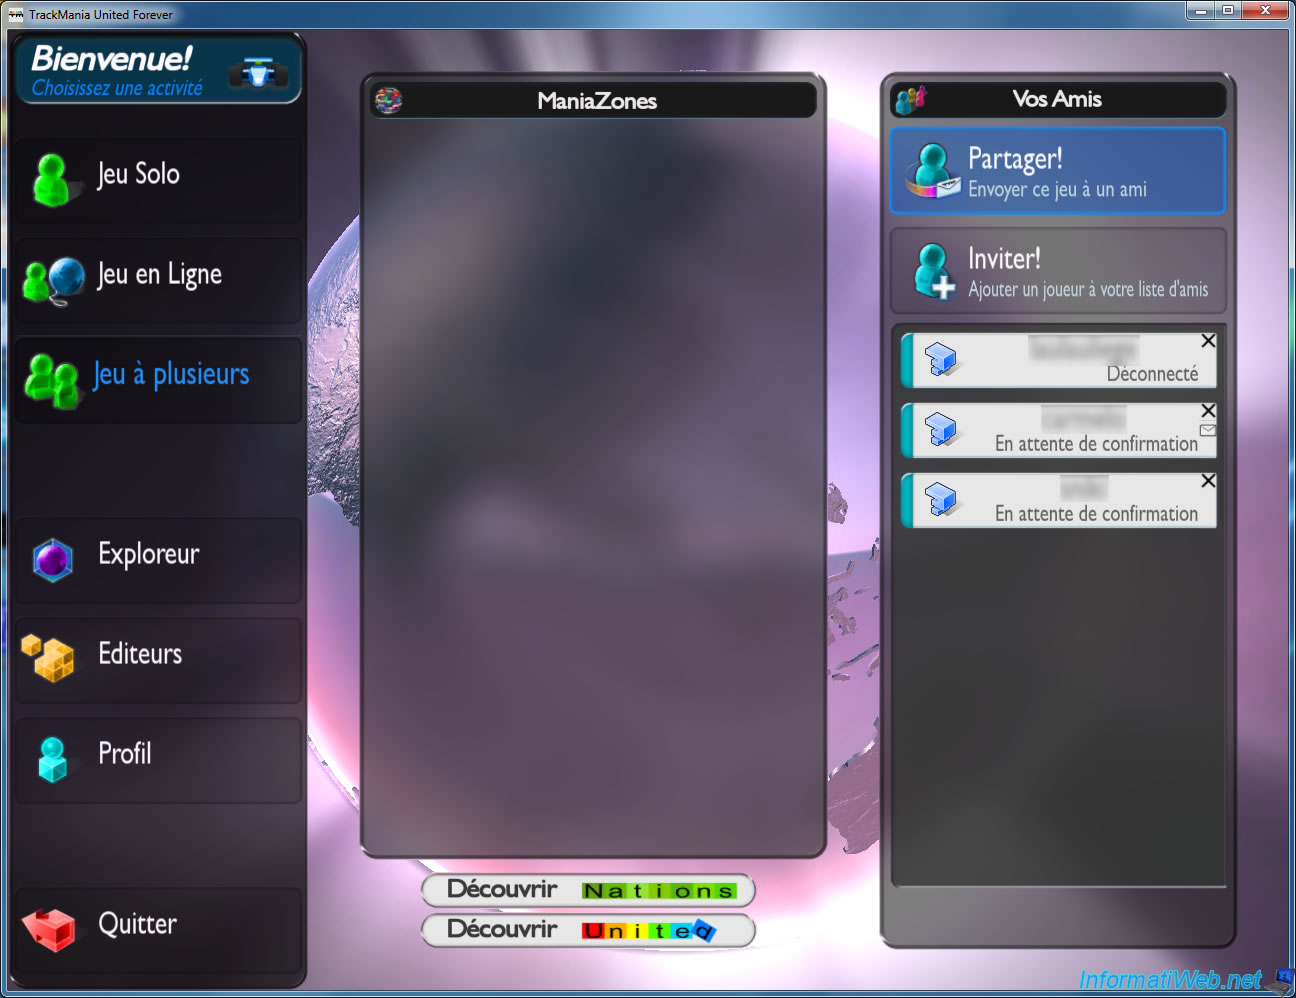
Once the server has reached the stage play, you can now start "TrackMania Nation Forever" or "TrackMania United Forever" and go to "Multiplayers game" menu.
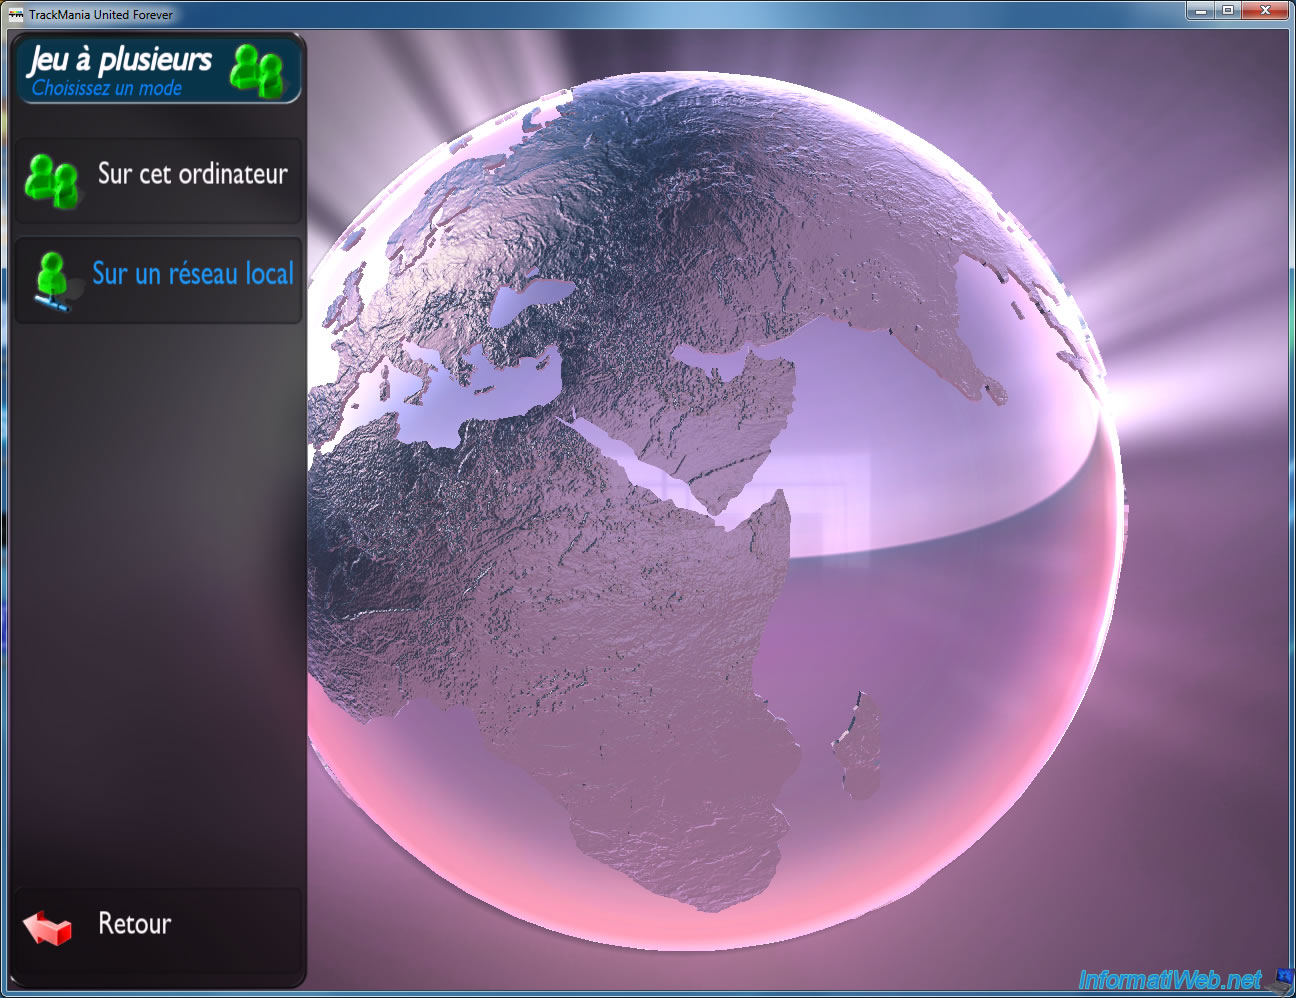
Then click on "On a local network".
And your dedicated server should appear in the list.
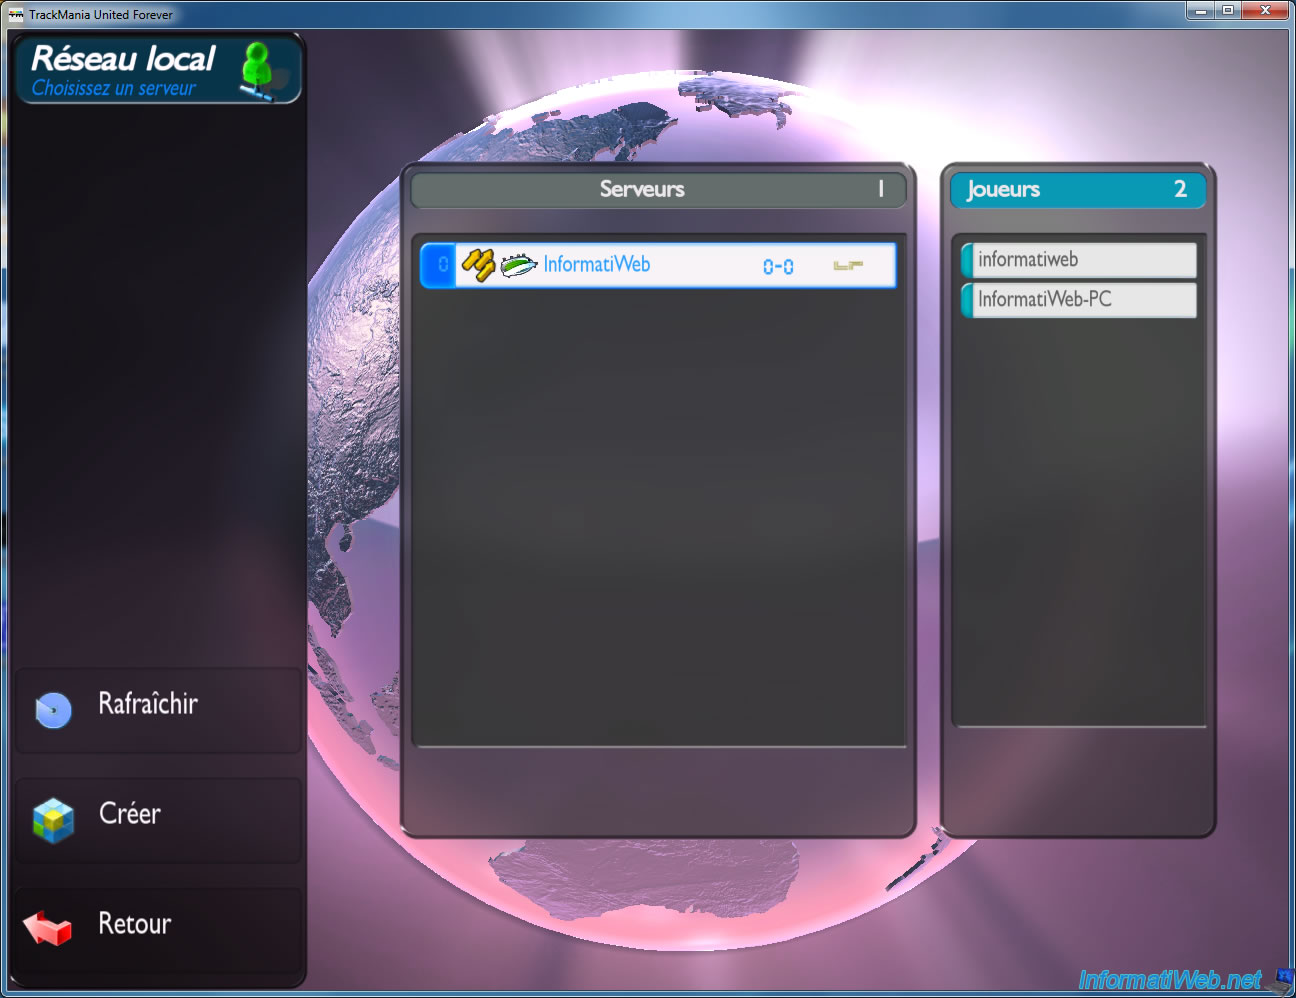
You can now see your server name, the description, the game mode and the playlist loaded by the server.
Click "Join" to test your server.
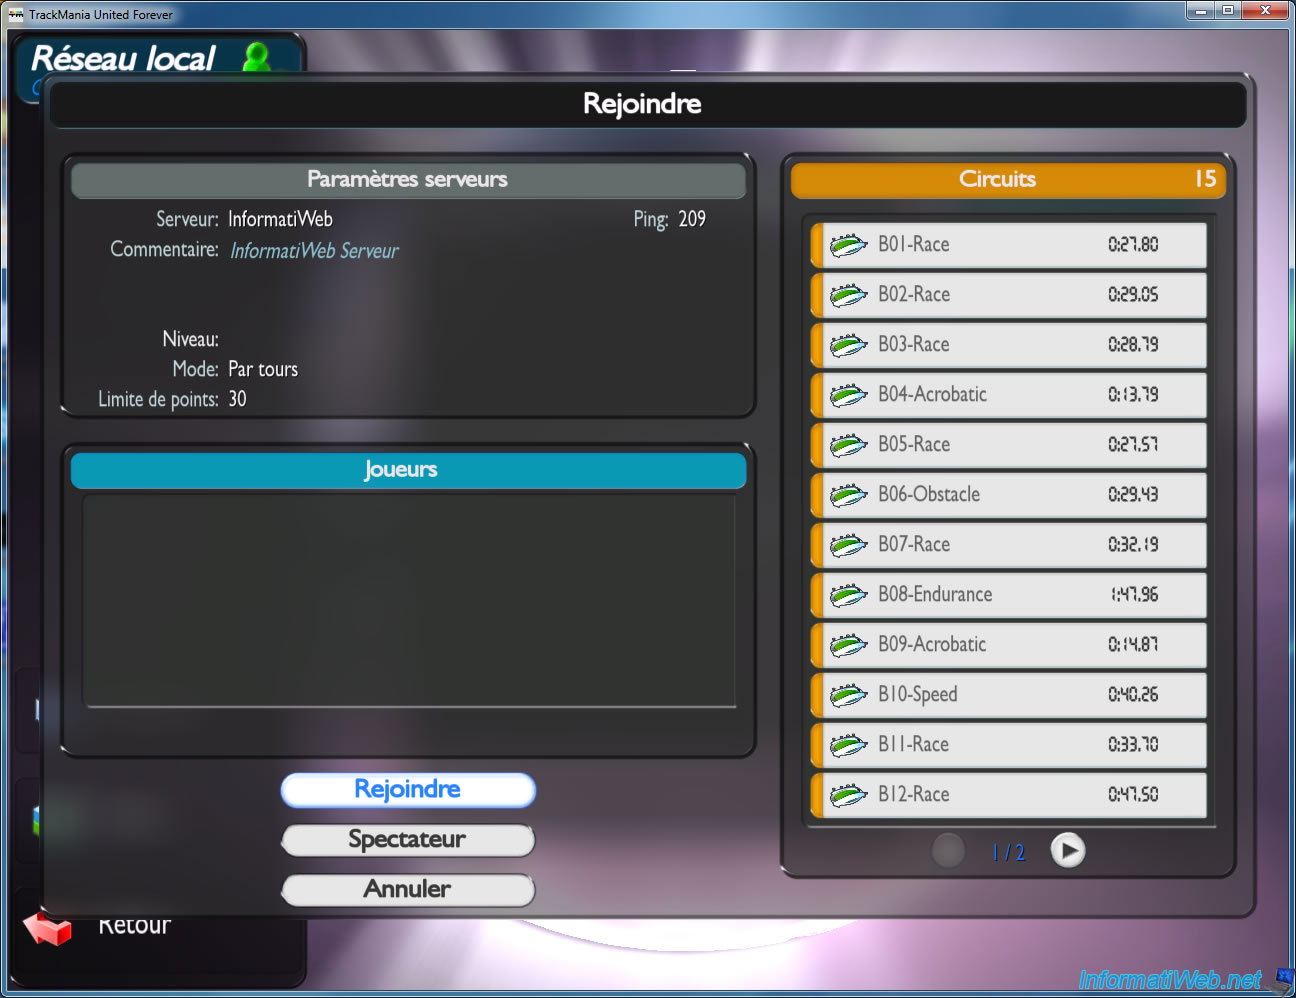
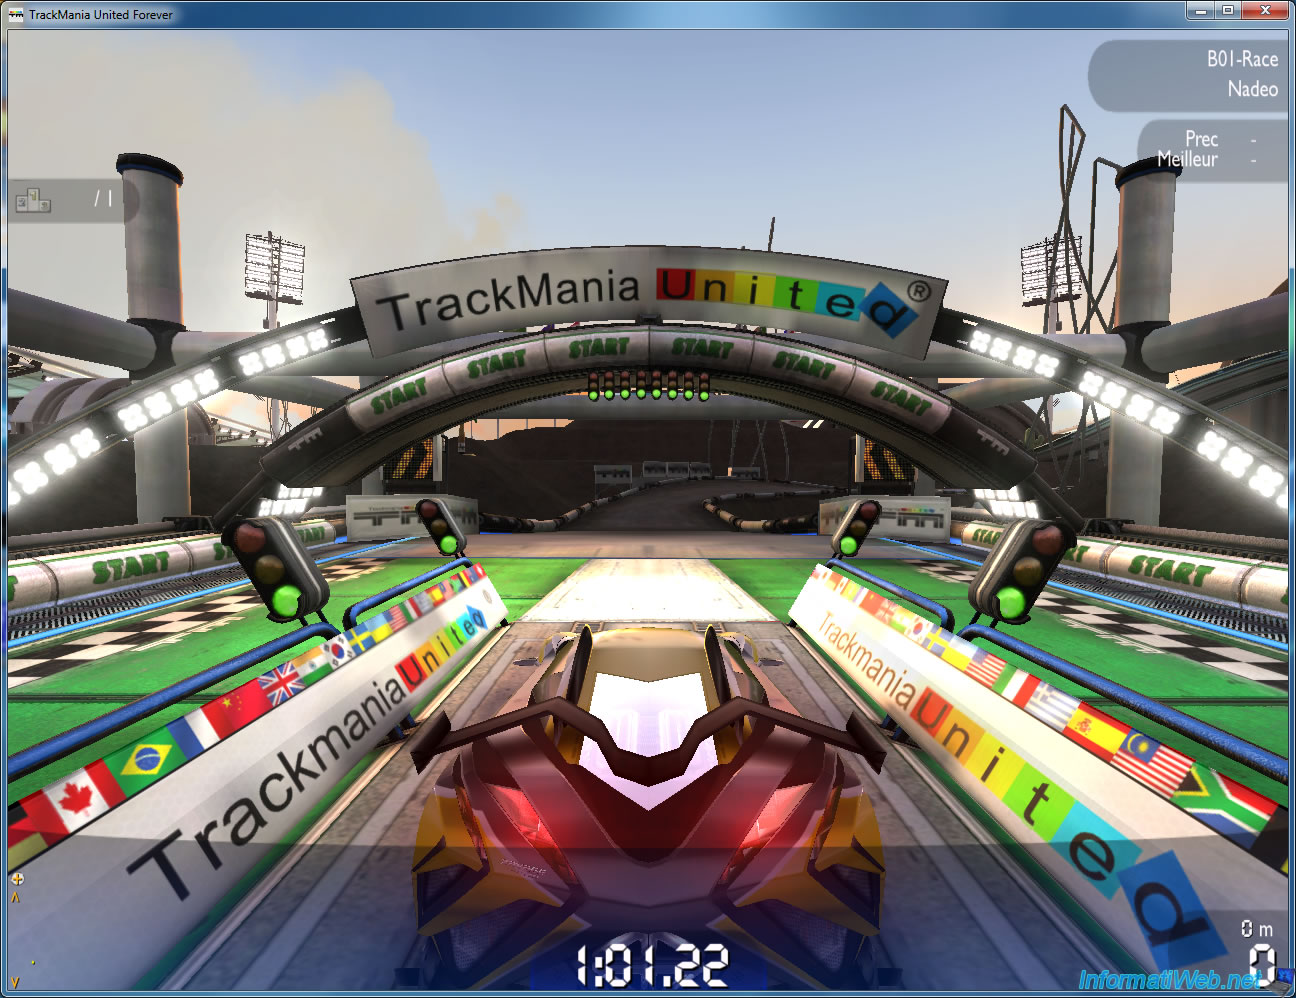
If your firewall is configured correctly, you should be able to log into your TM server.
By default, this is the appearance of the dedicated server. Admit that the interface is very simplistic. We will install "Xaseco" to manage records and two plugins that let you view the records in real time, ...
5. Install and configure XAseco
Download Xaseco on the official website.

Then create a "Xaseco" folder in the "server-tm" folder and unzip the contents of the downloaded file inside.
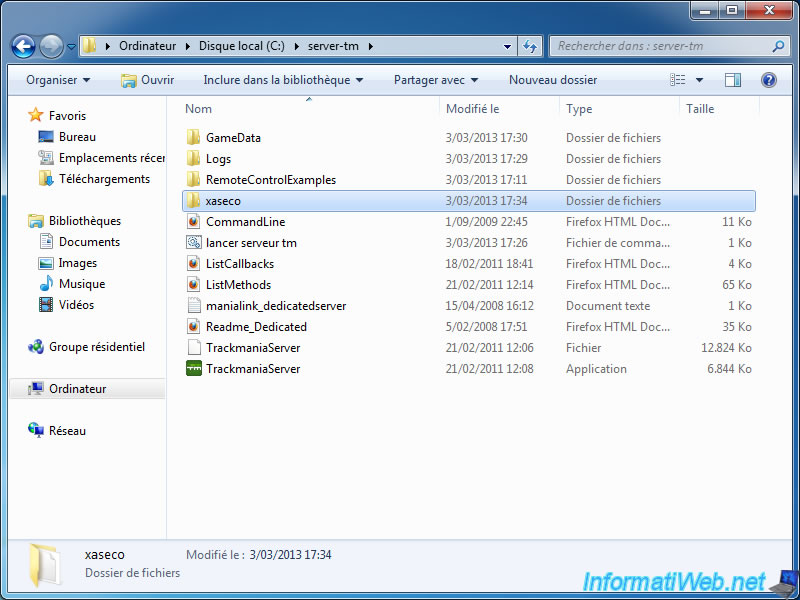
This is by default, the content of the "Xaseco" folder.
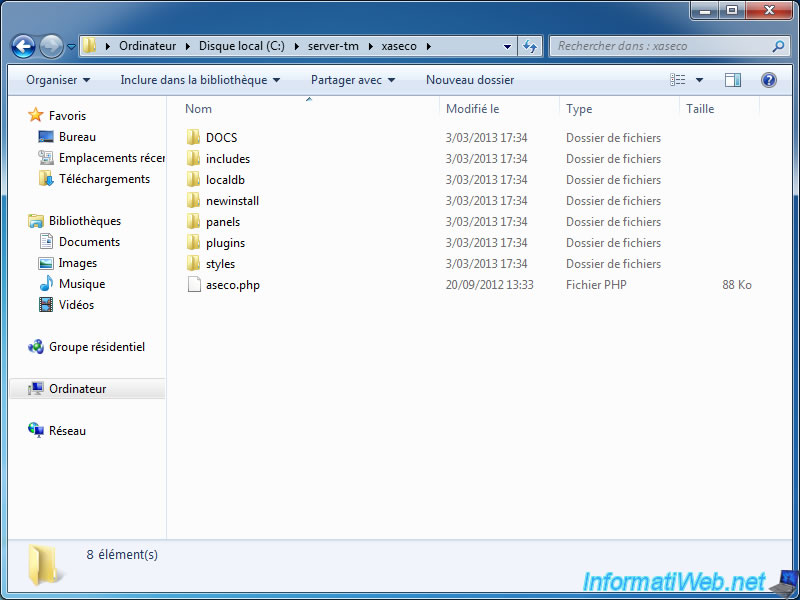
Go to the "newinstall" folder and make a copy of the files of this folder.
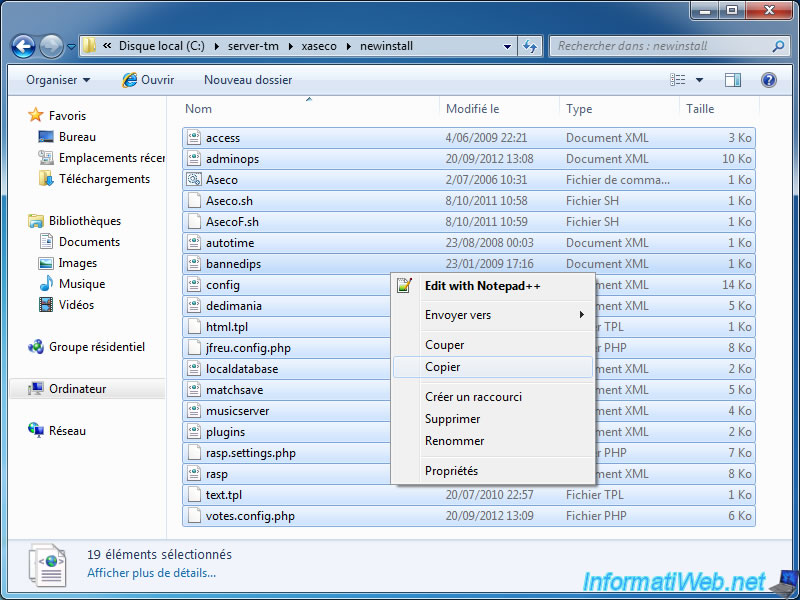
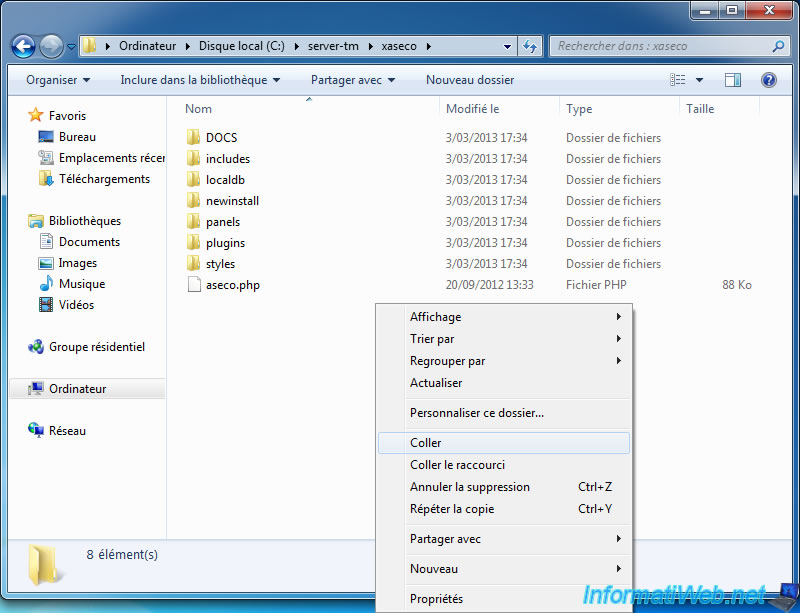
Back then in the Xaseco folder and paste the files you just selected.
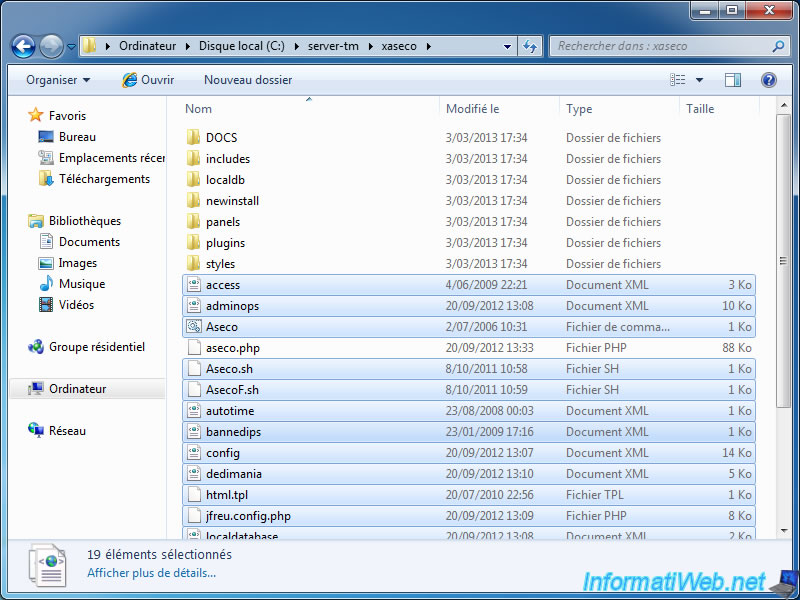
Xaseco folder now looks like this.
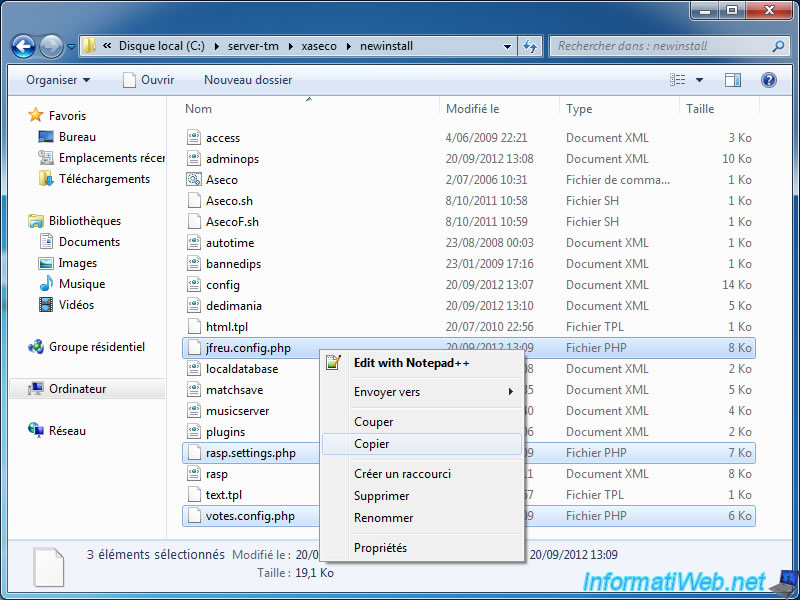
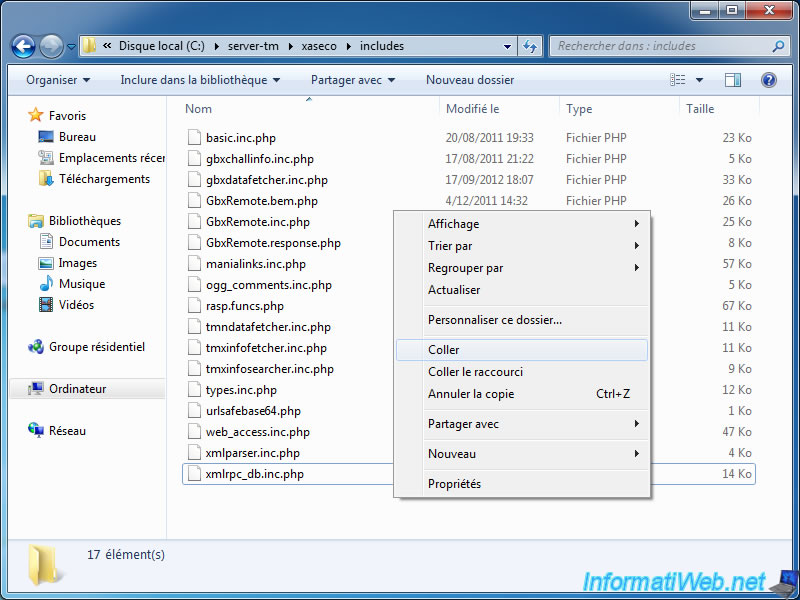
To avoid PHP errors, you also need to copy the files "jfreu.config.php", "rasp.settings.php" and "votes.config.php" in the "server-tm\Xaseco\includes" folder.
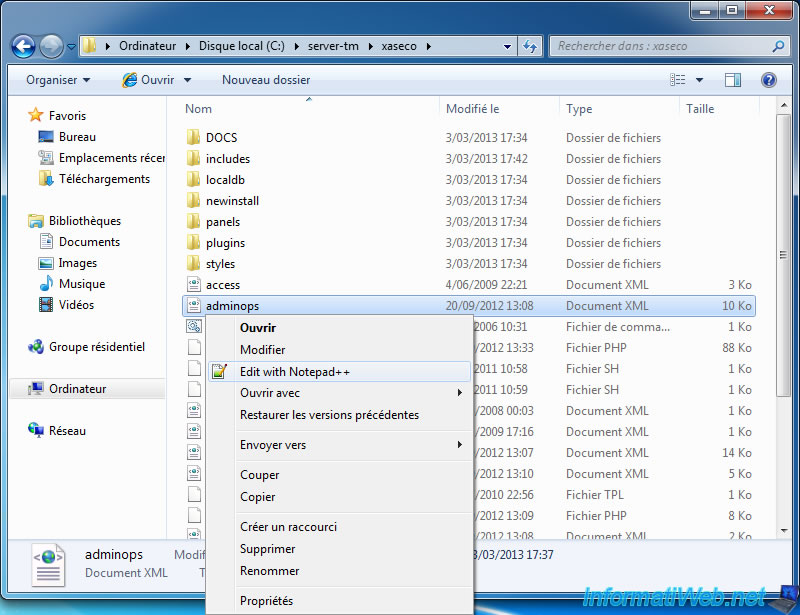
We now configure Xaseco. To do this, first right-click on the "adminops.xml" file and click "Edit with Notepad ++".
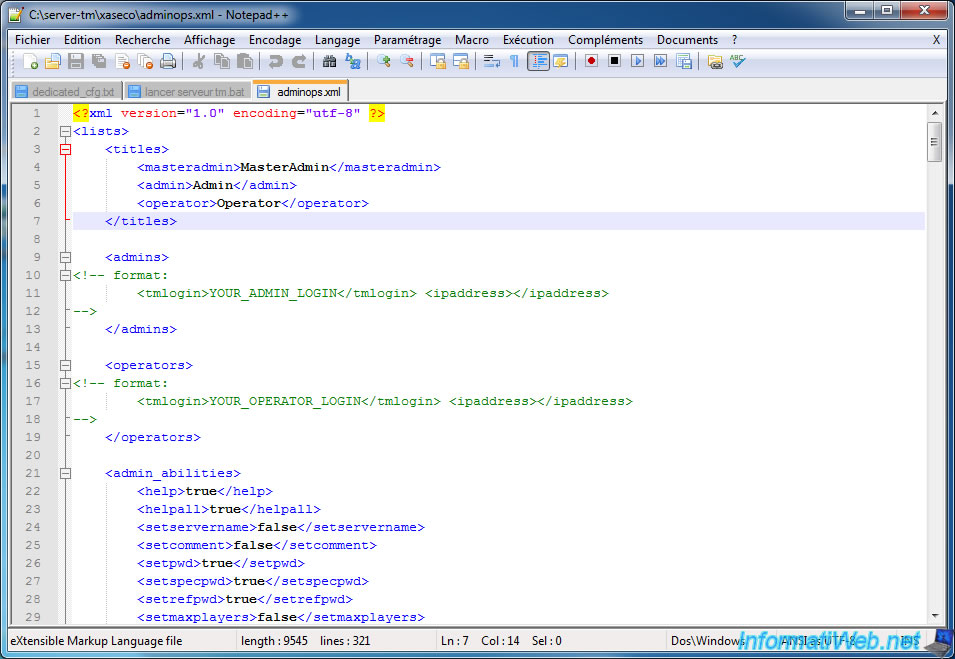
As you can see, this is the file that will allow you to define Admin and Operator. You can, if you want, change the name displayed instead of "MasterAdmin" ...
To add an Admin, just add the following line after the tag "<admins>" :
<tmlogin>TrackMania_login</tmlogin> <ipaddress></ipaddress>
To add an operator, just add the line after the tag "<operators>".
The MasterAdmin must be configured in the "config.xml" file unlike Admin and operators.
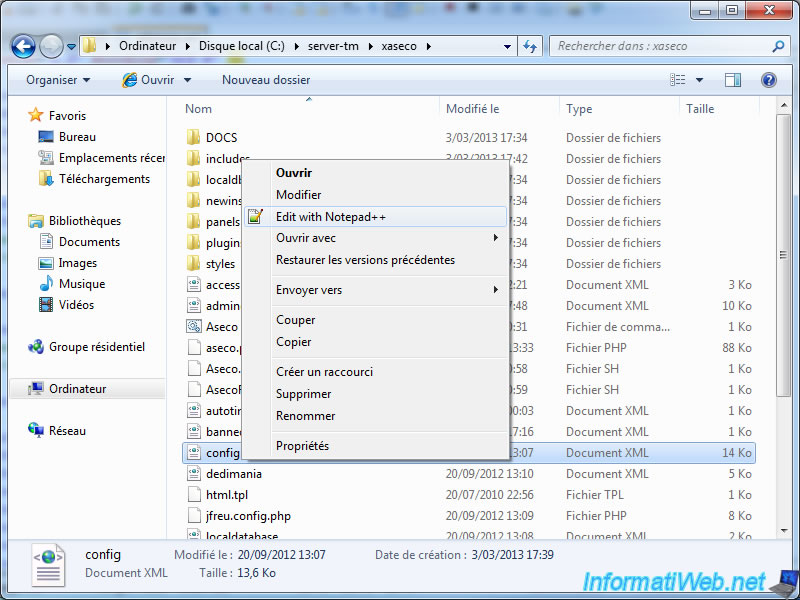
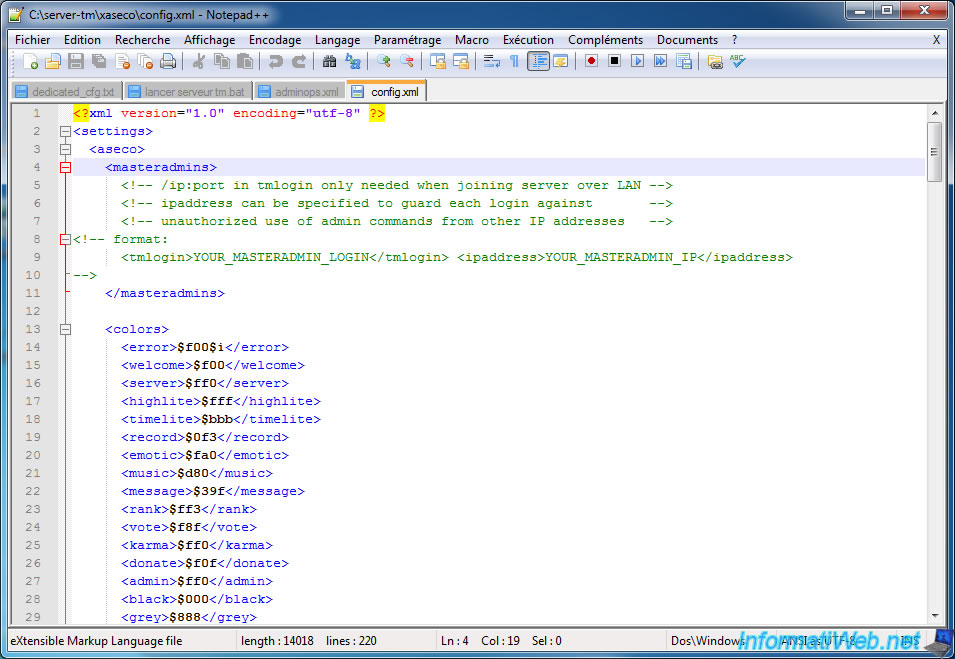
Now, configure the "config.xml" file.
At the begining of this file, you can add one or more MasterAdmin but you should at least define one.
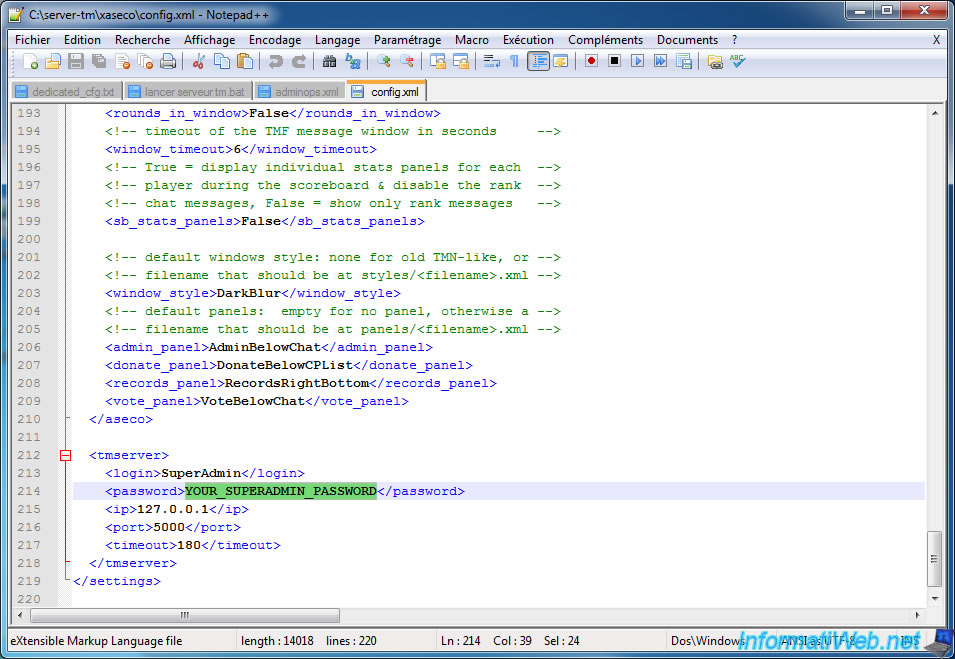
Then at the bottom of the same file, you must enter the password of the "SuperAdmin" account. It isn't a TrackMania account but the "SuperAdmin" account of the dedicated server. The password for this account is in the configuration file of the dedicated server : "dedicated_cfg.txt".
Note : Change the port 5000 if you changed it in the "dedicated_cfg.txt" file.
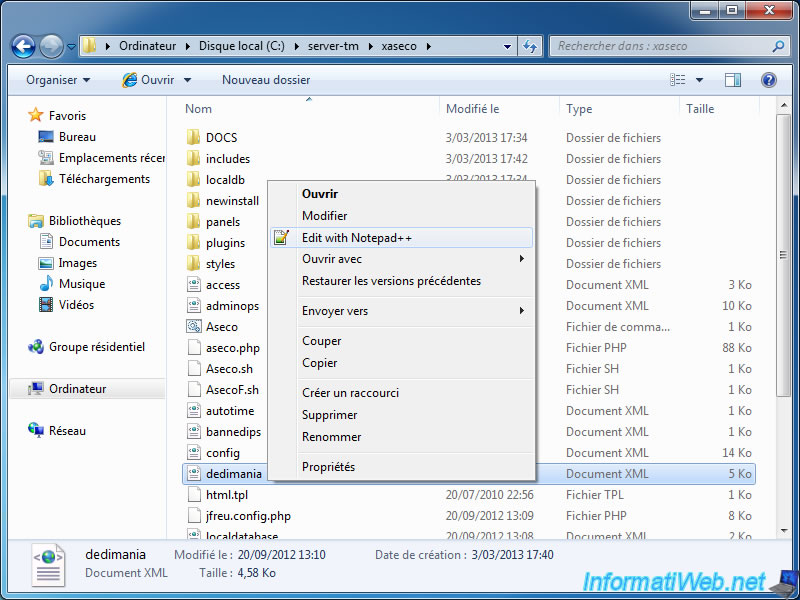
Now, configure the "dedimania.xml" file. This file will allow you to configure your TM server for Xaseco connects to Dedimania server that centralizes records of all players in the world.
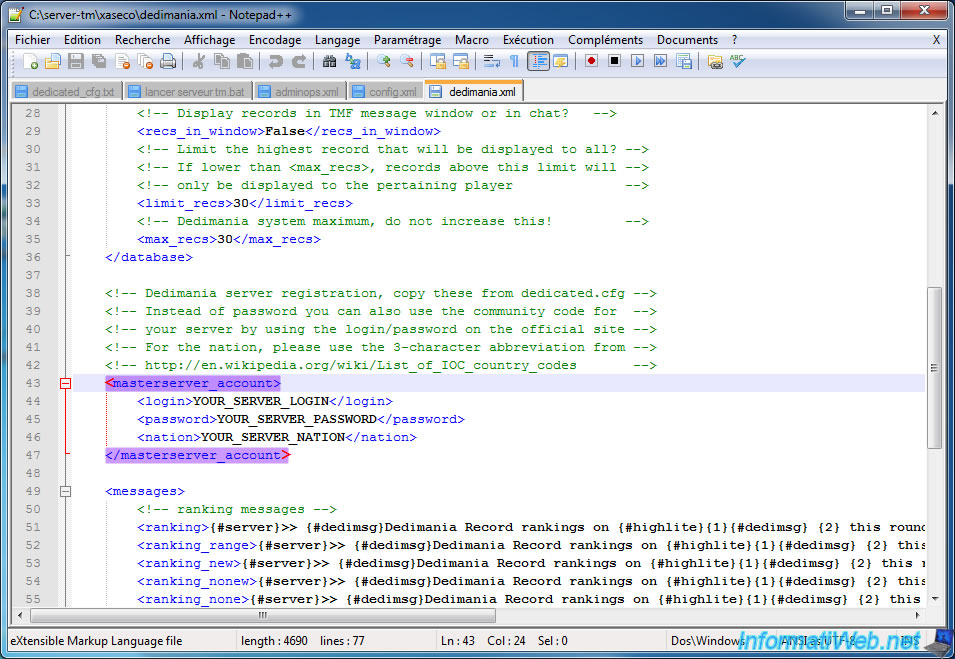
For this, you must log on the Dedimania server with the same TrackMania account used with the dedicated server.
Exemple :
<masterserver_account>
<login>informatiweb</login>
<password>PASSWORD_OF_THE_TM_ACCOUNT</password>
<nation>USA</nation> <!-- 3 letters that correspond to the country in which you are -->
</masterserver_account>
Note : If you don't know the 3 letters code for your country, go to Wikipedia.
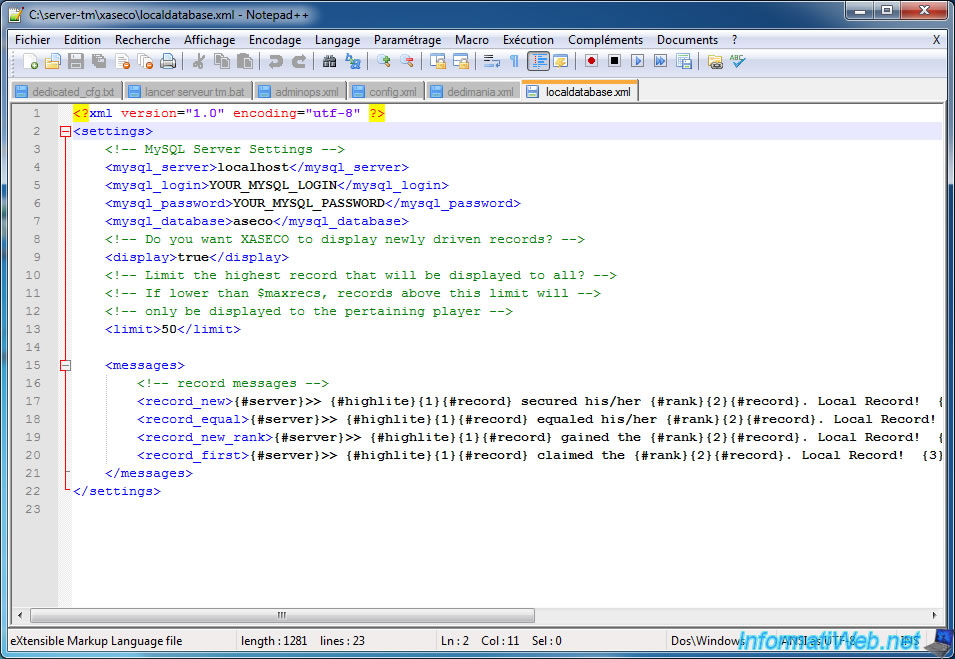
Then, configure the "localdatabase.xml" file that will allow Xaseco to save players records (of your server) in the MySQL database.
Note : The MySQL server is installed automatically by WAMP.
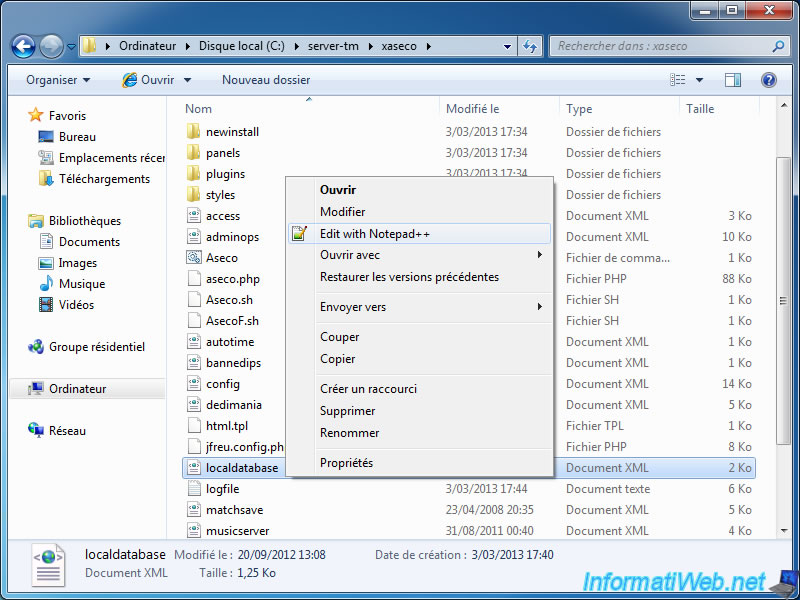
By default, a MySQL server identifiers are :
- mysql_server (Host) : localhost (127.0.0.1 or it's the same).
- mysql_login (user name) : root
- mysql_password (password) : (empty)
- mysql_database (database in which records will be stored) : aseco
The database must be created manually, for this we use PHPMyAdmin.
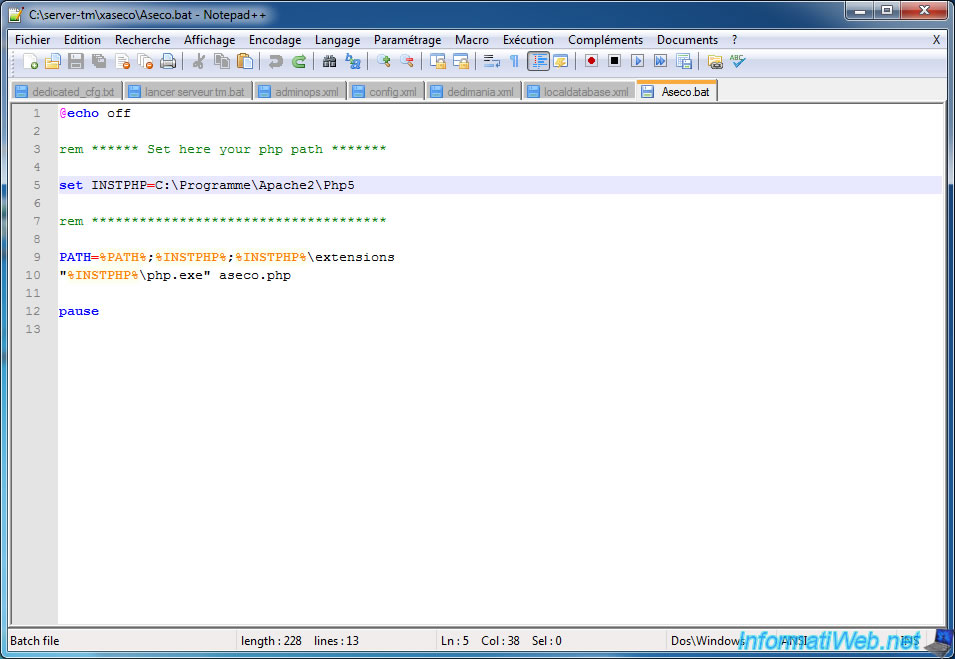
Then, configure the batch file (.bat) to indicate to Xaseco, where the PHP folder (installed by WAMP) and its extensions are located.
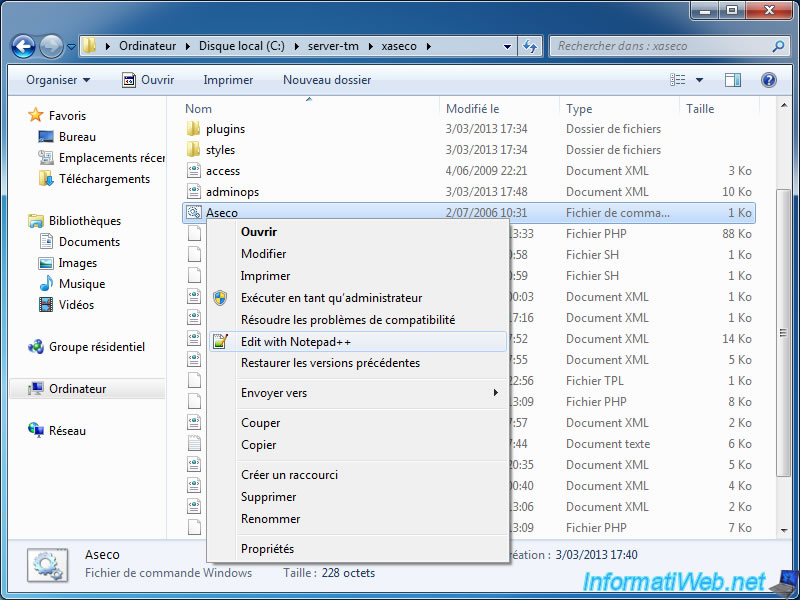
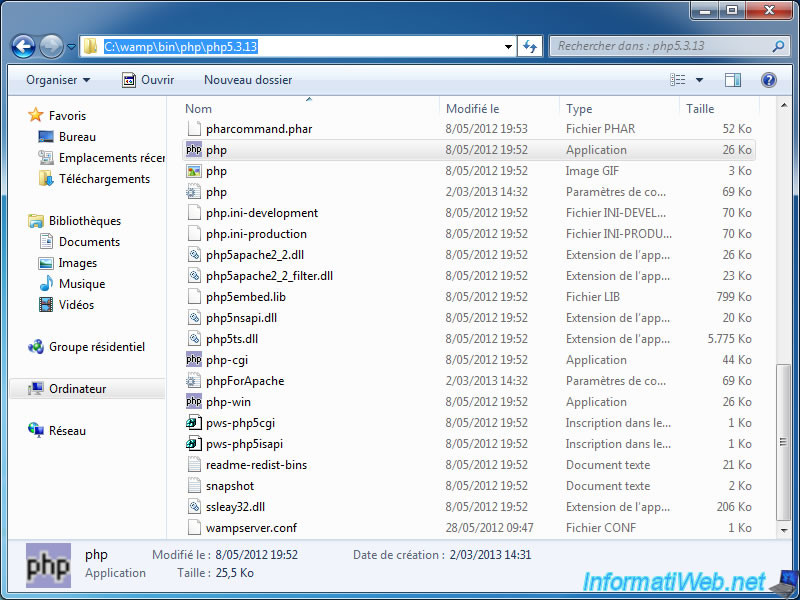
If you have installed WAMP, the path will look like this :
set INSTPHP=C:\wamp\bin\php\php5.3.13
Note : Since PHP 5, the extensions folder has been renamed to "ext". It's necessary to change the line in orange to this :
PATH=%PATH%;%INSTPHP%;%INSTPHP%\ext
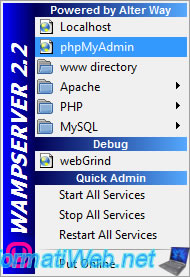
And finally, to complete the configuration of Xaseco, we will create the MySQL database it needs. To do this, click the WAMP icon (next to the time in taskbar) and click on "phpMyAdmin".
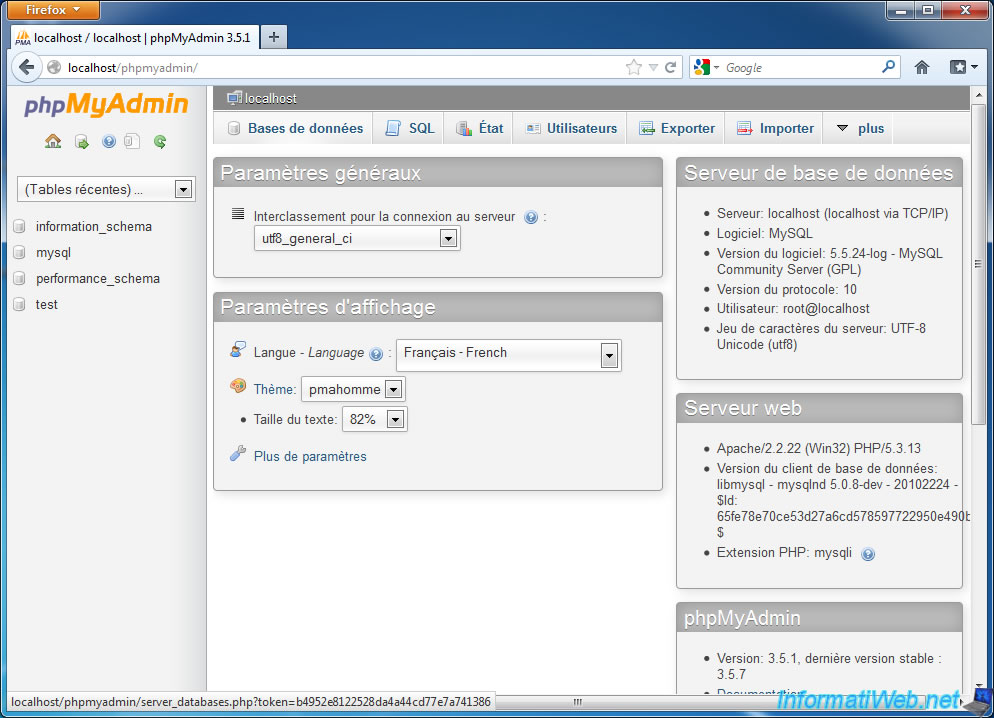
The following page opens. Click "Database" in the top bar.
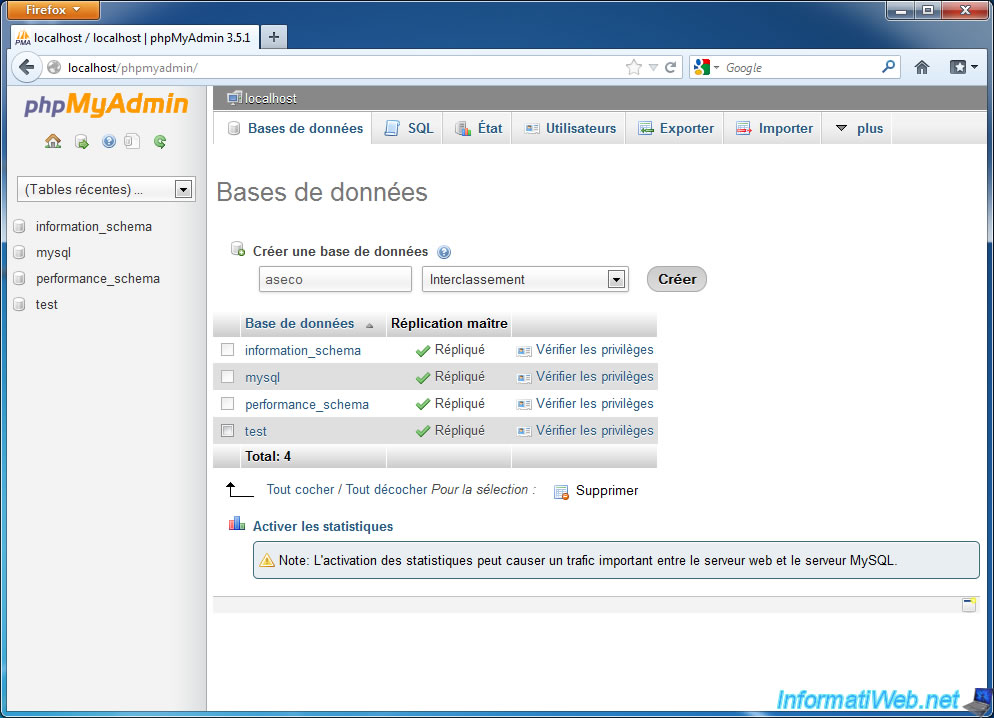
Then enter "Aseco" in the field and click "Create". Now that your (blank) database is created, Xaseco will do the rest (the creation of the structure and save records).

You must be logged in to post a comment