- Windows
- Windows XP
- 03 November 2013 at 11:52 UTC
-


This tutorial show you how to connect to a wireless network in Windows XP.
1. Connect to a Wi-Fi network
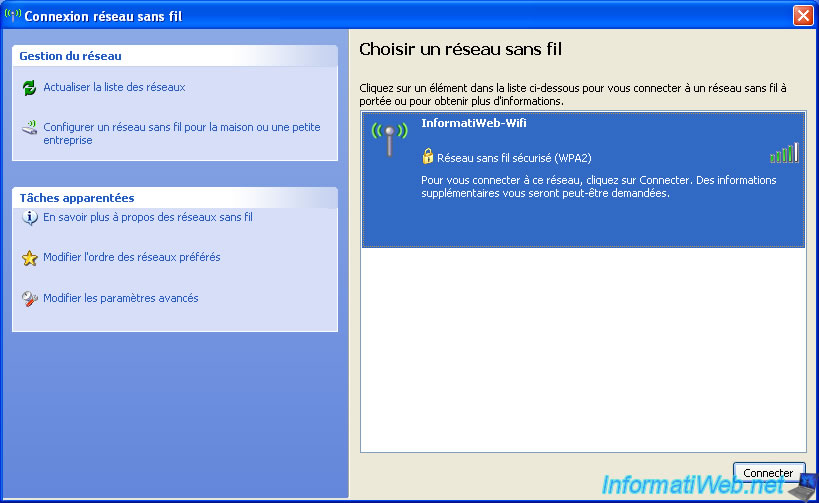
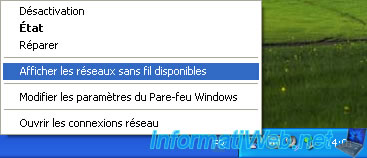
To connect to a Wi-Fi network on Windows XP, click on the ![]() icon in the taskbar.
icon in the taskbar.
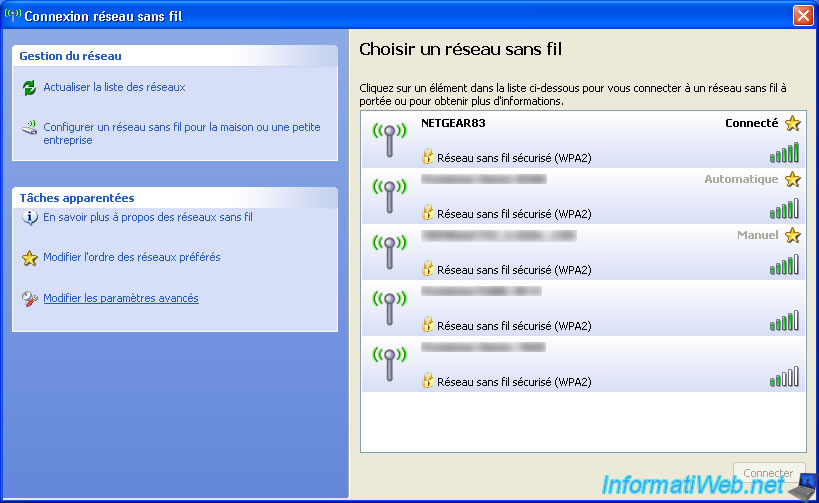
Then, in the "Wireless Network Connection" window that appears, select your Wi-Fi network and click "Connect".
Note : we don't recommend that you configure your WiFi network in hidden mode, because we tried somehow to connect a Windows XP computer to our hidden WiFi network and it would not work.
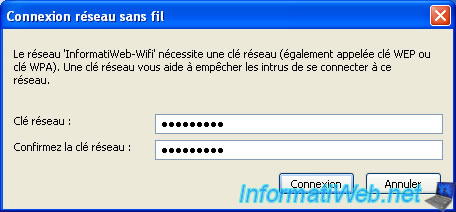
Then shown 2 times the network key (WEP or WPA key ...) if your wireless network is secure (recommended) then click "Connect".
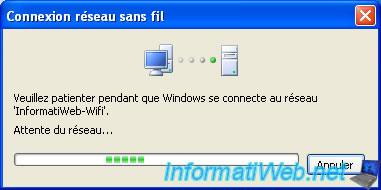
Windows will then attempt to connect to the desired wireless network.
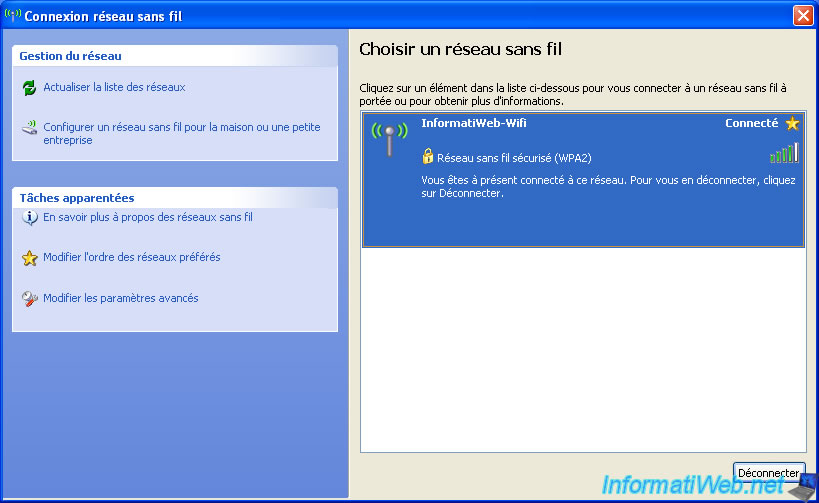
Once connected, the word "Connected" will be displayed at the top right of the WiFi network you are connected and the icon on the taskbar will become like this : ![]()
You will also notice that Windows by default, add the new wireless network to the preferred networks.
2. Delete the network profile of an old Wi-Fi network
To delete the network profile of an old Wi-Fi network that you connected to in the past, right-click on the network (Wi-Fi) icon in the taskbar, then click : View Available Wireless Networks.
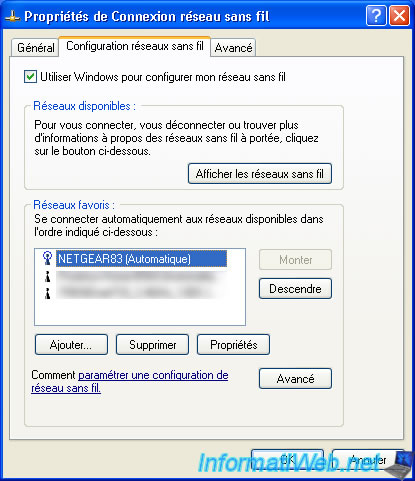
Then, click on the "Change advanced settings" link located in the left column.
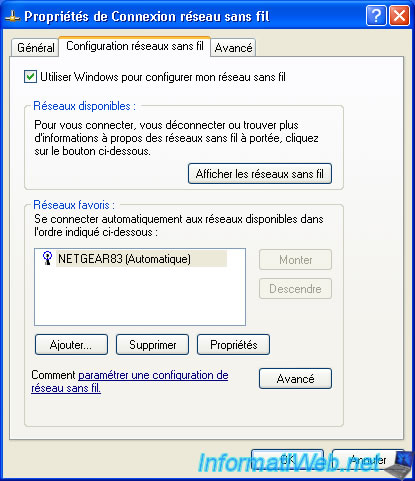
In the "Wireless Network Connection Properties" window that appears, go to the "Wireless Network" tab.
In the "Preferred networks" section, you will see the list of wireless (Wi-Fi) networks to which you have connected at least once.
Note that the icon of the wireless network you are currently connected to is slightly different from those of other preferred wireless networks.
To delete an old preferred network, select it and click Remove.
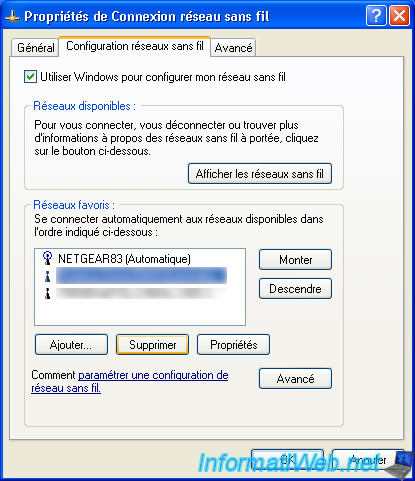
Once you have removed the desired old preferred network(s), click OK.
Share this tutorial
To see also
-

Virtualization 8/9/2019
VirtualBox - Virtualize Windows XP
-
Windows 12/4/2015
Windows XP - System restore
-

Windows 1/8/2020
Windows XP - Update your install CD easily
-

Windows 4/7/2012
Windows XP - Use a Bluetooth headset
You must be logged in to post a comment