- Windows
- Windows XP
- 12 August 2019 at 15:06 UTC
-

- 1/3

On Windows XP, you can easily access a Windows XP Pro computer (on the same network) using Windows Remote Desktop.
Warning : the remote desktop server (Remote Desktop / RDP) is only available on the professional edition of Windows XP.
On the other hand, the “Remote Desktop” client is available on both editions of Windows XP: home and professional.
- Enable Remote Desktop (RDP) on Windows XP Pro
- Allow Remote Desktop (RDP) on Windows XP Firewall (SP2 minimum)
- Disable sleep on Windows XP
- Change your password on Windows XP Pro
- Connect to remote desktop from a PC running Windows XP
- Access client PC partitions from the RDP session opened on the remote PC
- Create and access a virtual partition of the client PC from the RDP session opened on the remote PC
1. Enable Remote Desktop (RDP) on Windows XP Pro
To get started, go to the Windows XP Pro start menu and right-click "Properties" on "My Computer".
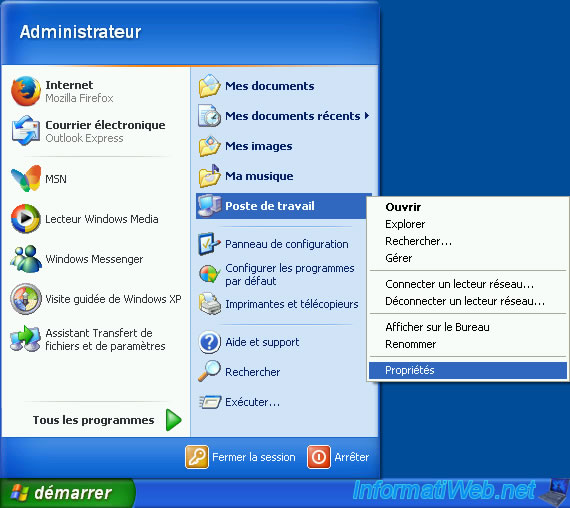
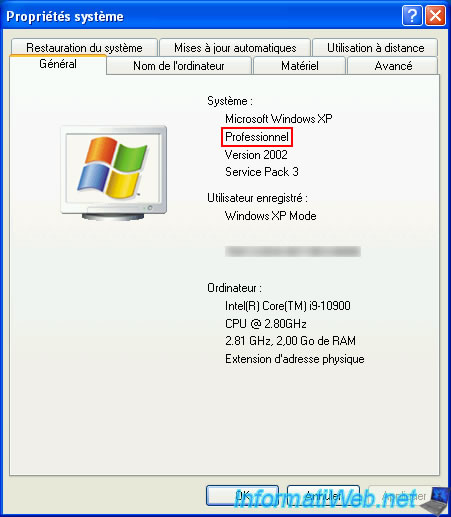
In the "General" tab of the "System Properties" window that appears, verify that you have the "Professional" edition of Windows XP.
Note: if you use the XP mode available on Windows 7 (including if you have imported this XP mode to another virtualization solution using one of our tutorials), you are currently using the Pro edition of Windows XP.
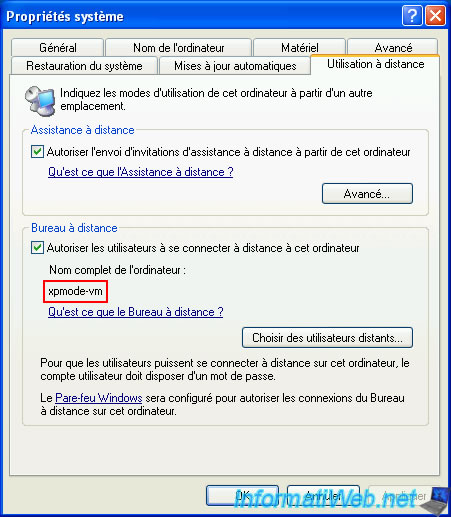
In the "Remote" tab of this same window, check the "Allow users to connect remotely to this computer" box located in the "Remote Desktop" section.
As you can see, by default, the user you are currently logged in with will be able to access this computer using their Windows account.
To allow other users to use remote desktop, click the "Select Remote Users" button and add the desired users.
To connect to this computer via the same network, you will need to enter the name of this computer in your "Remote Desktop Connection" client.
This name is shown here (boxed in red in the image below).
Caution: Your user account on this computer must be password protected before you can connect to this computer via Remote Desktop (RDP).
Otherwise, you will likely receive an error saying your password is incorrect.
Important : if the "Remote Desktop" section does not exist in your case, it is because you are using the Home edition of Windows XP.
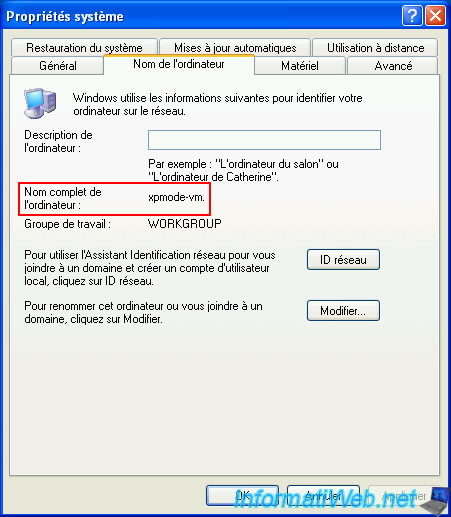
Note that the name of your computer is also displayed in the "Full computer name" tab and that you can change it if you wish by clicking on the "Change" button.
Warning : if you change the name of your computer, a restart will be necessary.
2. Allow Remote Desktop (RDP) on Windows XP Firewall (SP2 minimum)
Since Windows XP SP2, a firewall protects your computer. Which blocks, by default, connections via remote desktop (RDP).
To fix this problem, open the start menu and click: Control Panel.
Warning : this firewall is no longer sufficient to protect you at present given that this version of Windows has not been updated for a long time.
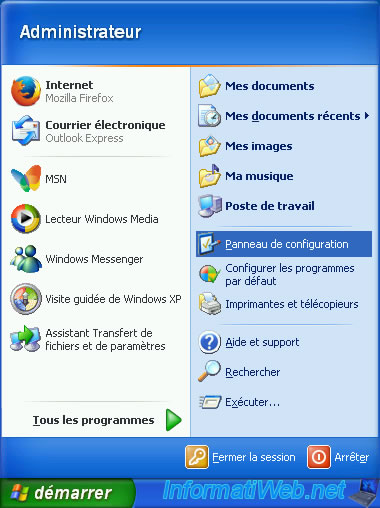
At the top left, click: Switch to Classic View.

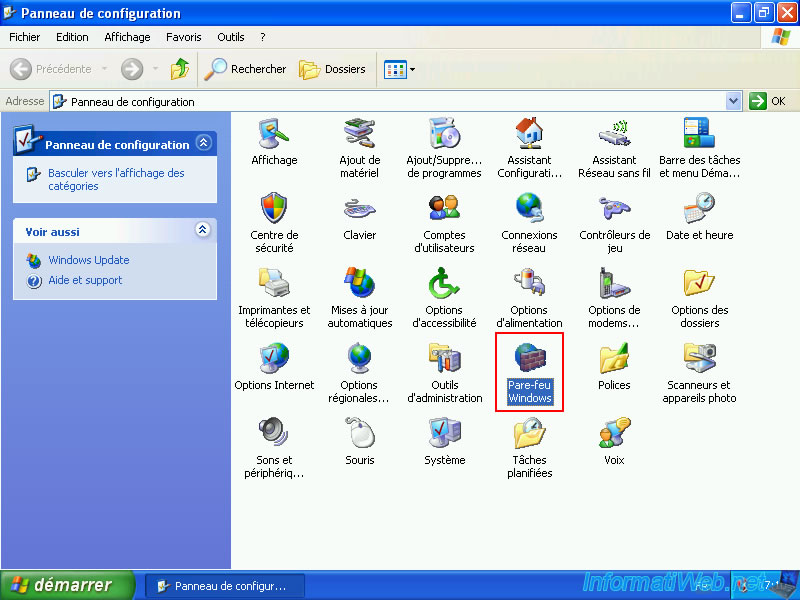
Double-click on “Windows Firewall”.
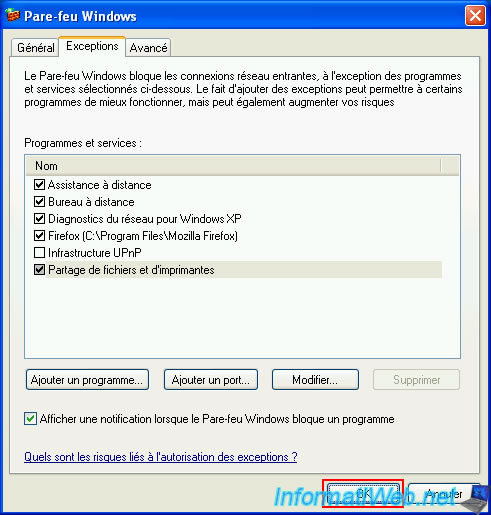
In the "Exceptions" tab, check the "Remote Desktop" box to allow connections on port 3389 (RDP).
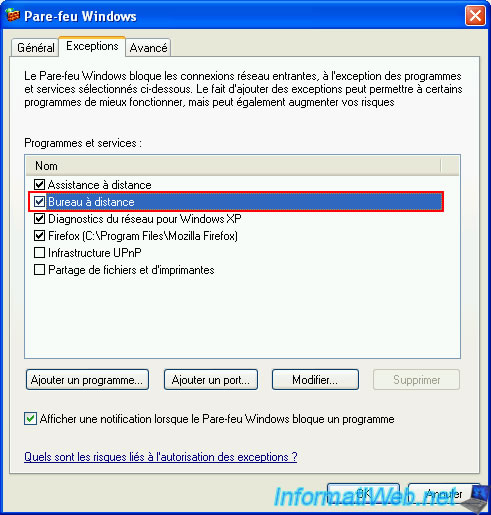
Warning : this is not enough for the connection from the “Remote Desktop Connection” client to work.
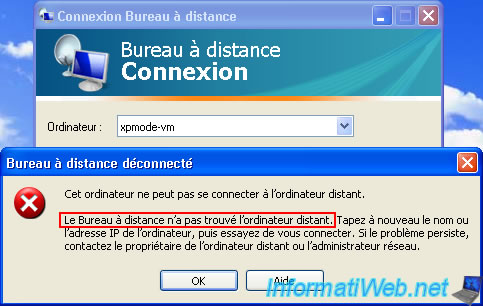
Indeed, if you try to connect to your Windows XP Pro computer from another Windows XP computer, you may receive the error below.
Plain Text
This computer cannot connect to the remote computer.

Remote Desktop could not find the remote computer. Type the computer name or IP address again, and then try to connect.
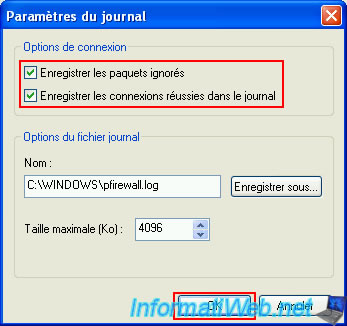
To quickly understand the problem, you just need to go to the "Advanced" tab, then click on the "Settings" button in the "Security Logging" section.
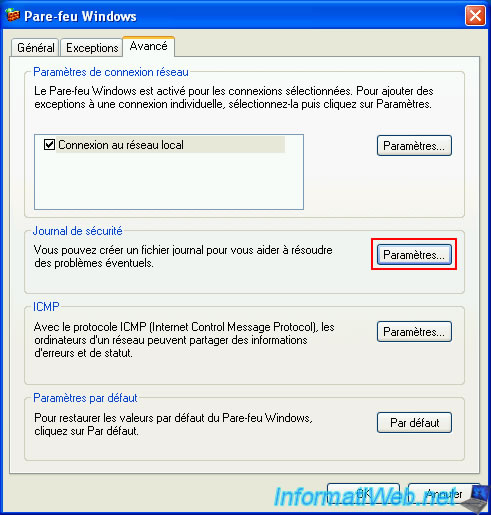
Check the 2 boxes below, then click OK.
- Log dropped packets.
- Log successful connections.
Try to reconnect from the "Remote Desktop Connection" client and open the "C:\WINDOWS\pfirewall.log" file with notepad.
In this file, you will notice that packets sent by your client computer (whose IP is "10.0.0.61" in our case) have been blocked (DROP) for UDP ports 137 and 138.
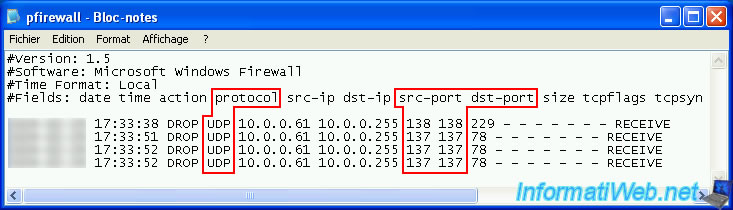
If you look on the "List of TCP and UDP port numbers - Wikipedia" page, you will easily see that ports 137 and 138 on Windows are used by NETBIOS.
This allows you to find the IP address of a computer from its computer name.

To also allow these 2 ports, the best is to select the "File and Printer Sharing" rule and click on the "Edit" button.

In the "Modify a service" window that appears, check the "UDP 137" and "UDP 138" boxes (in other words: the ports used by NETBIOS), then click OK.
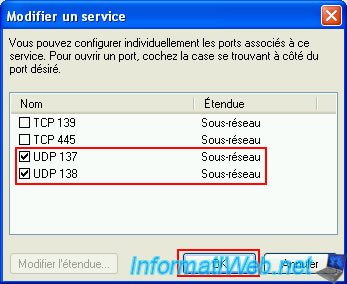
The box for the "File and Printer Sharing" rule appears checked and grayed out (because only certain ports of this rule have been authorized in the firewall).
Click OK.
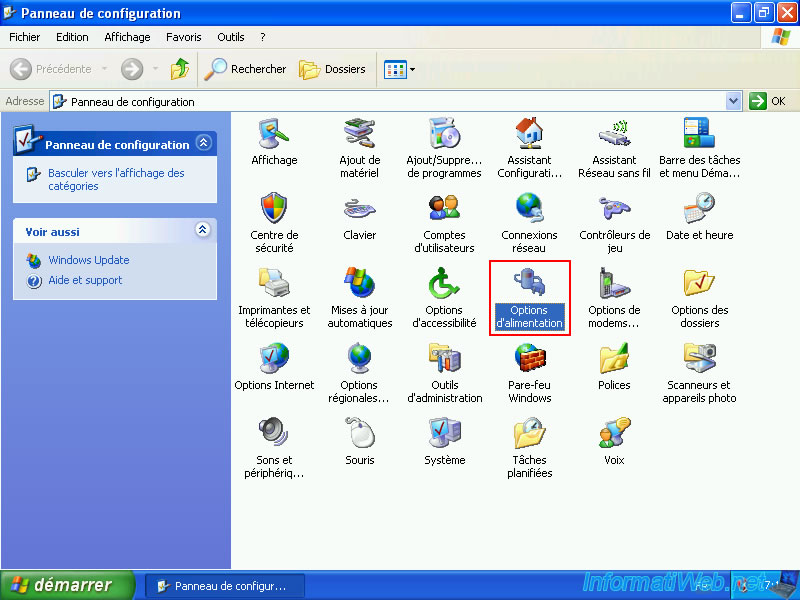
3. Disable sleep on Windows XP
To ensure that your Windows XP computer is always accessible remotely, it is best to disable sleep (to prevent it from turning off on its own).
To do this, in the control panel (accessible via the start menu), double-click on: Power Options.
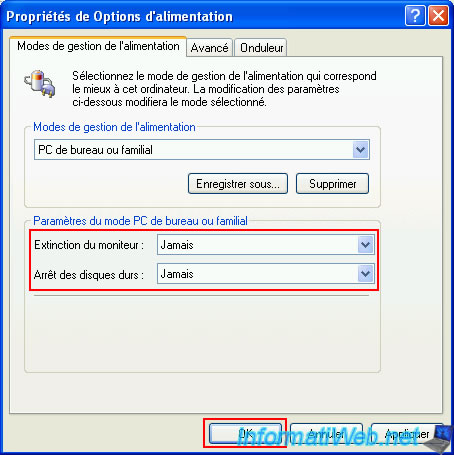
Select “Turn off monitor : Never”.
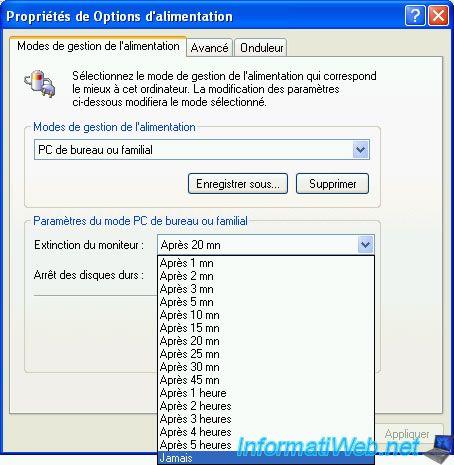
The same goes for the option: Turn off hard disks.
Then click OK.
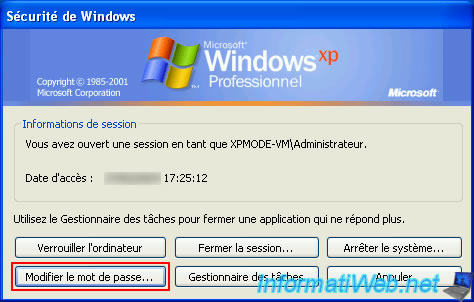
4. Change your password on Windows XP Pro
To change the password of the user account you are currently logged in under, press the keys: CTRL+ALT+DEL.
In the "Windows Security" window that appears, click on the button: Change Password.
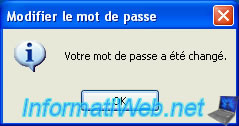
Type the old password for your account (if there is one), then type a new password in the next 2 boxes (New Password / Confirm New Password).
Then click OK.

The message "Your password has been changed" will appear.
Click OK.
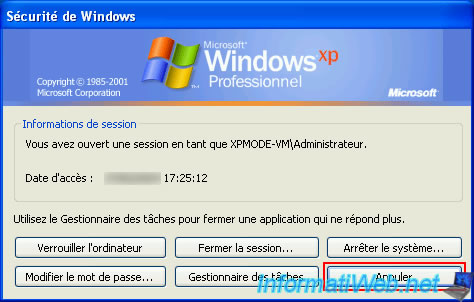
Click "Cancel" to close this "Windows Security" window and return to your Windows session.
Share this tutorial
To see also
-
MultiBoot 3/11/2024
Microsoft multiboot with Windows XP and Windows 7
-

Windows 11/11/2012
Windows XP - Formatting and reinstalling
-

Windows 3/14/2013
Windows XP - Repair installation of Windows
-

Windows 1/8/2020
Windows XP - Update your install CD easily
You must be logged in to post a comment