Take control of a computer over Remote Desktop (RDP) on Windows XP
- Windows
- Windows XP
- 12 August 2019 at 15:06 UTC
-

- 2/3
5. Connect to remote desktop from a PC running Windows XP
As explained previously, the “Remote Desktop Connection” client is available on all editions of Windows.
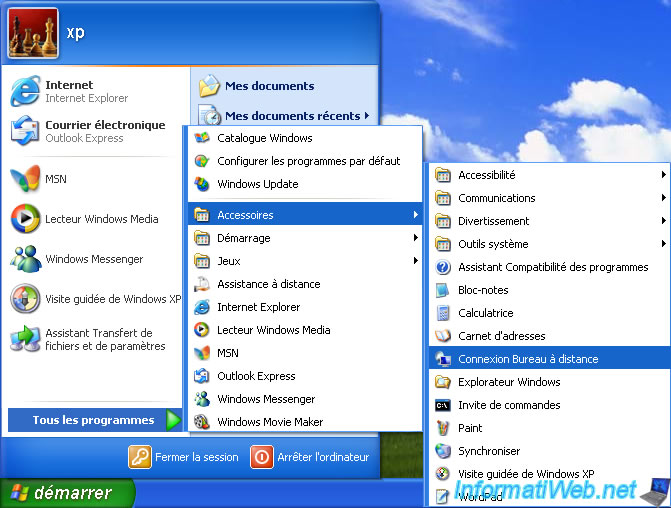
In Windows XP, open the start menu and go to: All programs -> Accessories -> Remote Desktop Connection.
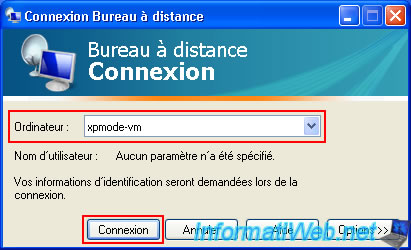
Enter the computer name of the computer (running Windows XP Pro) you want to access, then click: Connect.
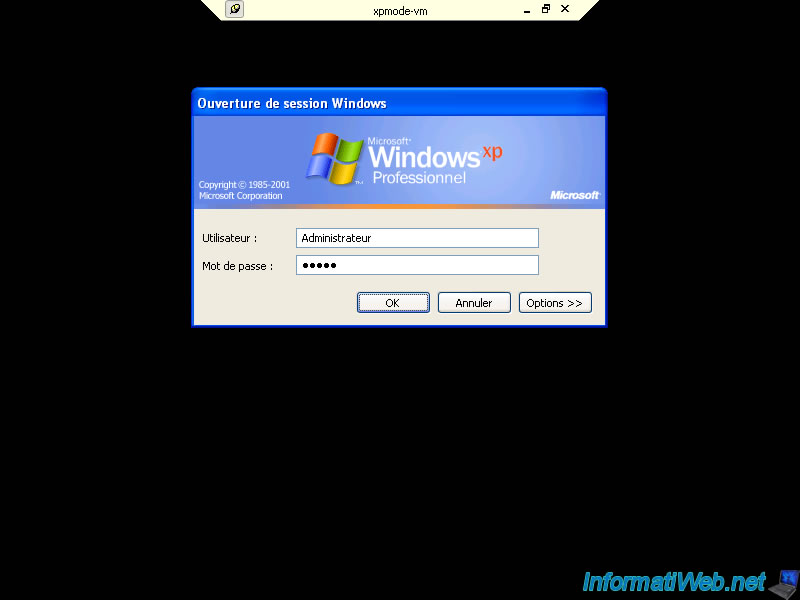
Log in with a user account authorized to connect via remote desktop.
By default, the user account used on Windows XP Pro when you enabled RDP (remote desktop) server.
Warning : the user account used must be protected by a password.
Note: it is possible that the "Windows logon" window appears after only ten seconds.
Just wait for it to appear automatically.
If you attempt to log in with a user account that is not password protected, the warning below will appear and you will not be able to log in to the remote PC via Remote Desktop.
Plain Text
Unable to log you because of an account restriction.

Otherwise, it will work and you will land on the Windows XP Pro session of the remote PC.
Note that, by default, you can't shut down or restart the remote computer from the start menu.
Only close your Windows session or log out (which leaves the session open on the remote PC).
In both cases, the remote PC will remain on.
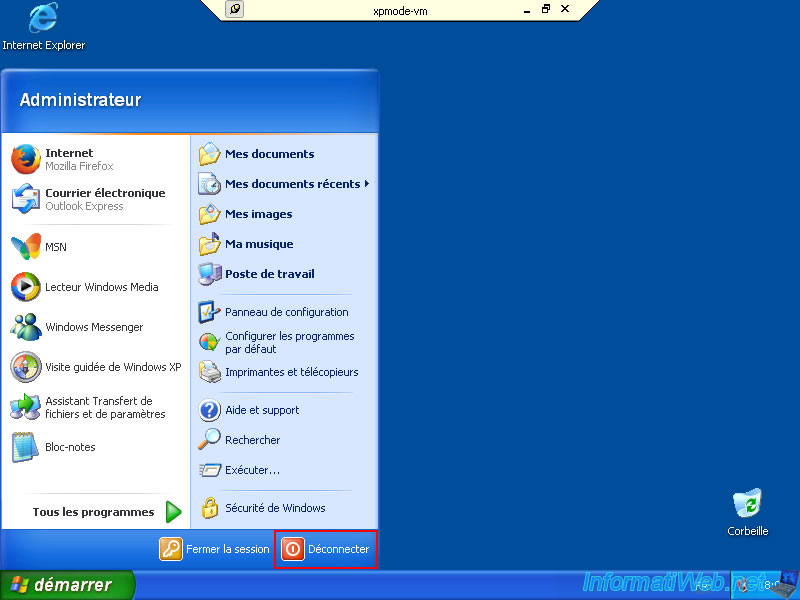
If you chose "Disconnect", a window with a "Disconnect" button will appear.
If you click on it, your session will remain open on the remote PC, but the window on your end will close automatically.
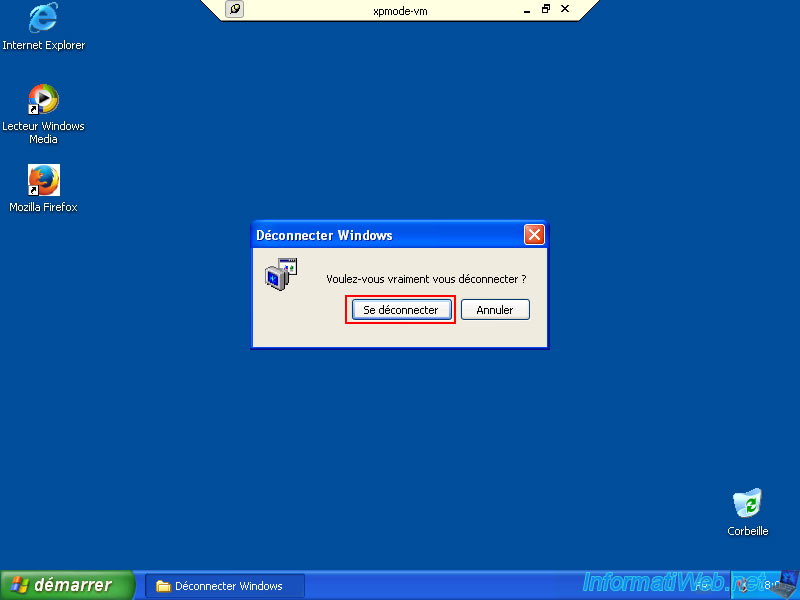
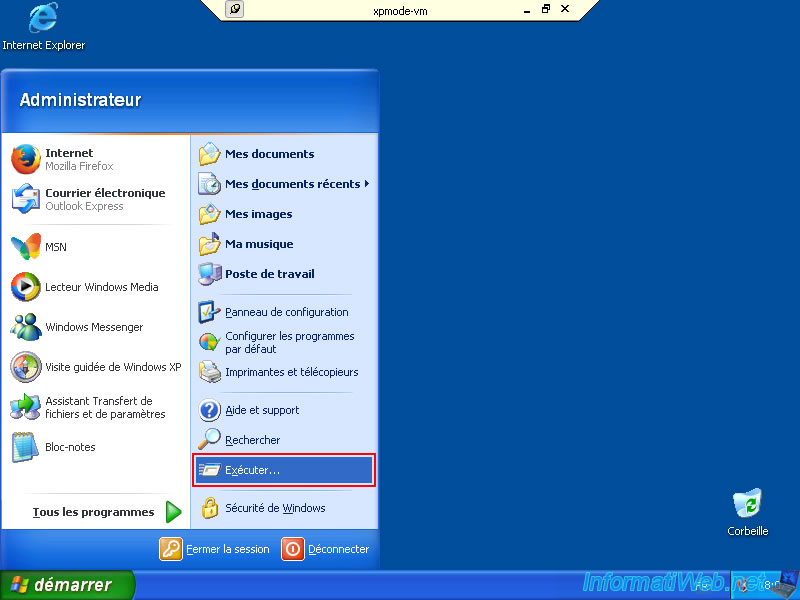
If you need to shut down or restart the remote PC, here's a little tip.
Open the start menu and click: Run.
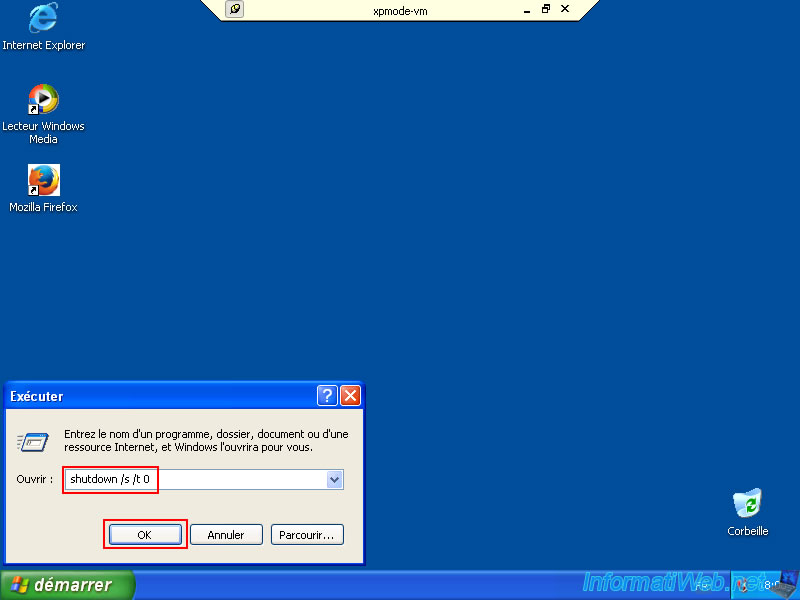
In the "Run" window that appears, type one of the commands below.
To immediately and cleanly shut down Windows XP, use this command:
Batch
shutdown /s /t 0
To immediately restart the remote PC, use this command:
Batch
shutdown /r /t 0
Then click OK.
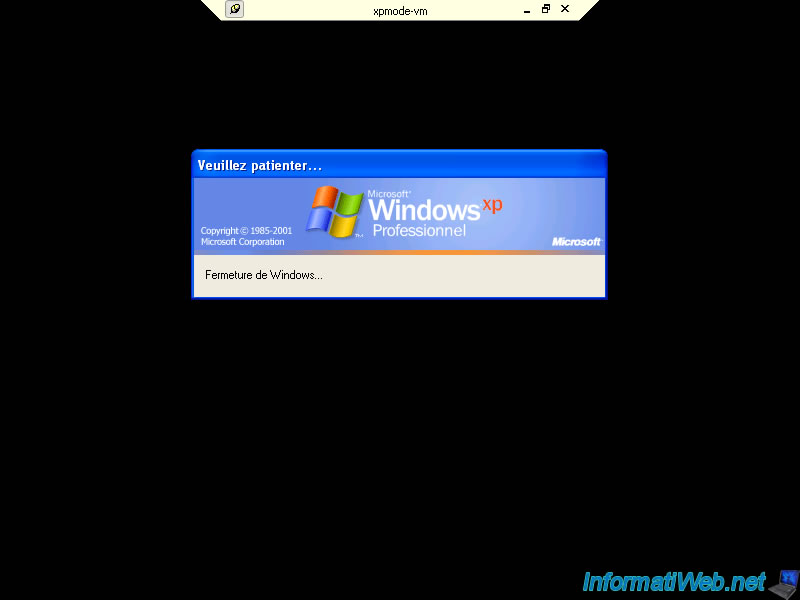
If you have chosen to shut down Windows XP, you will see a small window appear with the message "Shutting down Windows".
6. Access client PC partitions from the RDP session opened on the remote PC
To transfer files or folders between the client PC and the remote PC under Windows XP Pro, you will need to allow access to one or more partitions of your client computer in the "Remote Desktop Connection" client.
Warning : on Windows XP, you cannot copy files via simple copy and paste (via the clipboard) or drag and drop.
You can only enable clipboard sharing to copy text. Copying files via the clipboard is not supported on Windows XP.
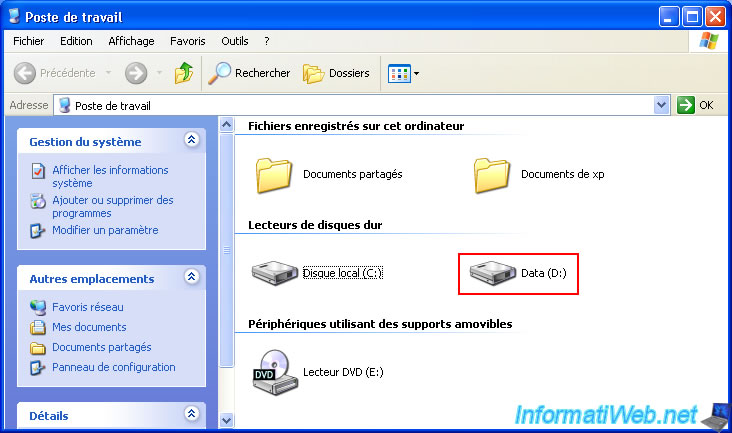
For the example, we added a hard drive with a single partition named "Data (D:)".
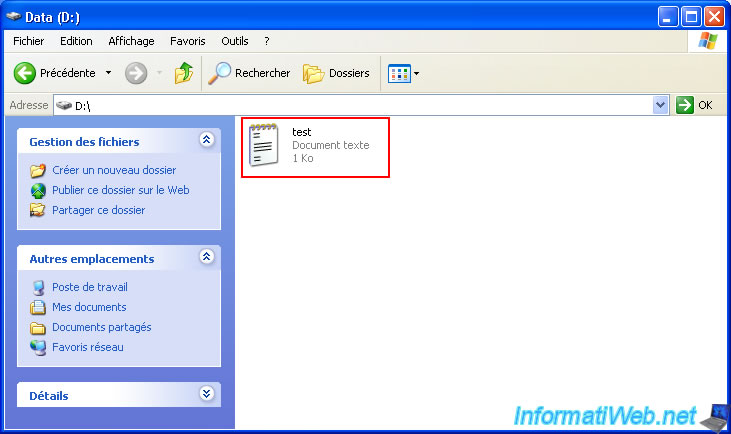
On this "Data (D:)" partition, we created a test file.
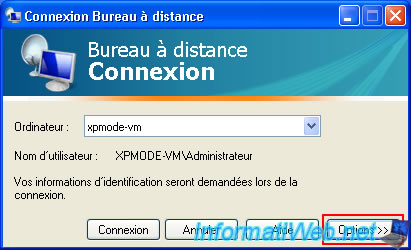
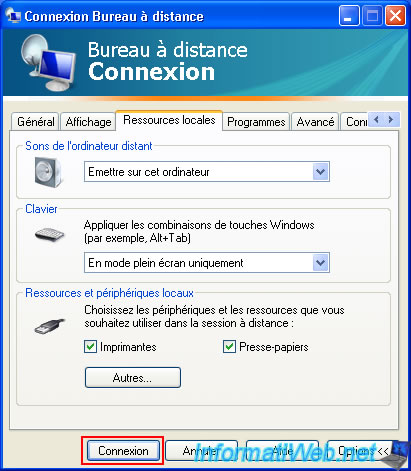
To access the files on your client PC from the session that you will open on the remote PC via the "Remote Desktop Connection" client, you must first click on the "Options >>" button (located at the bottom right of the window).
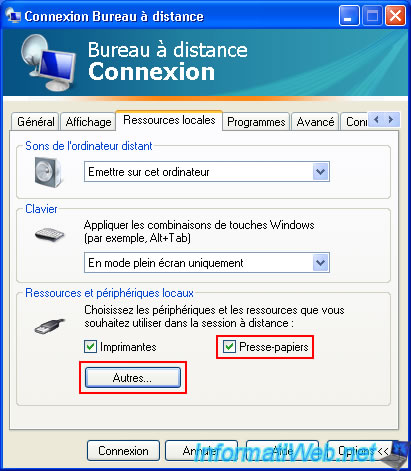
Several tabs with different options appear.
Go to the "Local Resources" tab and check the "Clipboard" box to be able to easily copy and paste text between the client PC and the remote PC.
Warning : this "Clipboard" option does not support copying files on Windows XP.
Unlike newer versions of Windows which allow this.
Next, click the “More” button in the “Local devices and resources” section.
For more information regarding the different options of the "Remote Desktop Connection" client, refer to our "Control a computer remotely" tutorial since the options are the same as on other versions of Windows.
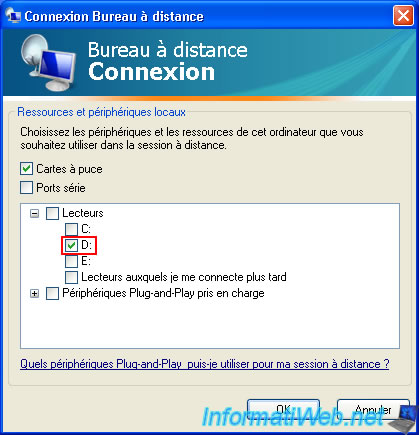
Click the "+" icon to the left of "Drives", then check the box for the partition on your client PC that you want to be able to access from the remote PC.
In our case "D:" (which corresponds to our "Data (D:)" partition.
Then, click OK.
Warning : if you run malware on your remote PC, it could potentially infect the files on your client computer.
To limit the damage, refer to the next step in this tutorial if you wish.
Important : the partitions of your hard drives, as well as your CD/DVD drives are listed here.
The last letter displayed therefore probably corresponds to the letter automatically assigned to your CD/DVD drive (on your client PC).
Now, click “Connect” at the bottom of the window.
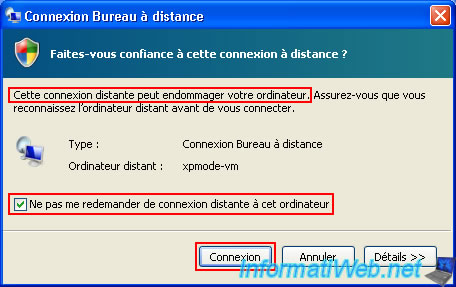
When you share local resources with the remote PC, Windows XP displays a warning.
The reason being the one mentioned above.
Plain Text
This remote connection could harm your computer.
Check the box “Don't ask me again for connections to this computer”, then click on: Connect.
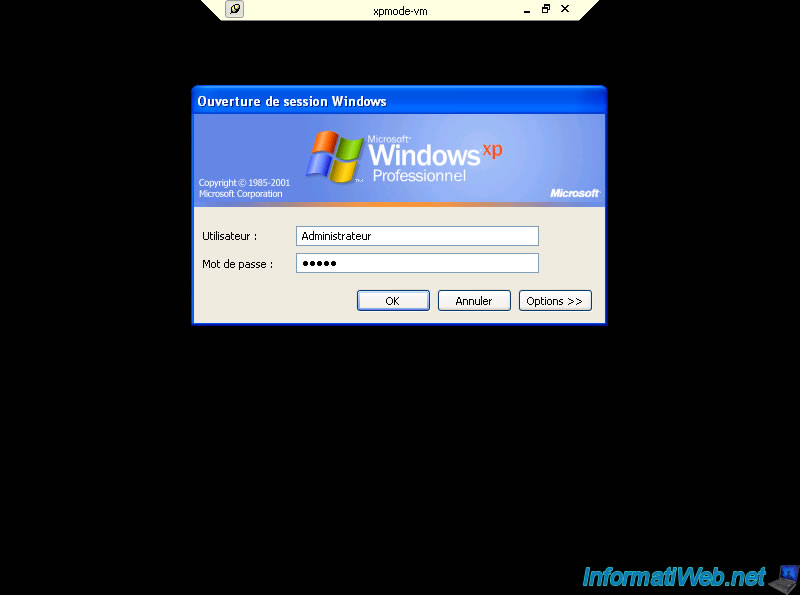
Type the credentials of a user account authorized to connect to the remote PC and click OK.
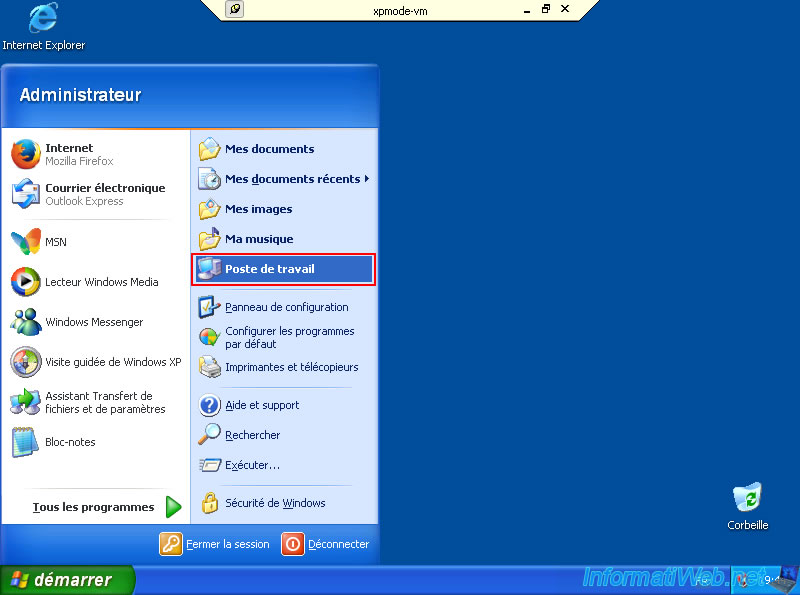
Go to the start menu and click on: My Computer.
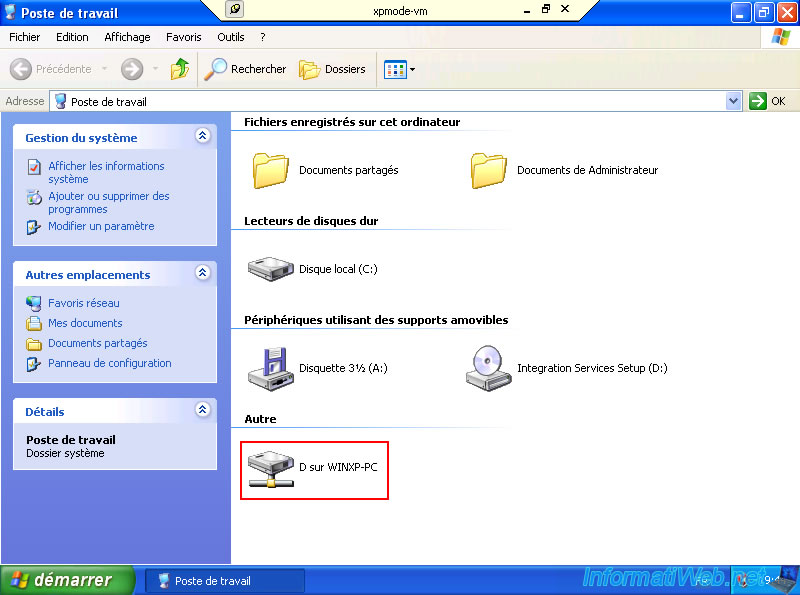
In the workstation that appears, you will see that an "Other" section has appeared with a network drive (named "D on WINXP-PC" in our case).
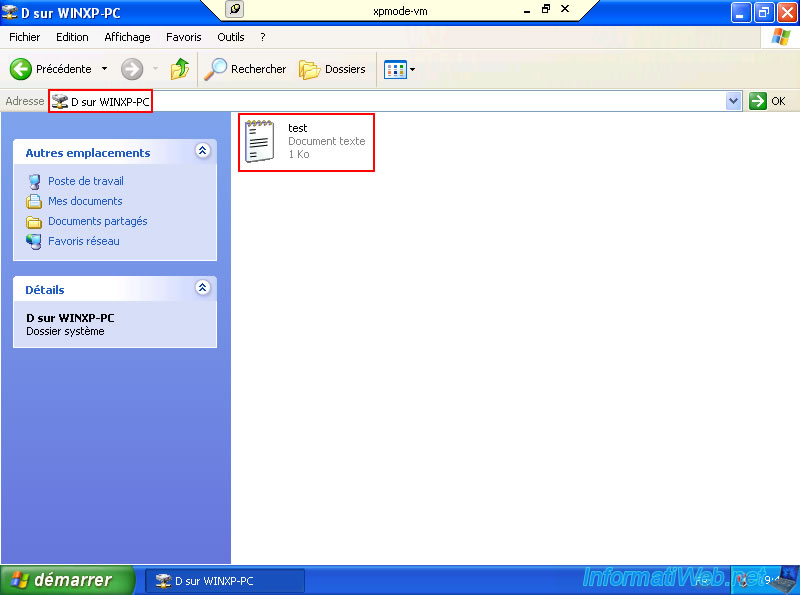
Double click on it to enter.
As expected, we have access to our test file from our client PC.
Share this tutorial
To see also
-
Windows 11/27/2020
Upgrade from Windows XP to Windows 7
-
Windows 11/22/2012
Windows XP - Create a bootable USB key to install Windows
-
Windows 6/16/2018
Windows XP - File sharing
-

Windows 4/7/2012
Windows XP - Use a Bluetooth headset
No comment