- Windows
- Windows XP
- 16 June 2018 at 13:16 UTC
-

- 1/3

In Windows XP, it's possible to share files (or more precisely folders) in 2 different ways :
- simple file sharing (enabled by default) : the folder is shared and can be read and written by anyone. This facilitates the creation of sharing, but this poses a big security problem.
- advanced file sharing : you will be able to manage the access rights for each share (via share permissions and NTFS rights), but it takes longer to set up.
- Set up a workgroup
- Use simple file sharing
- Access a shared folder on Windows XP
- Create a hidden network share
- Use advanced file sharing
1. Set up a workgroup
Before you can share files between 2 computers, it's best to put them in the same workgroup.
By default, all Windows PCs are in the workgroup : WORKGROUP.
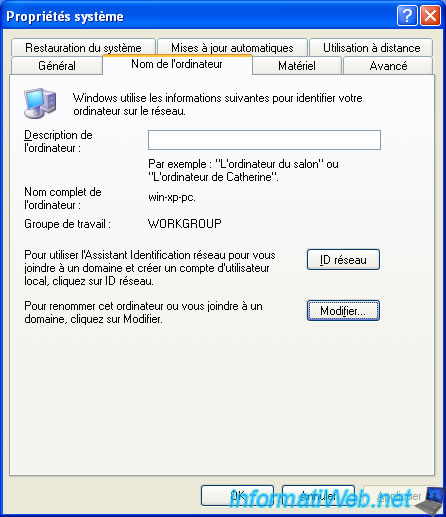
To do this, go to the start menu and right click "Properties" on My Computer.
Then, go to the "Computer Name" tab.
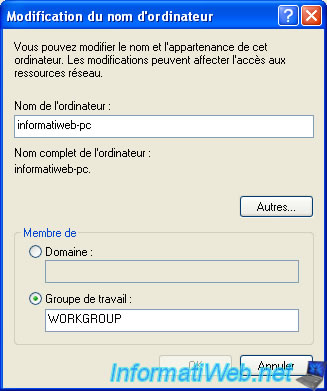
As you can see, our 1st PC is called "informatiweb-pc" and it's in this workgroup : WORKGROUP.
If you want to modify one of these 2 values, click on the Change button.

Change the name of the computer and/or the workgroup if necessary and click OK.
Same on the 2nd PC.
Warning : 2 computers can't have the same name on the same network.
2. Use simple file sharing
By default, Windows XP uses the simple file-sharing system.
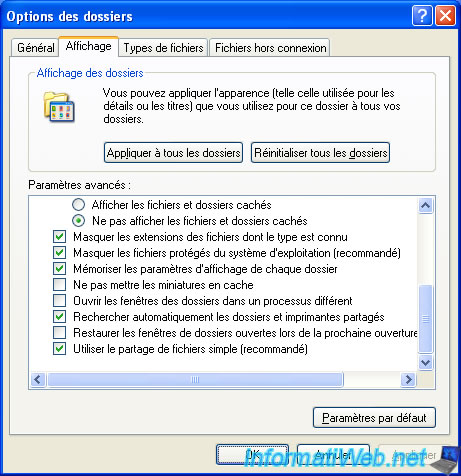
Nevertheless, if necessary, open a folder, then go to the "Tools -> Folder Options" menu.
In the "View" tab, check that the "Use simple file sharing (Recommended)" checkbox is checked.
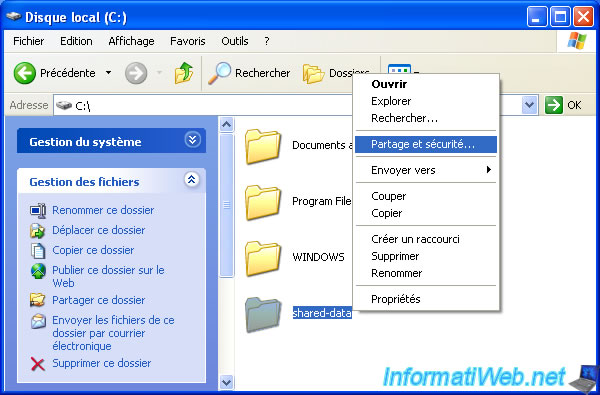
Then, right click on the folder to share and click on "Sharing and Security".
If you have never shared files on Windows XP, you will first need to enable file sharing by clicking on the displayed link : If you understand the security risks but want to share files without running the wizard, click here.
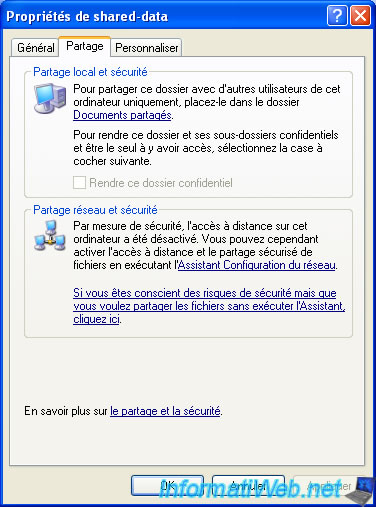
Select "Just enable file sharing" and click OK.
Note : the wizard simply allows you to rename your computer, as well as to change the workgroup in which it's located.
But since this is already done in our case, we can directly select the "Just enable file sharing" option.

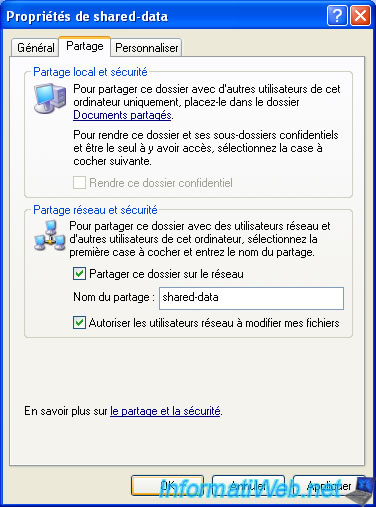
Check the "Share this folder on the network" box to share this folder.
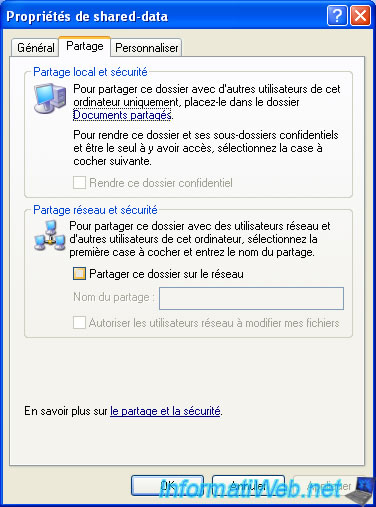
To allow the creation and modification of files via the network share, also check the "Allow network users to change my files" box.
Otherwise, leave this box unchecked to share this folder in "read only".
Once the folder is shared, you will see a small hand appear on this folder.
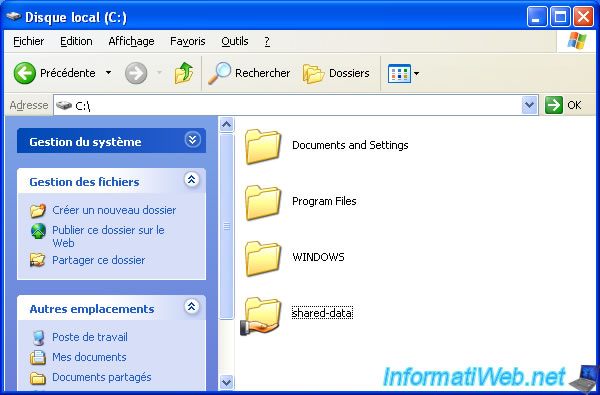
We have created a test.txt file in this shared folder.

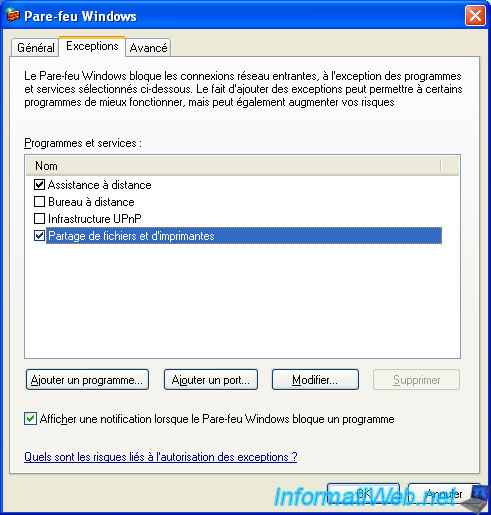
Note that from service pack 2 of Windows XP, your computer will be protected by default by a firewall.
This can block file sharing if the "File and Printer Sharing" exception is not checked.
3. Access a shared folder on Windows XP
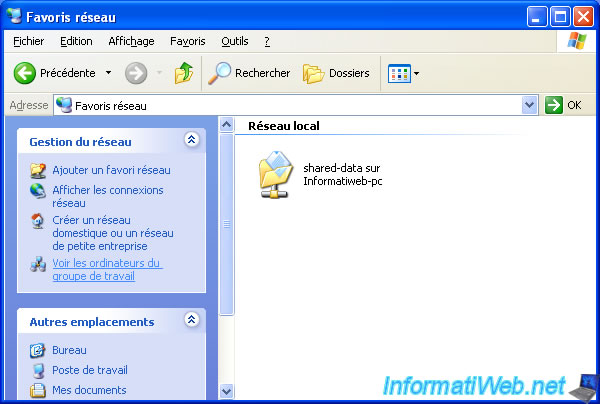
To find a shared folder in Windows XP, you must go to the network places.
To do this, open the My Computer window and click on "My Network Places" on the left.

By default, Windows will show you the shared folders it will find on the network.
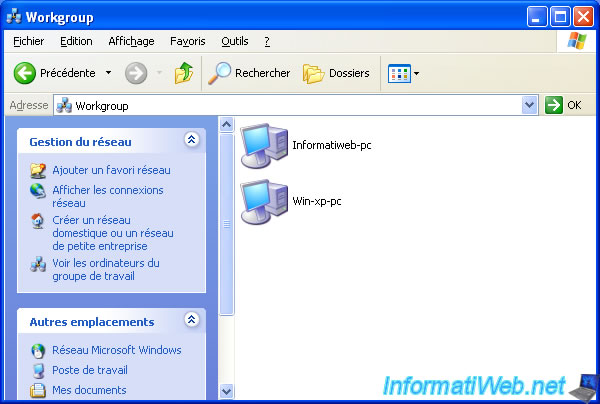
Note : to view computers that are in the same workgroup as you, click "View workgroup computers".
The list of computers in the same workgroup as your computer is displayed.
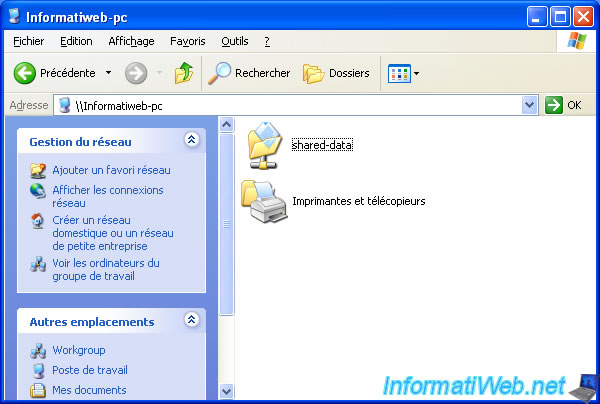
By double-clicking on the PC where you have enable the file sharing (in our case the "Informatiweb-pc" PC), you will see :
- folders shared on this PC
- a "Printers and Faxes" folder that will contain shared printers (if you share them)
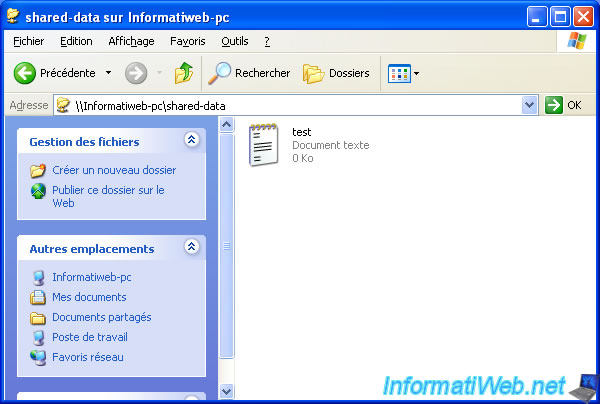
As expected, we have access to the text file that was in the previously shared folder.
Note : as you can see, the network path of a shared folder (in this case: \\Informatiweb-pc\shared-data) consists of the name of the target PC (Informatiweb-pc) and the name given for sharing (shared-data).
Share this tutorial
To see also
-
Windows 11/11/2012
Windows XP - Formatting and reinstalling
-
Windows 4/4/2013
Windows XP - Start in safe mode
-
Windows 12/4/2015
Windows XP - System restore
-

Windows 1/7/2010
Windows XP - Windows Search - Search engine
You must be logged in to post a comment