Simple, advanced, hidden and secure file sharing on Windows XP
- Windows
- Windows XP
- 16 June 2018 at 13:16 UTC
-

- 2/3
4. Create a hidden network share
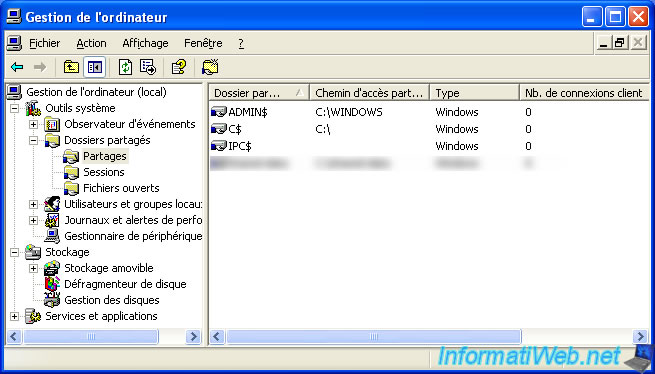
When you enable file sharing on Windows XP, you also automatically enable access to administrative shares created by Windows.
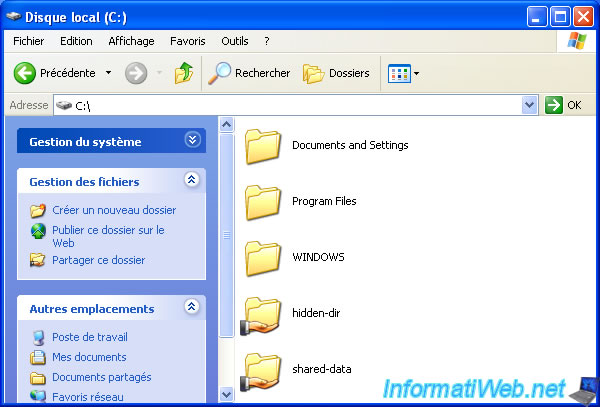
In this case, the "hidden" shares :
- ADMIN$ : that allows you to access the folder where Windows is installed from another computer of your network
- C$ : which allows you to access the entire local disk C of the target PC from another computer of your network
- IPC$ : which is a special sharing that simply allows the processes to talk to each other
These shares pose a big security problem, especially since Windows XP is no longer supported by Microsoft.
Note : these administrative shares are hidden thanks to the "$" suffix.
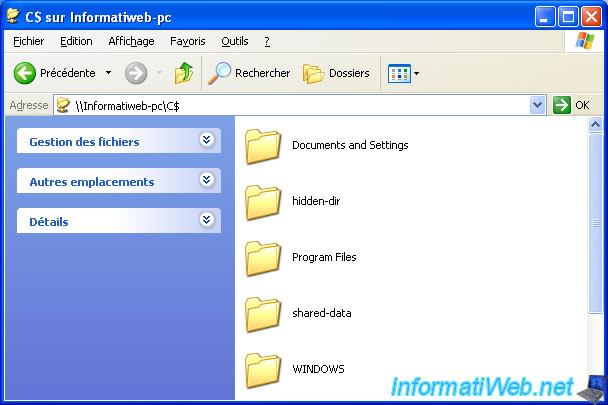
From another PC on the network, you could for example access the drive C of the machine through the "C$" administrative share.
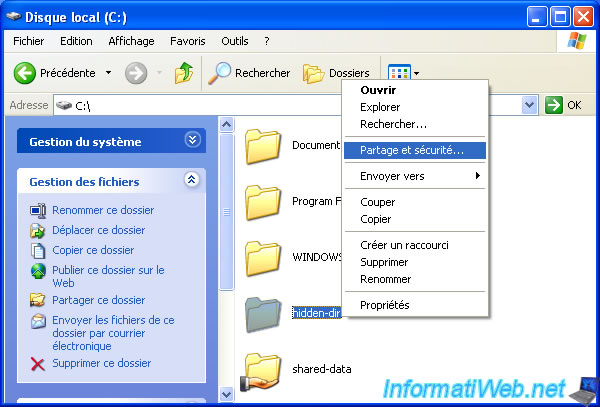
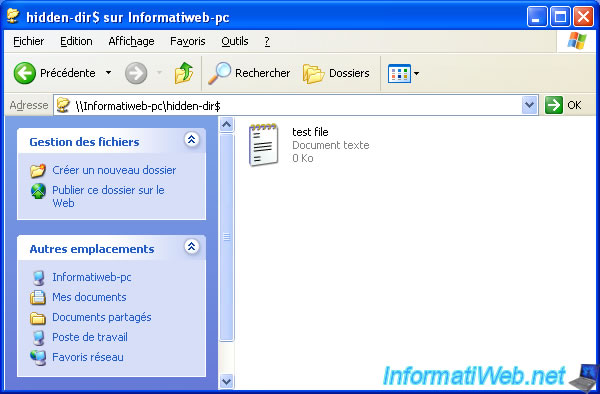
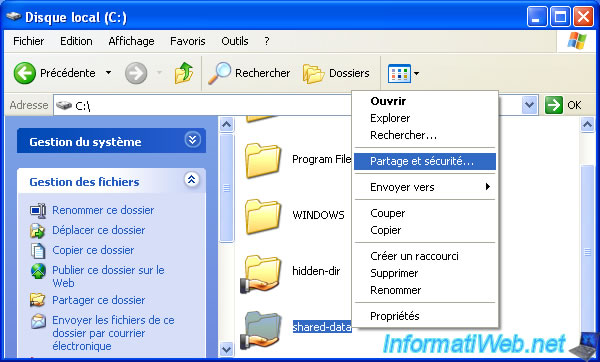
To create a hidden shared folder, create a new folder and right-click "Sharing and Security" on it.
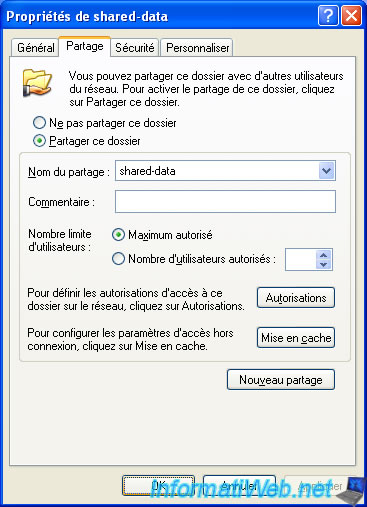
Check the boxes as before, but this time, add a $ at the end of the share name.
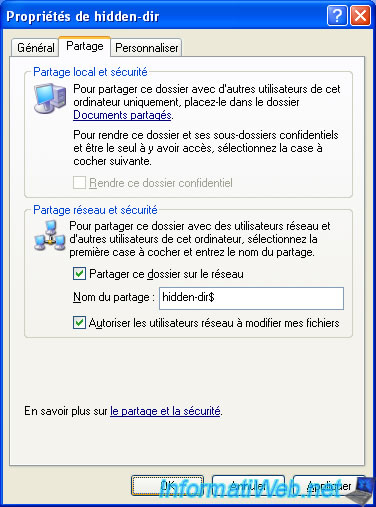
The folder "hidden-dir" is shared.
But it will not appear in the shared folders of our computer.
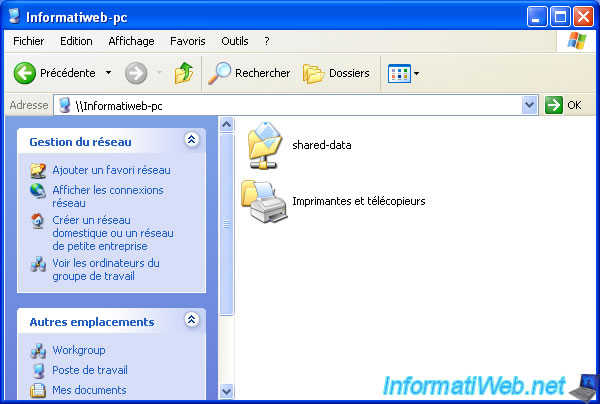
However, by manually specifying the path of this network share, it will be easily accessible.
5. Use advanced file sharing
5.1. Enable advanced file sharing
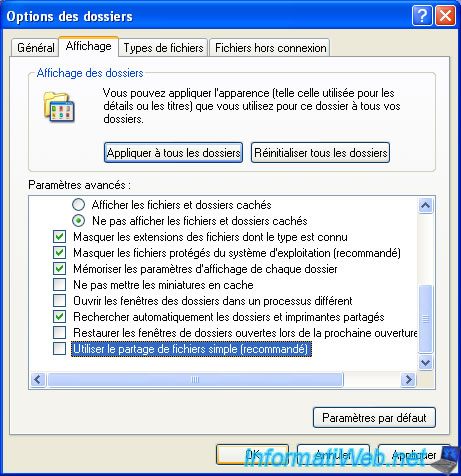
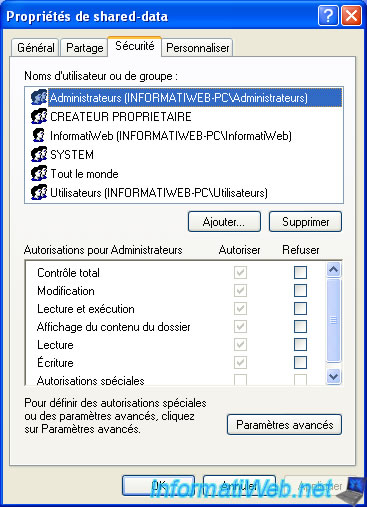
To enable advanced file sharing and also enable the "Security" tab in the folder properties, go to the Tools menu and click : Folder Options.
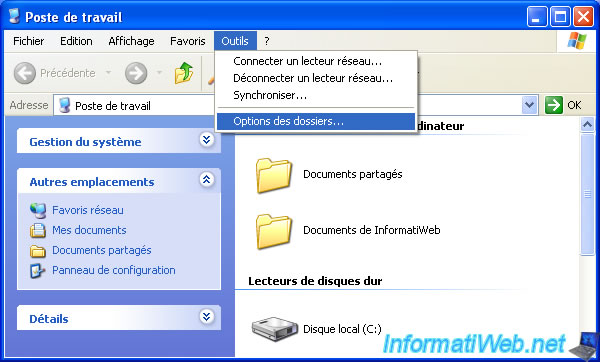
Uncheck "Use simple file sharing (Recommended)" box and click OK.
Right-click on a shared folder and click "Sharing and Security" again.
Now, Windows XP shows you many more options including :
- the Permissions button
- the Caching button
- an option to limit the maximum number of simultaneous users for this share
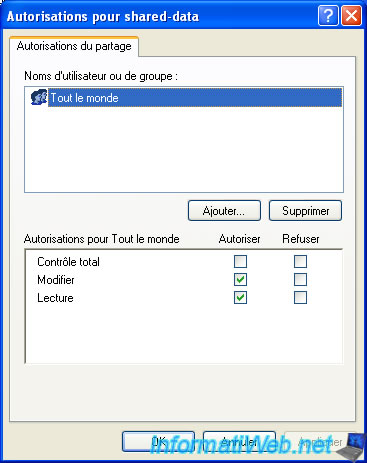
If you click on the "Permissions" button, you will be able to choose which user will be able to access your shared folder and choose which permissions to grant it :
- Full control
- Modifier
- Read
Nevertheless, as you can see, the number of permissions available is very limited.
To better handle these permissions, you will be able to go through NTFS rights.
To be brief, if you allow full control for a user in the persmisssions section, but you limit these NTFS rights (eg, allow only "Read and Execute", "Display Folder Contents" and "Read"), this user will not be able to edit files on this network share, but will be able to open the files it contains.
Share this tutorial
To see also
-
Virtualization 8/9/2019
VirtualBox - Virtualize Windows XP
-
Windows 11/22/2012
Windows XP - Create a bootable USB key to install Windows
-
Windows 11/11/2012
Windows XP - Formatting and reinstalling
-

Windows 3/14/2013
Windows XP - Repair installation of Windows
No comment