- Live CD
- UBCD
- 27 January 2013 at 12:38 UTC
-

With our tutorial, you can test your hardware : Hard disk (HDD), random access memory (RAM), graphics card (GPU) and the processor (CPU).
For this, you will need "Ultimate Boot CD".
- Test your hard drive (and attempt to repair bad sectors thereof)
- Test the memory (RAM)
- Test your graphics card (GPU)
- Test your processor (mainly in the case of an overclock)
1. Test your hard drive (and attempt to repair bad sectors thereof)
To test your hard drive, we will use a live CD called "Ultimate Boot CD". To boot from a Live CD, you need to burn and configure your BIOS for your computer to boot on your CD / DVD drive. To do this, read our tutorial "Change the BIOS boot order".
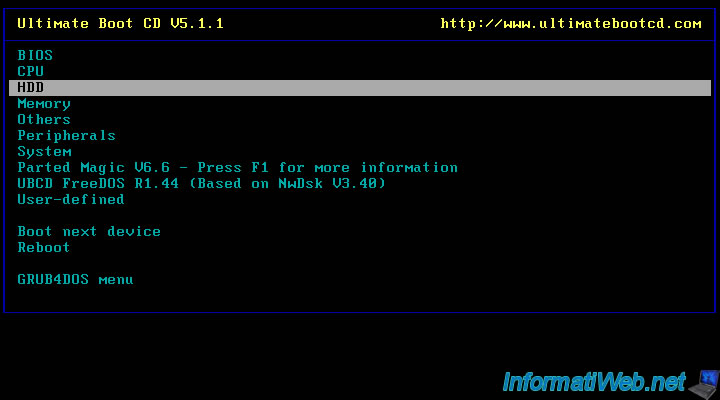
If your computer starts well on your CD / DVD drive, you should get this. Go to "HDD".
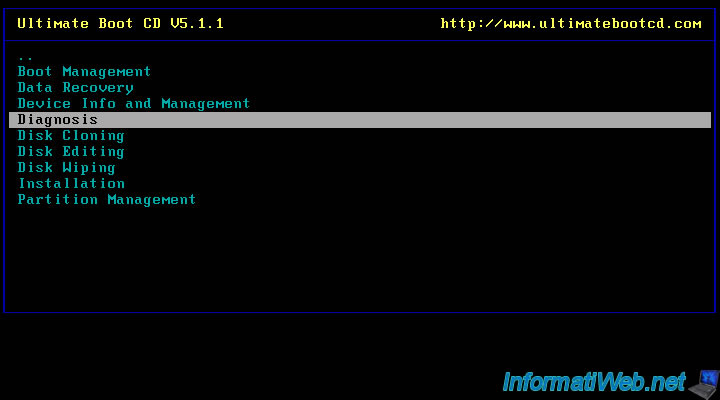
Select "Diagnosis".
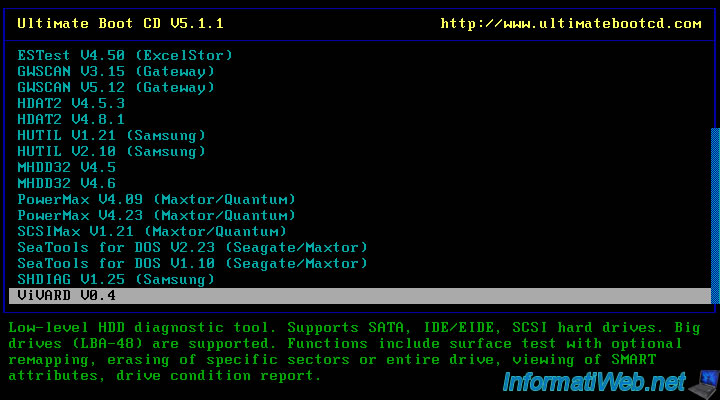
And use the software named "ViVARD" (this is the last in the list).
You can of course use other software test if you wish or if ViVARD doesn't work on your computer (incompatibility with the controller of your hard drive, for example).
Like other software testing, we recommend : HDAT2.
To use it, refer to our tutorial : Test your hard disk with HDAT2 from Ultimate Boot CD
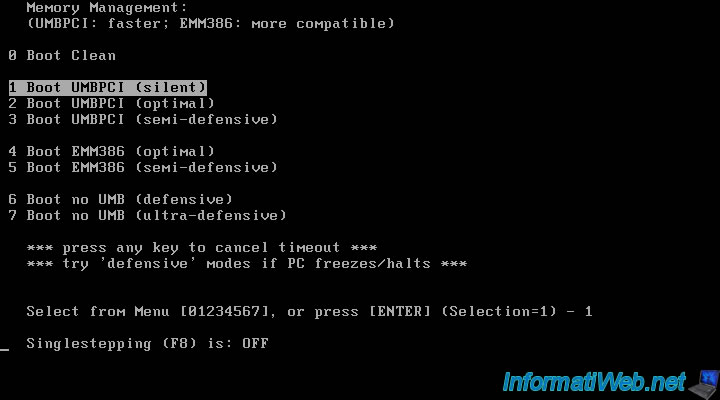
If you chose ViVARD, the computer will wait a few seconds for that menu. Wait until the menu disappears or press ENTER to select the default option.
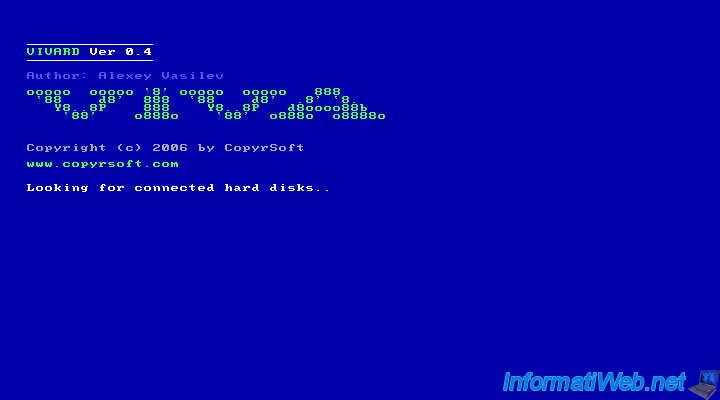
Then you get on the program ViVARD on blue background (do not worry, this isn't a Windows Blue Screen or BSOD even if the color is the same). It will now search your hard drives. This process takes no longer than 30 Seconds.
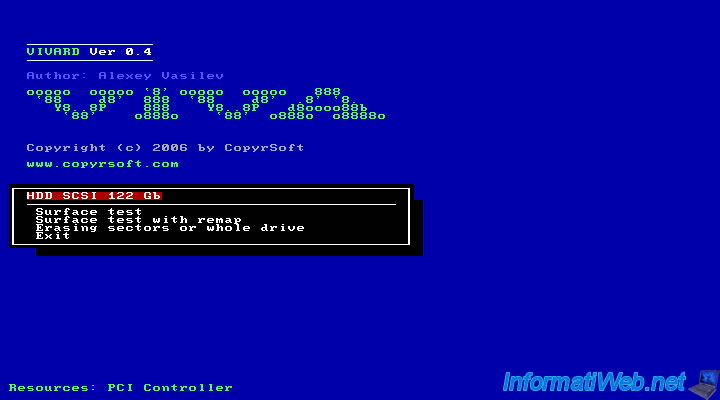
Select the hard drive tested and press the "ENTER" button.
Note : If you do not see the red highlight, look at the bottom of the screen. If you are on a hard drive, it will be marked "Resources : PCI Controller".
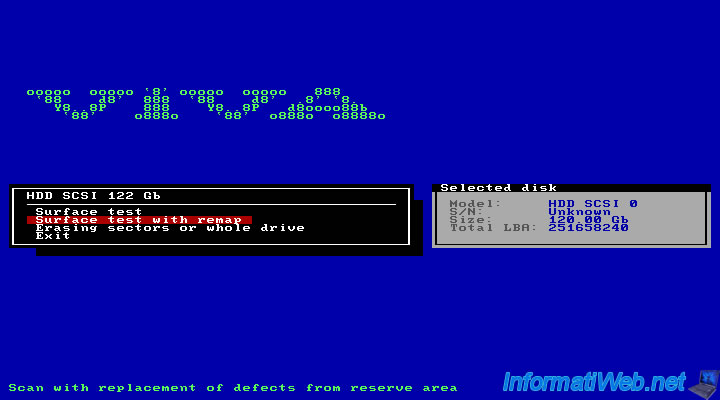
Information about the selected hard disk appear to the right.
Now select "Surface test with remap" and press "ENTER" button.
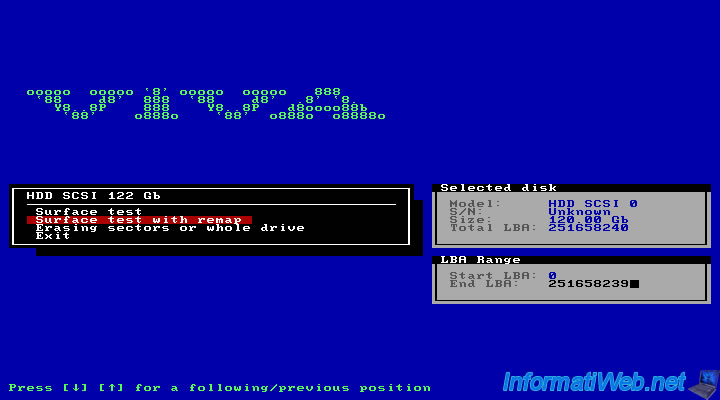
Then you can choose to test a range of sectors on your hard disk. To fully test your hard drive, simply press 2 times the ENTER button.
ViVARD will now test your hard drive and attempt to "repair" bad sectors .
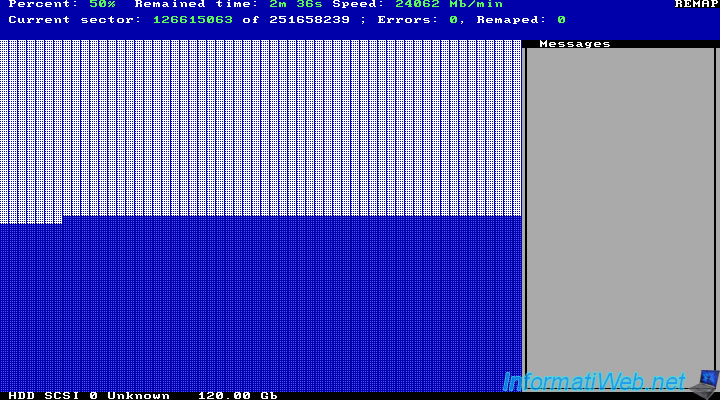
Here is a short explanation of the interface:
- Percent, Remained time and Speed : Indicates the state as well as the speed of the test.
- Current sector : Indicates the area that is currently being tested
- Errors : The number of detected errors by "ViVARD". When an error occurs, the square is displayed in red as in the picture below.
- Remaped the number of bad sectors (represented by the number of errors detected) that have been repaired. *
* In reality, ViVARD does not repair errors (because they are physical) but just saying the hard drive "act as if this sector didn't exist" so it will not use anymore and freeze problem, for example, has disappeared) .
Note : The test is shorter or longer depending on the size of your hard drive and your computer's performance. Having launched the test in a speed test virtual machine is very high and in no way corresponds to the average real test. Besides testing a virtual hard disk has no interest because everything is software, but it has allowed us to make you printscreens program with good image quality.
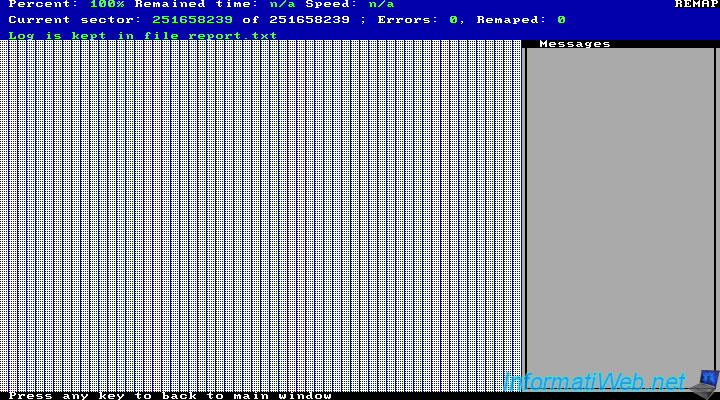
Once the test is complete, the percentage (Percent) will be 100% and the line "Log file is Kept in report.txt" will be displayed in green at the top of the screen.
Several cases are now possible :
- Either you "Errors : 0" and " Remaped : 0" : No error was detected (and therefore no repaired since it's useless)
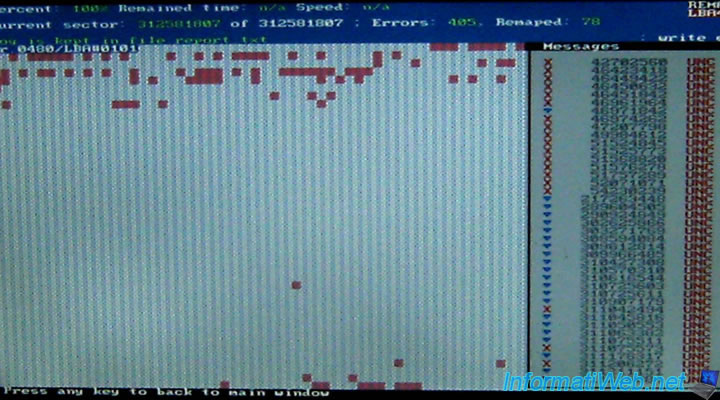
- Either you have an error number (Errors) exceeds the number of repaired errors (Remaped) : It is time to buy a new hard drive and transfer the data (some data might be corrupted. It depends on whether they are on the detected defects sectors, or not) .
- Either you have an error number (Errors) equals the number of repaired errors (Remaped) : In this case , it means that all errors detected were repaired nevertheless a hard drive with a weakness may very well again. This can cause you to lose data (or prevent the computer from restarting Windows if it's there) .
In this case :
1) Let the number of errors is quite high and therefore it is best to change your hard drive data security
2) Let the number of errors is very low and it may be that your hard drive to make more errors (physical).
Note : If the "Drive not ready" message appears at the top of the screen, it means that your hard drive is defective. Indeed, this message appears when the read head of the hard drive goes somewhere else than what was requested by the computer. Causing random crashes.
We recommend that you still make backups of your data if you keep a hard drive despite having one day set errors on it.
Here is a picture of the program has detected errors on a hard drive. As you can see any errors that hard drive could not be all repaired, the owner must replace it with a new one.
2. Test the memory (RAM)
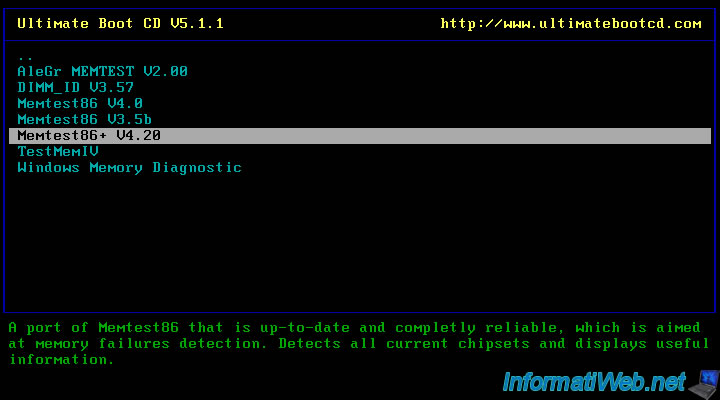
To test your RAM, we will use the same live CD as above. But this time, go to "Memory".
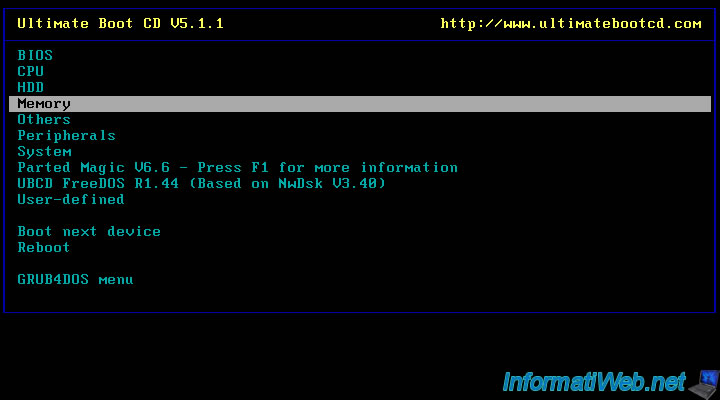
Then run "Memtest86 + V4.20".
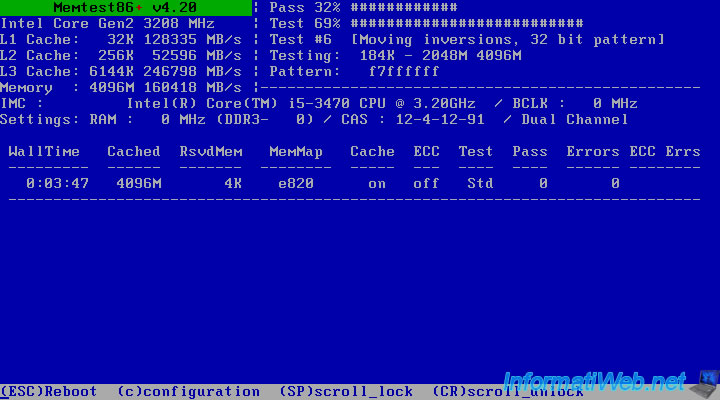
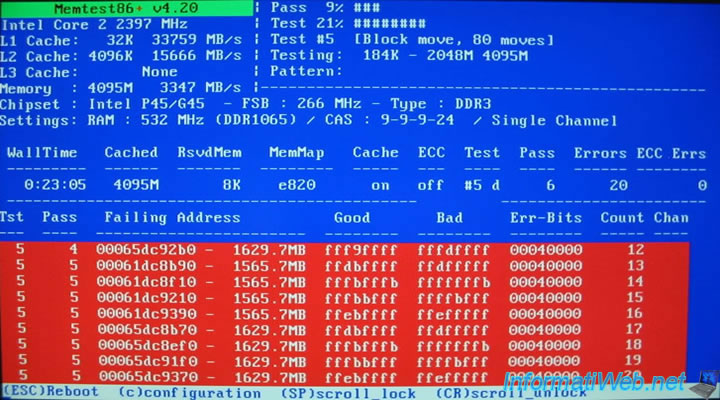
Memtest will now test all your RAM sticks (RAM). This test writes random data in RAM and then read to determine whether the data has been written correctly. If this is not the case, errors are displayed in red in the lower part of the screen.
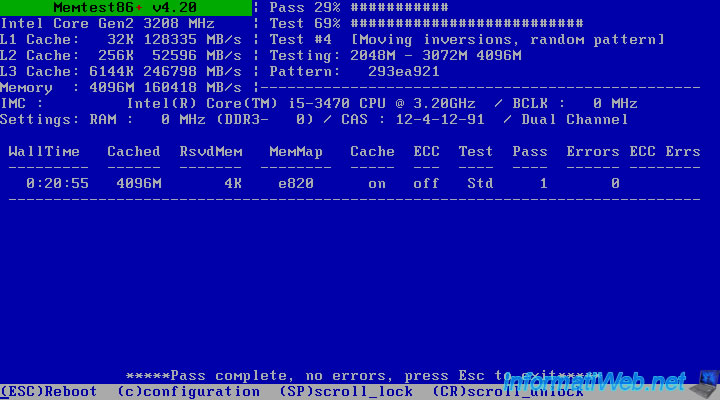
Once the test is completed, the message "***** Pass Complete, no errors press Esc to exit ***** appears at the bottom of the screen if it does not find any errors.
Here is an overview of the program if it finds errors.
In the case where the program detects errors and you have multiple RAM sticks :
- Turn off your computer
- Remove all your RAM sticks
- Put in one stick
- And retest
- Do the same for the other sticks in order to keep the bars that still work and discard those that are defective.
3. Test your graphics card (GPU)
To test the graphics card, we will use a program installed on Windows. In this tutorial, we will provide you with 2 software tests : 3D Mark and FurMark.
First test software: 3D Mark.
3D Mark is very heavy to download, we recommend that you download from the FTP server (for FTP is faster than HTTP since it is intended for file transfer) of "clubic.com". To do this, go to the download page for 3D Mark (on clubic.com) and click on the link "Choose a different server".
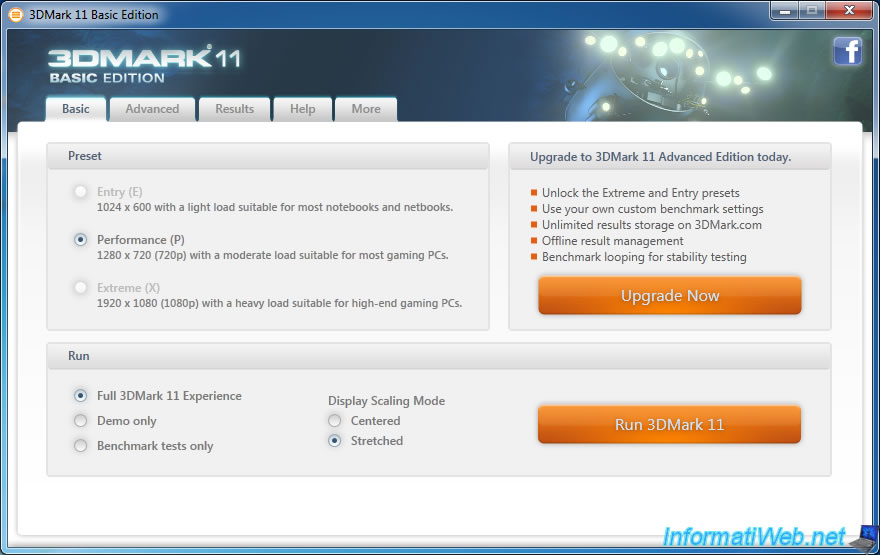
Install it and click "Run 3DMark 11" to launch the benchmark (the test).
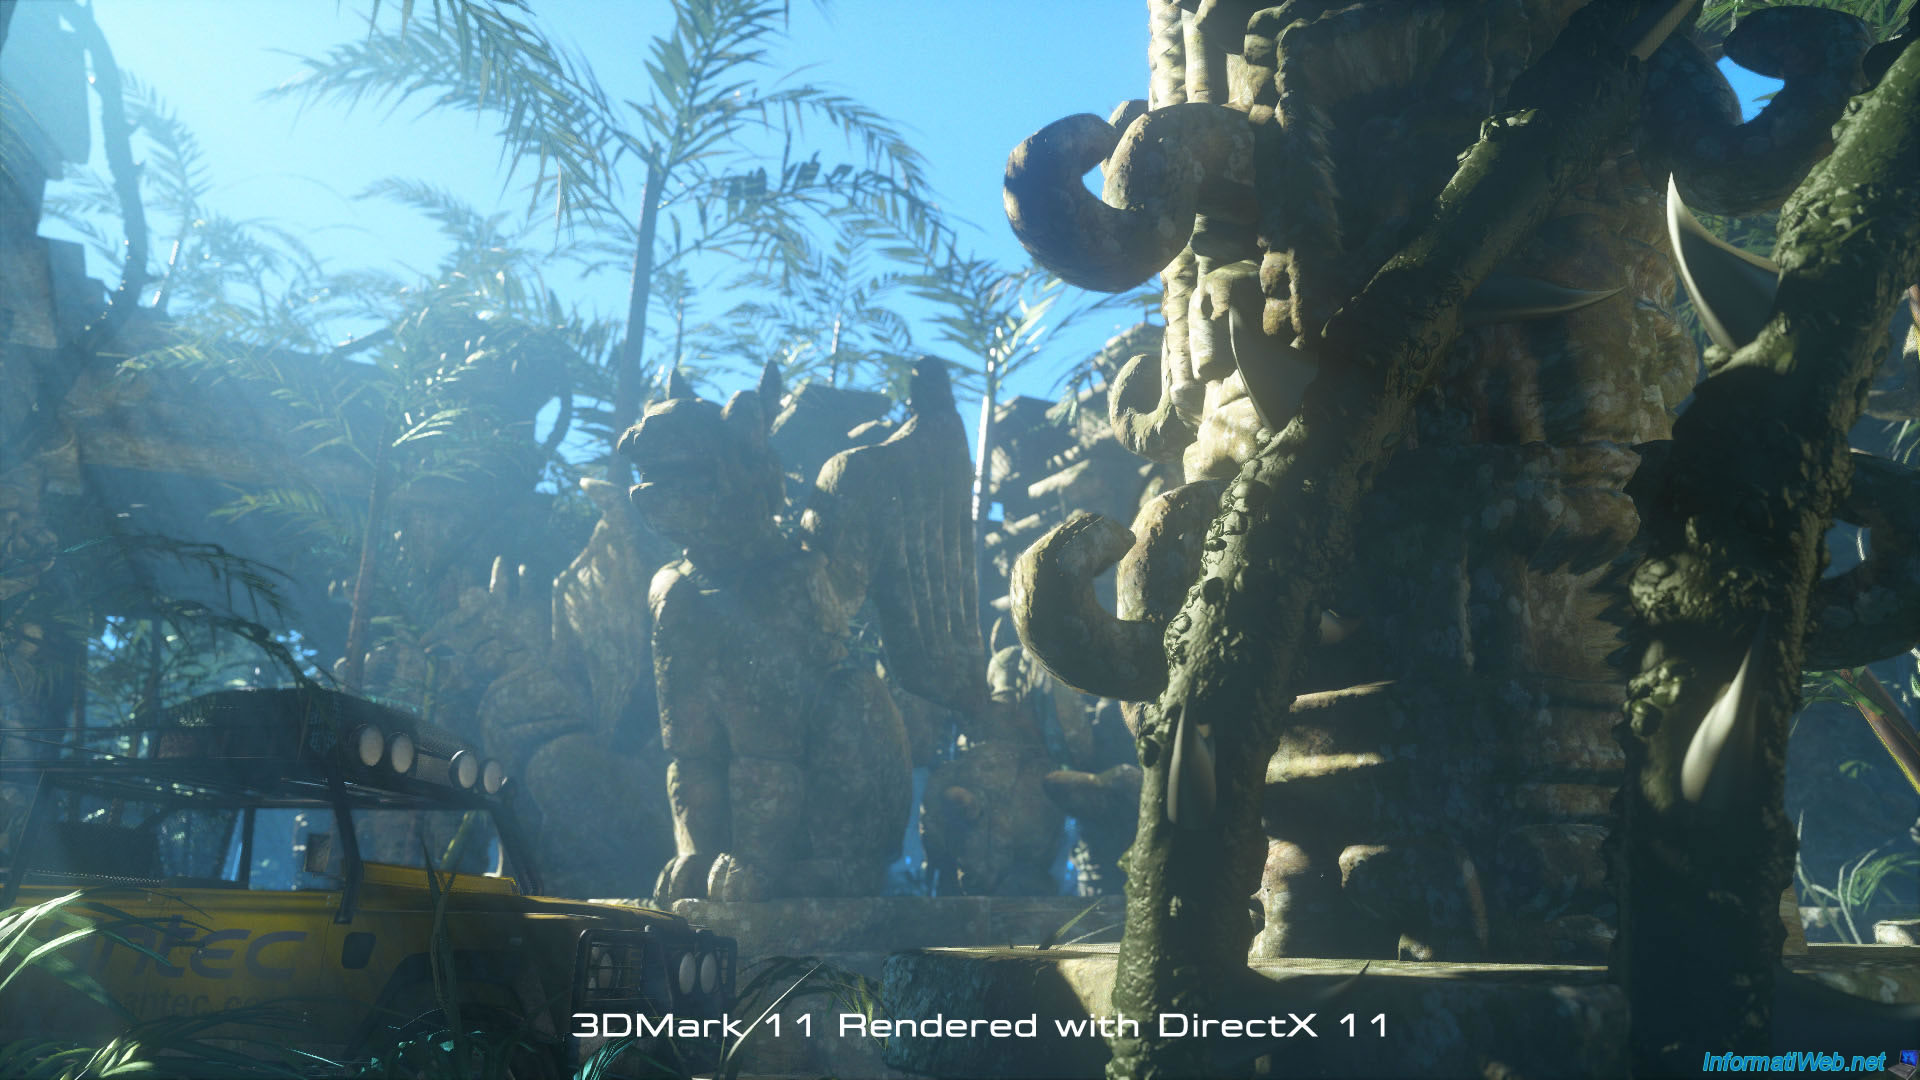
Here is an example of HD image displayed by "3DMark 11".
Note : The tests do not always detect the problems, we advise you to look from time to time the screen of your computer to verify that there are no bugs in the pictures. If you see something wrong in one of the on-screen images, it's probably your graphics card has a problem.
Second software test : FurMark.
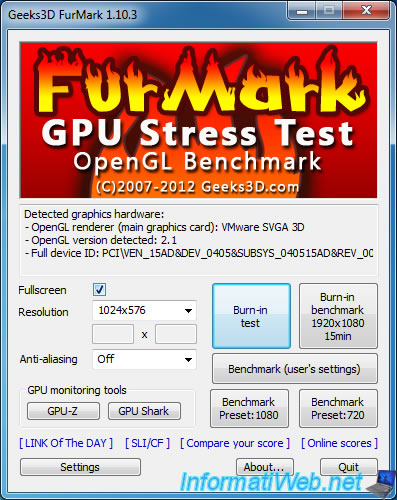
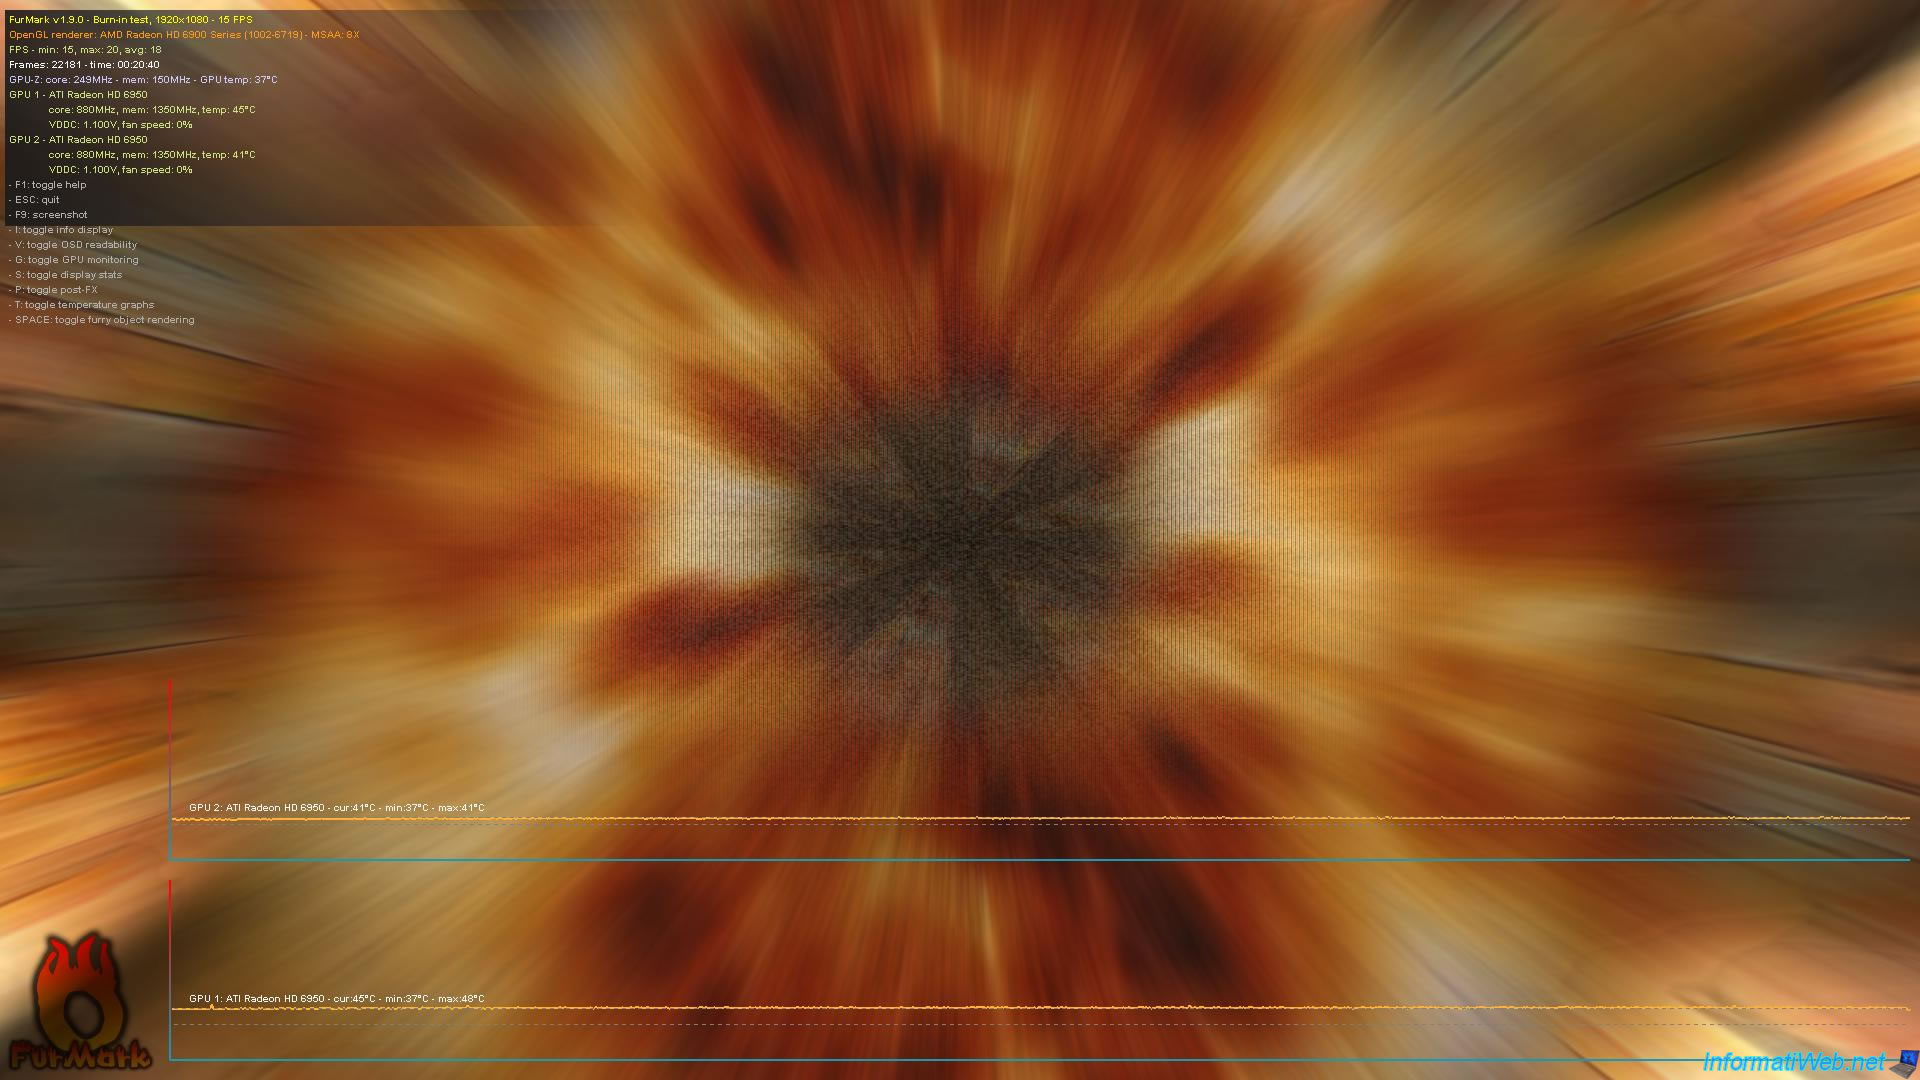
Download FurMark on the publisher's website (ozone3d.net) and install it. Then click "Burn-in test" to launch the benchmark (the test).
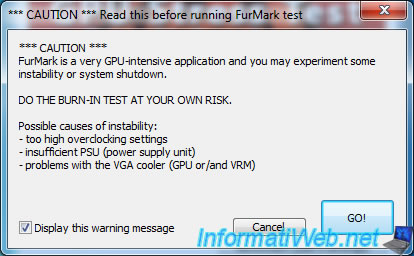
FurMark warns you that this program can create system instabilities, overheating, ...
Note : The tests do not always detect the problems, we advise you to look from time to time the screen of your computer to verify that there are no bugs in the pictures. If you see something wrong in one of the on-screen images, it's probably your graphics card has a problem.
The graph below bug is simply due to the reduction of the original image. Click here to view full size.
4. Test your processor (mainly in the case of an overclock)
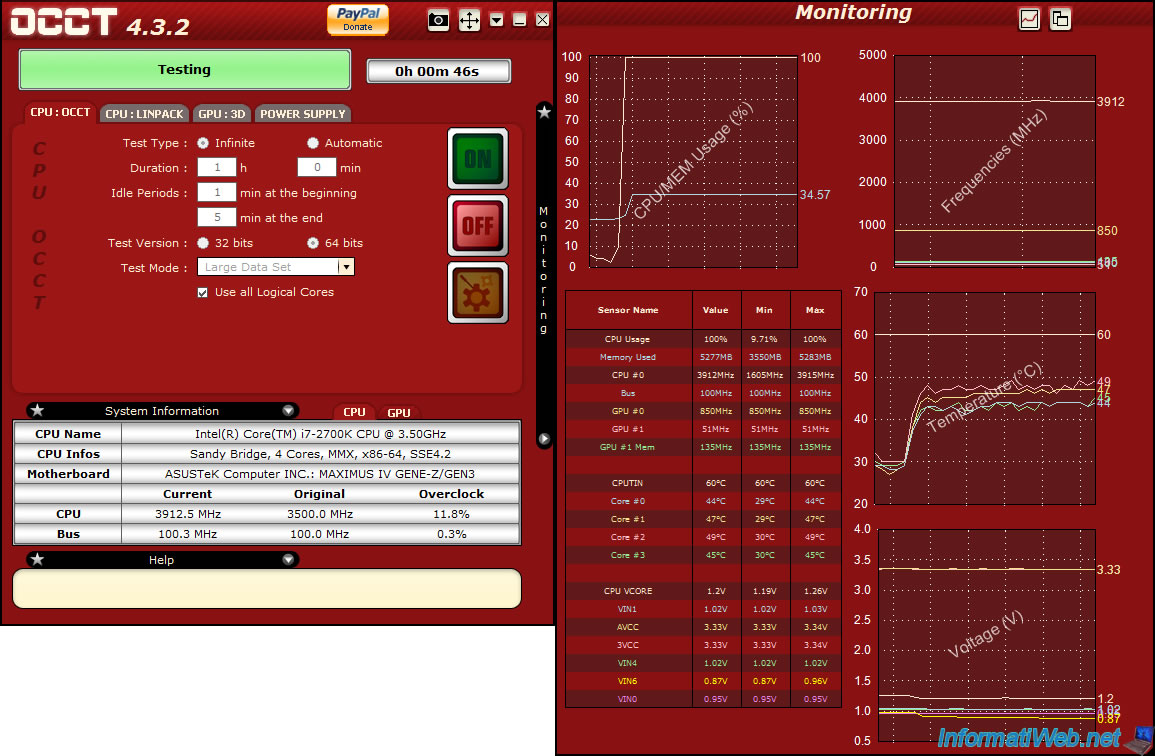
We will now test your processor (CPU). This test is mainly used to test an overclock. To start, just click the "ON" button.
The principle of this test is to stress the processor by operating at maximum. If the test fails an error message will be displayed during the test.
As you can see, this program also has a feature of monitoring.
Share this tutorial
To see also
-

Live CD 6/14/2022
UBCD - Create a bootable Ultimate Boot CD USB key
-
Live CD 2/17/2013
UBCD - Customize Ultimate Boot CD
-

Articles 2/17/2013
UBCD - Presentation of the live CD features
-
Live CD 4/18/2016
UBCD - Test your hard disk with HDAT2

You must be logged in to post a comment