- BIOS
- 21 May 2016 at 09:19 UTC
-

In some cases, it's necessary to force the use of the internal graphics card to use the PCI or PCI-E graphics card for something else.
For example : on a virtualization server, this technique allows you to use the internal graphics card (eg HD Graphics for Intel CPUs) and pass the PCI or PCI-E graphics card to a virtual machine using the VGA Passthough. (If your setup allows it, of course)
In short, depending on the BIOS of your motherboard, the necessary options may have different names.
Here are 2 examples of BIOS that will allow you to do the same thing.
Important : before putting the external graphics card as the default graphics card, make sure that you will be able to connect your monitor on your motherboard. Indeed, once the modification saved, the PCI or PCI-E graphics card will no longer send at startup signal. Which will require you to connect your monitor on your motherboard to get back into the BIOS to make the inverse manipulation.
Note: If it's too late, you have 2 solutions :
- Find a monitor with a plug compatible with your motherboard (VGA, DVI or HDMI depending on motherboards models)
- Turn off the computer by still pressing the power button, unplug the computer power and remove the round cell battery (which is on the motherboard) for 30 seconds. The BIOS will be reset (with default settings) and your PCI or PCI-E graphics card will work normally again.
1. BIOS UEFI Asus (blue)
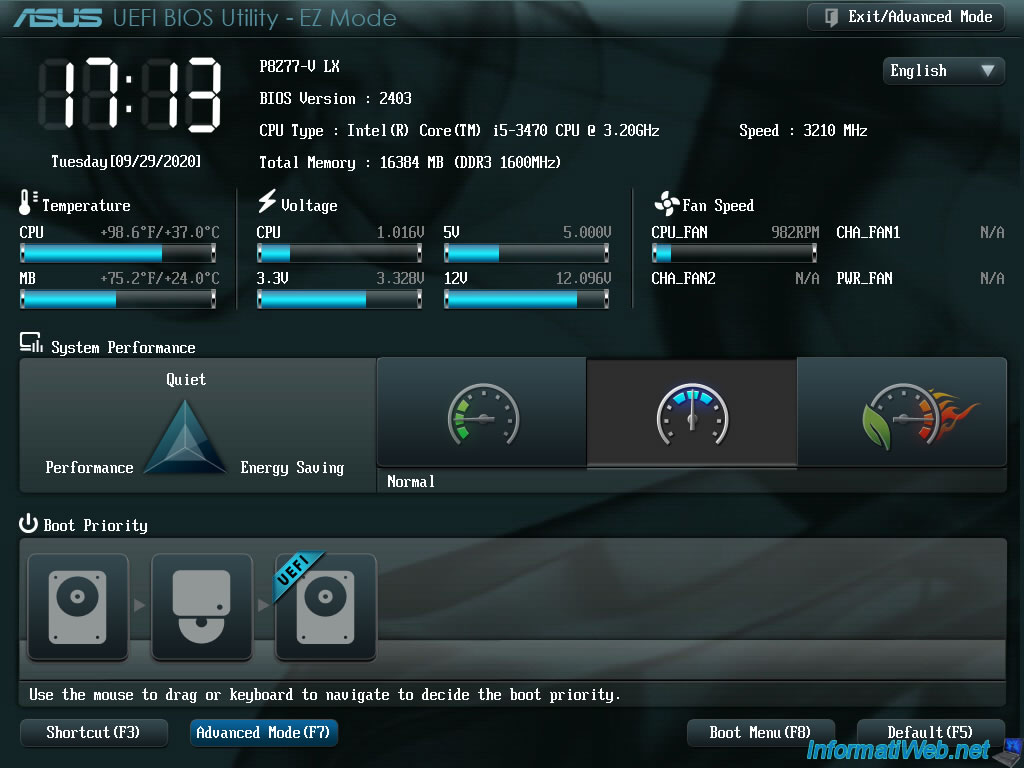
If your Asus motherboard BIOS looks like this, click on "Advanced Mode (F7)" at the bottom left.
The "Enter Advanced Mode?" message is displayed.
Click OK.

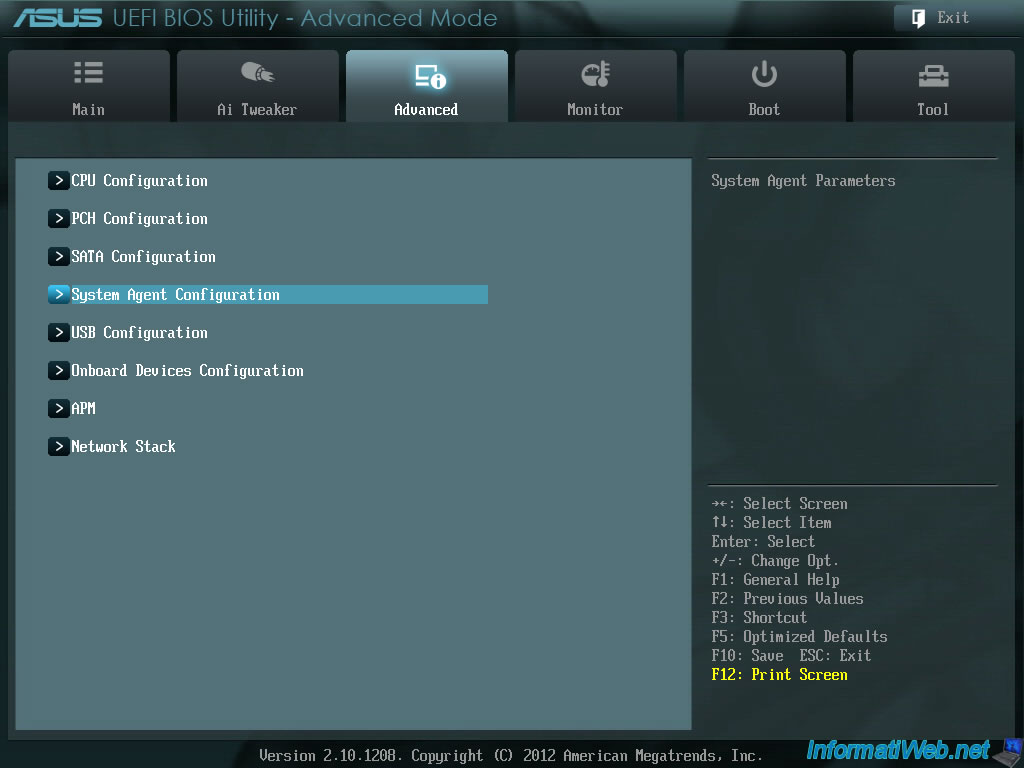
In the "Advanced" section of your BIOS, go to : System Agent Configuration.
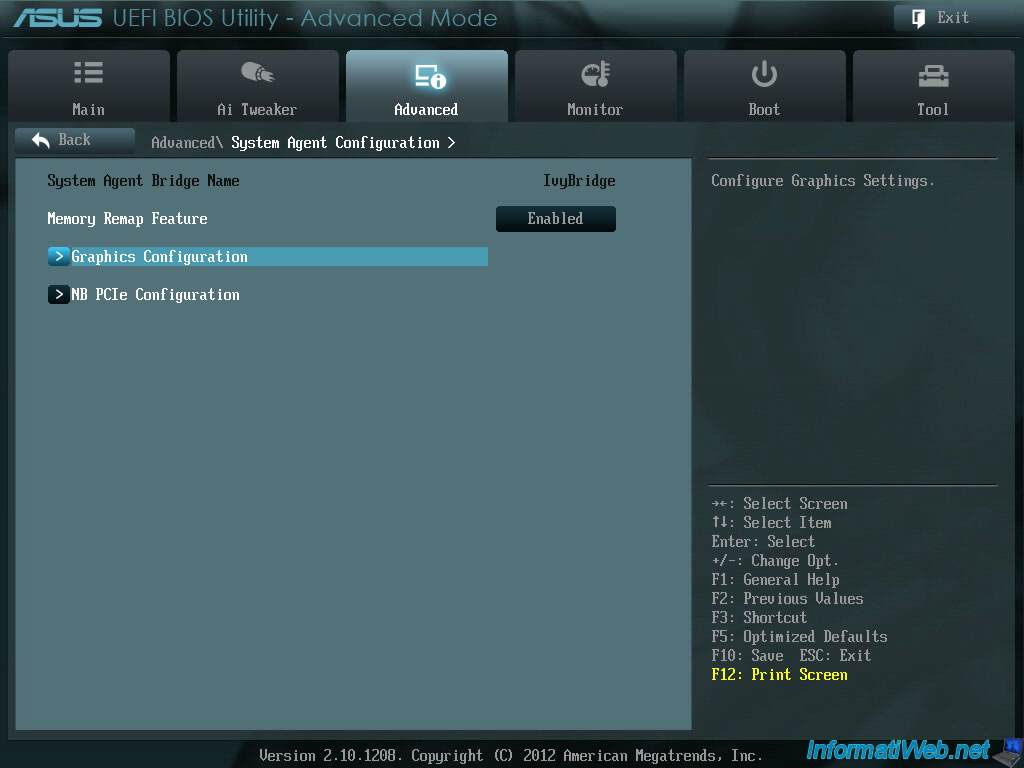
Then, in : Graphics Configuration.
In this "Graphics Configuration" section, you will find an "iGPU Multi-Monitor" setting which allows you to add the support of the multiscreen (so : support the use of several graphics cards).
Click on it which is disabled by default.
Note : as this setting is disabled by default, the internal graphics card (integrated in your processor) is disabled when you connect a graphics card in PCIE (PCI Express).
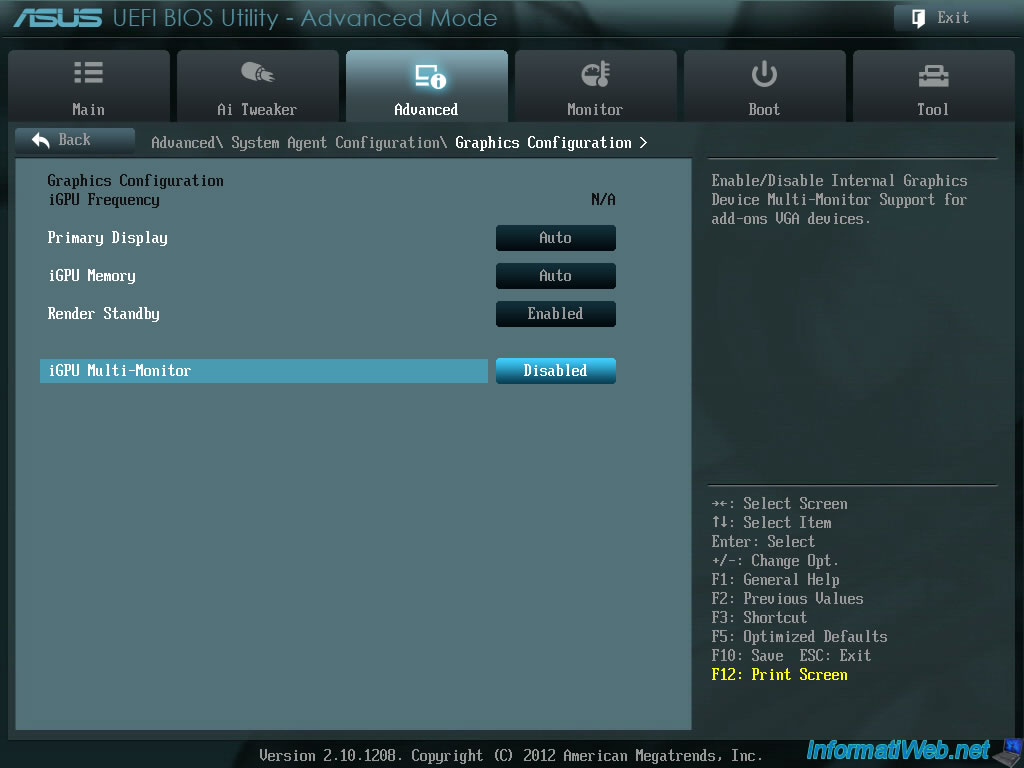
Select "Enabled" and press Enter.

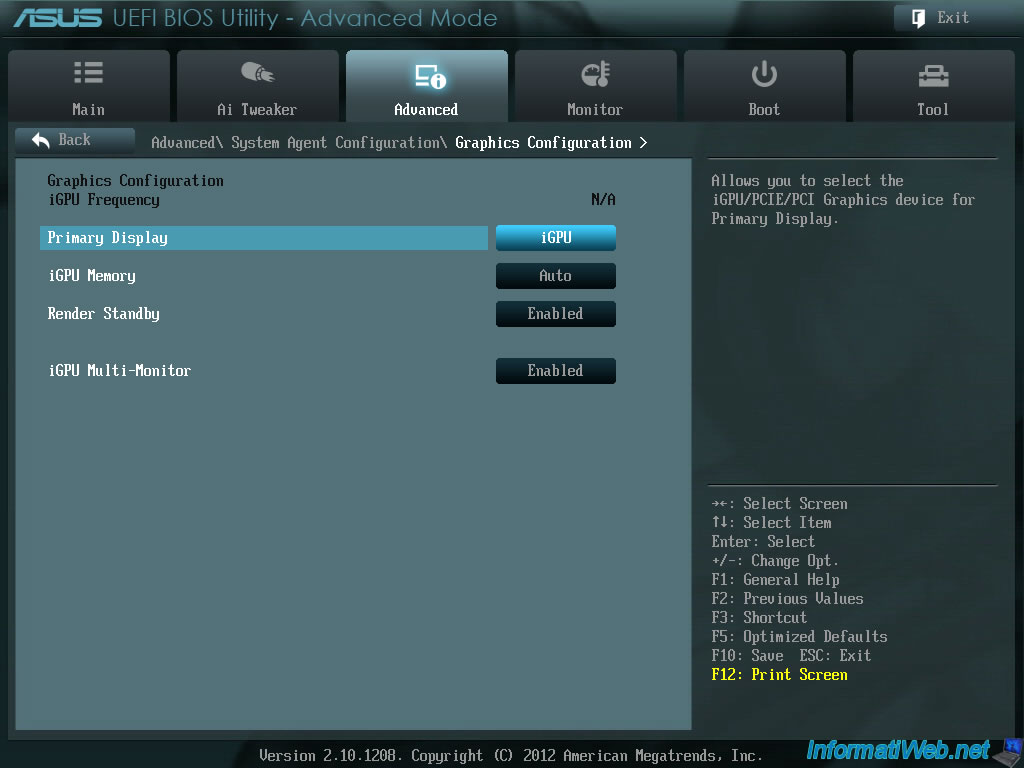
Now that the "iGPU Multi-Monitor" setting is enabled, you must configure the "Primary Display" setting to choose which graphics card will be used by default by your computer.
As you can see, by default, this setting configured to "Auto" (automatic).
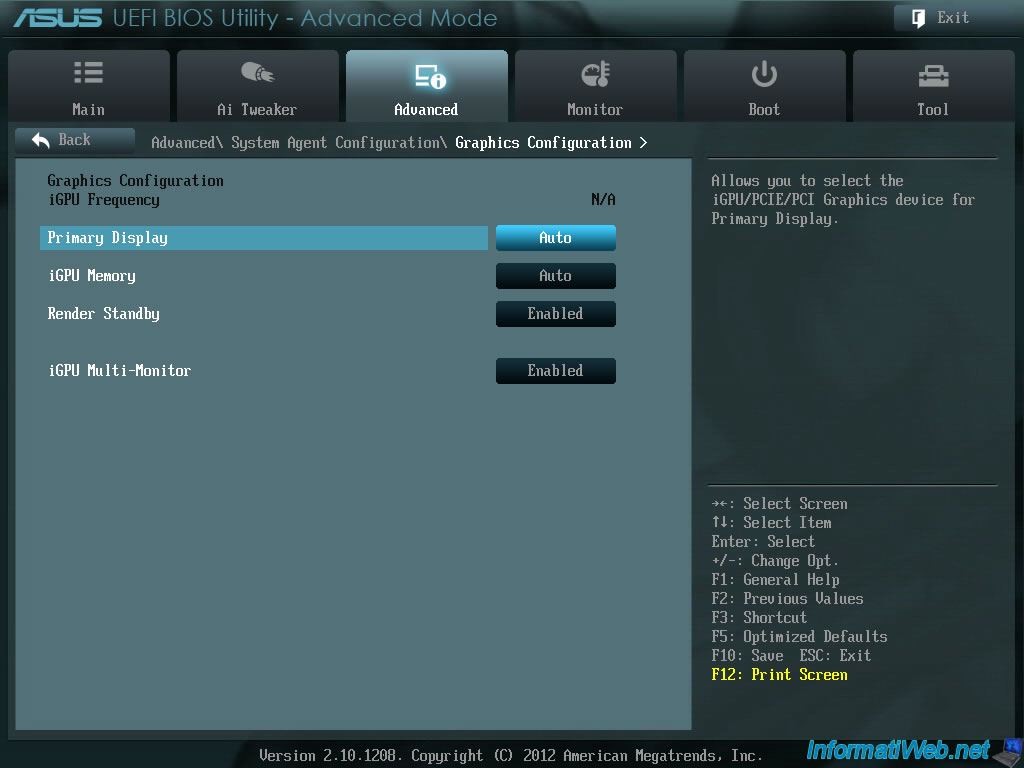
Choose "iGPU" so that your computer initializes the internal graphics card (for example : Intel HD Graphics) by default, instead of using the graphics card connected in PCIE.

Now, your computer will use your computer's internal graphics card by default.
Finally, save the changes by pressing F10 and don't forget to connect your screen to the VGA, HDMI, ... port of your motherboard instead of that of your graphics card.
Otherwise, the screen may remain black after restarting your computer.
2. BIOS UEFI (yellow/grey)
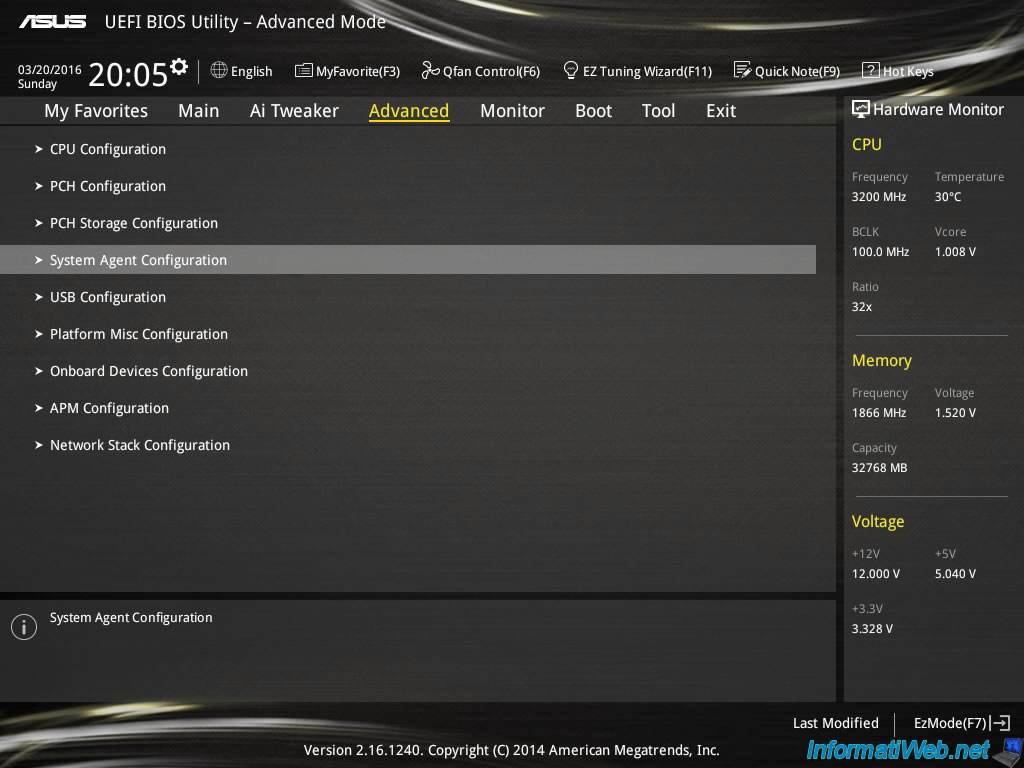
In the new UEFI BIOS of Asus, you must go to : Advanced -> System Configuration Agent.
Then : Graphics Configuration.
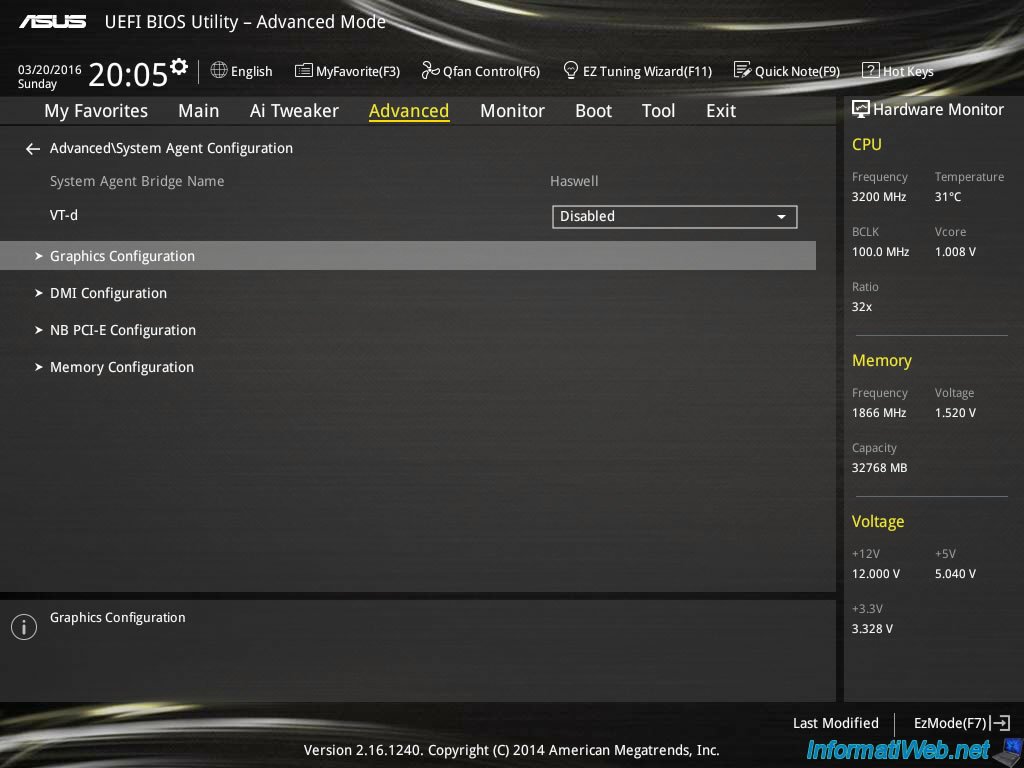
As shown at the bottom of the screen, you must enable the "CPU Graphics Multi-Monitor" for supplying the 2 graphics cards (both) :
- The integrated graphics : integrated
- And the PCI or PCI-E graphics card : dicrete graphics devices
Note : "CPU Graphics Multi-Monitor" is equivalent to the "Onboard VGA : Auto / Always Enable / Enable If No Ext PEG" option present in the Award BIOS.
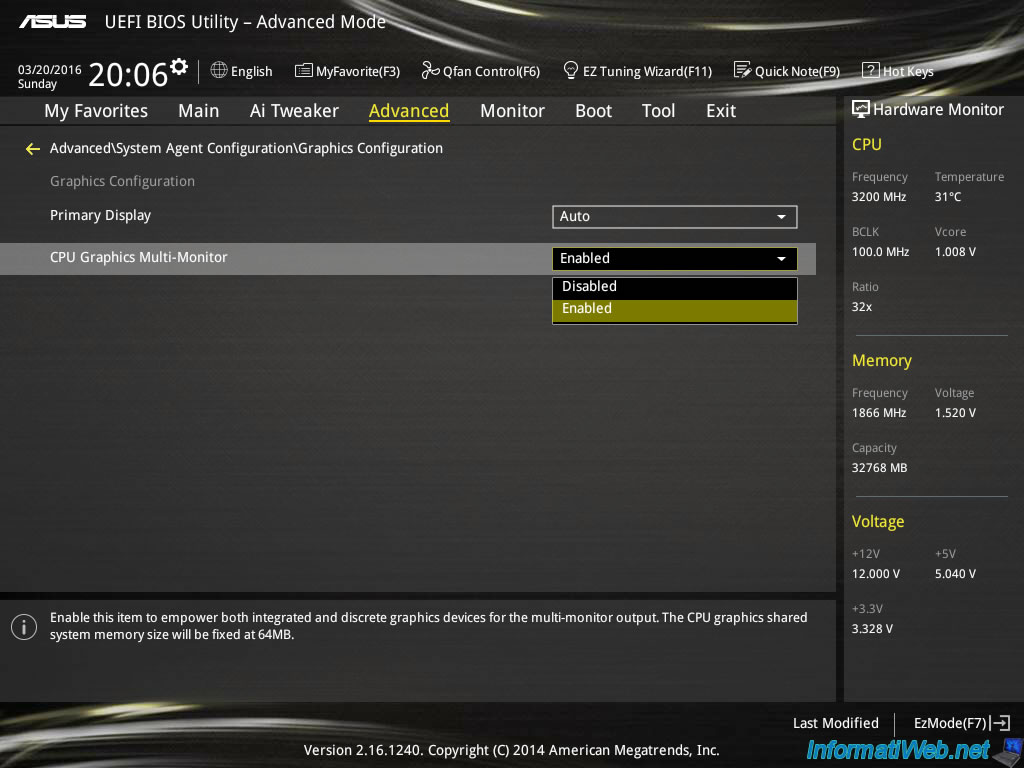
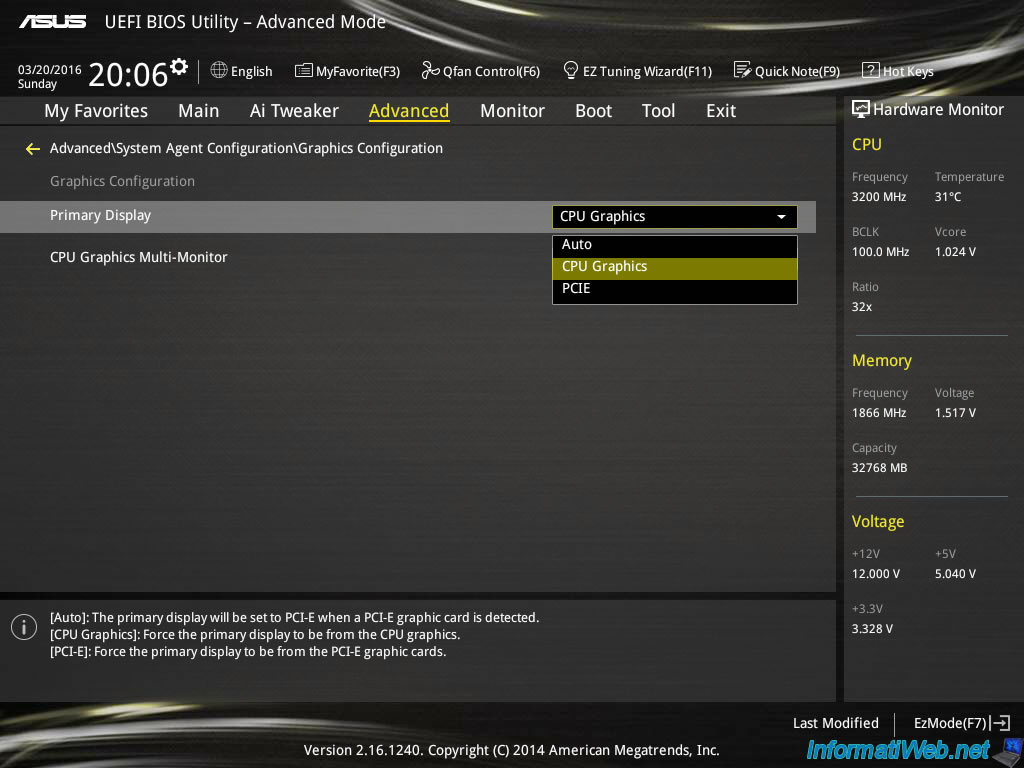
Finally, click on the "Primary display" option (primary graphics card) and choose "CPU Graphics" (Graphics of the processor, so : Intel HD Graphics).
Info : default (value : auto), the BIOS use the internal graphics card if there are no additional graphics card (PCI or PCI-E).
But, if an additional graphics card is plugged on the motherboard, the internal graphics card will be disabled by the BIOS.
This is no longer the case after changing these two options.
Note : "Primary display" is the equivalent of the "Init Display First" option present in the Award BIOS.
3. BIOS Award (old BIOS)
In the Award BIOS, you must go to : Advanced BIOS Features.
To begin, select the "Onboard VGA" option.
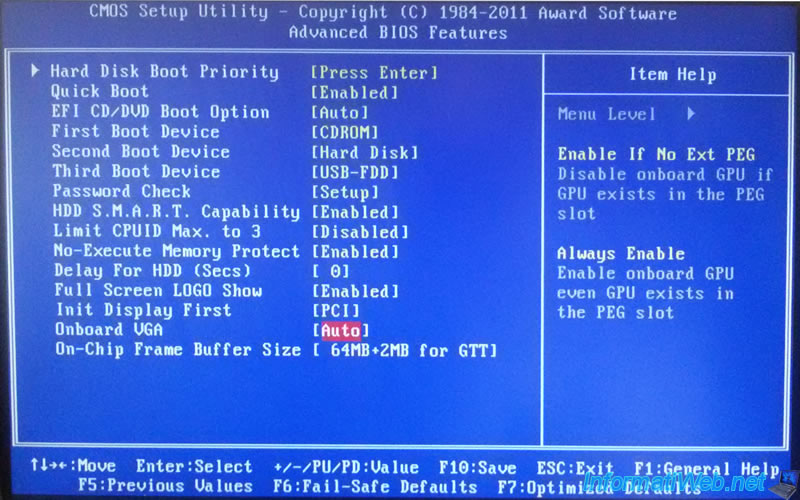
Then, select the "Always Enable" value.
Thus, the internal graphics card will always be enabled, even if a PCI or PCI-E graphics card is plugged on the motherboard.

Then, select the "Init Display First" option and select the "Onboard" value to use the internal graphics card instead of the PCI or PCI-E graphics card plugged on the motherboard.
Thus, the graphics card PCI or PCI-E is not used by default.
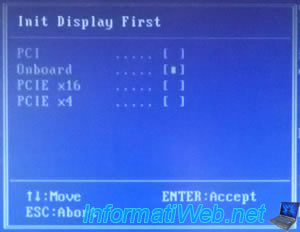
Finally, press F10 to save changes and connect your monitor on the VGA, DVI or HDMI port of the motherboard.

Share this tutorial
To see also
-

BIOS 11/23/2021
Configure your computer's BIOS to boot in LEGACY BIOS mode
-
BIOS 8/6/2015
Create and configure a RAID 0, 1, 5, ... (Intel)
-
BIOS 1/2/2024
Flash the BIOS of an Asus ROG motherboard (via Asus EZ Flash 3)
-
BIOS 12/9/2024
Flash the BIOS of an Asus ROG motherboard and update Intel ME
You must be logged in to post a comment