- BIOS
- 25 November 2015 at 12:51 UTC
-


Updated : 22 November 2023 at 20:08.
If you have installed a virtualization server and want to "pass" the graphics card or other PCI device to a virtual machine running on your hypervisor (virtualization server), you should enable IOMMU (or VT-d for Intel) in the motherboard BIOS of your server.
This technology allows you :
- to pass a PCI device to a HVM (hardware or virtual machine hardware-assisted virtualization) virtual machine
- isolate I/O and memory accesses to prevent DMA attacks on the physical server hardware.
IOMMU is used in particular by the "PCI passthrough" feature of XenServer.
Important : so that PCI passthrough (passing a PCI device to a VM) and GPU passthrough (same, but for graphics cards) can work correctly, we recommend that you enable the CSM module in the BIOS / UEFI firmware of your motherboard.
Indeed, without this CSM module, it happens that the PCI passthrough and/or the GPU passthrough don't work. This is particularly the case when you try to pass a graphics card to a virtual machine on Unraid.
To do this, refer to our tutorial: Configure your computer's BIOS to boot in LEGACY BIOS mode.
1. Enable VT-d for Intel CPU
If you have an Intel CPU, the IOMMU technology is called "Intel VT-d".
1.1. BIOS UEFI Asus (blue)
To get started, enable processor virtualization (Intel-VT-x) in the advanced settings of your BIOS.
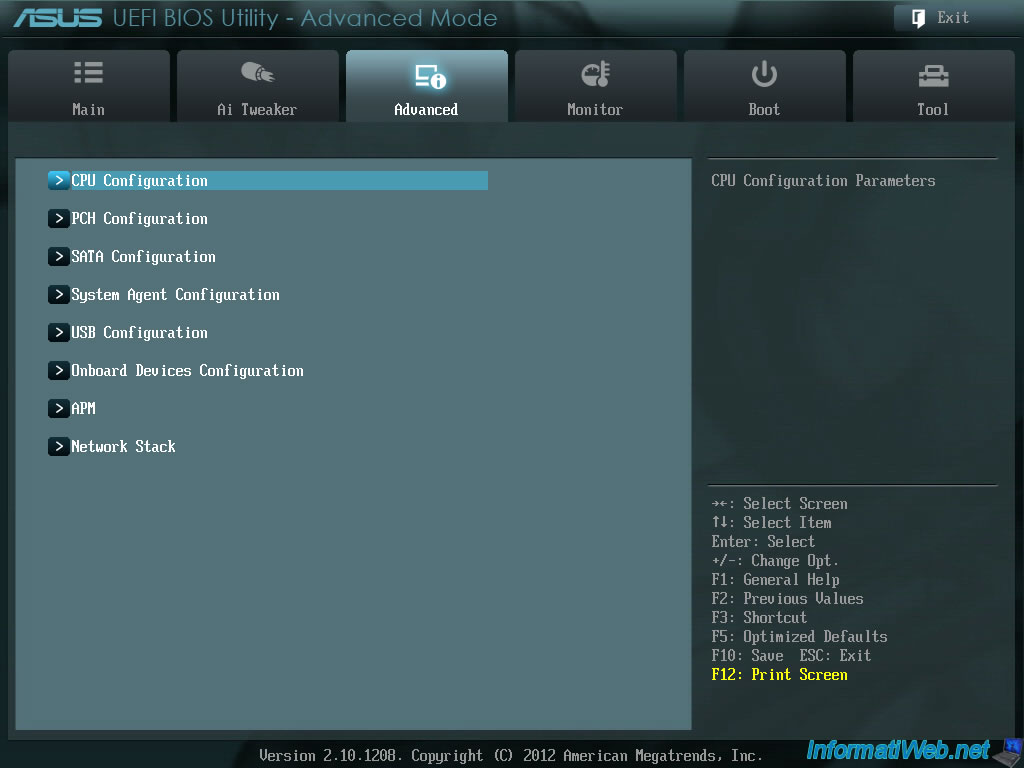
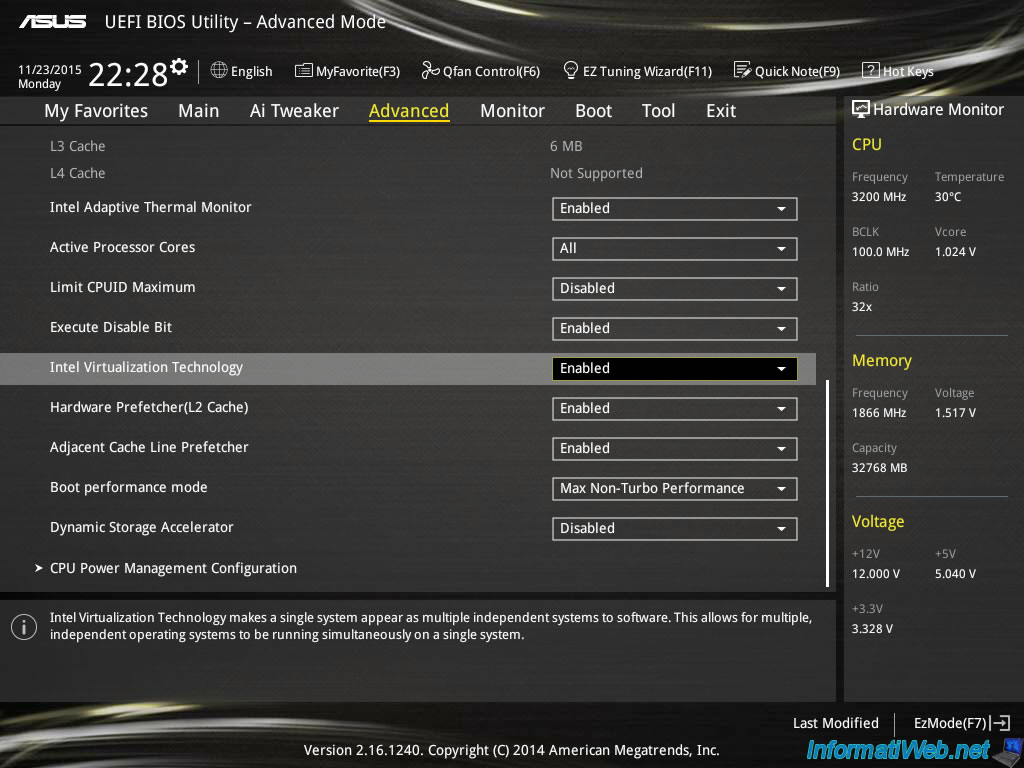
Once in BIOS advanced mode, go to the "Advanced" section (at the top) and click on "CPU Configuration".
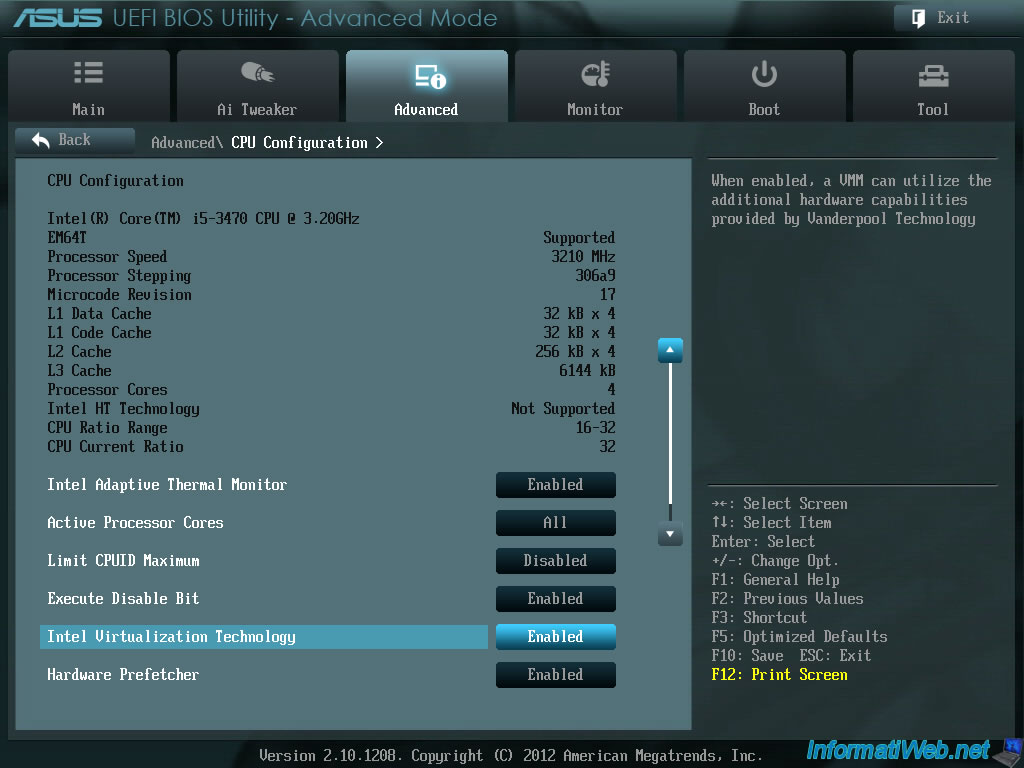
Here, check that the "Intel Virtualization Technology" setting is enabled.
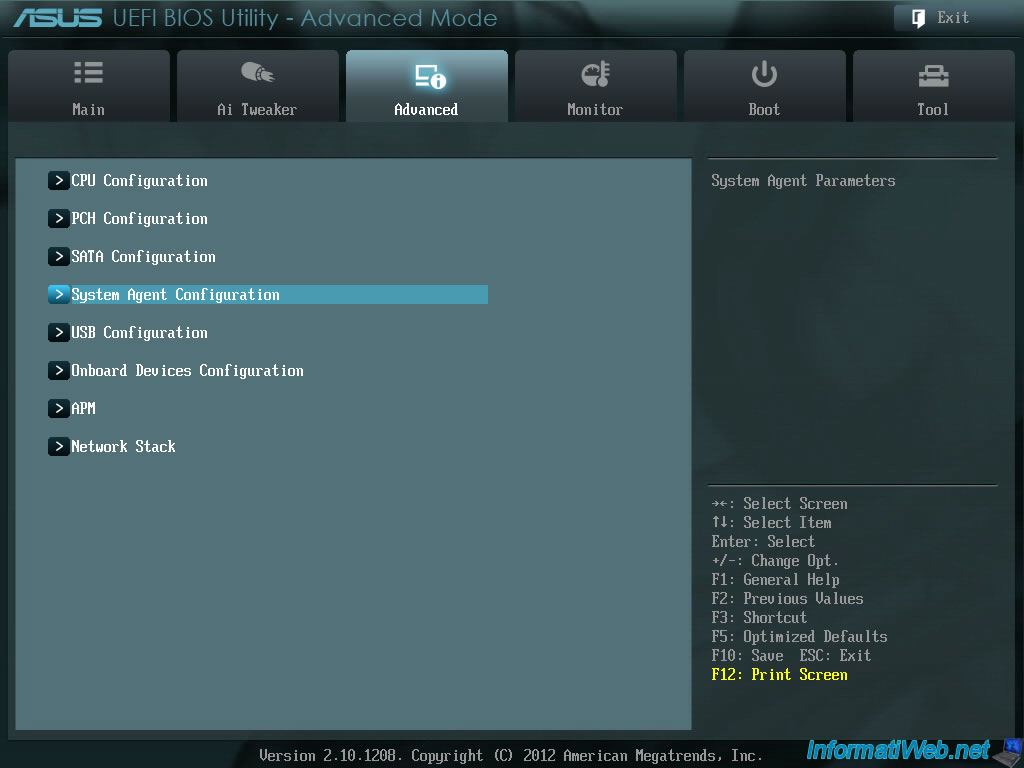
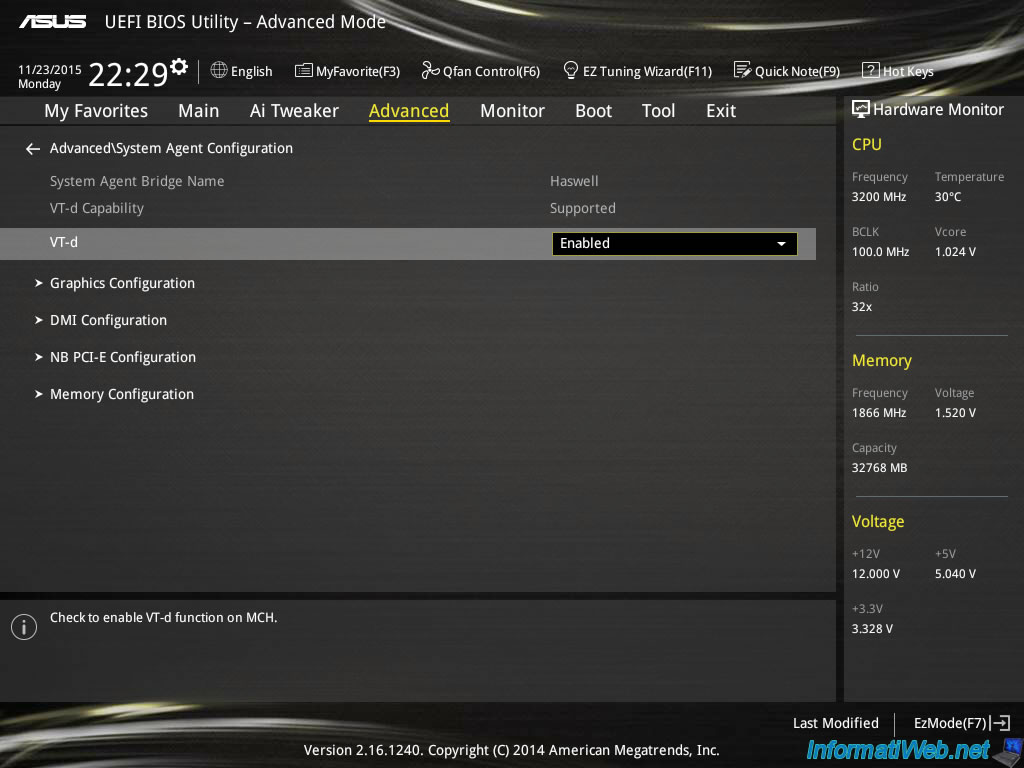
Then, click on the "Back" button at the top left to return to the menu and go to : System Agent Configuration.
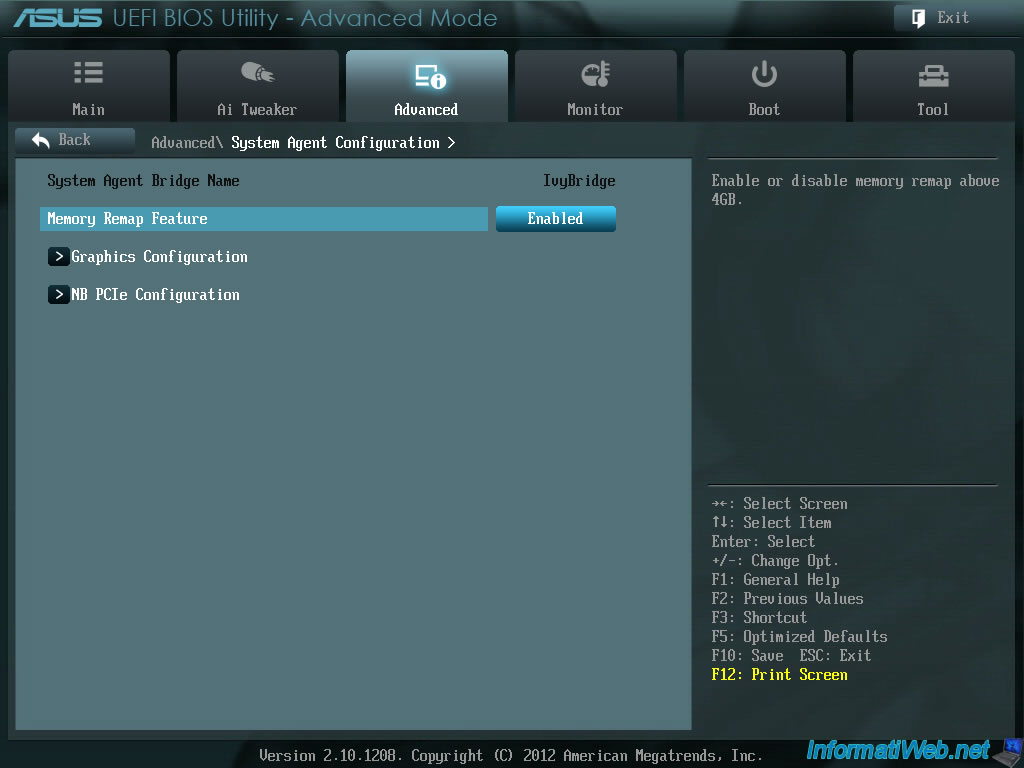
Enable the "Memory Remap Feature" setting that corresponds to the Intel VT-d / IOMMU.
1.2. Asus UEFI BIOS (color: electric blue)
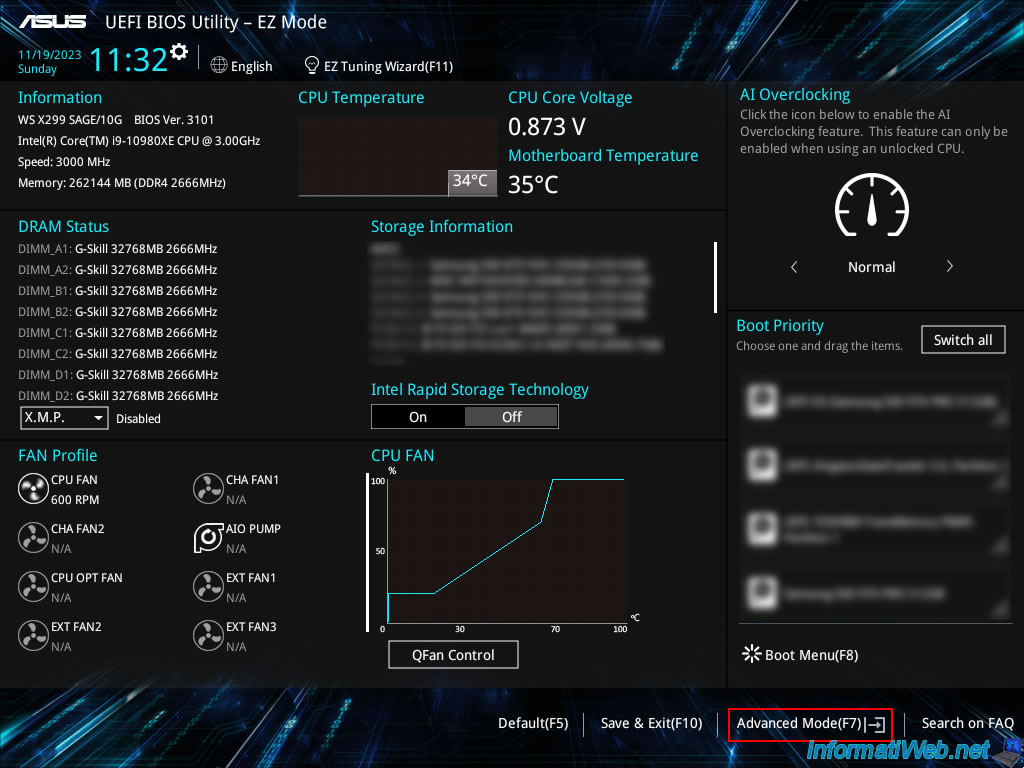
If you have an Asus WS X299 SAGE/10G motherboard or another model with visually the same BIOS, press the "Del" key on your keyboard several times when your computer starts up to enter.
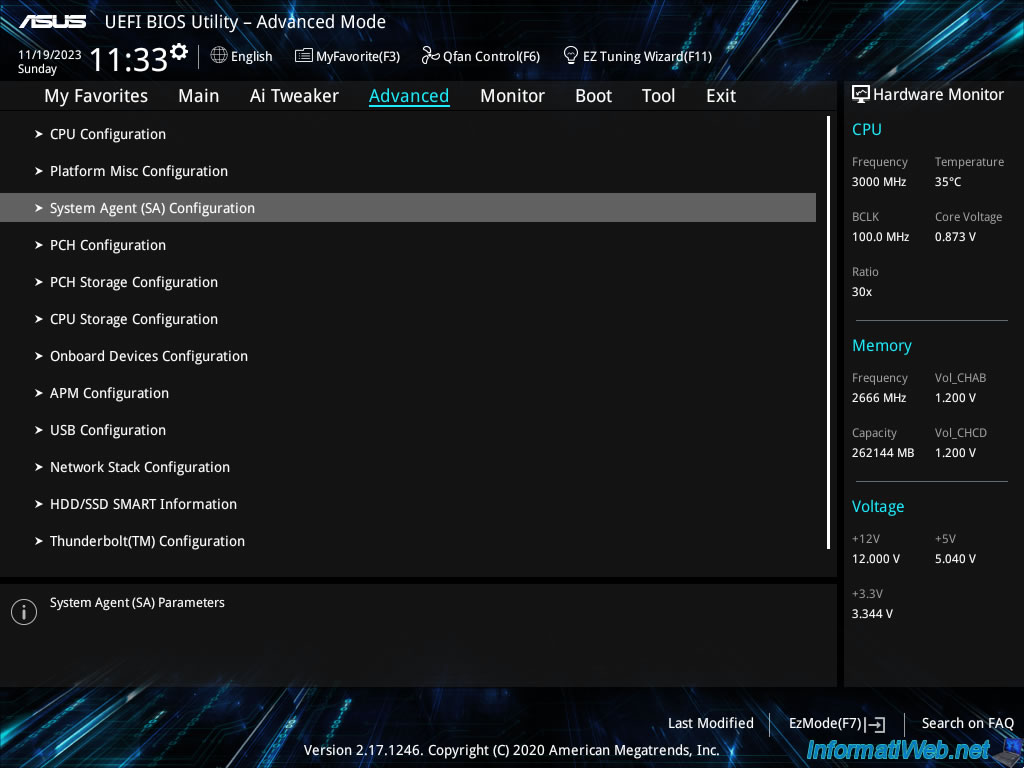
Next, enter advanced mode by clicking "Advanced Mode (F7)" (at bottom right).
To use input/output (I/O) virtualization, you first need CPU virtualization.
For this BIOS, refer to step "2. Asus UEFI BIOS (color: electric blue)" of our tutorial "Enable virtualization (Intel VT-x / AMD-V)".
Once CPU virtualization (Intel VT-x) is enabled, go to the "Advanced" tab, then click "System Agent (SA) Configuration".
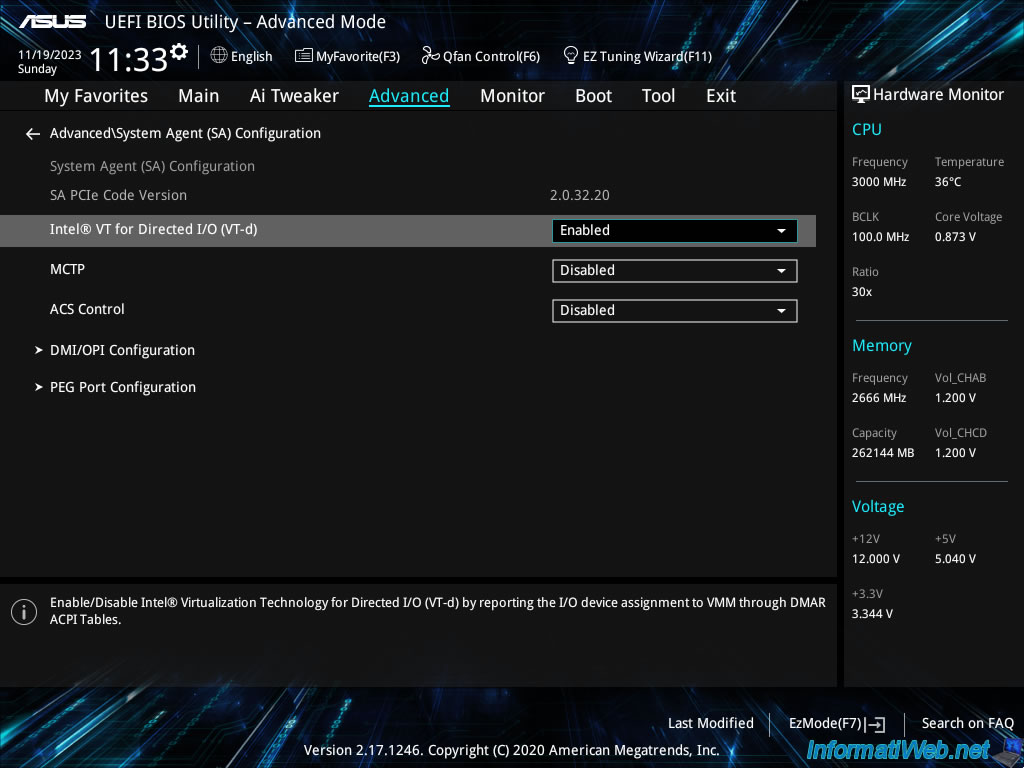
Enable the "Intel® VT for Directed I/O (VT-d)" setting by selecting the "Enabled" value for this setting.
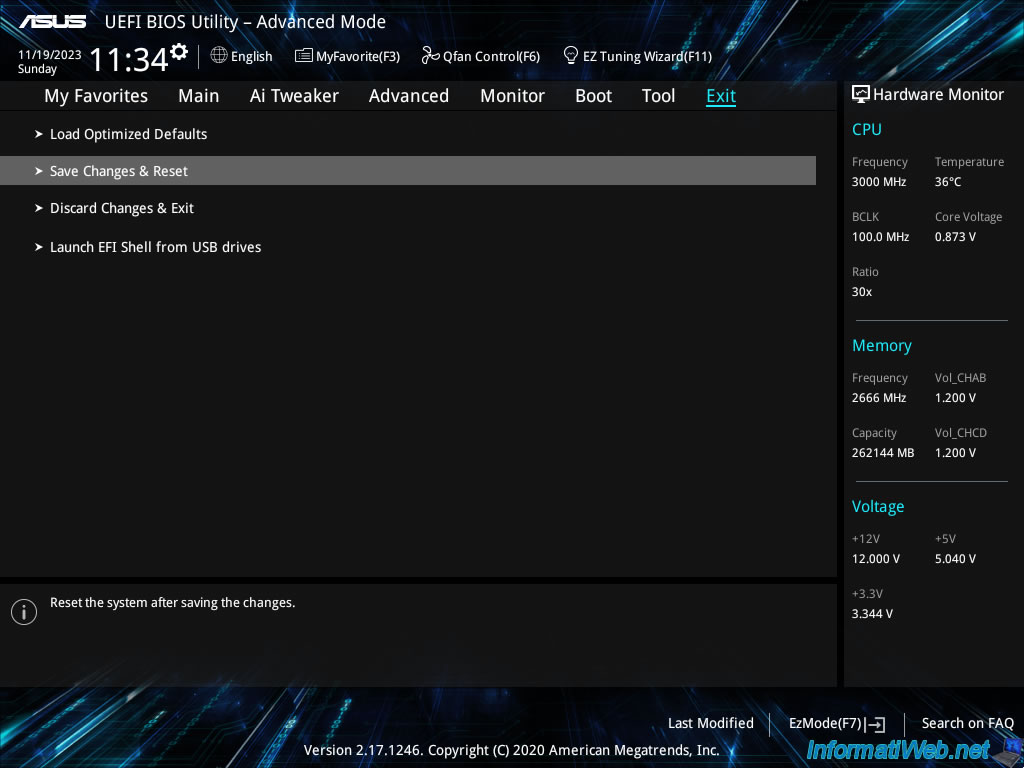
Finally, go to the "Exit" tab and click "Save Changes & Reset".
Confirm saving the changes by clicking OK.
1.3. BIOS UEFI Asus (yellow/grey)
If it is not already done, enable "Intel VT-x" virtualization feature. This is the virtualization technology that everyone knows.
In the Asus UEFI BIOS, this feature is in "Advanced -> CPU configuration" and is named "Intel Virtualization Technology".
Note : You can find other interfaces in our tutorial : Enable virtualization (Intel VT-x / AMD-V)
Then, if your motherboard supports it, you will find the "VT-d" option that matches IOMMU in "Advanced -> System Agent Configuration" or "Advanced -> North Bridge".
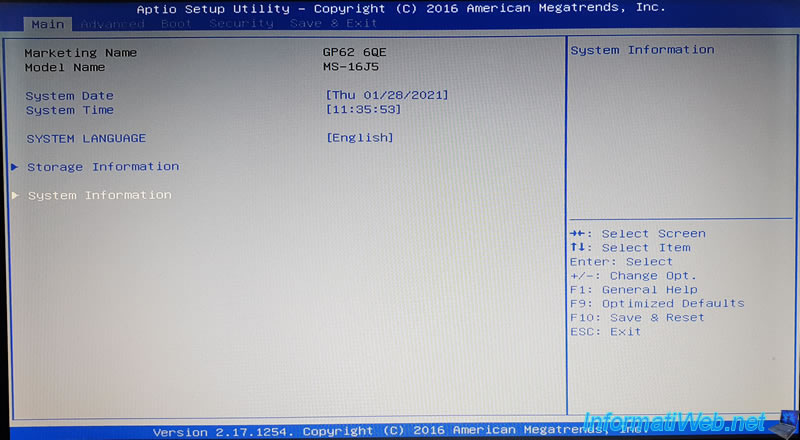
1.4. MSI BIOS (American Megatrends)
If you have a fairly powerful and especially recent MSI laptop PC, it's possible that it supports input/output virtualization (Intel VT-d).
This is particularly the case with the "MSI GP62 6QE Leopard Pro" laptop PC.
To enable the Intel VT-d in this BIOS, go to the "Advanced" tab, select the "VT-d" option and press Enter.

Select "Enabled" and validate by pressing Enter.

Note that you will probably also need to enable the "Intel Virtualization Technology" option (which corresponds to the Intel VT-x) since you need the Intel VT-d feature.
2. Enable IOMMU for AMD CPU
If you have an AMD CPU, the IOMMU technology will be called IOMMU.
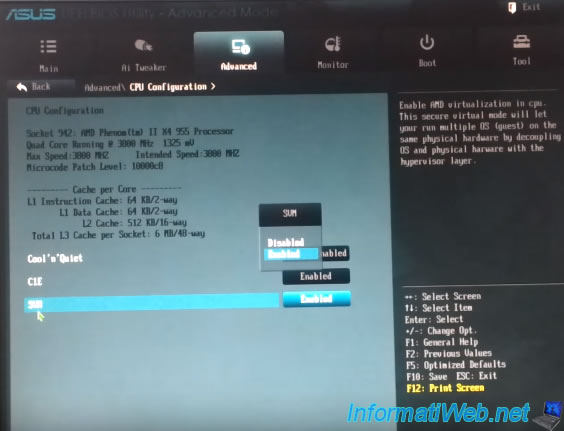
If it is not already done, enable the SVM virtualization.This is the virtualization technology that everyone knows.
In the Asus UEFI BIOS, this feature is in "Advanced -> CPU configuration" and is called SVM (Secure Virtual Machine), or AMD-V or AMD Virtualization.
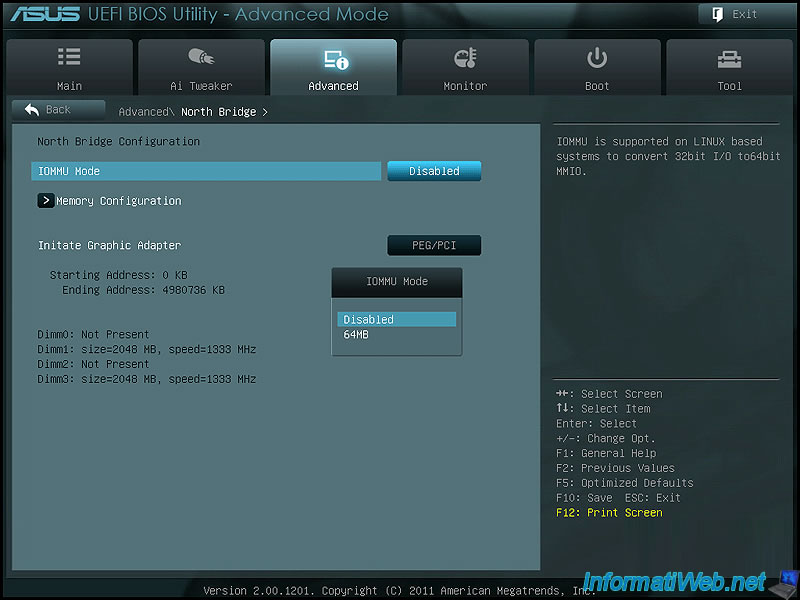
Then, if your motherboard supports it, you will find the IOMMU option in : Advanced -> North Bridge.
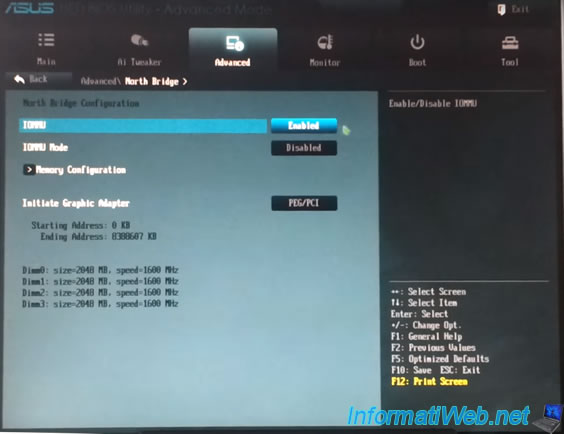
Finally, it is possible that an "IOMMU Mode" option is also available.
This option is different from the "IOMMU" option and allows you (as shown in the image) to redirect 32 bits I/O to 64 bits I/O.
If the server is a 64-bit OS and virtual machines to which you pass PCI devices are also in 64 bits, this option will not serve you. You can leave "IOMMU Mode" to disabled.
Note : Enabling "IOMMU Mode" will take 64MB of RAM.
Share this tutorial
To see also
-

BIOS 10/27/2021
Automatically enable the numeric lock (num lock) when your computer starts up
-

BIOS 12/25/2012
Change the hard disk controller mode
-

BIOS 3/18/2014
Gigabyte - Configure the BIOS from Windows
-
BIOS 11/18/2016
Reset your BIOS settings
You must be logged in to post a comment