- BIOS
- 22 November 2023 at 15:52 UTC
-

- 1/3

Enabling virtualization in the BIOS of your motherboard should only be made if your processor supports it. In the case, otherwise you will not be probably not possible to activate or it will not work.
Know any time that all the new processors now support virtualization (called VT-x for Intel and AMD-V for AMD).
- BIOS UEFI Asus (color : blue)
- Asus UEFI BIOS (color: electric blue)
- BIOS UEFI Asus (color : grey, yellow and white)
- BIOS Award
- MSI BIOS (American Megatrends)
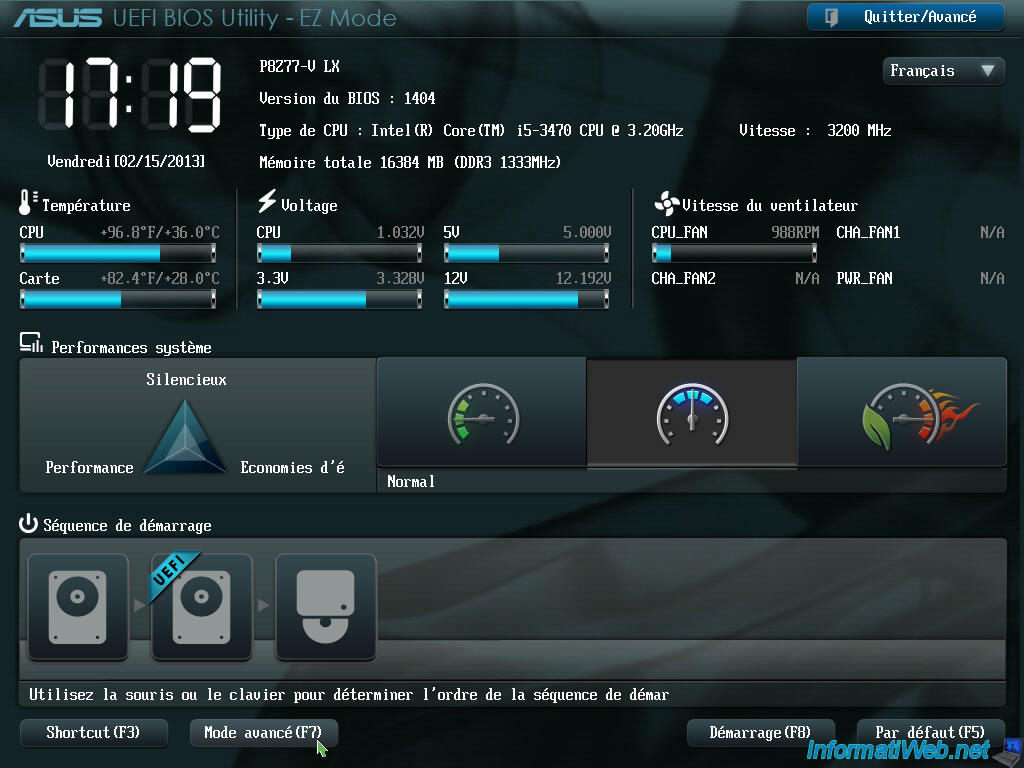
1. BIOS UEFI Asus (color : blue)
At startup, when the logo of your motherboard appears, press several times DEL key (depending on your keyboard) to enter into the BIOS.
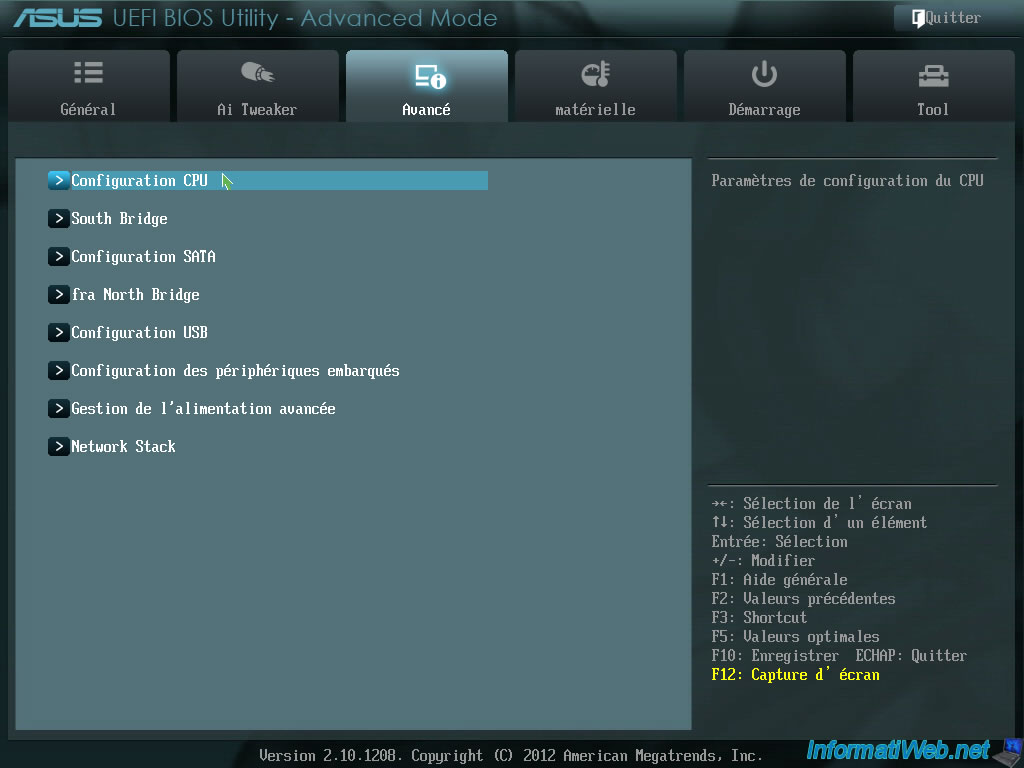
Then, if your BIOS is like this, go to the advanced mode.

Then "Advanced" and search term "Virtualization" or a similar term in a category called "processor", "CPU", ...
In our case this category is called "CPU Configuration".
Look for "Intel Virtualization Technology" or "VT-X" for Intel processors.
Or "AMD-V", "SVM" or "Secure Virtual Machine" for AMD processors.
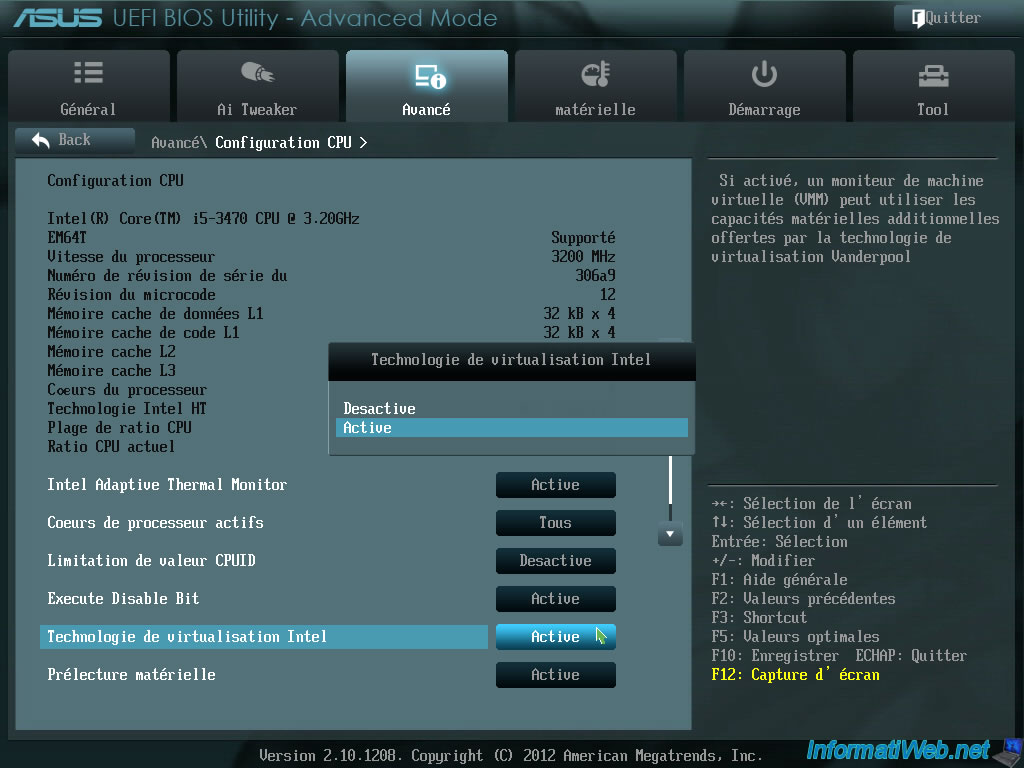
Once modified, click "Exit" and save the changes (in general, it is the F10 key).
2. Asus UEFI BIOS (color: electric blue)
To enter the BIOS of your Asus motherboard (in this case: Asus WS X299 SAGE/10G), press the "Del" key on your keyboard several times when your computer starts up (before Windows appears).
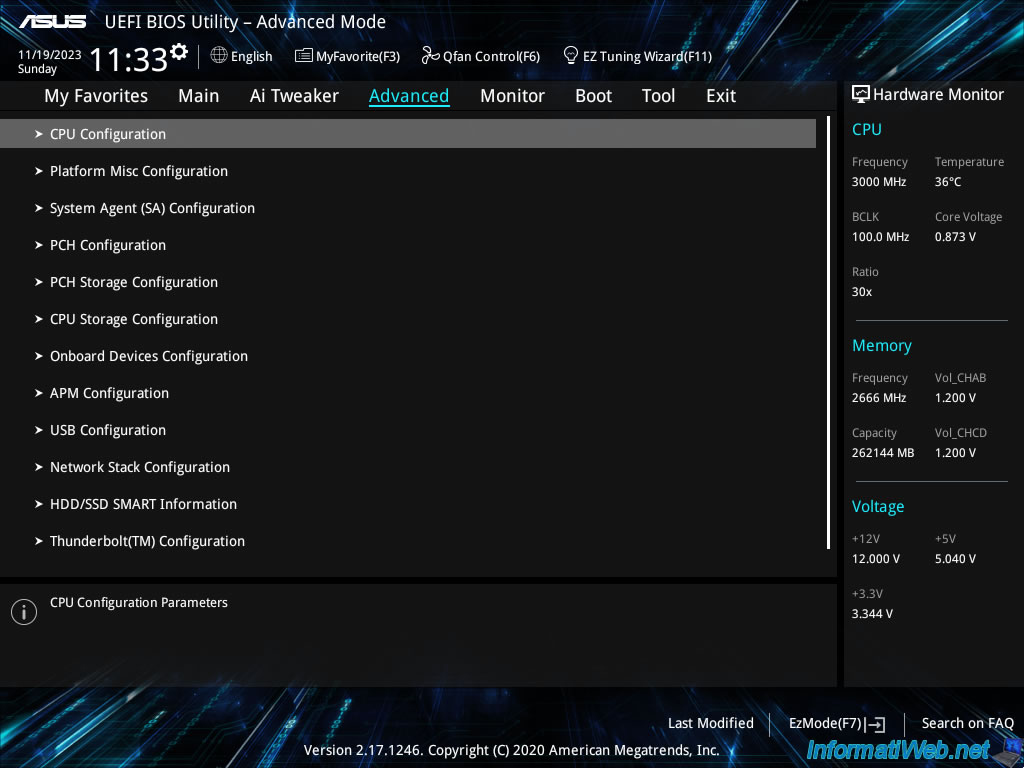
Then, at the bottom right of the screen, click "Advanced Mode (F7)".
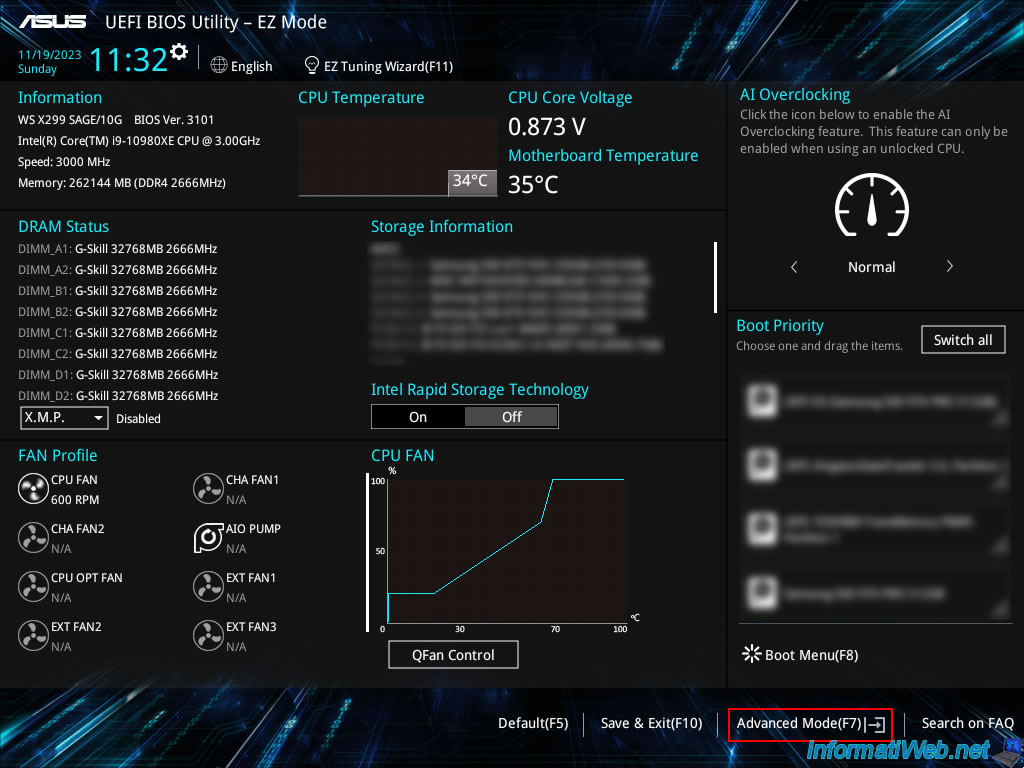
Go to the "Advanced" tab, then to: CPU Configuration.
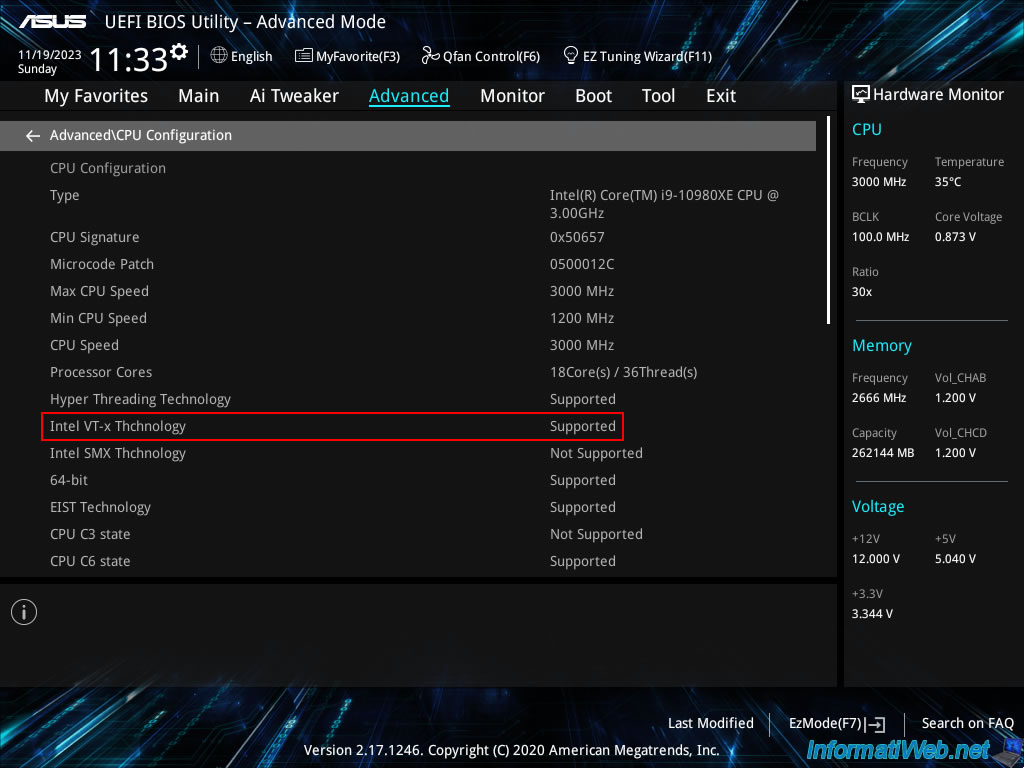
In this "CPU Configuration" section, you will see that processor virtualization is supported (Intel VT-x Technology: Supported).
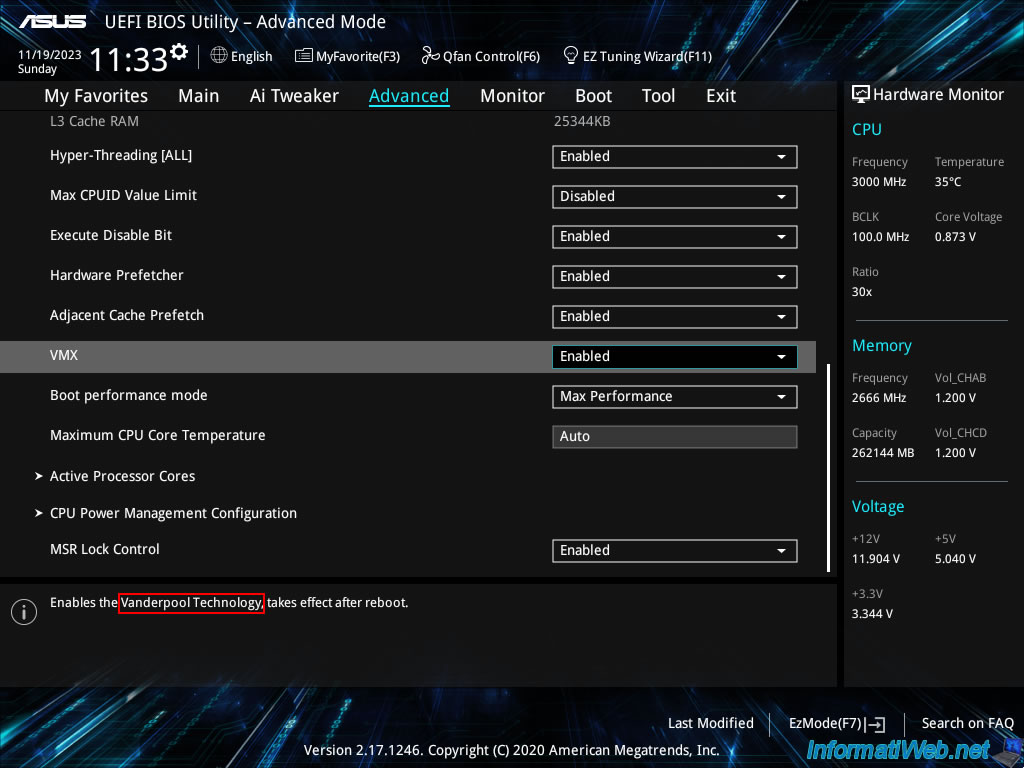
Go down to this section and enable the "VMX" setting.
As you can see in the description of this setting (shown at the bottom of the screen), this setting allows you to enable Vanderpool technology (which is the code name used for Intel virtualization technology, as you can check in Intel's "Cover Slide Title - Intel" PDF.
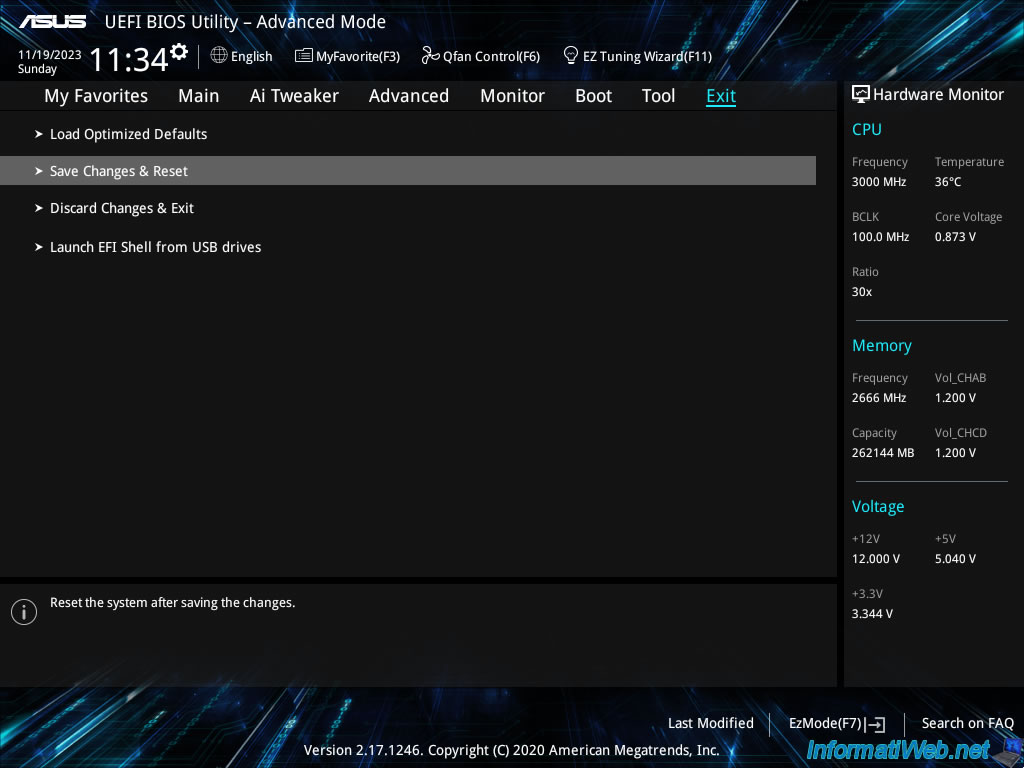
Once this "VMX" setting is enabled, go to the "Exit" tab and click "Save Changes & Reset".
Note: you can also use the keyboard shortcut "F10" to exit the BIOS of an Asus motherboard while saving the changes.
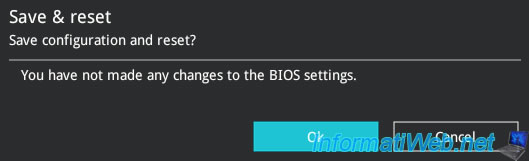
The changed setting will appear here.
In our case, this was already enabled, so no change was detected in our case.
Click OK to save the change and restart your computer.
Share this tutorial
To see also
-

BIOS 1/11/2022
Enable the TPM 2.0 module on your motherboard
-

BIOS 5/21/2016
Force the use of the internal graphics card
-
BIOS 11/18/2016
Reset your BIOS settings
-

BIOS 11/9/2021
Take a printscreen in a recent Asus BIOS
You must be logged in to post a comment