- BIOS
- 04 February 2021 at 18:24 UTC
-

- 1/5
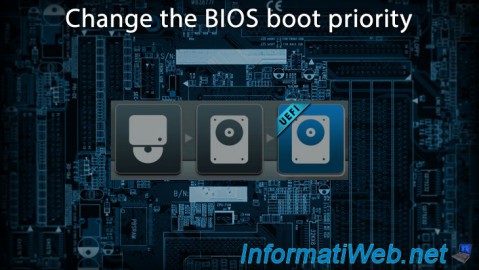
In this tutorial, we will explain how to start your computer on a USB stick but this tutorial is valid whatever device (CD / DVD, HDD, ...).
Note : depending on your BIOS, it's sometimes possible to go through several methods.
- BIOS UEFI
- Asus UEFI BIOS (yellow/gray)
- BIOS Award (Old BIOS)
- Touch BIOS (Gigabyte motherboards only)
- BIOS Phoenix (Old BIOS)
- BIOS American Megatrends - AMI BIOS (Old BIOS)
- MSI BIOS (American Megatrends)
1. BIOS UEFI
To enter the BIOS of your Asus motherboard, press the "Delete" or "Del" key several times on your keyboard when starting your computer (before Windows starts).
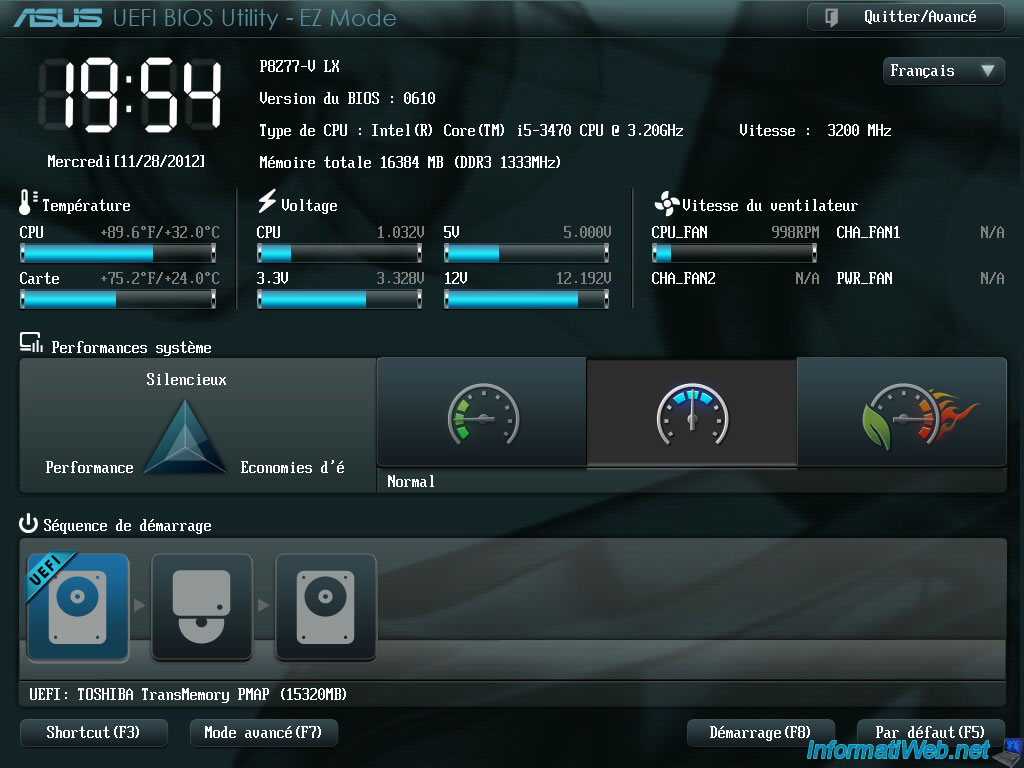
1.1. The simplified interface
In this tutorial, we will explain how to start your computer on a USB stick but this tutorial is valid for some devices (CD / DVD, HDD, ...).
Select your USB drive. And, while holding down the left mouse button, drag it to the far left. In our case, it is a USB "TOSHIBA TransMemory".
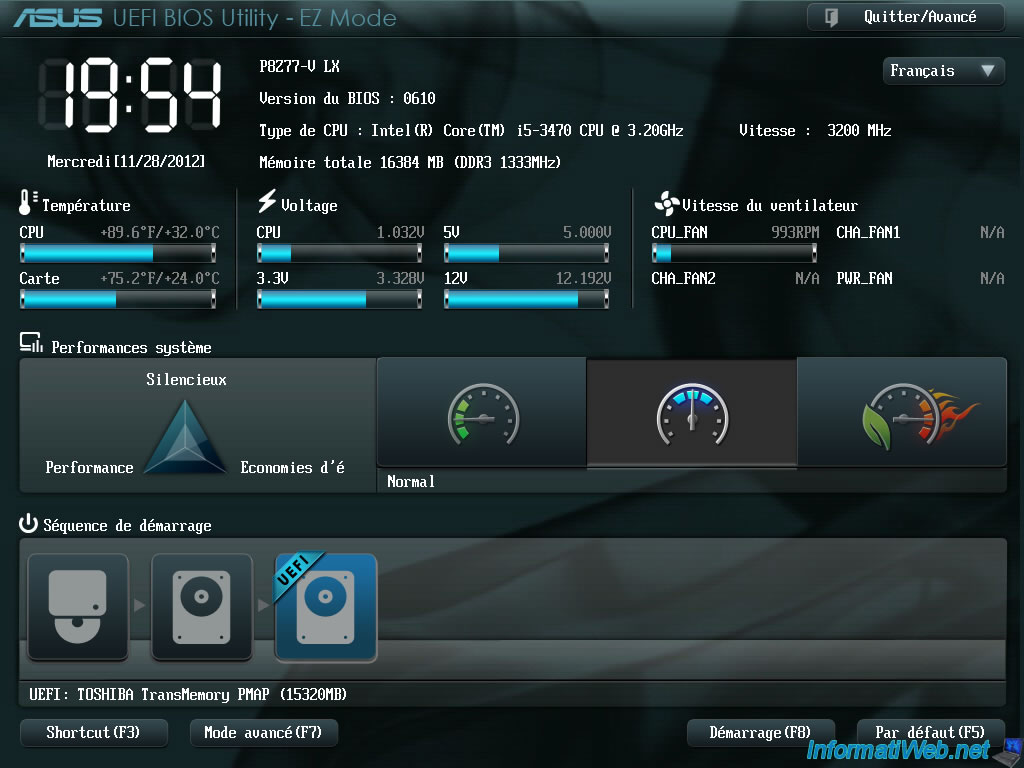
Then click "Exit" -> "Save Settings"
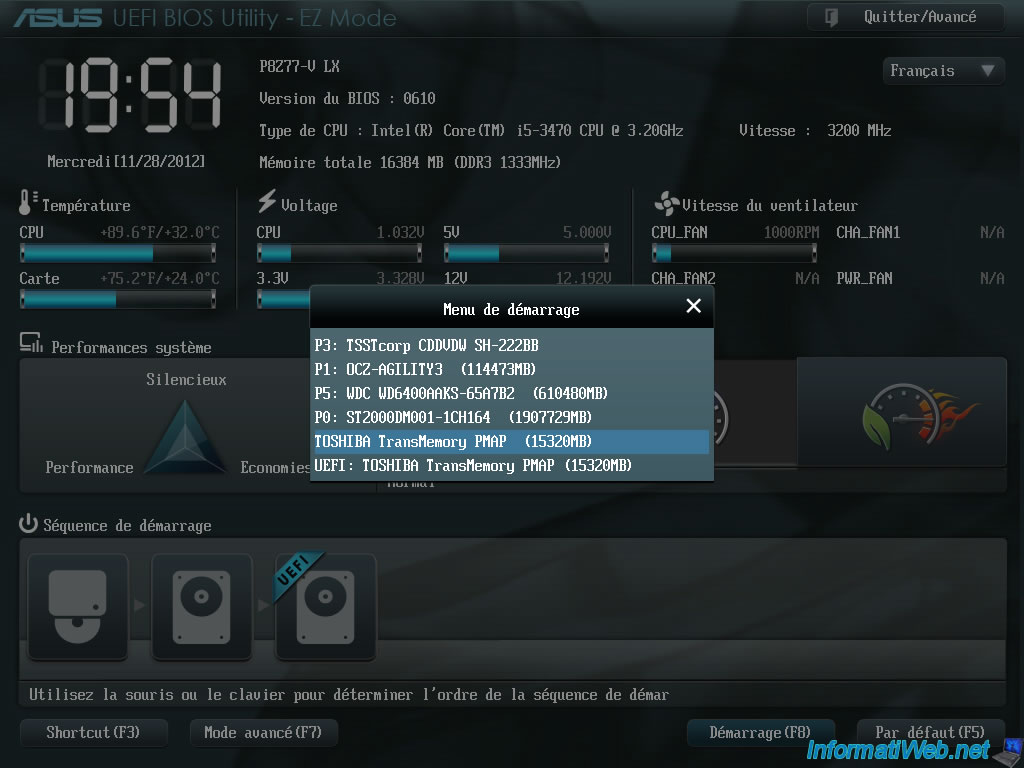
1.2. The start menu
Note: The start menu allows you to start on the desired when you do device. After rebooting the computer will restart after configuring the boot order.
Click the "Start (F8)" button.
Then, double-click on your USB drive in the list.
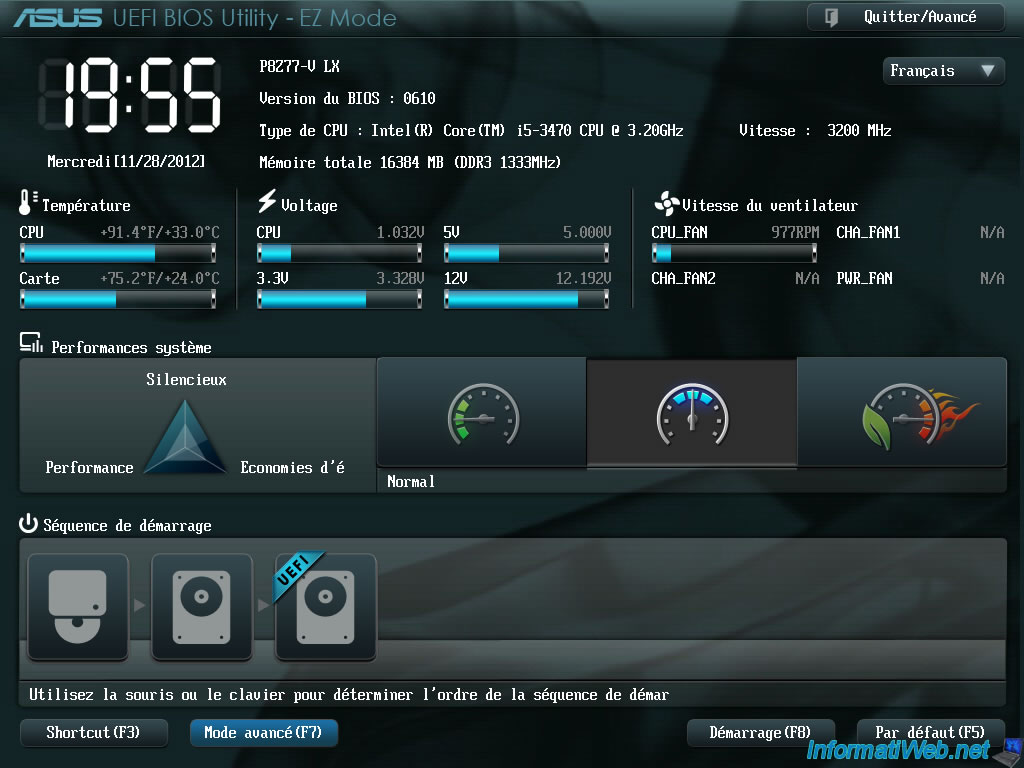
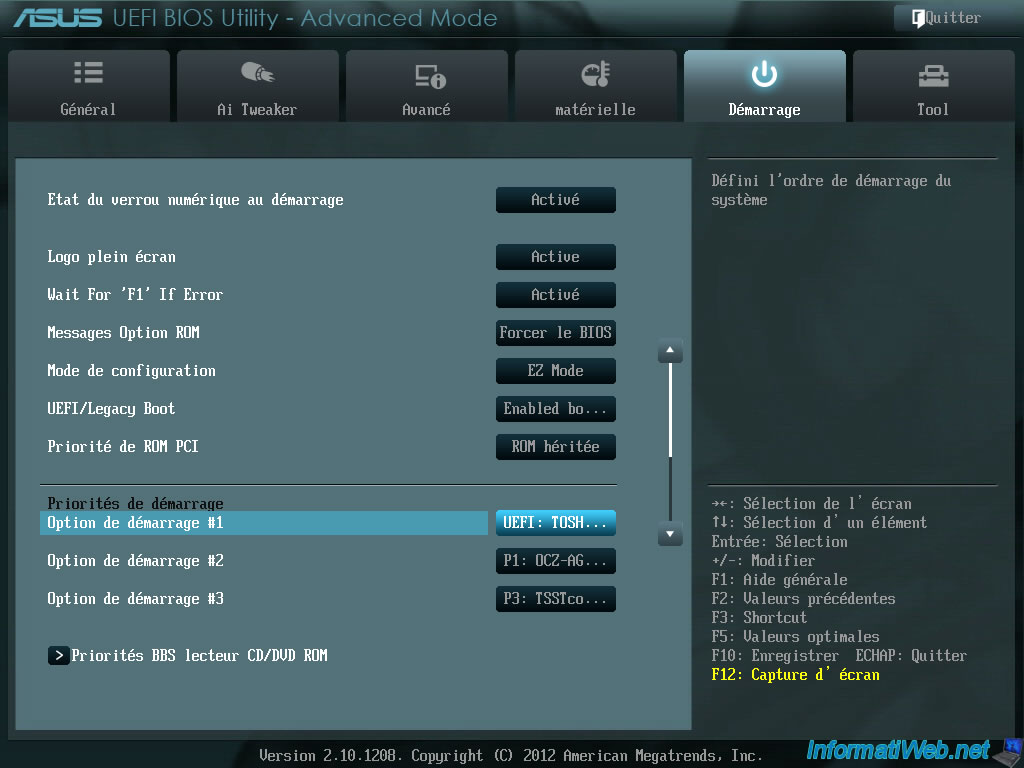
1.3. The Advanced Interface (Advanced Mode)
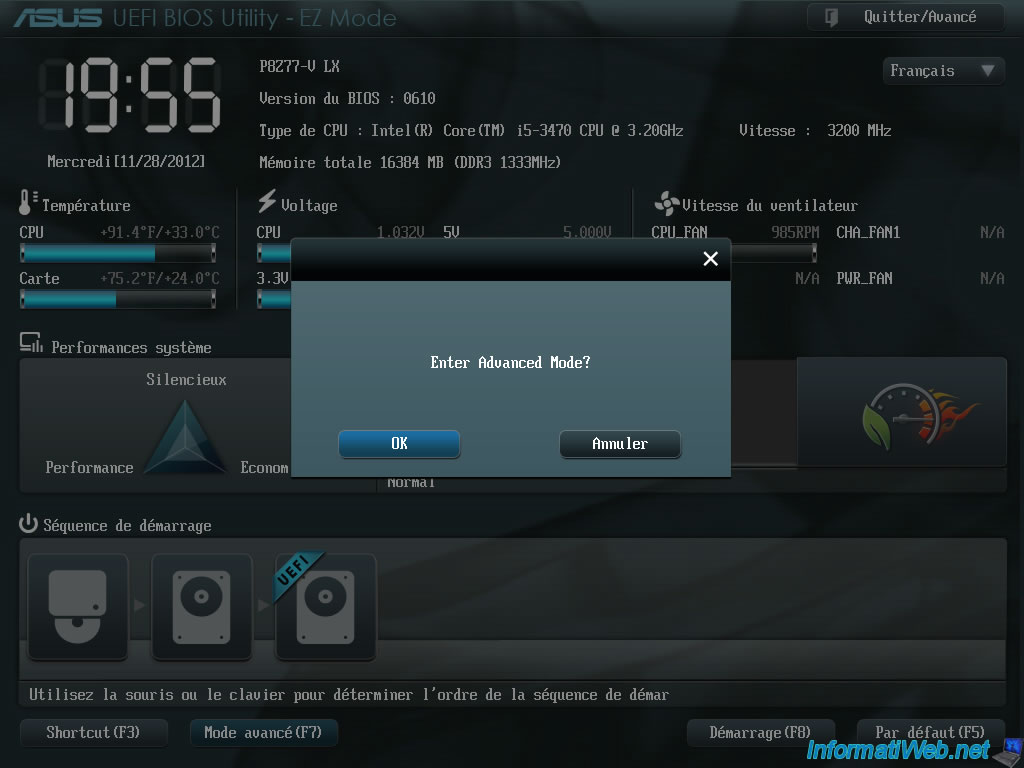
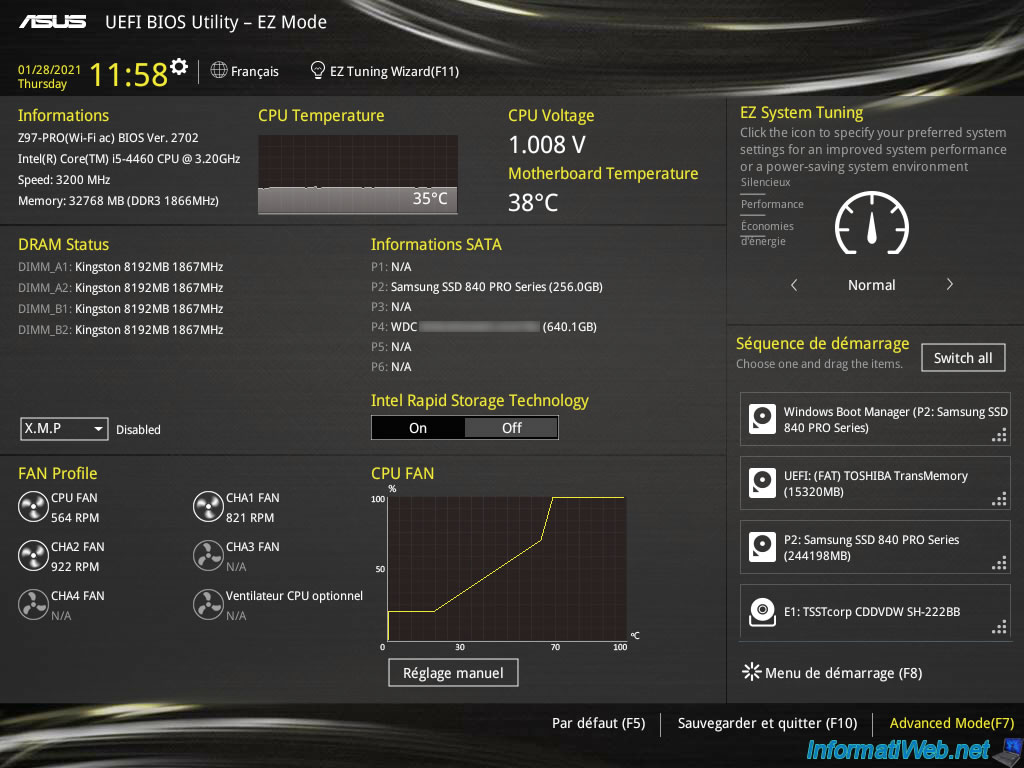
Click the "Advanced Mode (F7)" button.
Click "OK".
Then scroll down to the category "Priorities startup". Click the value next to "Boot Option #1" to change it.

In the list, select your USB device. In our case : "UEFI : TOSHIBA TransMemory PMAP (15320MB)".
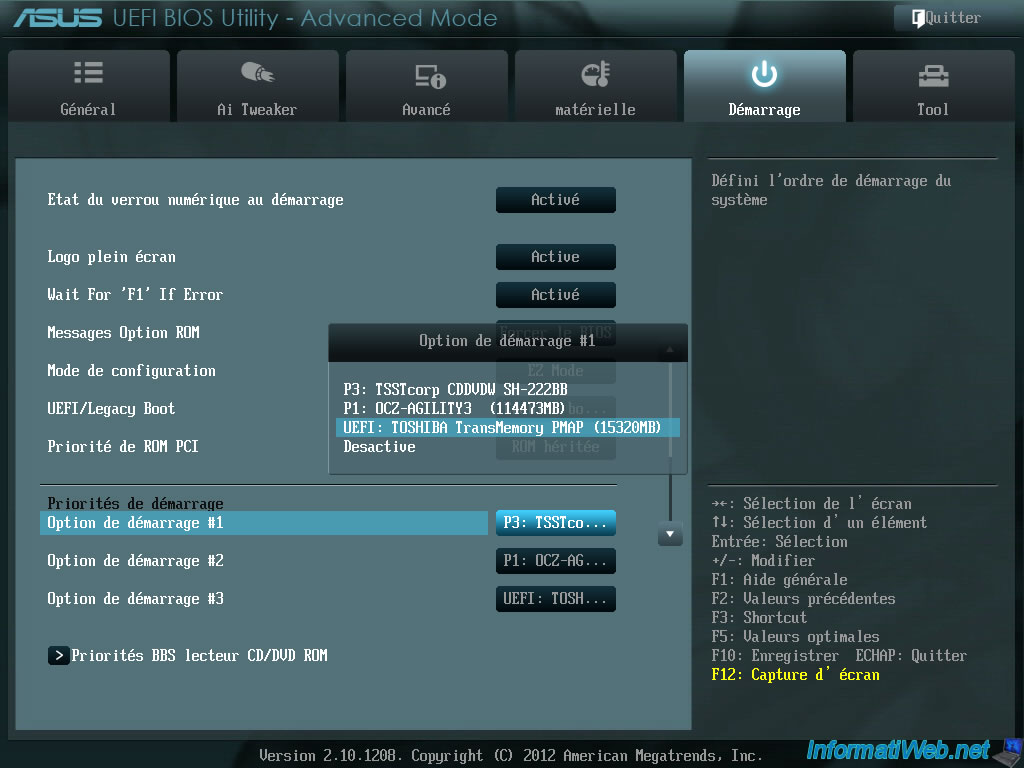
Once modified, click "Exit" and save the changes.
2. Asus UEFI BIOS (yellow/gray)
If you have a newer Asus motherboard (like the "Asus Z97 Pro Wi-Fi ac", for example), then you will have an yellow and gray BIOS like this.
To enter it, press "Del" or "Delete" when you start your computer.
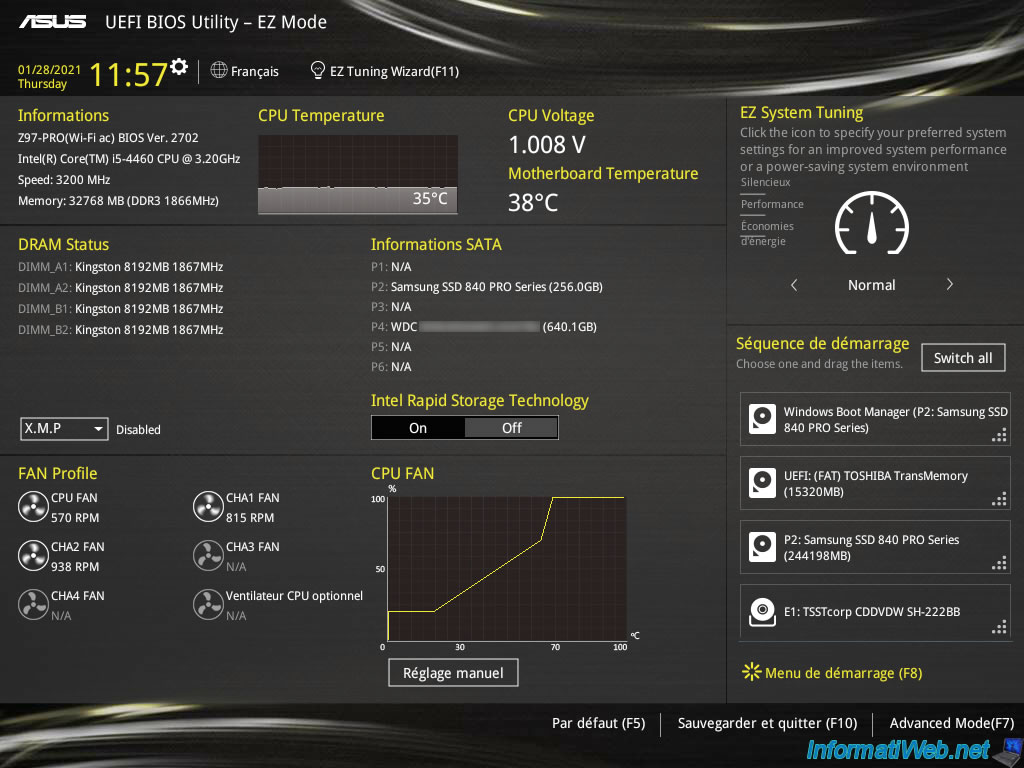
2.1. The simplified interface
Once you are in this BIOS, you can quickly change the boot sequence (boot order) at the bottom right of the screen.
To do this, select the desired device (in our case : our "TOSHIBA TransMemory" USB key) and slide it to the desired position.
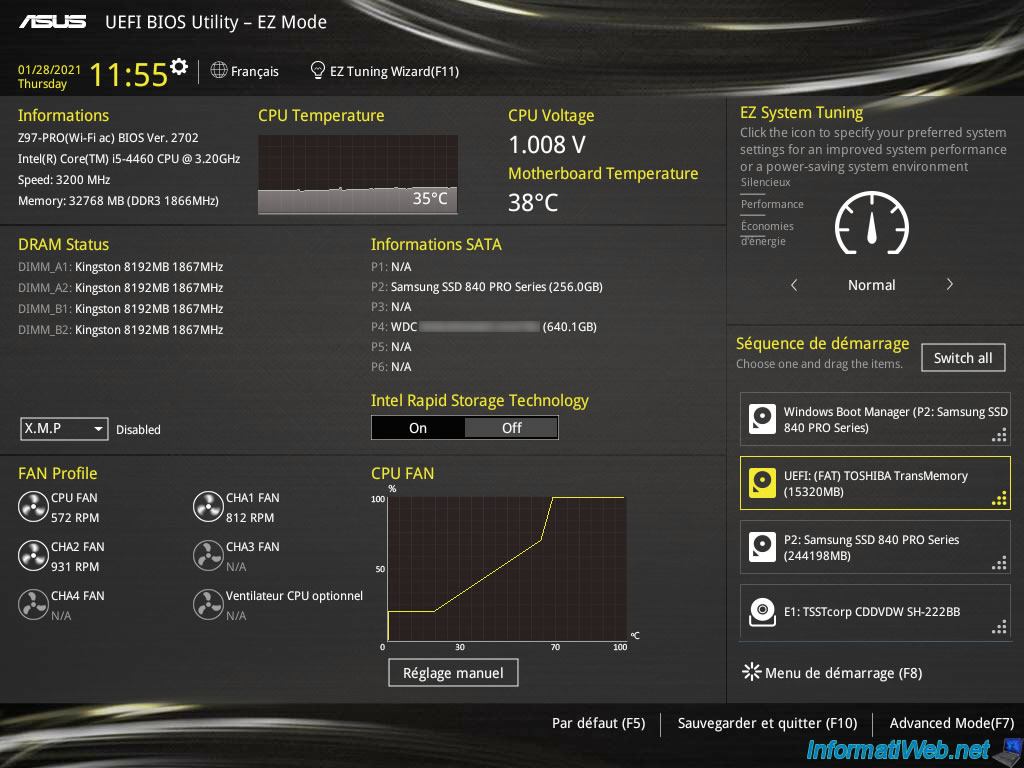
In our case, we dragged it to the top of the list so that our computer would first try to boot to it before other devices.
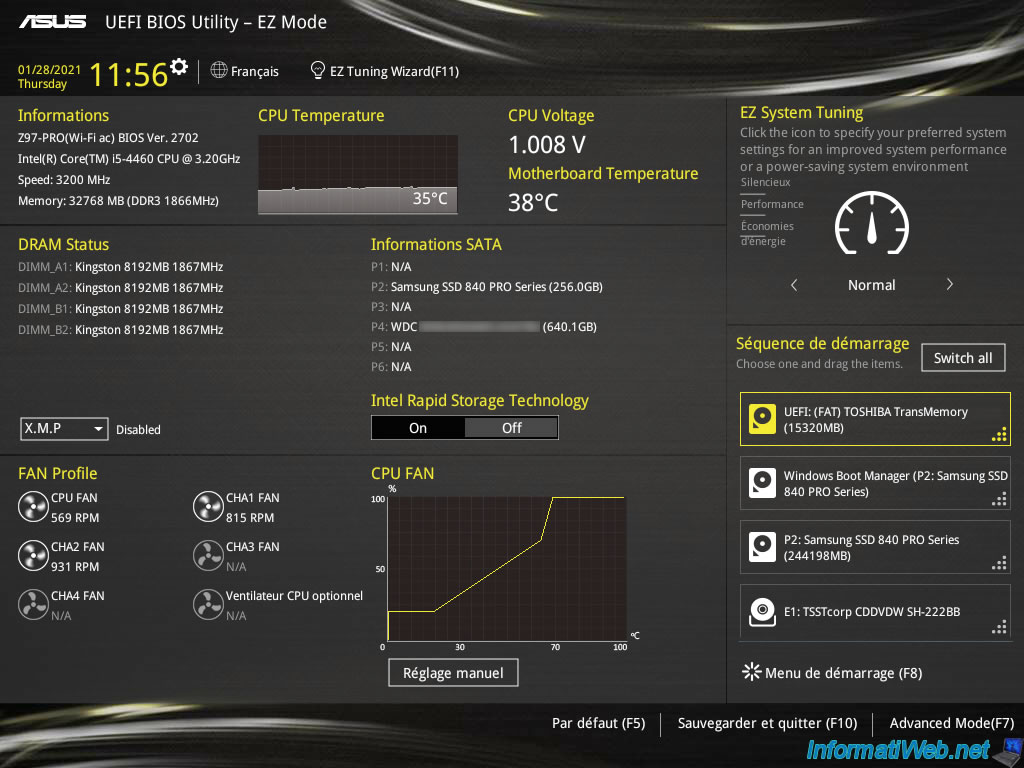
Then, click on "Save & Exit (F10)" to save the changes.

Finally, click OK.
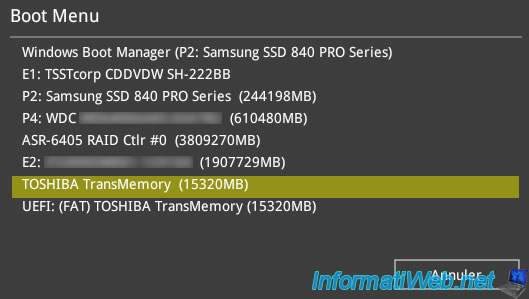
2.2. The boot menu
If you have this Asus BIOS, you can also use the boot menu accessible from the BIOS by clicking on the "Boot Menu (F8)" option.
Or by pressing F8 directly when starting your computer (before Windows starts).
In both cases, this boot menu will appear.
- Select the desired option with the arrow keys, then press Enter to boot to the desired device.
- OR select the desired option by moving the mouse, then left-clicking on the desired option.
In our case, we want to boot on our "TOSHIBA TransMemory" USB key.
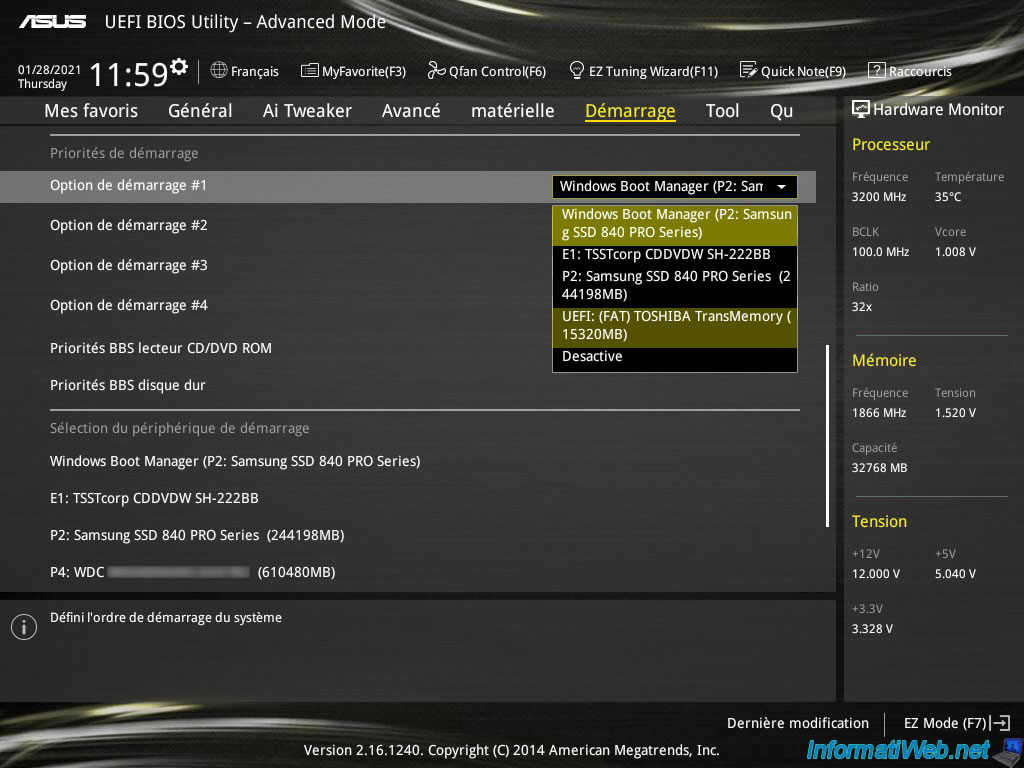
2.3. The advanced interface
The 3rd possibility to manage the boot order of your computer is to go to the advanced mode of this BIOS.
To do this, click on "Advanced Mode (F7)" at the bottom right.
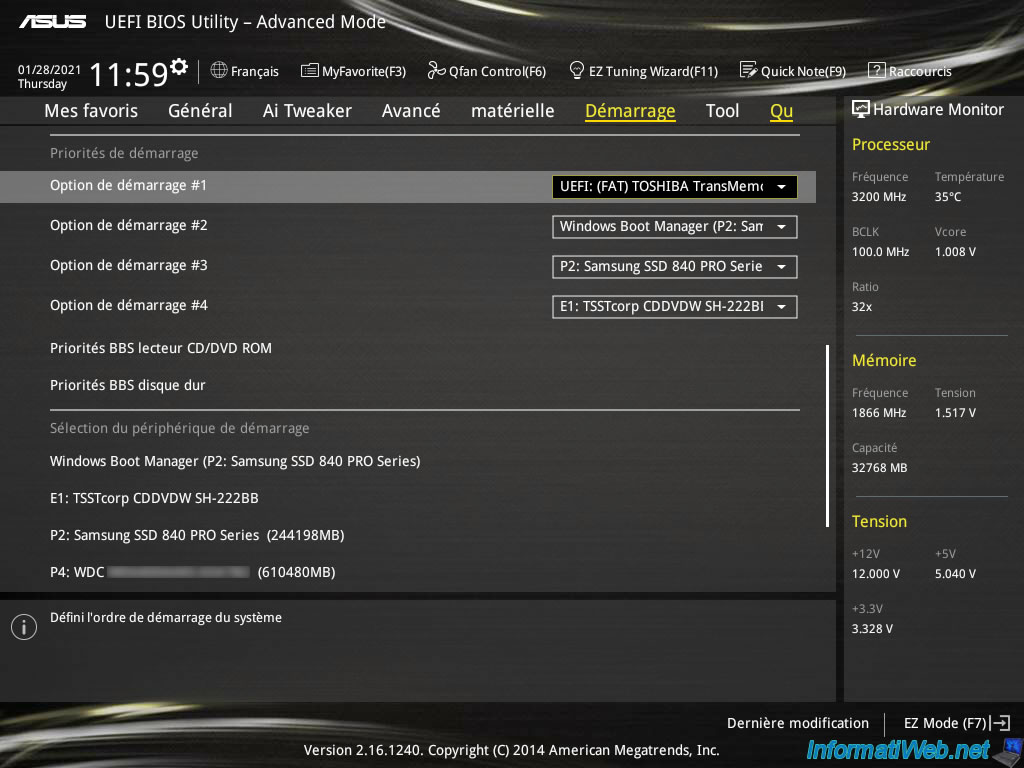
Then, go to the "Boot" tab and locate the "Boot Option Priorities" section.
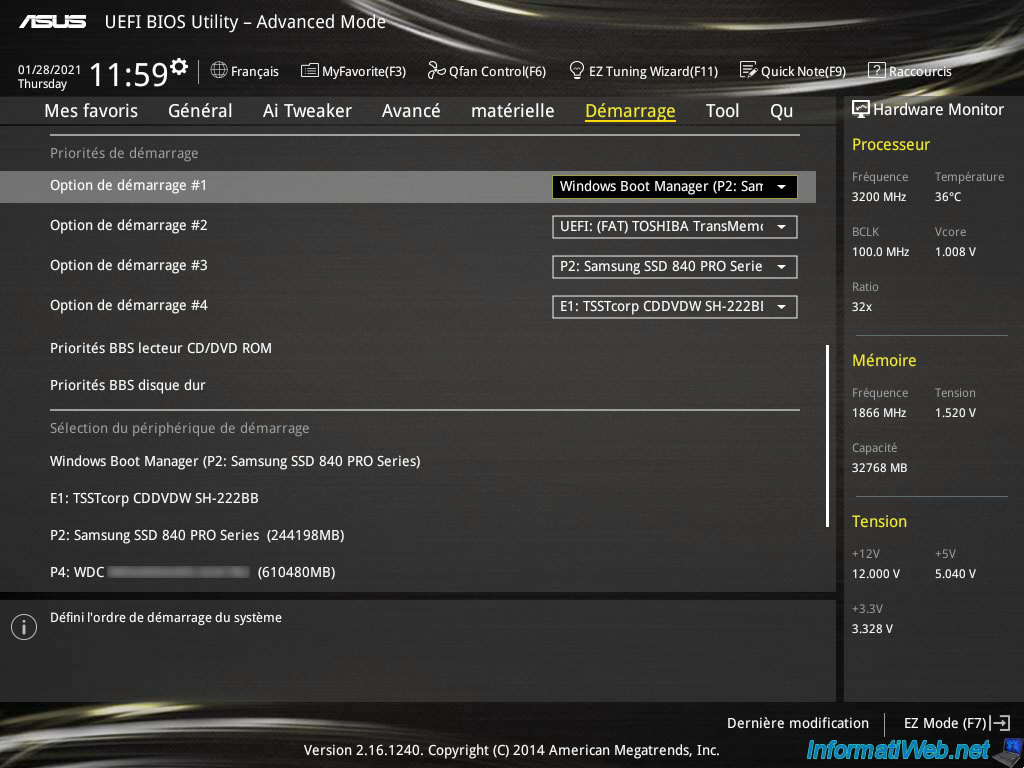
To change the boot order, click on the value next to "Boot Option # 1" and select the device you want to boot first.
In our case : our "TOSHIBA TransMemory" USB key.
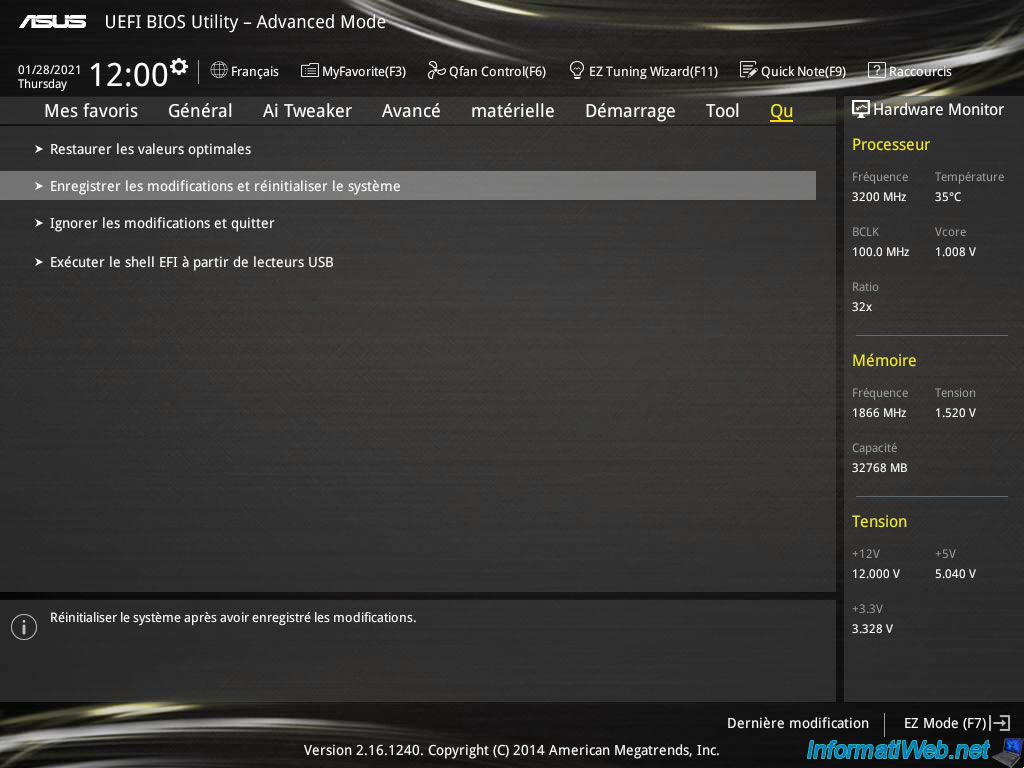
Then, go to the "Exit" tab.
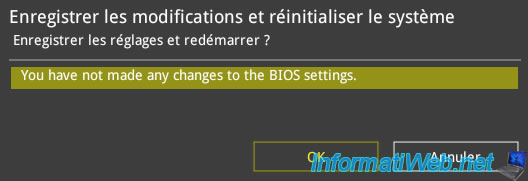
Then, click on : Save Changes & Reset.
Note that you can also use the "F10" keyboard shortcut to save changes.
Share this tutorial
To see also
-

BIOS 10/27/2021
Automatically enable the numeric lock (num lock) when your computer starts up
-

BIOS 11/30/2021
Configure your computer's BIOS to boot in UEFI mode (firmware)
-

BIOS 11/25/2015
Enable IOMMU or VT-d in your BIOS
-
BIOS 11/9/2021
Take a printscreen in a recent Asus BIOS
You must be logged in to post a comment