Change the BIOS boot priority
- BIOS
- 04 February 2021 at 18:24 UTC
-

- 5/5
6. BIOS American Megatrends - AMI BIOS (Old BIOS)
If your motherboard has a American Megatrends BIOS (AMI BIOS), the configuration is very simple.
When the logo of the motherboard appears when your computer starts, press the key indicated at the bottom of the screen. Generally, it's : DEL or F2.
In this BIOS, go to "Boot" menu and then in "Boot Device Priority".
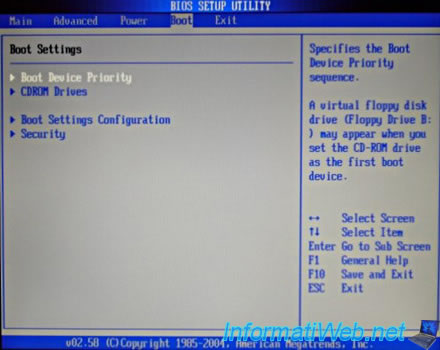
To boot from a CD or a DVD, select your CD / DVD drive for the "1st Boot Device" option.

Finally, press the F10 key (Save and Exit) and then confirm by pressing the "Y" key, if necessary.
7. MSI BIOS (American Megatrends)
If you have a MSI laptop PC, you can enter the BIOS by pressing the "Delete" key on the keyboard when it starts up.
Then, go to the "Boot" tab of the BIOS to manage the boot order of your various devices : hard disk, built-in CD/DVD drive, USB key, ...
7.1. Boot in UEFI mode with LEGACY BIOS support
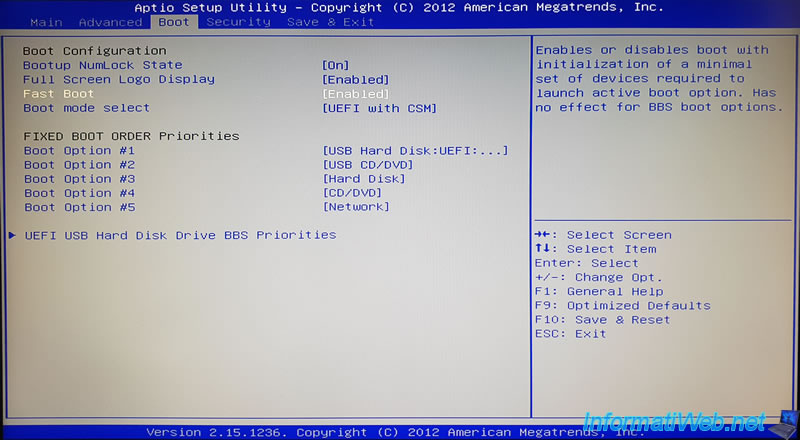
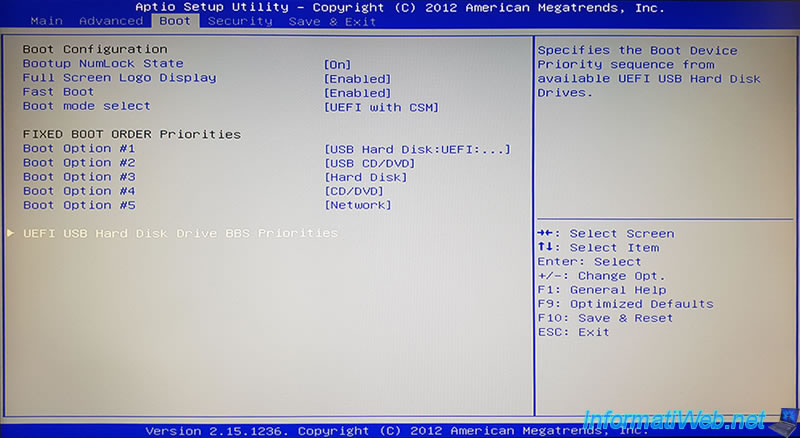
Depending on the value selected for the "Fast Boot" and "Boot mode select" options, the available boot options will be more or less limited.
Here is what is available when "Fast Boot" is enabled and when "Boot mode" is set to "UEFI with CSM" (which stands for UEFI boot with support for old BIOS functions via CSM).

For the Boot mode, you have the choice between 3 options :
- UEFI with CSM : allows booting in UEFI mode and old BIOS mode (via CSM = Compatibility Support Module)
- LEGACY : allows booting on a device with a LEGACY BIOS. This allows you to boot on old Live CDs, for example.
- UEFI : allows you to boot on recent OS including Windows 7, 8, 8.1 and 10 and to benefit from secure boot (if it's enabled in the BIOS of your computer)

At the moment, we have access to :
- global startup priorities : FIXED BOOT ORDER Priorities - Boot Option #X
- boot priorities for USB media via UEFI firmware : UEFI USB Hard Disk Drive BBS Priorities
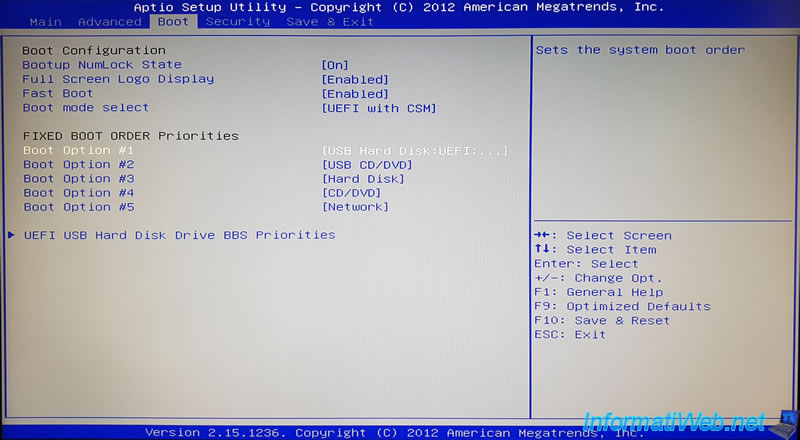
For this tutorial, we will first boot on our USB key.
To do this, select the "Boot Option #1" line and press Enter to change its value.
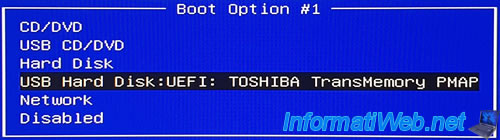
Then, select the device you want to boot to first.
In our case, our USB key. So, we select the "USB Hard Disk:UEFI: TOSHIBA TransMemory PMAP" line and we press Enter to validate.
If you have more than one USB key currently plugged into your computer, you may not be able to see it.
In this case, select the "UEFI USB Hard Disk Drive BBS Priorities" line and press Enter.
Here, you will see all your currently plugged USB keys appear.
Select "Boot Option #1" and press Enter.
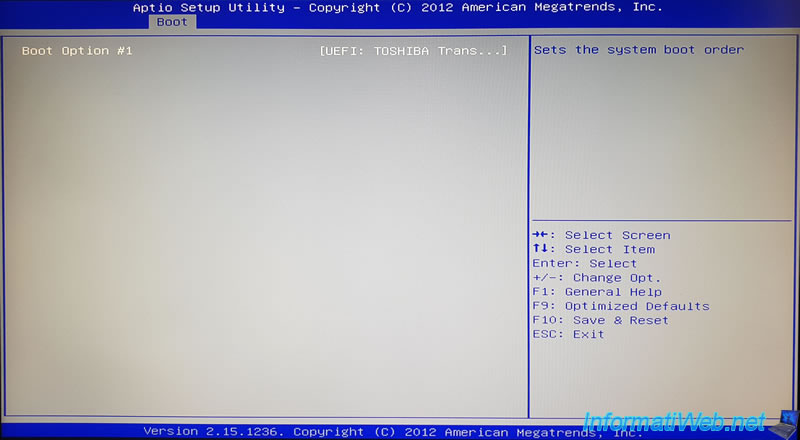
Select the USB key you want to boot to and press Enter.

Now, you will see this USB key in the "Boot" tab of the BIOS.
7.2. Boot in old BIOS mode (LEGACY)
If the desired boot option doesn't appear or you want to boot from an old Live CD, you will need to configure this BIOS to work like the old BIOS and not with UEFI firmware.
To do this, go to the "Boot" tab, select the "Fast Boot" line and press Enter to change its value.
Note : as indicated on the right of this BIOS, the Fast Boot allows you to initialize a minimum of devices required for booting on the desired device (active boot option).
When fast boot is enabled, some startup options may therefore not appear here.
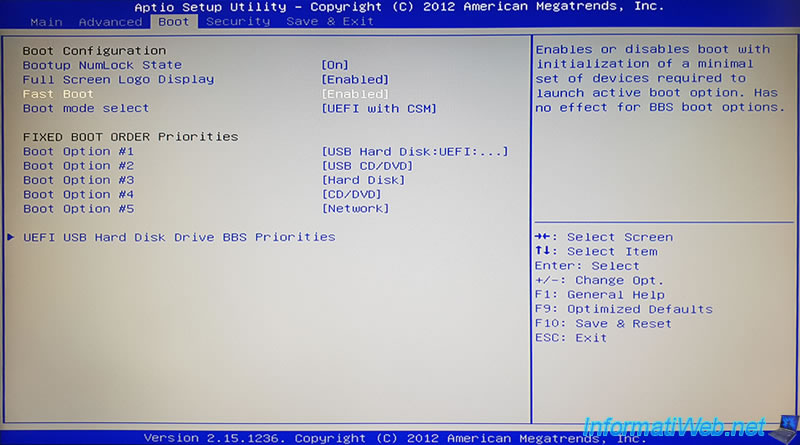
Select "Disabled" to disable Fast Boot.

Then, select the "Boot mode select" line and press Enter to change its value.
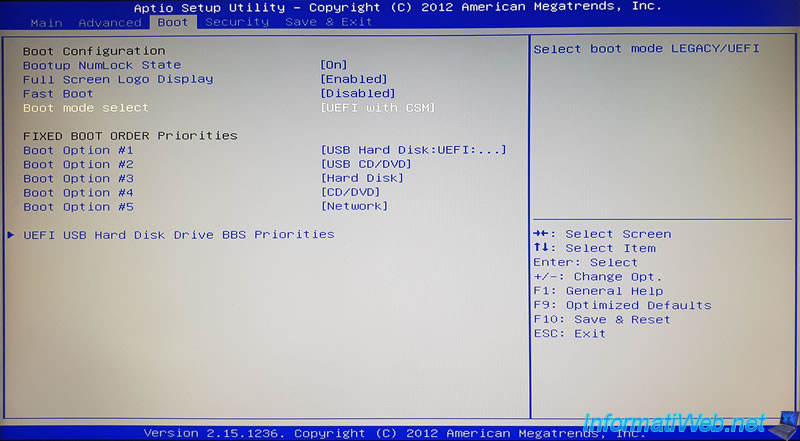
Select "LEGACY" and press Enter.

Then, go to the "Save & Exit" tab, select "Save Changes and Reset" and press Enter to save the changes.
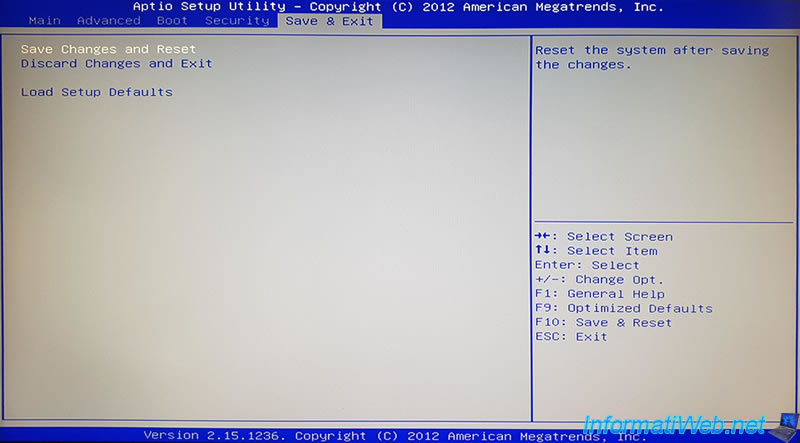
Confirm saving changes.

On restart, press "Delete" again to reenter BIOS.
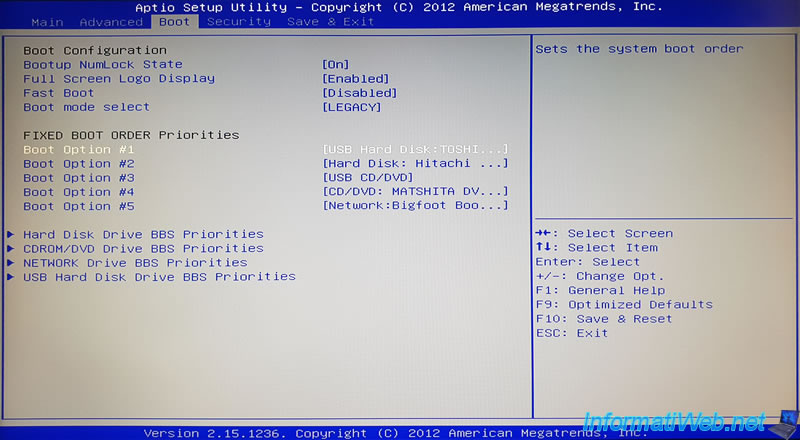
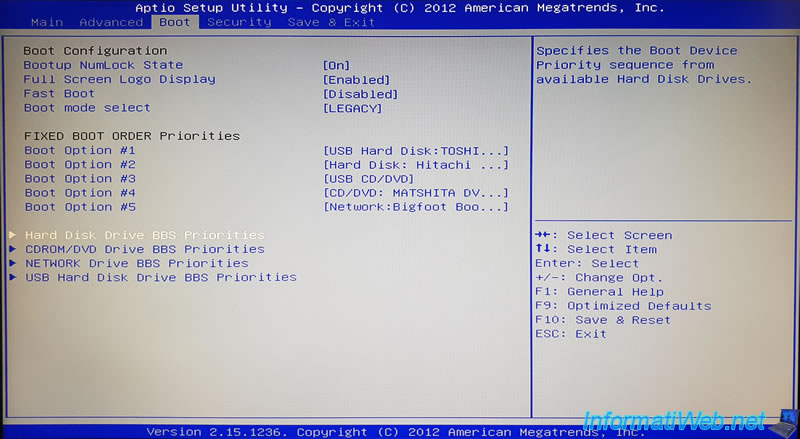
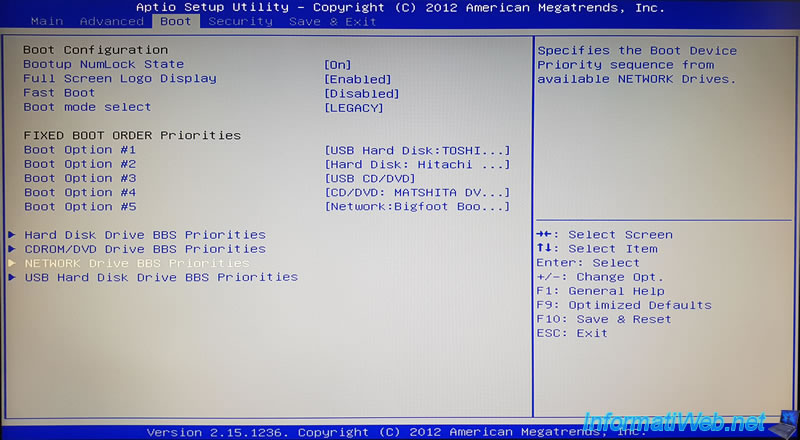
Go back to the "Boot" tab of it and you will see that :
- the name of the boot options (Boot Option #X) has changed.
- "... Drive BBS Priorities" options have appeared.
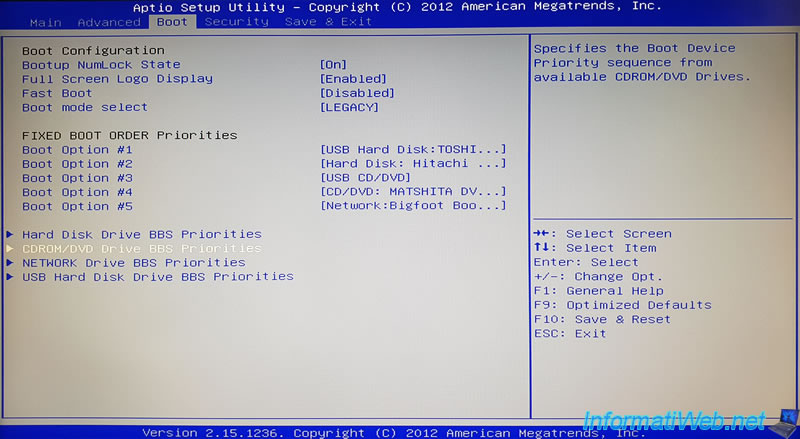
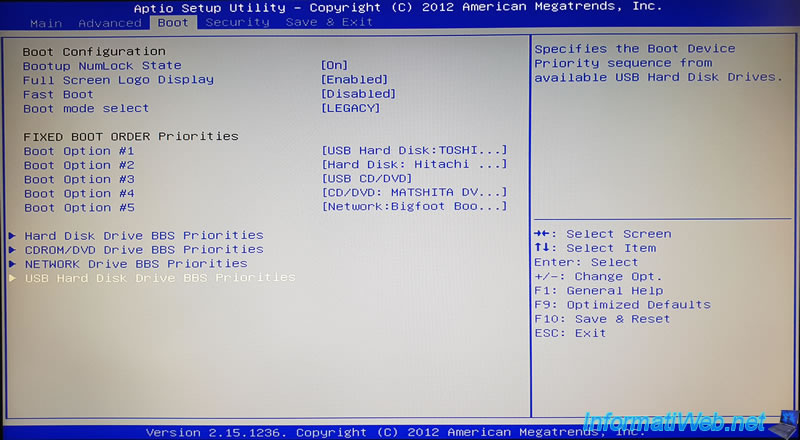
Note that the "... Drive BBS Priorities" options allow you to manage the priority by type of device :
- Hard Disk Drive BBS Priorities : allows you to manage the boot order for internal hard drives
- CDROM/DVD Drive BBS Priorities : allows you to manage the boot order for CD/DVD drives
- NETWORK Drive BBS Priorities : allows you to manage the boot order for booting over the network (PXE)
- USB Hard Disk Drive BBS Priorities : allows you to manage the boot order for USB media (USB keys, external hard drives connected to an USB port, ...)
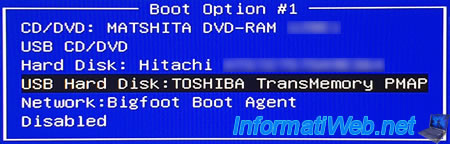
If you select the "Boot Option # 1" and press Enter, you will see that the device names are now displayed.
This was not the case when Fast Boot was enabled.
In our case, the available boot options are :
- CD/DVD - MATSHITA DVD-RAM : the CD/DVD drive integrated into our MSI laptop PC
- USB CD/DVD : a CD/DVD drive that you can connect to USB
- Hard Disk - Hitachi : the internal hard drive whose brand is Hitachi
- USB Hard Disk - TOSHIBA TransMemory PMAP : the USB key currently plugged into our MSI laptop
- Network - Bigfoot Boot Agent : allows booting over the network via PXE
- Disabled : allows you to disable this boot option
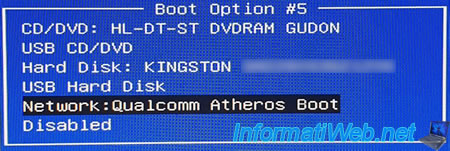
Note that depending on the model of your MSI laptop PC, booting over the network may be handled by a "Qualcomm Atheros Boot" device.
7.3. Boot Priorities by Device Type (BBS Priorities)
As explained previously, the "... Drive BBS Priorities" options allow you to manage the boot order of each type of device.
This is useful when you have several internal hard drives, several USB keys plugged in simultaneously, ...
To manage the boot order on your internal hard drives, select "Hard Disk Drive BBS Priorities" and press Enter.
In our case, there is only one internal hard drive.
However, if you had multiple hard drives in your case, then select the "Boot Option #1" line and press Enter to change its value.
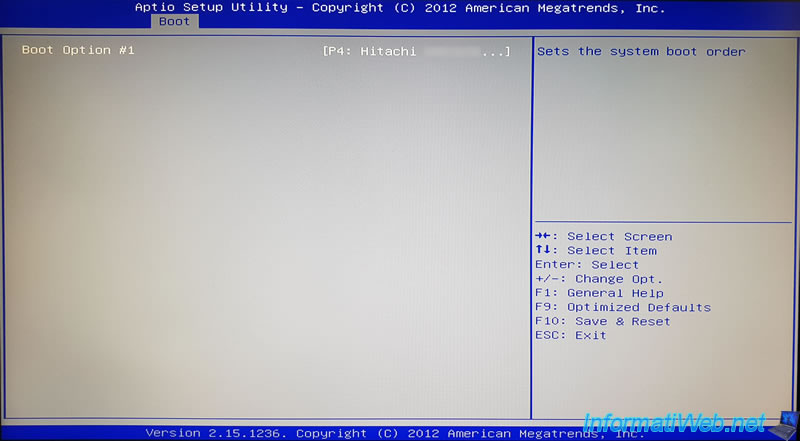
The list of internal hard drives available in your laptop PC is displayed.
Select the internal hard drive you want to boot from and press Enter to validate.

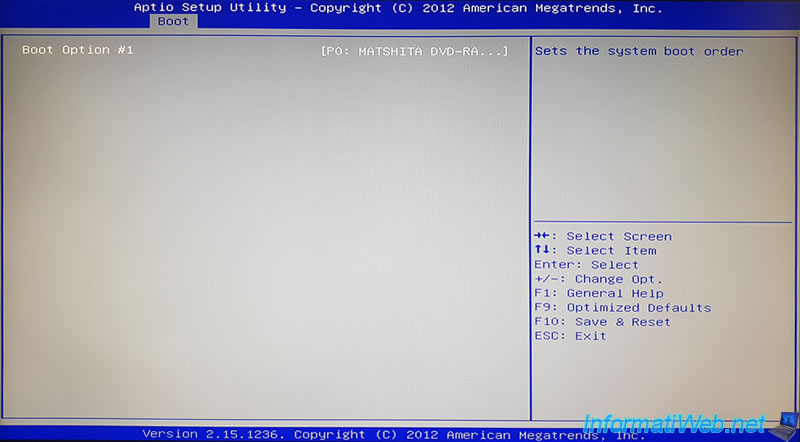
To manage the boot order of your CD/DVD drives, select "CDROM/DVD Drive BBS Priorities" and press Enter.
The list of CD/DVD drives available on your MSI laptop PC appears.
To change the boot order, select the 1st line and press Enter (as explained previously).
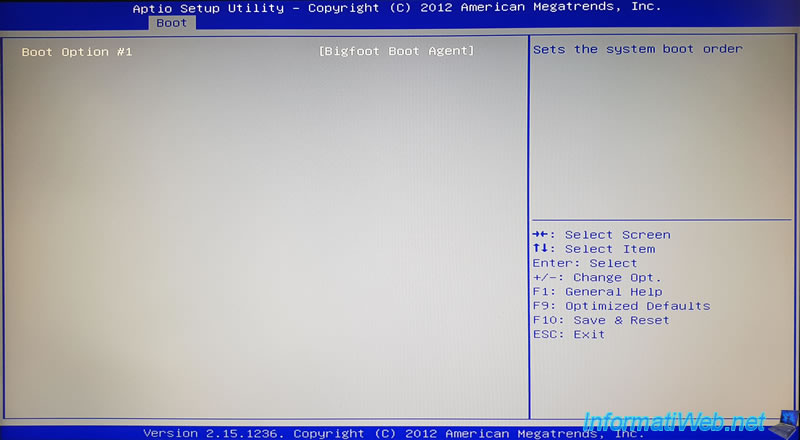
To manage the boot order for the network, select "NETWORK Drive BBS Priorities" and press Enter.
The list of options for booting on the network appears.
To change the boot order, select the 1st line and press Enter (as explained previously).
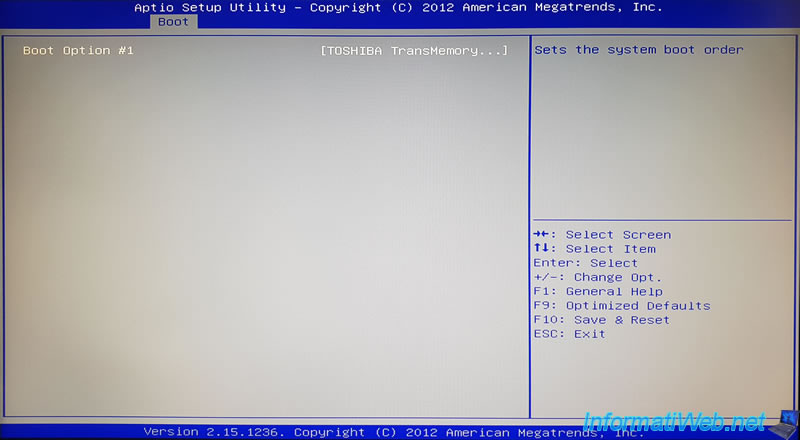
To manage the boot order on your USB media (USB keys, external hard disks, ...), select "USB Hard Disk Drive BBS Priorities" and press Enter.
The list of USB media (USB keys, external hard drives, ...) connected to your MSI laptop PC appears.
To change the boot order, select the 1st line and press Enter (as explained previously).
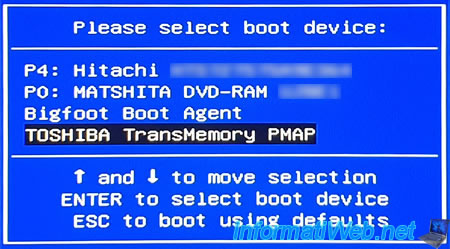
7.4. Boot menu
Although the hotkey is not listed anywhere, it's possible to access this boot menu on MSI laptops by repeatedly pressing the F11 key while the computer is booting.
Then, select the device on which you want to boot with the arrows of the keyboard, then validate by pressing Enter.
In our case, we can boot on :
- the internal hard drive : P4 - Hitachi ...
- the integrated CD/DVD drive : P0 - MATSHA DVD-RAM
- the network : Bigfoot Boot Agent
- the USB key plugged into our MSI laptop : TOSHIBA TransMemory PMAP
Share this tutorial
To see also
-

BIOS 12/18/2023
ASUS ROG MAXIMUS XIII HERO - Enable internal graphics card (iGPU)
-
BIOS 12/25/2012
Change the hard disk controller mode
-
BIOS 1/29/2016
Flash the BIOS of an Asus motherboard (via Asus EZ Flash 2)
-
BIOS 1/2/2024
Flash the BIOS of an Asus ROG motherboard (via Asus EZ Flash 3)
No comment