- BIOS
- 23 November 2021 at 14:53 UTC
-

- 1/2

All computers (desktops or laptops) have a BIOS which is stored in a chip present on the motherboard thereof.
On recent motherboards, you will surely be entitled to UEFI firmware instead of the old BIOS.
However, UEFI is not compatible with old operating systems (such as : Windows XP, 2000, ...).
To solve this problem, manufacturers have created a feature called "CSM (Compatibility Support Module)" which allows you to start your computer in "old BIOS" mode (also called : LEGACY BIOS).
In this tutorial, you will see how to configure the BIOS of your Asus motherboard or your MSI laptop PC to boot in "LEGACY BIOS" mode.
1. Asus UEFI BIOS (blue)
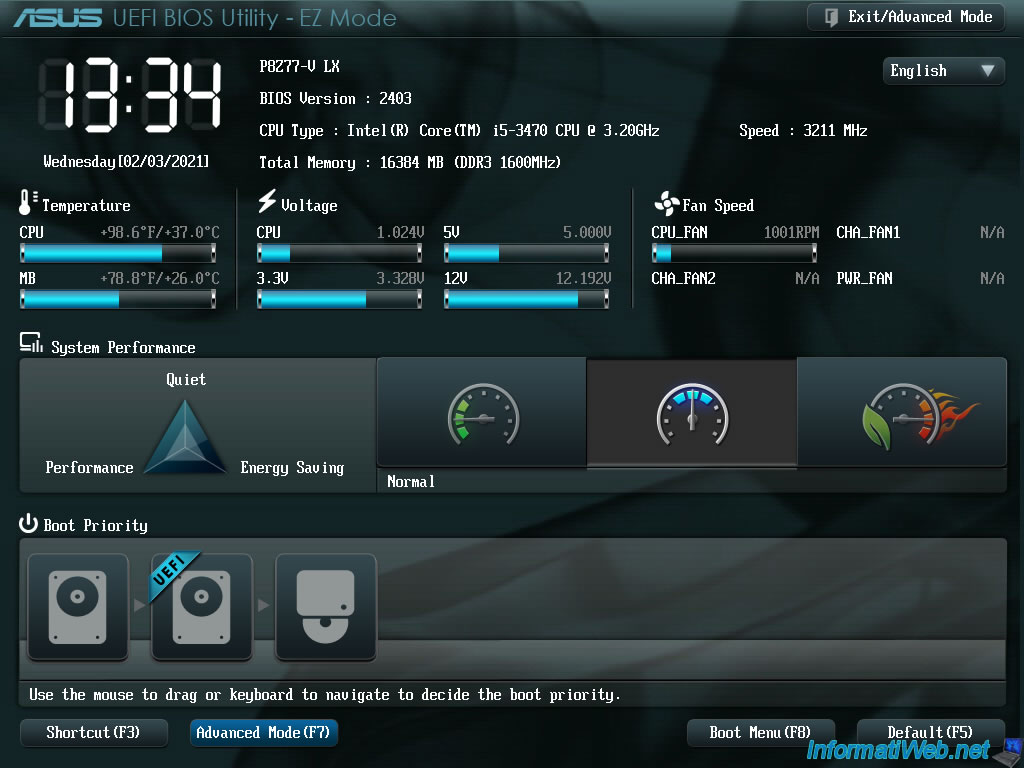
If you have a computer with an Asus P8Z77-V LX motherboard or another model of this brand, you may have a blue/green BIOS like this.
To enter it, press the "Delete" or "Del" key when starting your computer.
Then, click on "Advanced Mode (F7)".
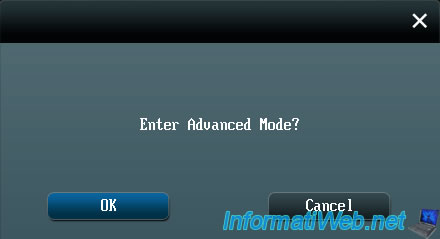
Click OK to enter Advanced Mode.
1.1. Boot in LEGACY BIOS mode
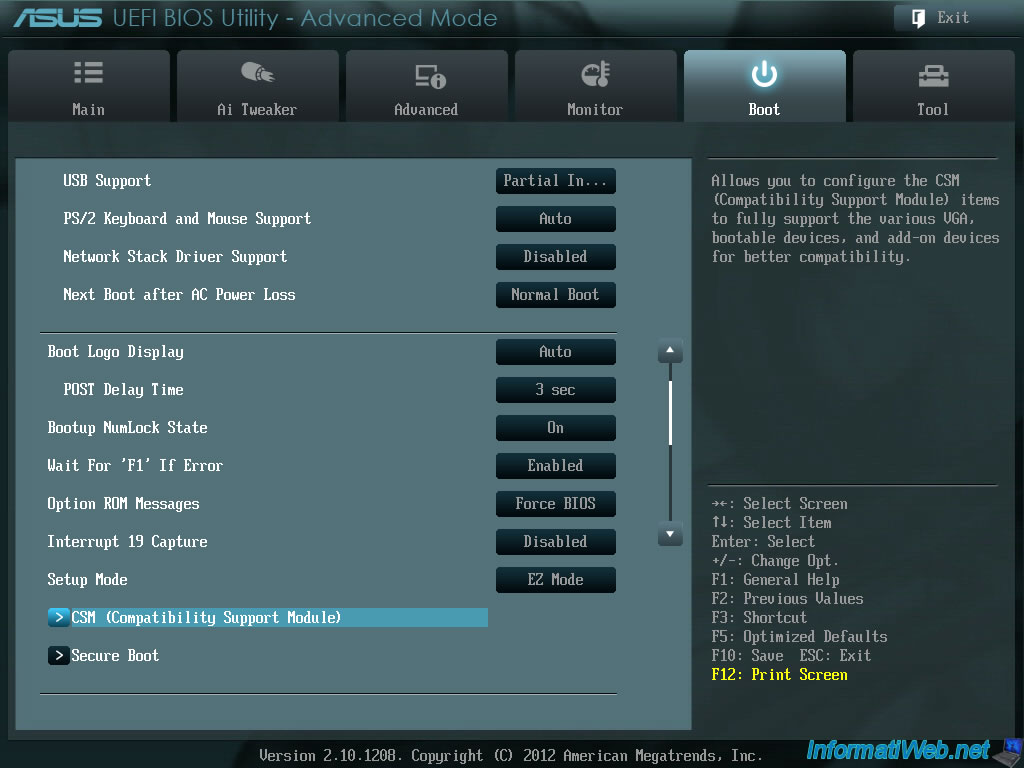
Then, go to the "Boot" tab and click on "CSM (Compatibility Support Module)".
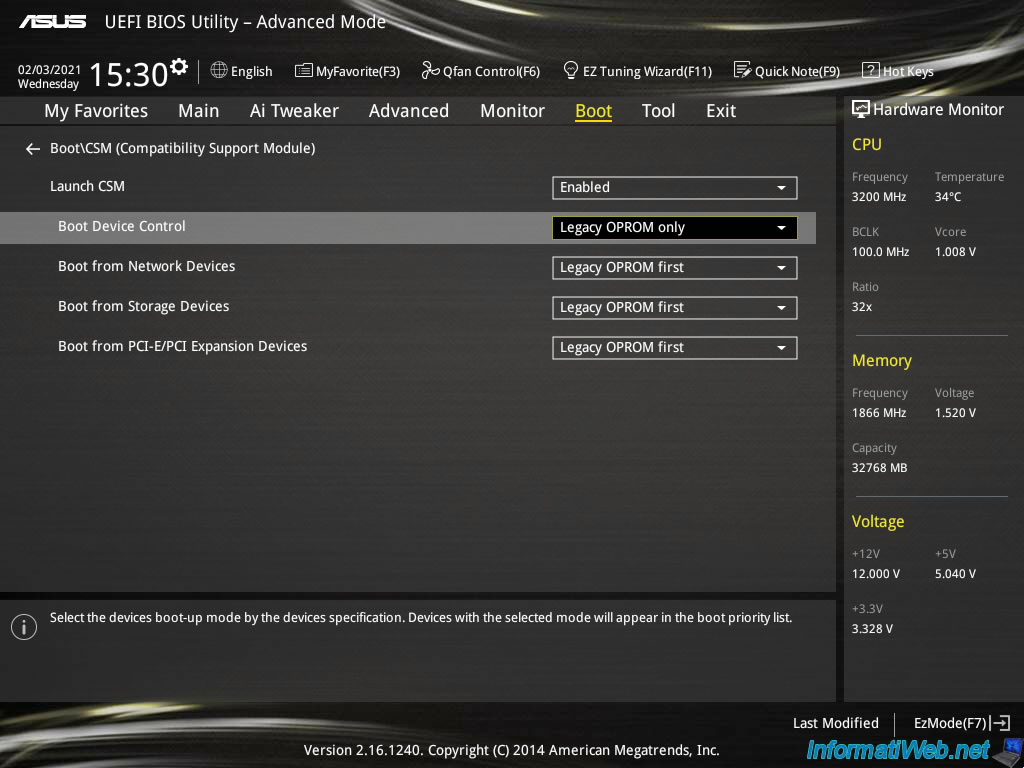
In this "CSM (Compatibility Support Module)" menu, change the value of "Launch CSM" to "Enabled" to enable this compatibility module allowing you to start in "LEGACY BIOS" mode from the UEFI firmware of your motherboard.
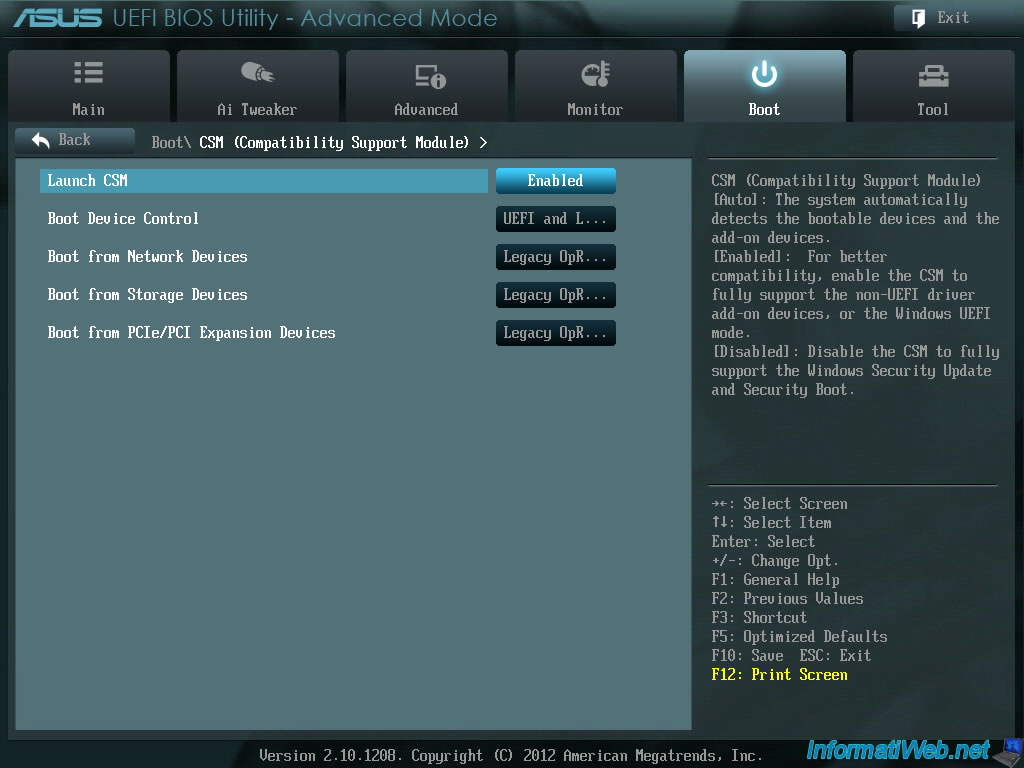
Once the "Launch CSM" option is enabled, other options will appear :
- Boot Device Control : global boot option
- Boot from Network Devices : boot option for network devices
- Boot from Storage Devices : boot option for storage devices (hard disks, ...)
- Boot from PCIe/PCI Expansion Devices : boot option for devices plugged in via a PCIe (PCI Express) or PCI expansion card
For the value of these options, you will have the choice between :
- UEFI and Legacy OpROM : allows your computer to start in "LEGACY BIOS" mode and in "UEFI" mode
- Legacy OpROM only : allows your computer to start only in "LEGACY BIOS" mode
- UEFI only : allows your computer to start only in "UEFI" mode
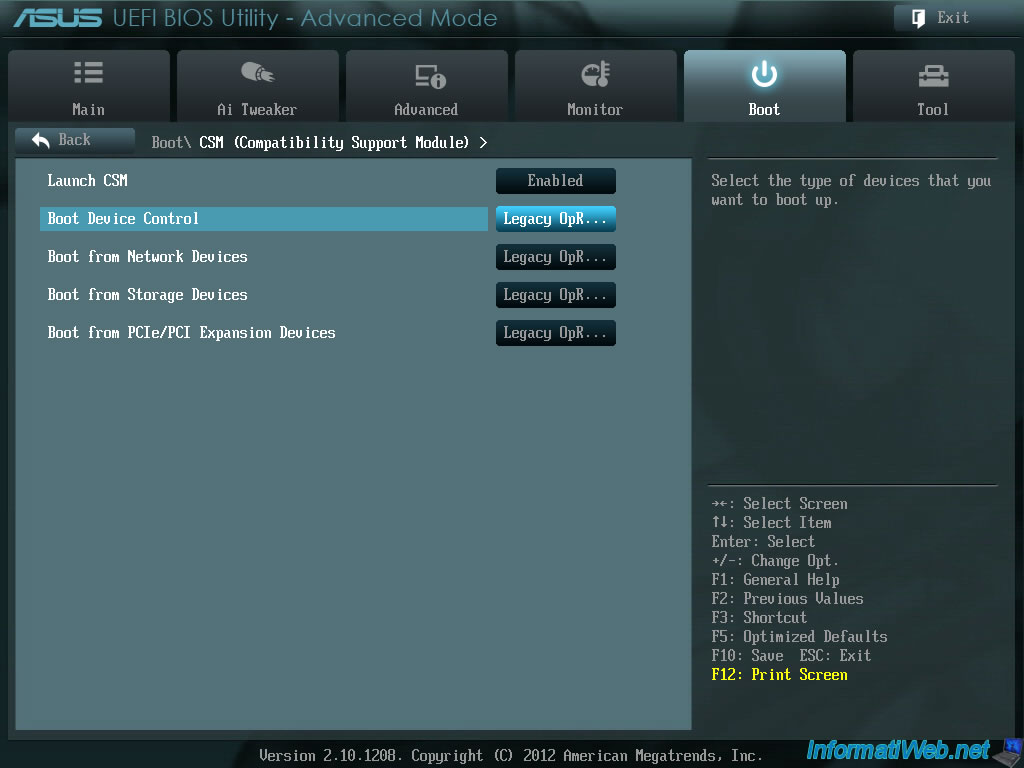
For the "Boot Device Control" option, select "Legacy OpROM only" so that your computer can start only in "LEGACY BIOS" mode on your devices (internal and external hard disks, CD/DVD drive, ...).
This will allow you to be sure that Windows will install in "LEGACY BIOS" mode and not in UEFI when you install it the next time.
For the other "Boot from ..." options, you will not find the value "Legacy OpROM only".
For these options, you should therefore select "Legacy OpROM first".

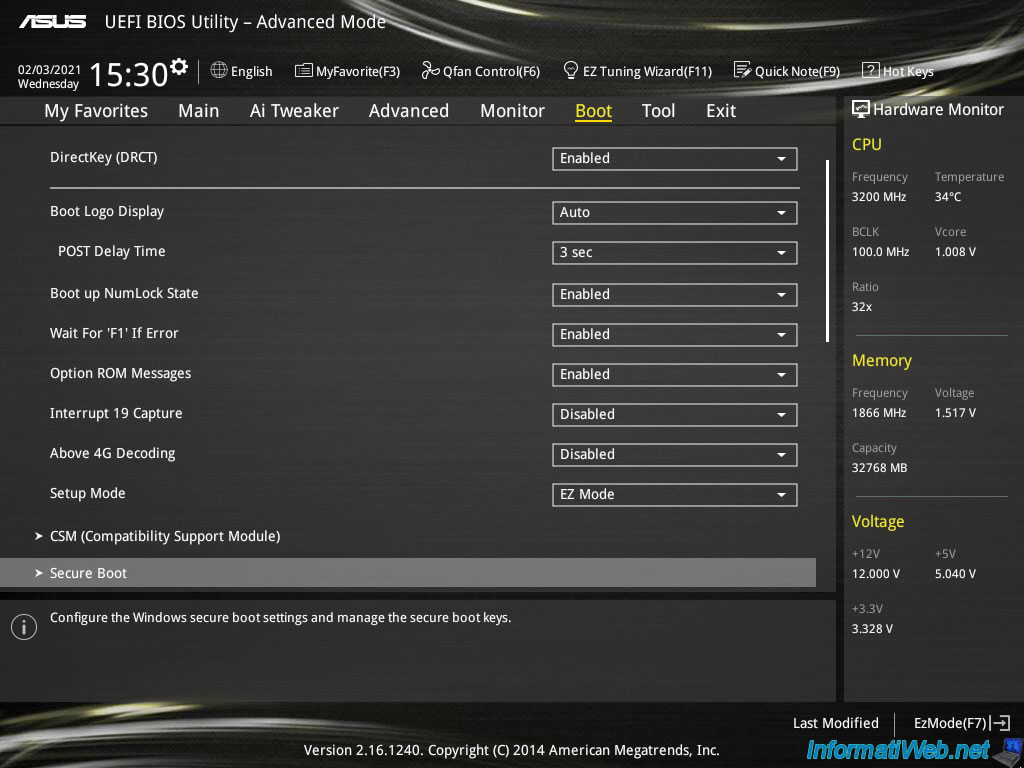
Go back to the "Boot" menu by clicking on the "Back" button at the top left, then go to "Secure Boot".
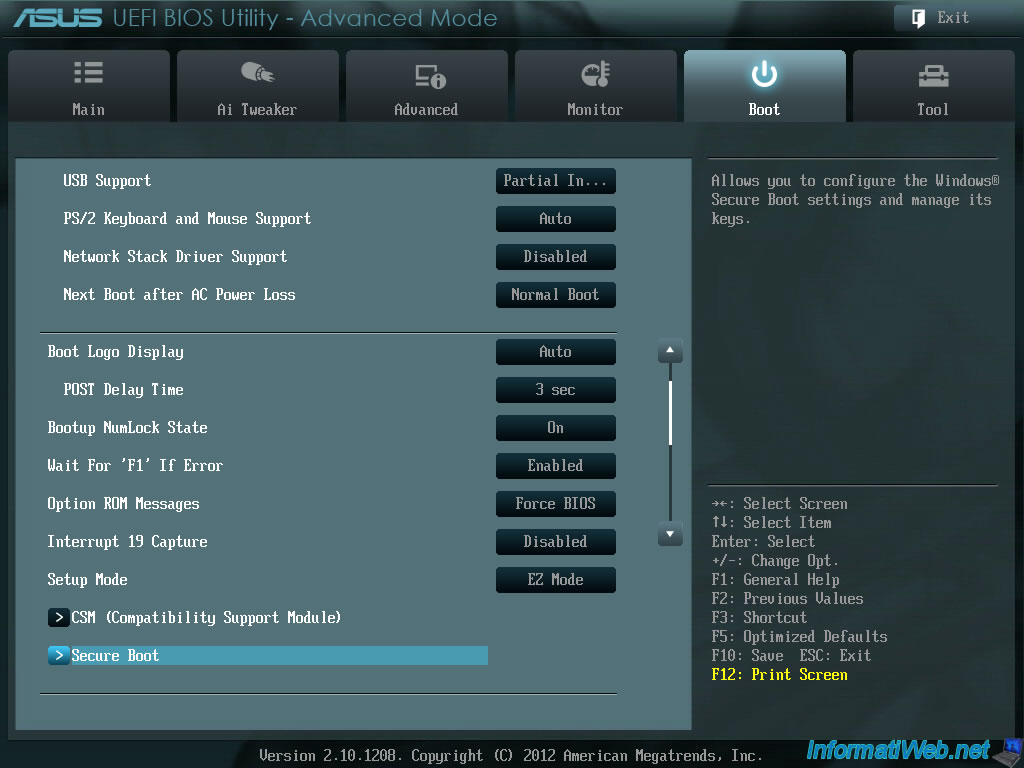
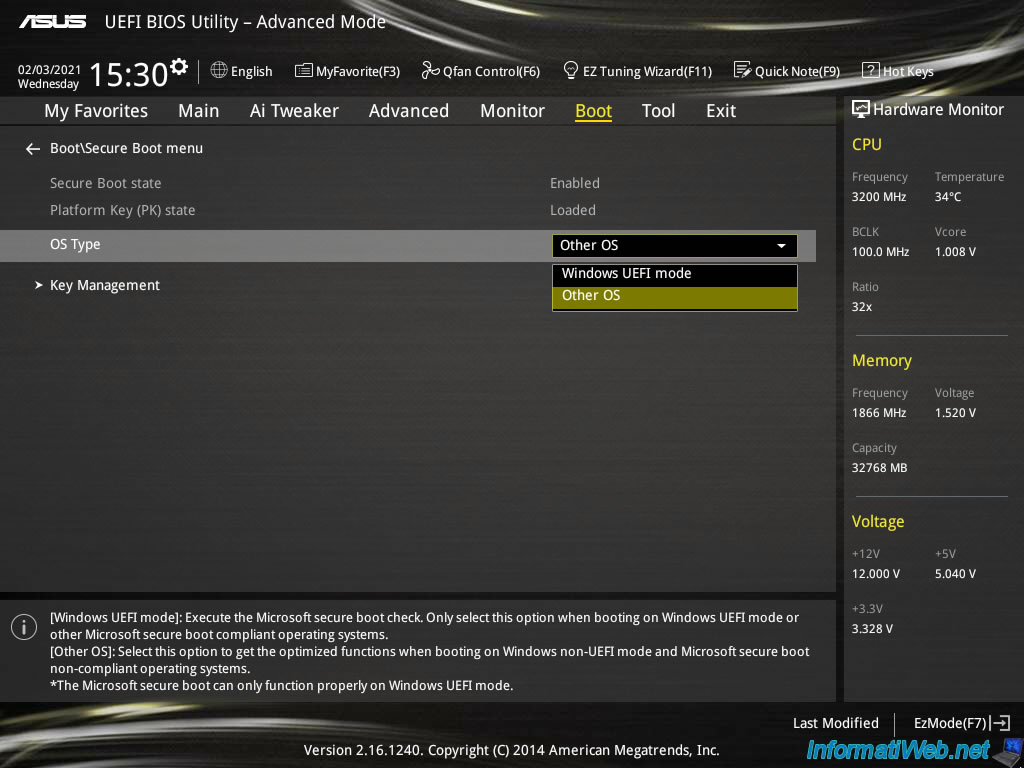
In this "Secure Boot menu", you will find an "OS Type" option.
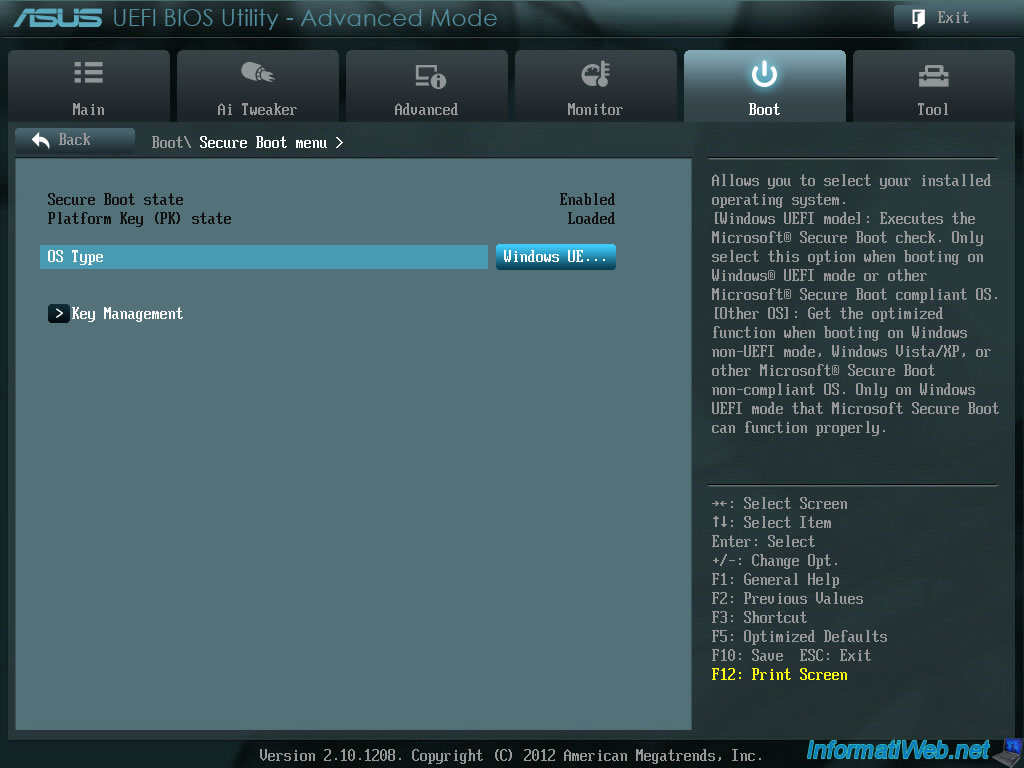
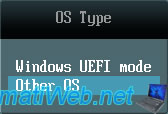
Change its value to "Other OS" to optimize booting on compatible Windows OS installed in "LEGACY BIOS" mode.
This is still the case for Windows XP and earlier versions of Windows. But also for Windows 7 and more recent versions when installed in "LEGACY BIOS" mode.
1.2. Change the boot order
Now that your computer is configured to boot in LEGACY BIOS mode, don't forget to change the boot order to :
- boot first on your CD/DVD drive (or your bootable USB key to install Windows)
- then boot on your internal hard drive where you will install Windows
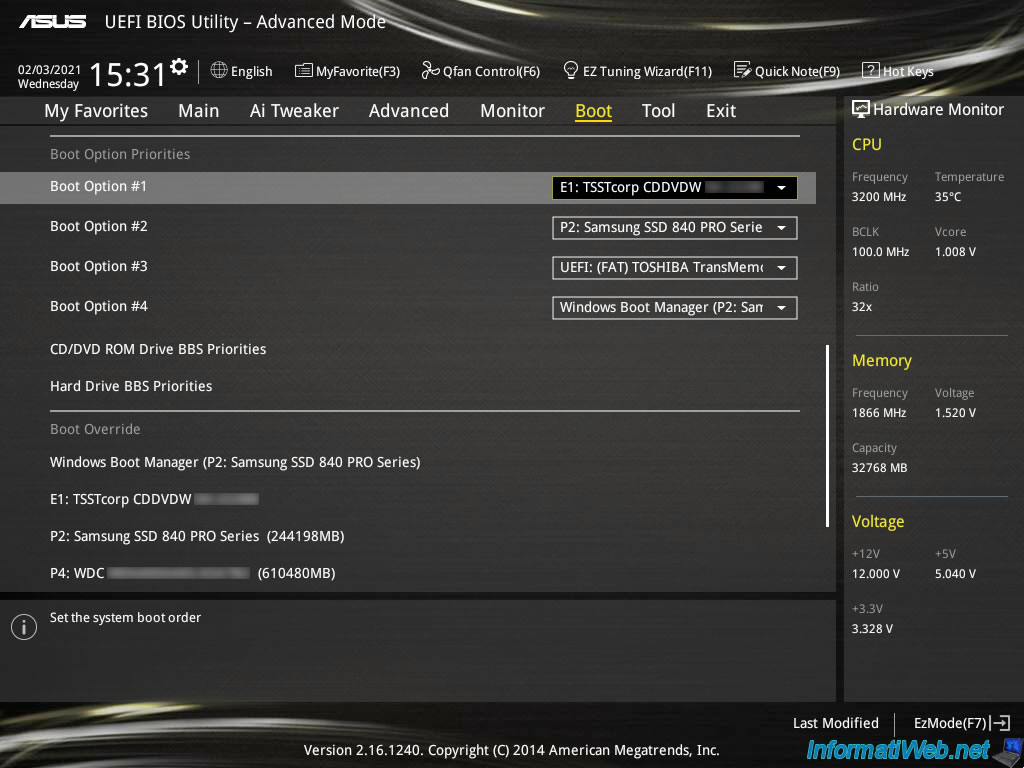
To do this, go to the "Boot" tab and locate the "Boot Option Priorities" section.
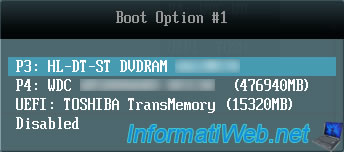
Select the "Boot Option #1" line and press Enter to change its value.
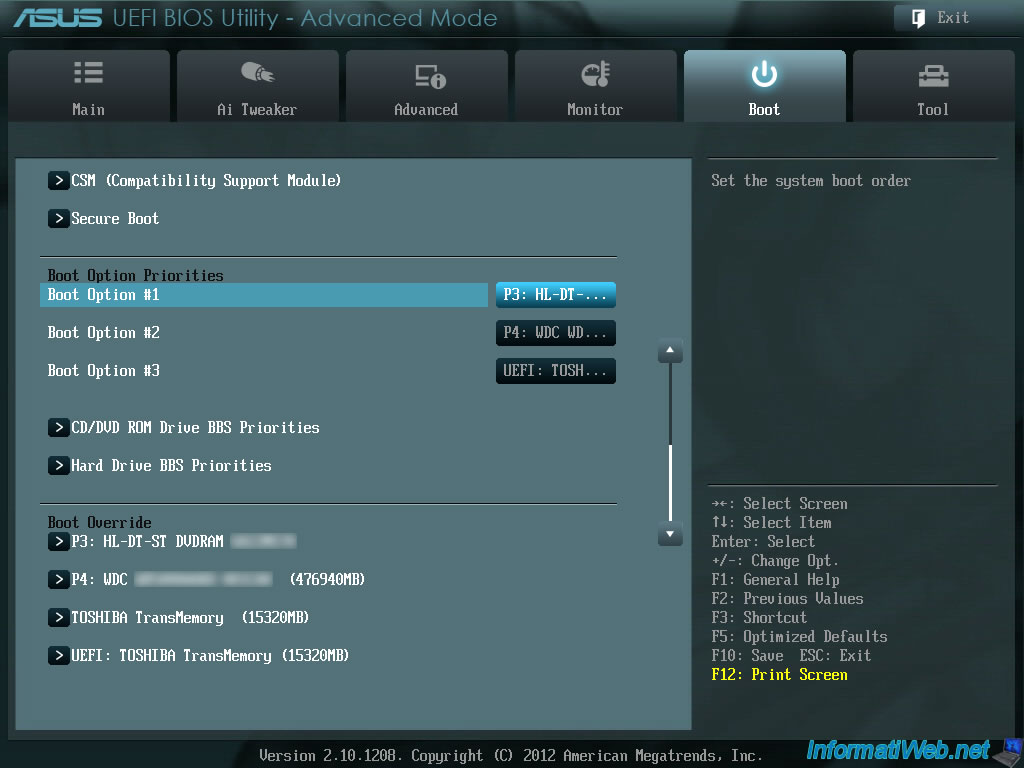
Select your CD/DVD drive (if you want to install Windows from its installation CD/DVD) or your USB key (if you created a bootable USB key to install Windows).
In our case, this is the "HL-DT-ST DVDRAM ..." device.
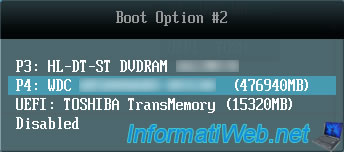
Then, select the "Boot Option #2" line and press Enter.
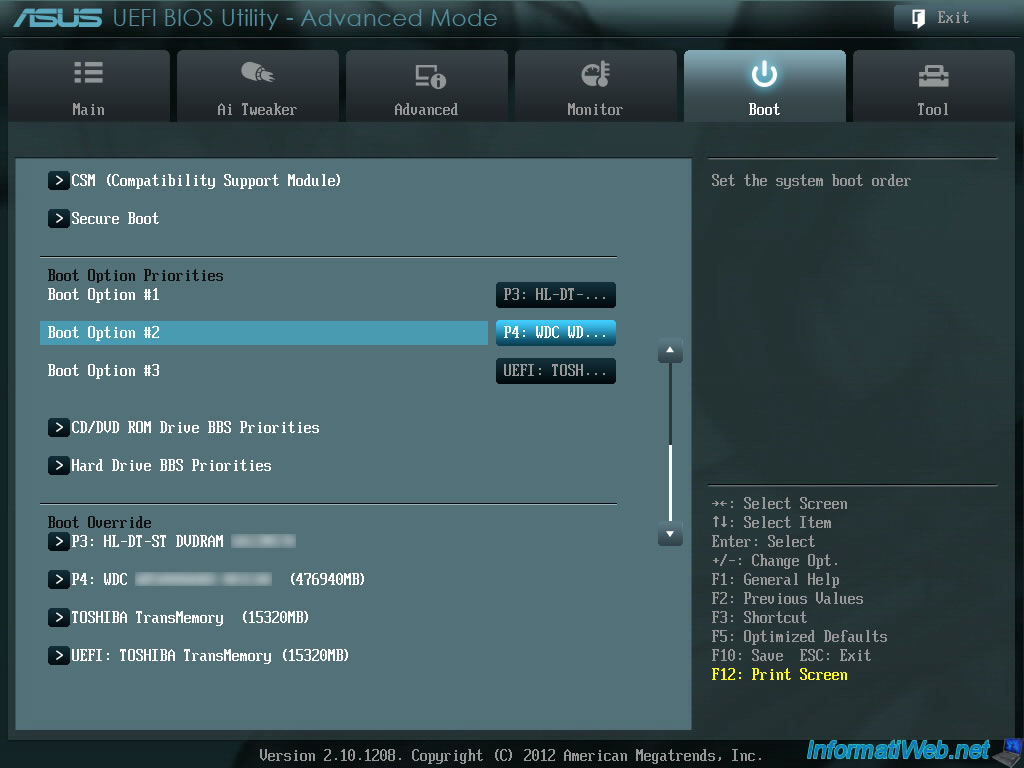
Select the hard drive or SSD on which you will install Windows.
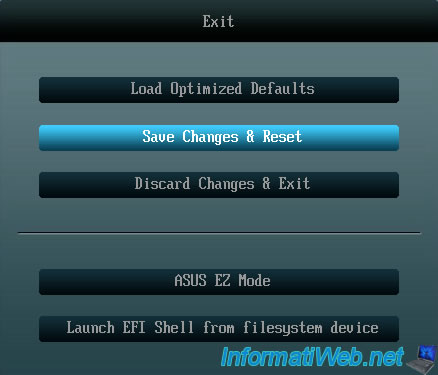
Finally, click on the "Exit" button at the top right, then on "Save Changes & Reset" to save the changes.
2. Asus UEFI BIOS (yellow/gray)
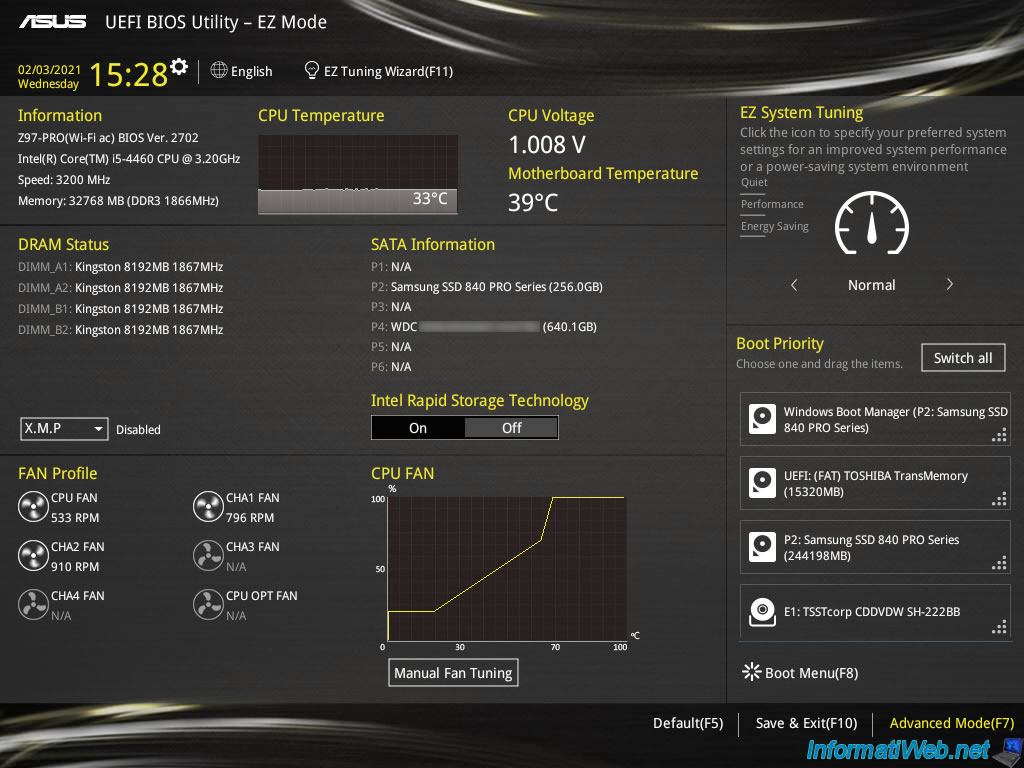
If you have a newer Asus motherboard than the previous one (example : Asus Z97 Pro Wi-Fi ac), then you might have an yellow and gray BIOS like this.
To enter it, press the "Delete" or "Del" key when starting your computer.
Then, go to the advanced mode of this BIOS by clicking on "Advanced Mode (F7)" at the bottom right.
2.1. Boot in LEGACY BIOS mode
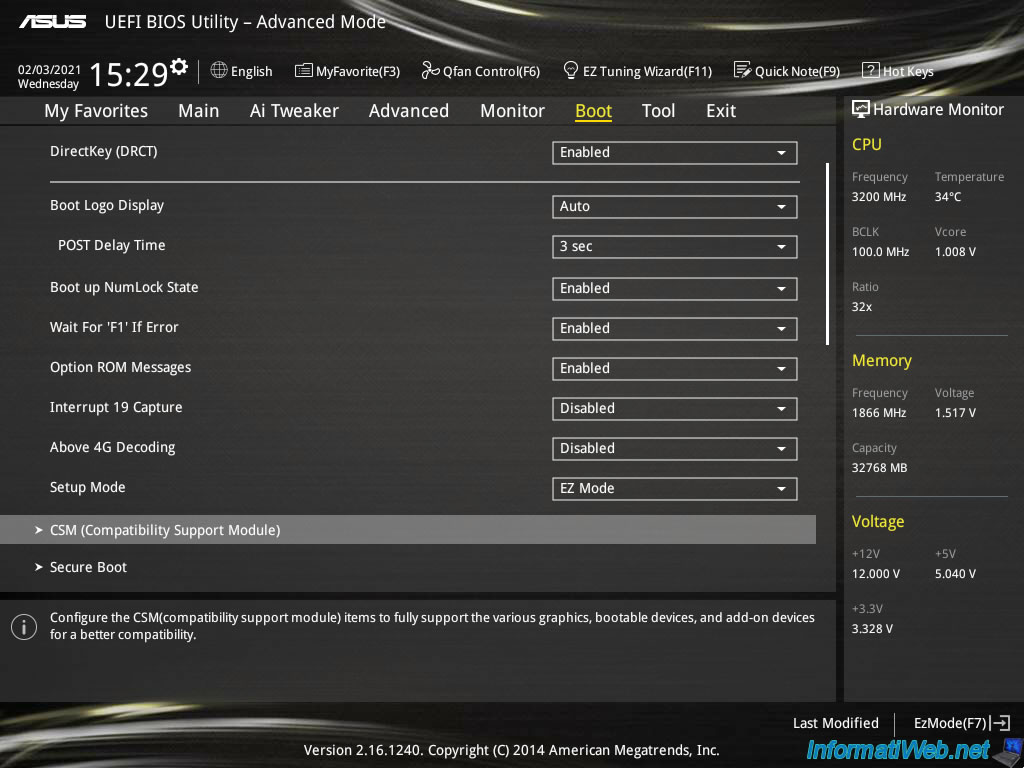
In the "Boot" tab, you will find a "CSM (Compatibility Support Module)" option.
Change the value of "Launch CSM" to "Enabled" to enable the boot support in "LEGACY BIOS" mode.
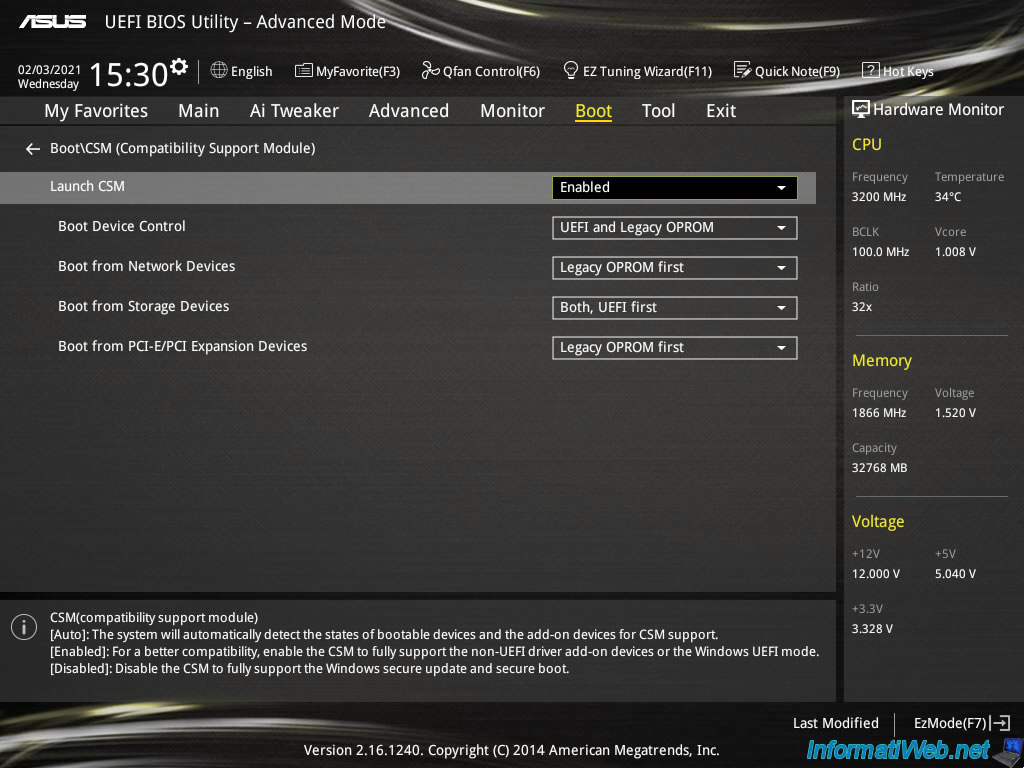
Once the "Launch CSM" option is activated, 4 additional options will appear :
- Boot Device Control : global boot option
- Boot from Network Devices : boot option for network devices
- Boot from Storage Devices : boot option for storage devices (hard disks, ...)
- Boot from PCI-E/PCI Expansion Devices : boot option for devices connected via a PCIe (PCI Express) or PCI expansion card
Select "Legacy OpROM only" for the "Boot Device Control" option so that your computer can only boot on your devices in "LEGACY BIOS" mode.
Then, select "Legacy OpROM first" for the other "Boot from ..." options (since the "Legacy OpROM only" value will not be available for these options).
Now that the "LEGACY BIOS" mode is enabled, you can disable the secure boot.
Indeed, secure boot is only possible when your computer is configured to boot in "UEFI" mode. Which is no longer the case here.
For this, click on : Secure Boot.
Then, select "OS Type : Other OS".
2.2. Change the boot order
Now that your computer is configured to boot in "LEGACY BIOS" mode, you need to change your BIOS boot order so that your computer :
- first boots on your CD/DVD drive (to start the Windows installation)
- then, on your hard drive or SSD
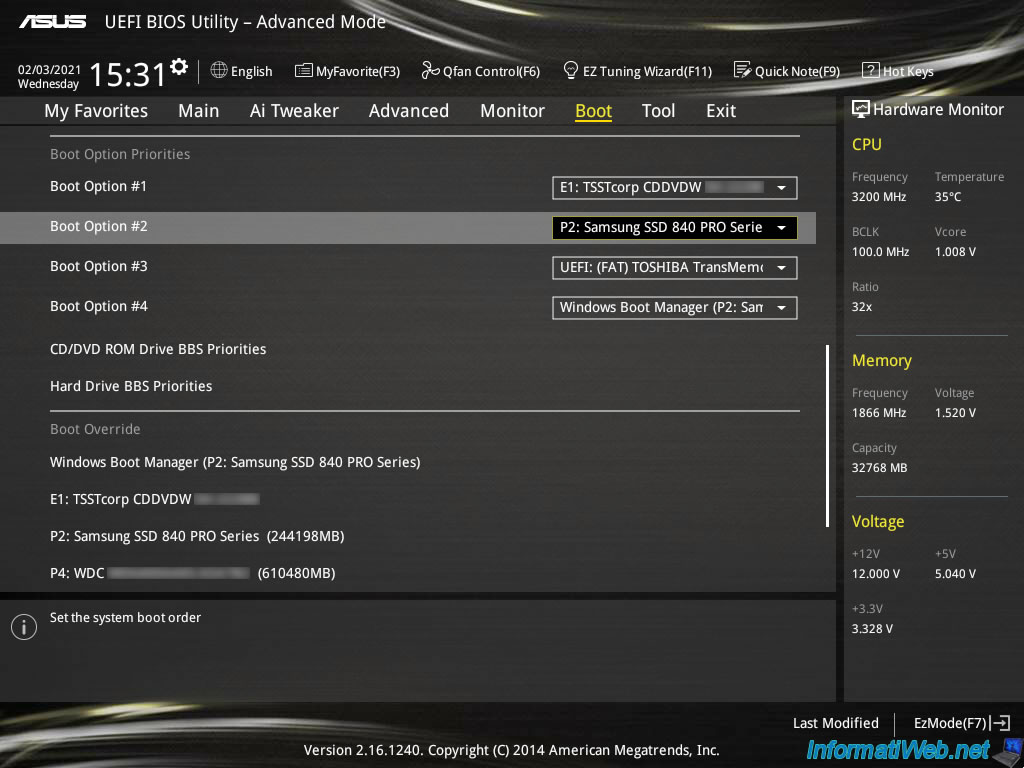
To do this, go back to the "Boot" tab of your BIOS and find the "Boot Option Priorities" section.
For the "Boot Option #1" line, select your CD/DVD drive.
For the "Boot Option #2" line, select your hard drive or SSD.
Finally, don't forget to save the changes made.
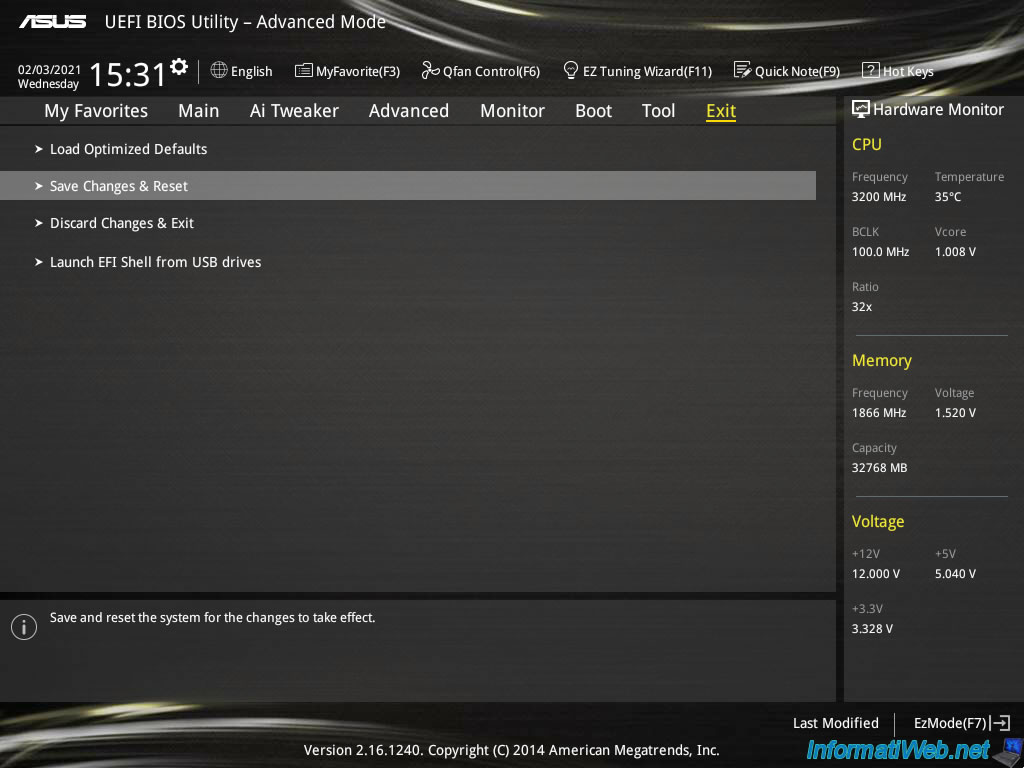
To do this, go to the "Exit" tab and click on "Save Changes & Reset".
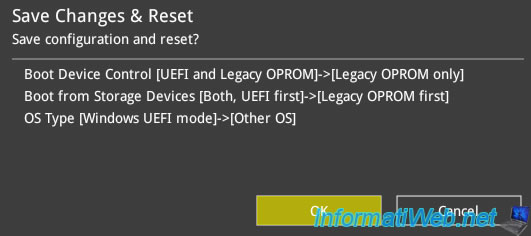
Confirm saving changes by clicking OK.
Note that this BIOS doesn't show all changes in this summary.
Share this tutorial
To see also
-
BIOS 12/7/2021
Asus X551C - Change the boot order of its BIOS
-

BIOS 1/11/2022
Enable the TPM 2.0 module on your motherboard
-

BIOS 12/21/2021
Fix the problem encountered when the BIOS battery is empty
-
BIOS 12/9/2024
Flash the BIOS of an Asus ROG motherboard and update Intel ME
You must be logged in to post a comment