- BIOS
- 04 January 2022 at 15:40 UTC
-

When you want to switch from a physical graphics card to a virtual machine using GPU passthrough, it's important that your computer doesn't initialize the graphics card that you want to pass to the virtual machine.
Most Intel processors integrate a graphics part called Intel HD Graphics.
In this case, just add a graphics card in your computer and configure the BIOS of your motherboard to use the internal graphics card (or in other words : the graphics part of your processor) as a priority.
Thus, the physical graphics card that you added is not initialized and can therefore be used by a virtual machine.
To do this, refer to our previous tutorial : Force the use of the internal graphics card (Onboard VGA).
At Intel, processors that don't have a graphics part (Intel HD Graphics) are :
- those whose model ends with the letter "F". This simply makes it possible to offer a cheaper price, given that there is no graphics part in this processor.
- those whose model ends with the letter "X" (or "XE"). This corresponds to high-end processors from Intel and are the most powerful processors from Intel.
Source : Intel® Boxed Desktop Processors with No Intel® Processor Graphics.
In our case, we have an Intel Core i9-10980XE processor which has 18 physical cores and can therefore provide 36 threads (36 logical cores) thanks to hyperthreading.
To use this processor, we needed a motherboard supporting this Intel processor family. Hence the use of an Asus WS X299 SAGE/10G motherboard.
In short, this means that in our case, our processor doesn't have a graphics part.
In our case, we want to switch our "MSI GeForce RTX 3070 VENTUS 3X OC" graphics card to a virtual machine thanks to the GPU passthrough.
However, since our processor doesn't have a graphics part (Intel HD Graphics), we can't use the graphics port (VGA, HDMI, ...) of our motherboard.
The only solution in this case is to buy an additional low-end graphics card. Indeed, the goal is simply to have a display to access the BIOS of your motherboard and the console of your server (whether it is VMware ESXi, Citrix XenServer or any other hypervisor supporting the GPU passthrough).
In our case, we bought the cheapest graphics card from a well-known brand that provided the connectivity supported by our screen.
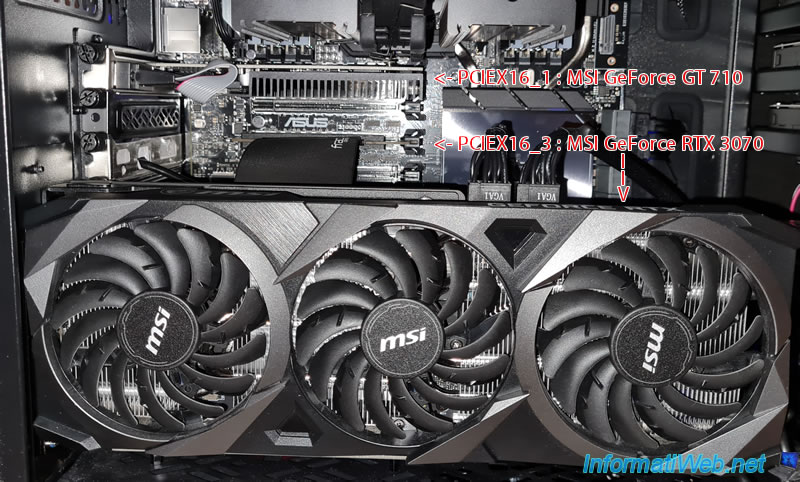
In this case, it's the "MSI GeForce GT 710 1GD3H LP" graphics card in the image below.
When your processor doesn't have a graphics part and you plug several graphics cards into your computer, the graphics card that will be initialized by default will be the one connected to the 1st PCIe port (starting from the top).
As you can see, we have 2 graphics cards in our computer :
- the low-end graphics card "MSI GeForce GT 710 1GD3H LP" used only to have a display for our server.
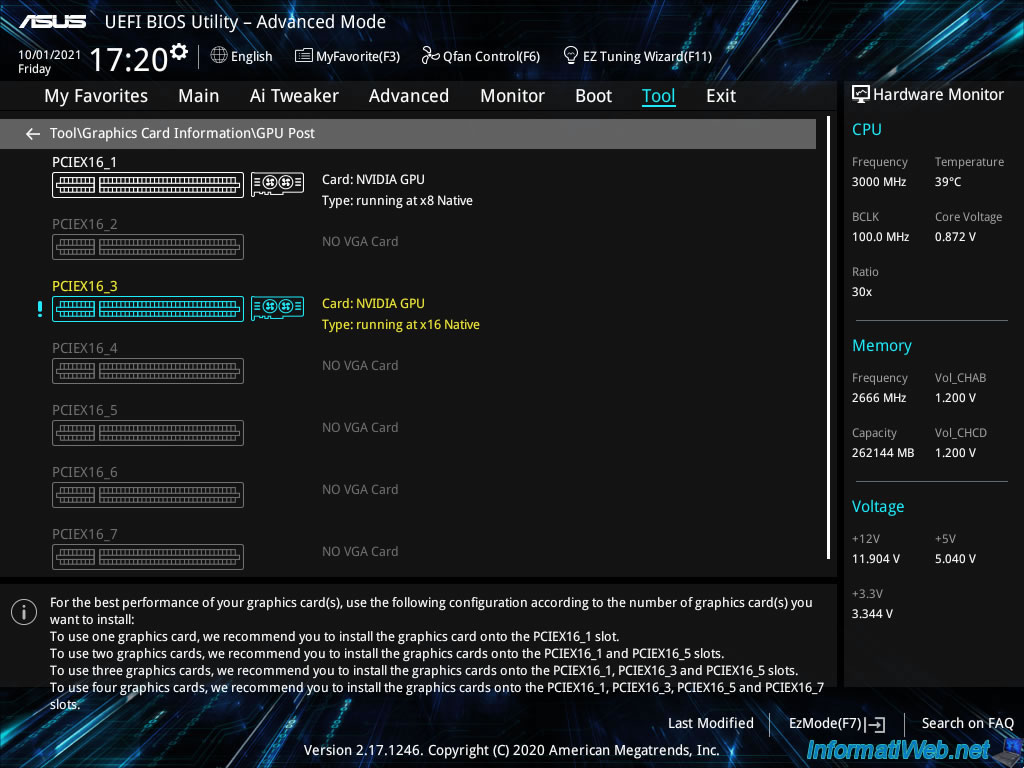
This is plugged into the 1st PCIe slot named "PCIEX16_1" on our motherboard and in its BIOS. - the high-end graphics card "MSI GeForce RTX 3070 VENTUS 3X OC" intended for the virtual machine via the GPU passthrough.
This is plugged into the 3rd PCIe slot named "PCIEX16_3" on our motherboard and in its BIOS.
Note that in our case, the RTX 3070 graphics card is installed in vertical mode and the corresponding PCIe cable therefore connects it to the "PCIEX16_3" port as you can see in the image below.
For the BIOS of our motherboard, it's therefore like this graphics card was physically connected to the "PCIEX16_3" port of our motherboard.
Once the graphics cards are connected, connect your screen to the graphics card plugged into the 1st PCIe port.
In our case, our screen is therefore connected to our "MSI GeForce GT 710 1GD3H LP" graphics card connected to the "PCIEX16_1" PCIe port.
Start your computer and your motherboard logo appears on the screen.
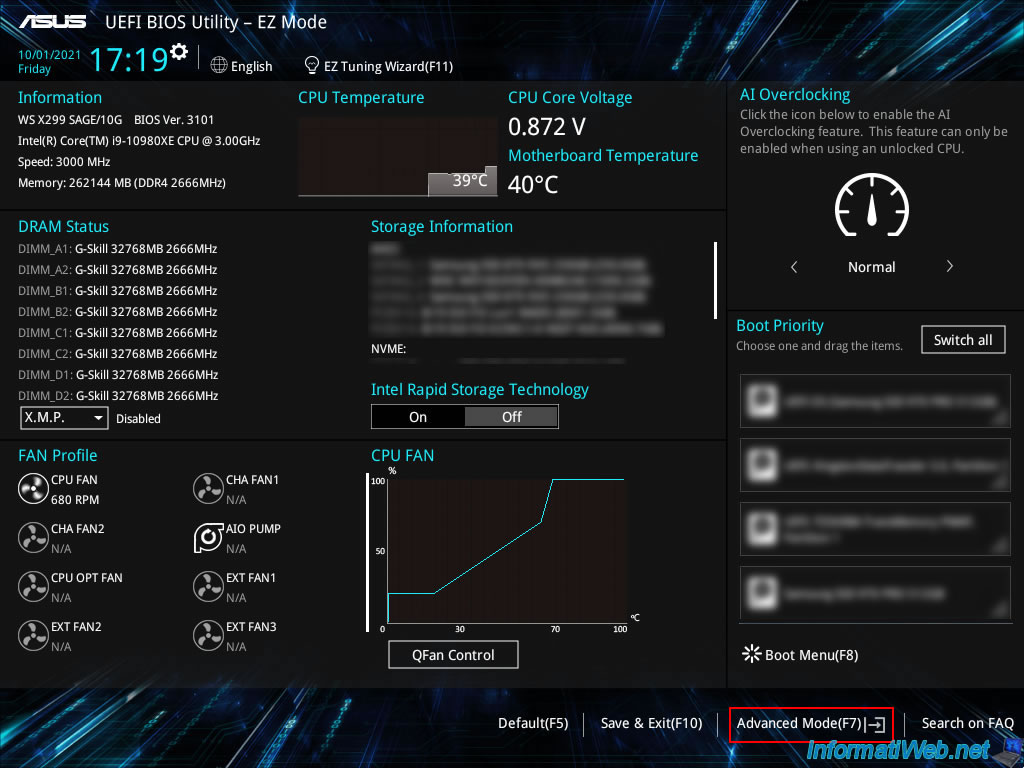
Enter the BIOS of your motherboard by pressing the DEL key on your keyboard several times when starting your computer, then click on : Advanced Mode (F7).
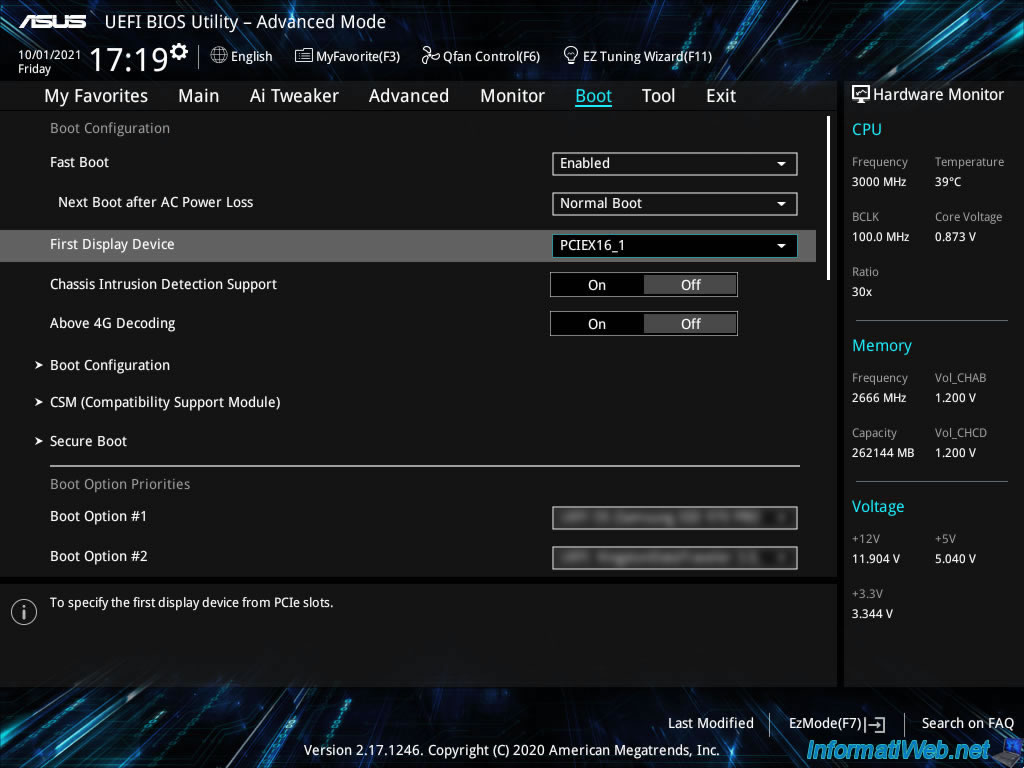
To choose which graphics card should be initialized by default by your motherboard, you must go to the "Boot" tab and locate the "First Display Device" option.
As you can see, by default your motherboard will use the graphics card connected to the 1st PCIe port on your motherboard. Namely in our case: PCIEX16_1.
It's on this graphics card that you will have a display to access the BIOS of your motherboard and to access the console of your favorite hypervisor.
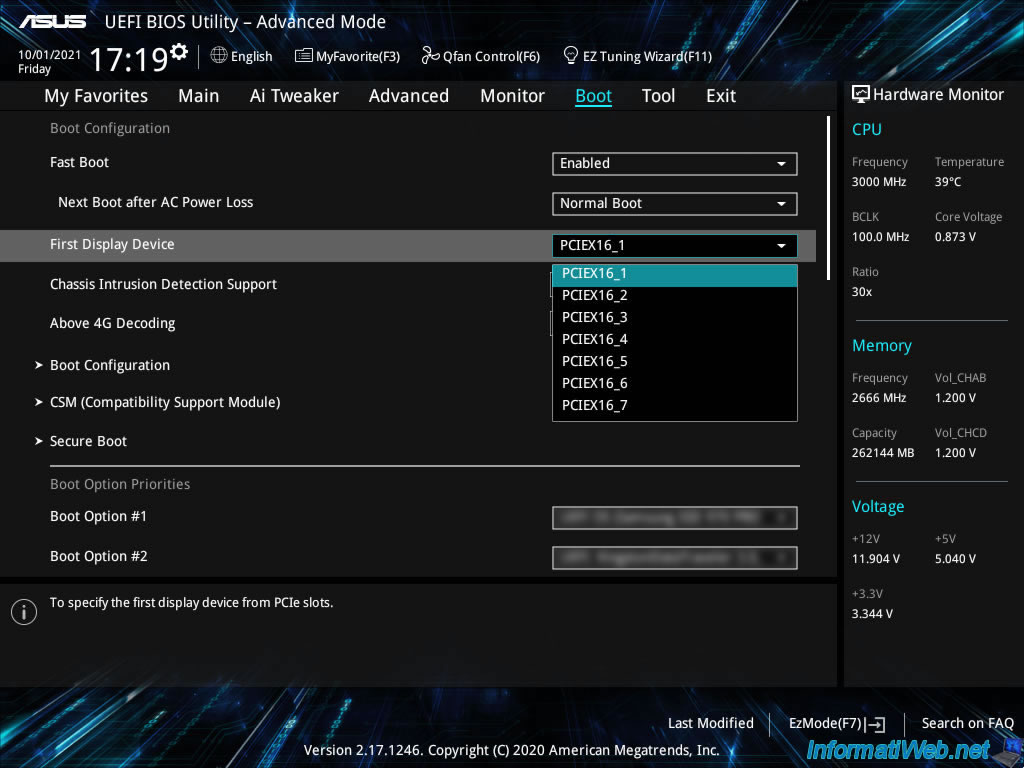
To have your motherboard use another graphics card by default, choose the name of the PCIe port to which it's connected.
This means that the graphics card selected here will be initialized by default.
This also means that the graphics card selected here can't be passed to a virtual machine.
In the BIOS of our Asus WS X299 SAGE/10G motherboard, we have the possibility to obtain information about the graphics cards plugged into our computer.
To do this, go to the "Tool" tab and choose the "Graphics Card Information" option.
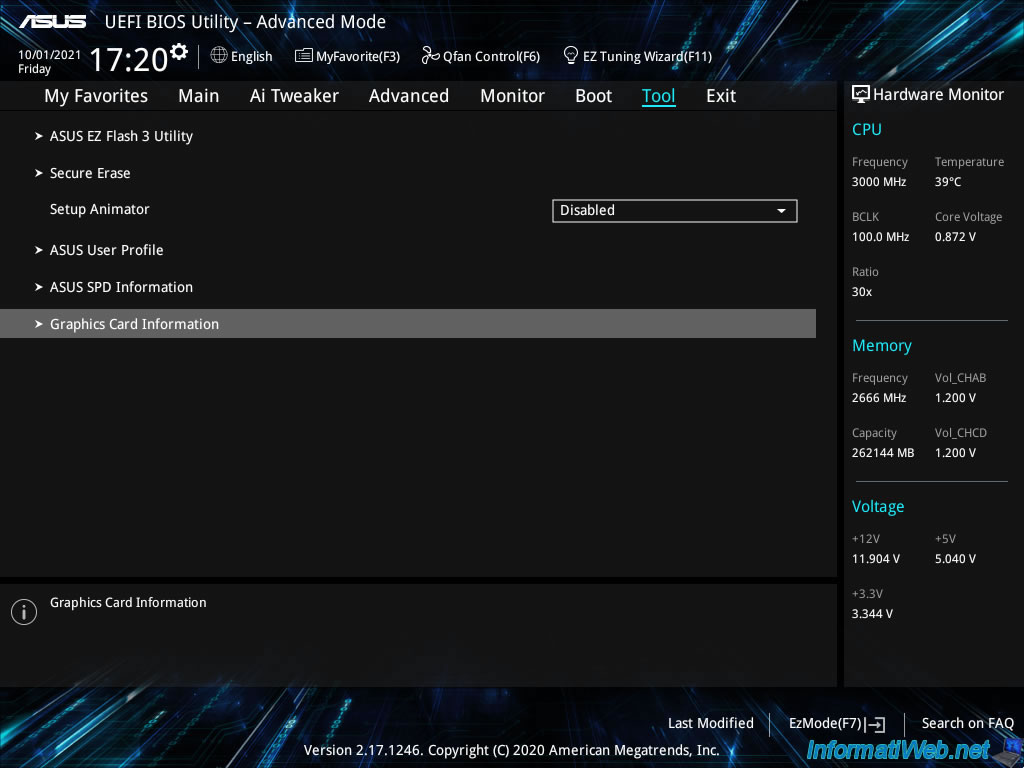
Then, click on : GPU Post.
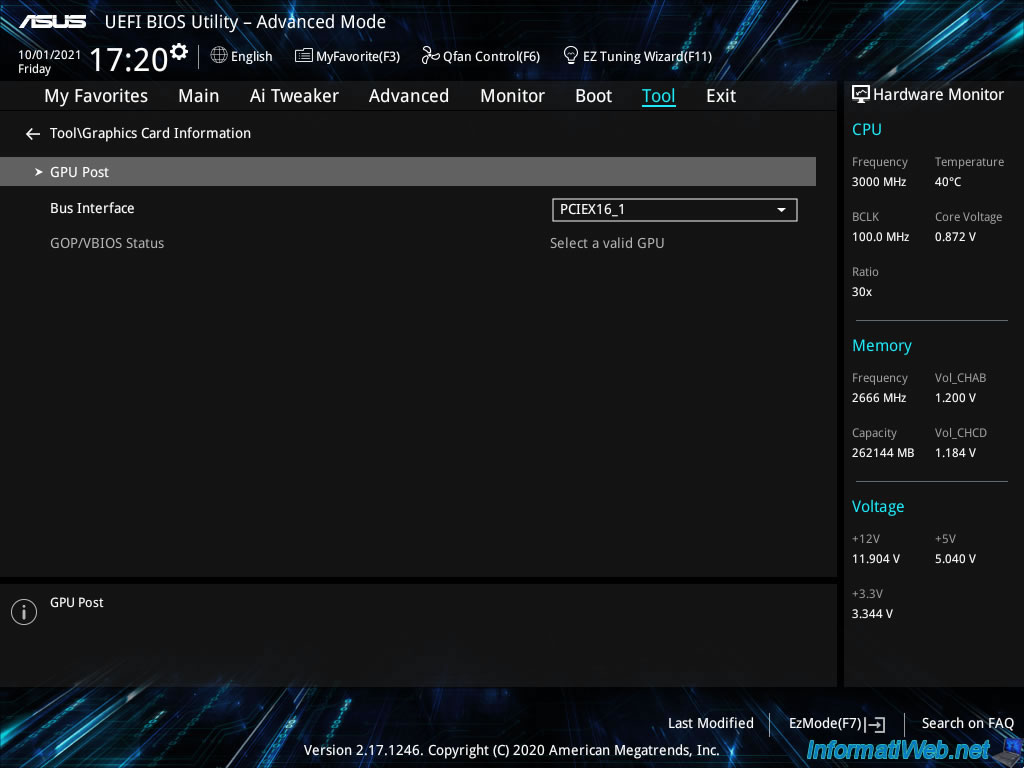
Here, the BIOS of your Asus motherboard tells you which ports your graphics cards are connected to.
By the way, note that Asus tells you at the bottom of the screen on which PCIe ports you should connect your graphics cards to get better performance with them when you connect more than one.
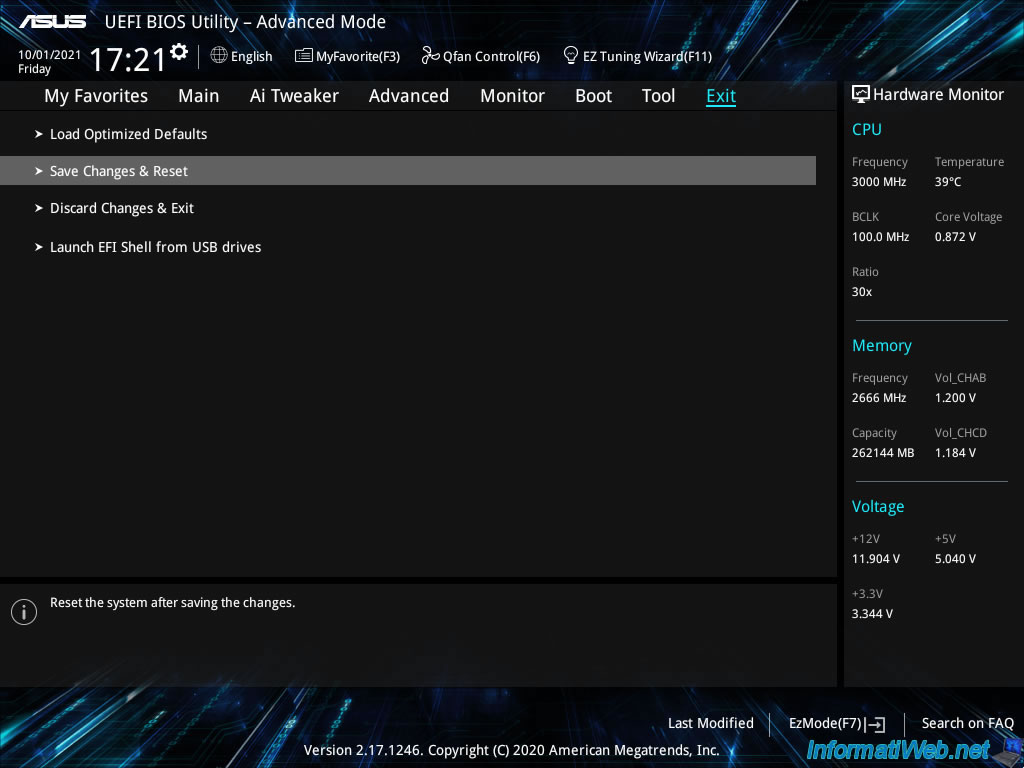
Once you have chosen the graphics card to initialize by default using the "First Display Device" option available in the "Boot" tab, don't forget to save the changes made.
To do this, go to the "Exit" tab and click on : Save Changes & Reset.
Then, click on OK.

Share this tutorial
To see also
-

BIOS 3/19/2016
Asus - The computer doesn't boot - DRAM_LED on
-

BIOS 1/26/2013
Change the BIOS boot priority
-
BIOS 1/2/2024
Flash the BIOS of an Asus ROG motherboard (via Asus EZ Flash 3)
-
BIOS 11/9/2021
Take a printscreen in a recent Asus BIOS

You must be logged in to post a comment