- BIOS
- 29 January 2016 at 13:45 UTC
-

Important :
- The flash BIOS may make your motherboard permanently unusable if the update is interrupted or if the downloaded file is corrupt.
- There is no need to update the BIOS of your motherboard if your computer is working properly. The motherboard BIOS update is primarily used to correct some problems of stability or compatibility problems (especially with the new RAM sticks).
- It's recommended to flash the BIOS of your motherboard by using the function provided in the current BIOS, and it is not recommended to do it through programs running on Windows or other operating systems.
To update the BIOS of an Asus motherboard with an UEFI BIOS like ours (see point 2 of the tutorial), here is the procedure.
Note : the procedure is not the same for all motherboards because they are all different.
- Download the latest update available on the manufacturer's site
- Flash (update) the BIOS of your Asus motherboard
- Full video of the BIOS flash
1. Download the latest update available on the manufacturer's site
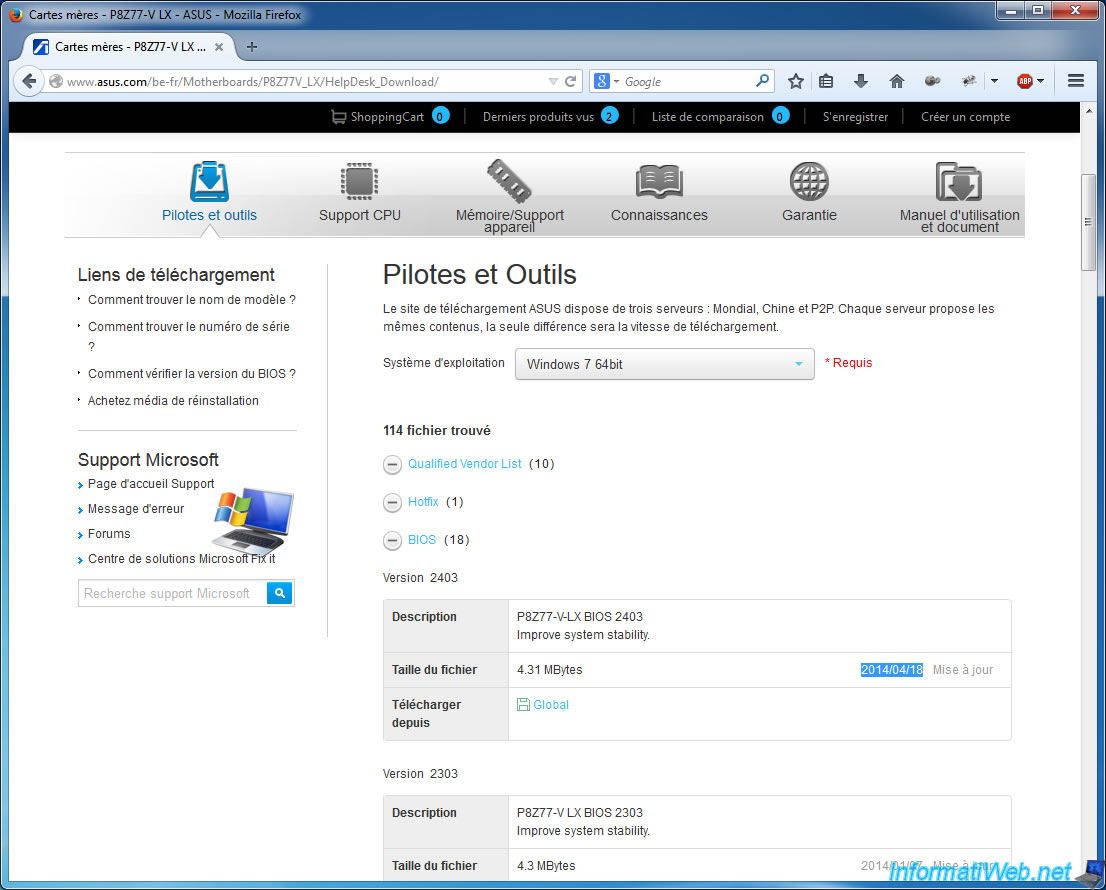
To update the BIOS of your motherboard, you only need to go on your motherboard manufacturer's website.
Important : never go to another website than that of the manufacturer at the risk of making your motherboard permanently inoperable.
Look for the model of your motherboard on their website and go to the "Drivers" or "Downloads" section according to the manufacturers. Then, select your operating system.
You will find a BIOS section with the different updates available.
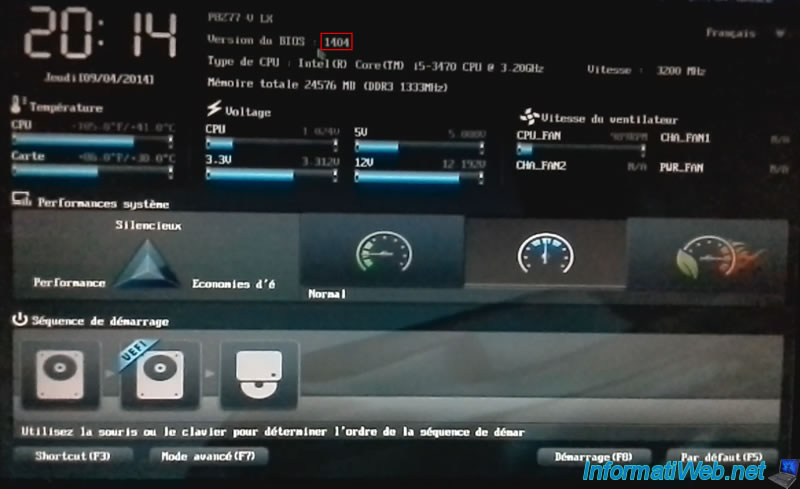
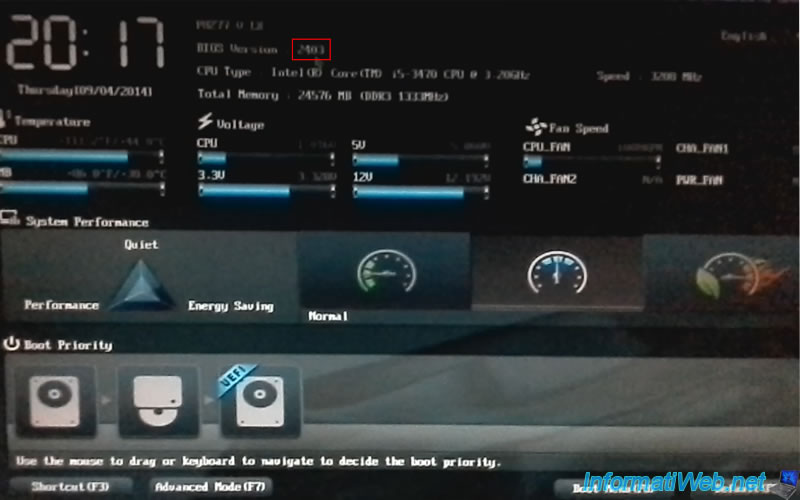
In our case, our BIOS is the 1404 version (see point 2 of the tutorial) and the Asus site proposes the 2403 version as the last version update at this time.
So, we download the 2403 version that was released on 04/18/2014.
Note : Images of this tutorial are from the time when we did this BIOS update of our old motherboard.
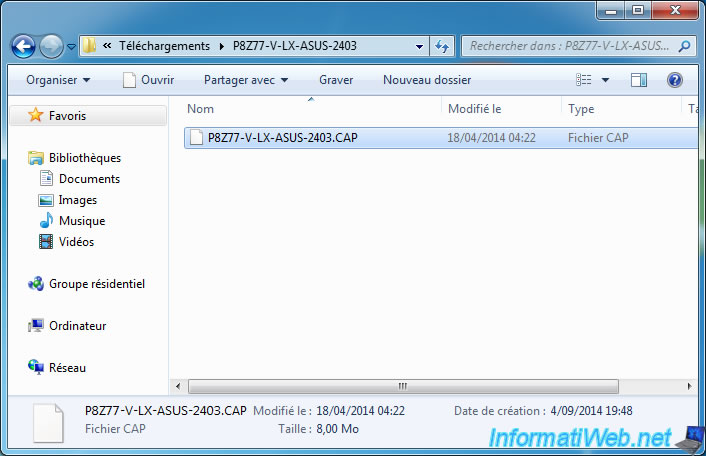
In our case, Asus provides us a zip file.
Unzip this zip file and go to the folder that appears.

In this folder, you will find the BIOS.
This file can have different extensions : rom, cap, bin, ...
It depends of manufacturers and motherboard models, but the principle is the same, whatever the file extension.
In our case, our BIOS has the ".CAP" extension.
We copy the file on an USB key.
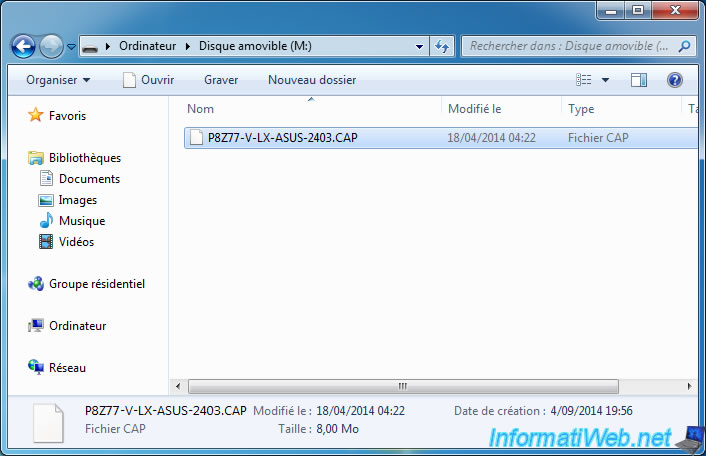
And we reboot the PC to flash the BIOS using ASUS EZ Flash 2.
2. Flash (update) the BIOS of your Asus motherboard
At startup, before Windows starts, press several times on the DEL key of your keyboard.
As you can see, now, our BIOS version is 1404.
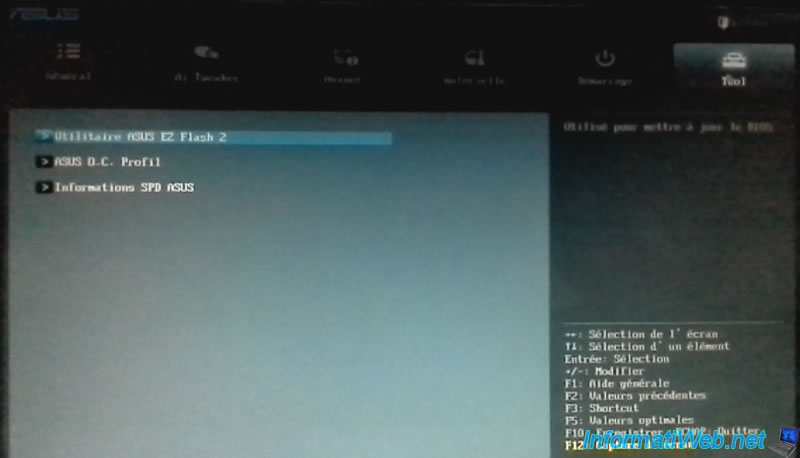
To flash (update) the BIOS of your motherboard, go to the "Tool" menu and select ASUS EZ Flash 2 Utility.
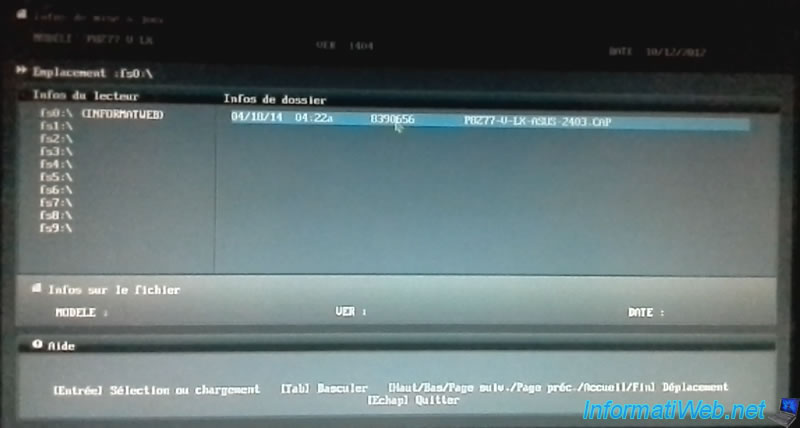
Select your USB key in the left column. In our case, we had named it : "INFORMATWEB".
On the right side you will see the BIOS file that you copied on your USB key.
In our case, the file "P8Z77-V-LX-ASUS-2403.CAP". Click on it with the mouse.
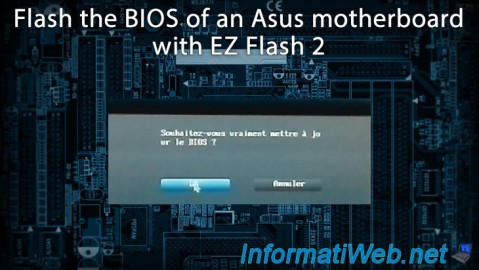
Asus asks if you want to read this file. Click OK.

And if you really want to update the BIOS of your motherboard. Click OK.

In theory, all newer motherboards check the BIOS file to use before updating the BIOS of the motherboard.
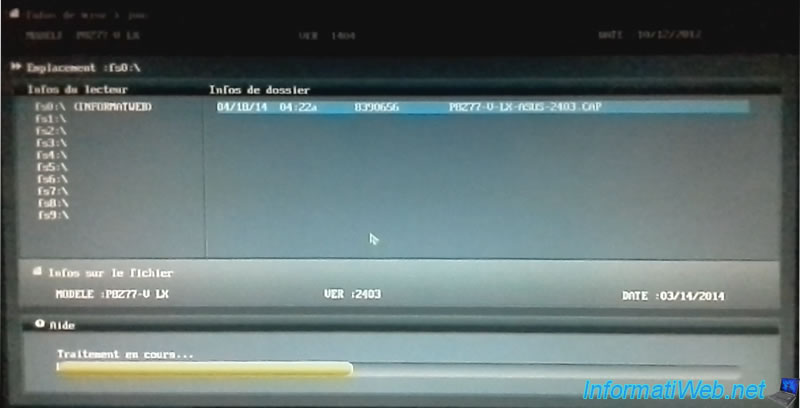
ASUS EZ Flash 2 updates the BIOS of the motherboard.
Note : With some motherboards, you will see that the BIOS is first erased and then updated with the file used.
Once the update is complete, the message "Update Successfully! System will be reset!" will be displayed.
Click OK.

The computer turns off abruptly and turned on again automatically after 10-20 seconds. This is quite normal so do not touch anything and wait.
After this time, the computer will turn on itself (as you can see in our video).
The logo of the motherboard is displayed.
![]()
And an error "MBR Error 1" may be displayed.
Indeed, the BIOS update has caused a loss of your BIOS setup (which is normal).

Restart your computer, and press several times on the DEL key to enter into the BIOS of your motherboard.
![]()
As you can see, now, the BIOS version is 2403.
To resolve the problem of this error "MBR Error 1", simply reconfigure the BIOS boot order like this : Change the BIOS boot priority
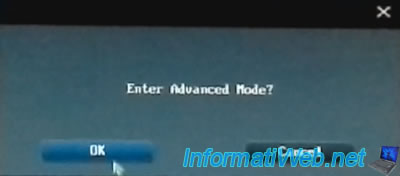
To change the boot order, go to the Advanced mode by clicking on the "Advanced Mode (F7)" button at the bottom of the screen.
Click OK.
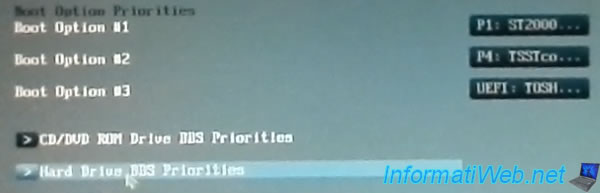
In the Boot tab, scroll down with the mouse wheel and you'll find the "Boot Option Priorities" section.
As you can see, you have :
- 3 boot options (Boot Option #1, Boot Option #2, ...)
- boot priorities for CD/DVD drives (CD/DVD ROM Drive BBS Priorities)
- boot priorities for hard drives and SSD (Hard Drive BBS Priorities)
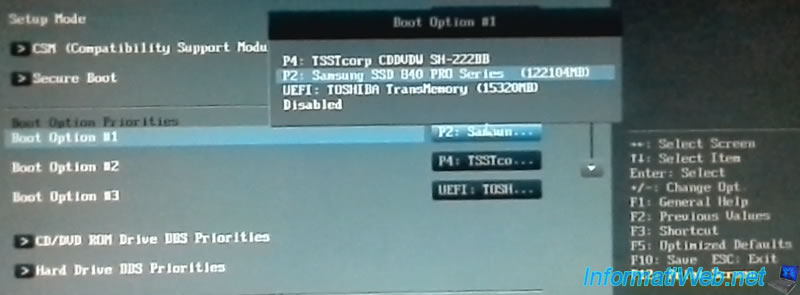
Because we have several hard disks in our computer, we click on "Hard Drive BBS Priorities".
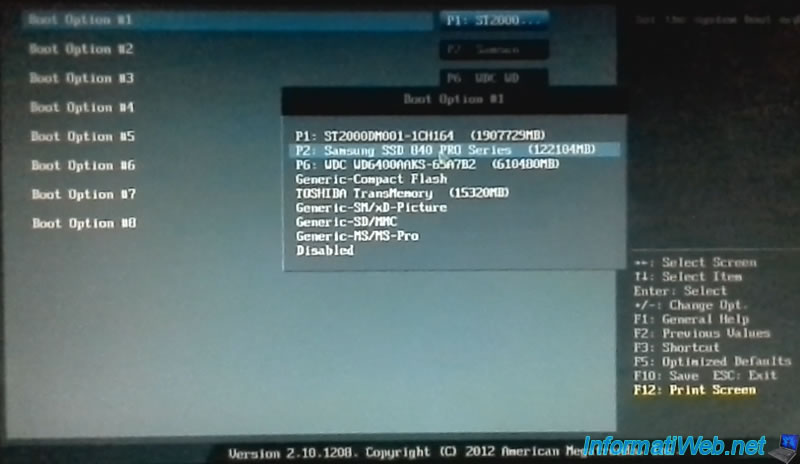
We click on the value of the line "Boot Option # 1" and we select our SSD "Samsung SSD 840 PRO Series" on which Windows is installed.
Then, the order of the other hard disks is not important.
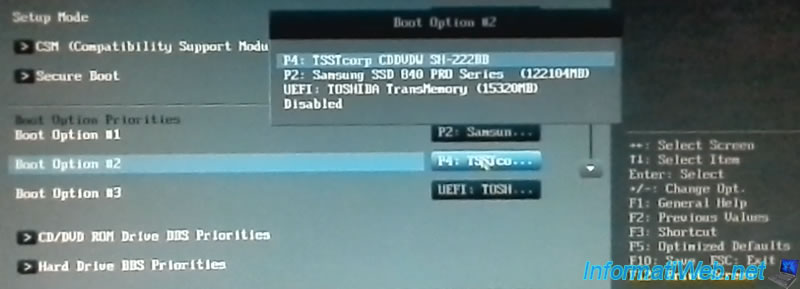
Return to the previous menu, and set the global boot order :
- Boot Option #1 : the hard drive that you have set as Boot Option #1 previously. In our case, our Samsung SSD ...
- Boot Option #2 : the CD/DVD drive. In our case : TSSTcorp CDDVDW SH-222BB
- Boot Option #3 : whatever you want. A floppy drive if you have one, or let the indicated option. You can also set this option to Disabled (off) if desired.
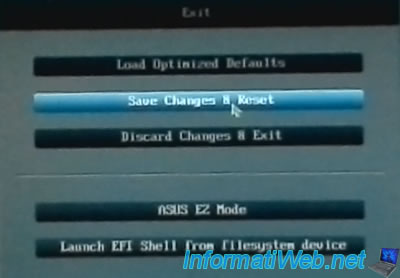
Finally, click on the "Exit" button on the top right, then click "Save Changes & Reset".
Keyboard shortcut : F10 (Save).
Click Yes to confirm.
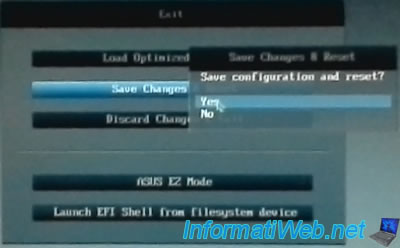
The computer restarts automatically.
![]()
And Windows will start properly.

3. Full video of the BIOS flash
Mettre à jour le BIOS de sa carte mère Asus via EZ Flash 2 from InformatiWeb on Vimeo.
Share this tutorial
To see also
-

BIOS 1/4/2022
Change the graphics card (GPU) initialized by default
-
BIOS 8/6/2015
Create and configure a RAID 0, 1, 5, ... (Intel)
-
BIOS 2/26/2013
Enable virtualization (Intel VT-x / AMD-V)
-

BIOS 12/21/2021
Fix the problem encountered when the BIOS battery is empty
You must be logged in to post a comment