- BIOS
- 21 December 2021 at 15:19 UTC
-

If your computer (and more specifically its motherboard) is several years old, the CR2032 battery on it may be empty.
This will pose a problem once you have unplugged your computer from the power outlet.
Indeed, when you physically unplug your computer (to protect it from a thunderstorm, for example), this battery allows you to keep the changes you have made in the BIOS of your motherboard.
To better understand how the BIOS or UEFI firmware of your motherboard works, refer to our tutorial : What are the differences between a BIOS and an UEFI firmware ?
1. Encountered problem
You start your computer as usual.
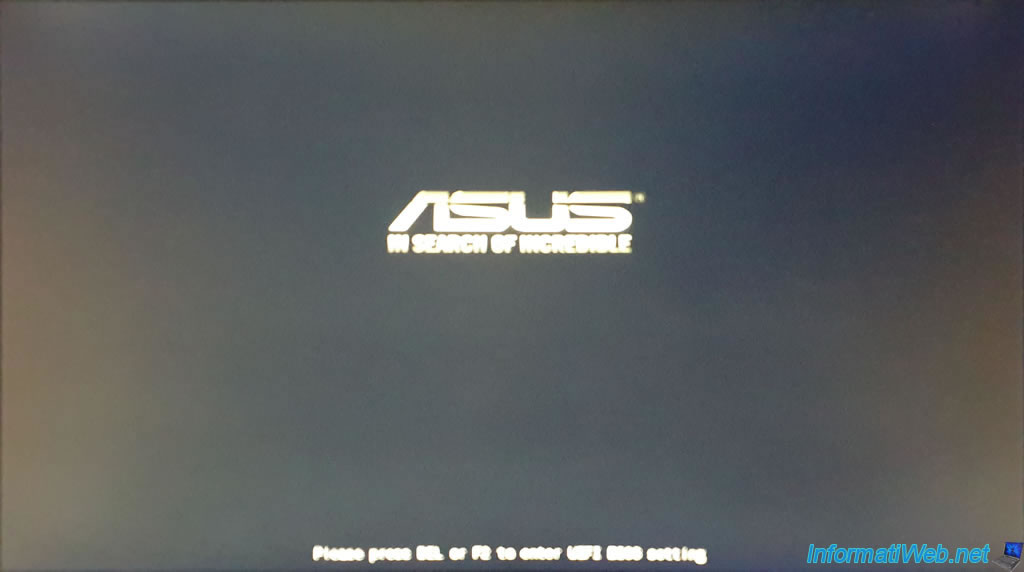
Except that the computer doesn't start on your usual operating system (Windows, Linux, ...).
In our case, our computer blocks by displaying the "American Megatrends" logo (which corresponds to the manufacturer of the BIOS / UEFI firmware located in our motherboard).
Then, at the bottom of the screen, our computer asks us to press the "F1" key to configure our computer's BIOS.
Nothing complicated, just press the F1 key on your keyboard.
Plain Text
AMIBIOS(C)2014 American Megatrends, Inc.
...
Please enter setup to recover BIOS setting.
Press F1 to Run SETUP.
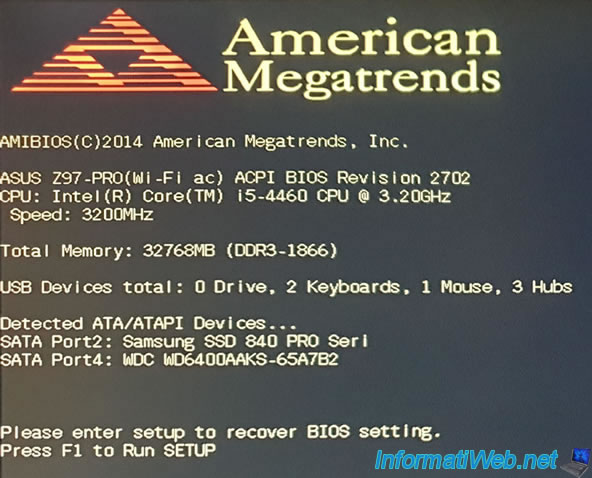
Depending on the motherboard of your computer, the error message may be different, but the principle remains the same.
Enter your motherboard BIOS to fix the problem.
Plain Text
CMOS checksum error - Default loaded.
Press F1 to continue, DEL to enter SETUP.
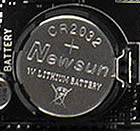
The battery present on your motherboard looks like this and as you can see its model is : CR2032.

2. BIOS or UEFI firmware setup
To solve the problem, the easiest way is to enter the BIOS (using the key specified in the error message displayed previously), then to exit it while saving the changes (even if you don't make any).
In this case, your computer will use the default settings defined by the manufacturer and the error message will no longer appear.
Note that the date / time of your computer is no longer correct since it's kept in real time by your computer thanks to the electricity coming from the power outlet or from the CR2032 battery when your computer is not plugged into the power outlet.
Without electricity, this value is therefore lost.
Important : remember to buy a new CR2032 battery (whose voltage is 3V) to replace the empty one on your motherboard.
Otherwise, the problem will reappear if you unplug your computer from the power outlet again.
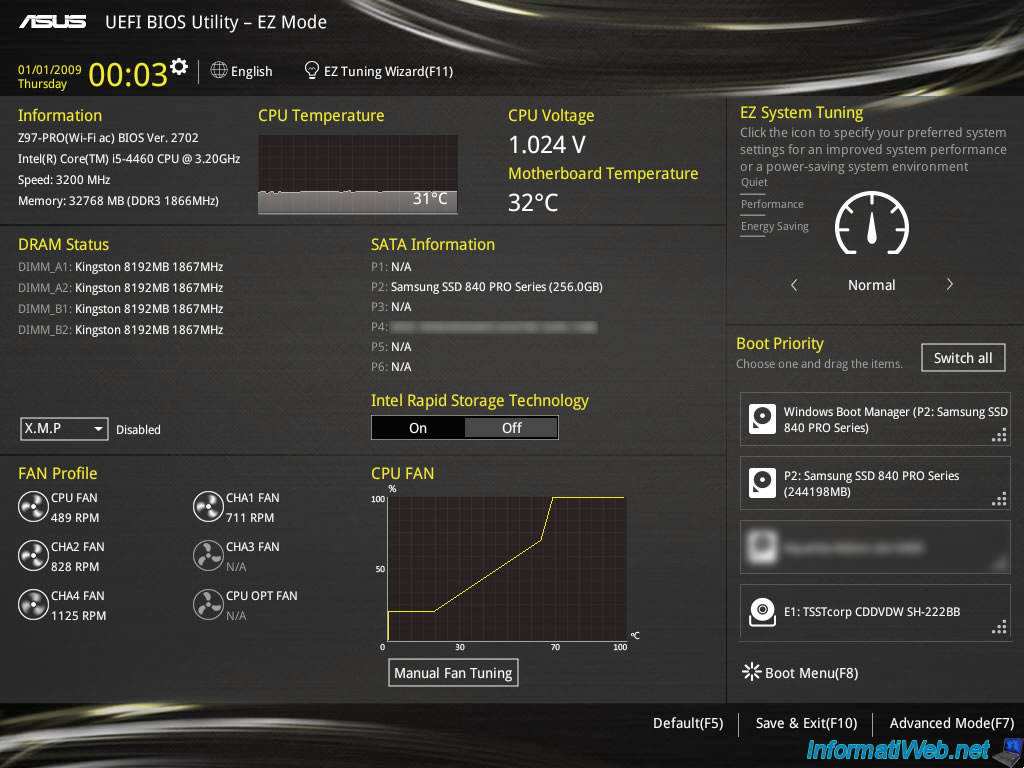
1st possibility : don't change anything in the BIOS and exit by saving the changes (even if there are none).
In the case of this Asus BIOS, you must click on "Save & Exit (F10)", then on : OK.
Note : no need to set the time if Windows is installed on your computer.
Indeed, by default, all Windows computers are configured to automatically synchronize their clock via the Internet from a time server managed by Microsoft.

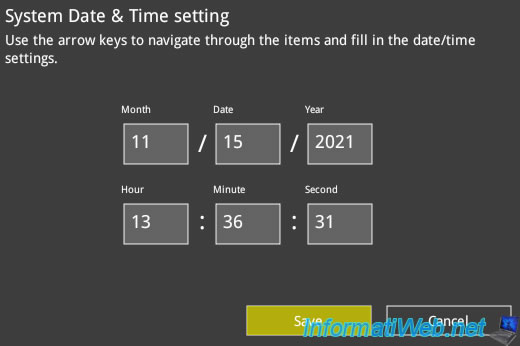
However, in the case of this Asus BIOS, you can change the date / time of your computer by clicking on the gear icon present just next to the clock at the top left of the screen.
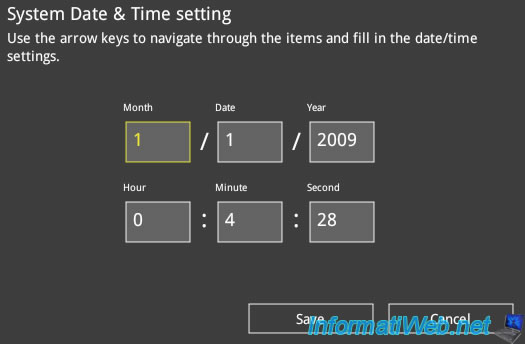
Once the date and time have been set, click on : Save.
In some cases, you may need to make some changes to get your computer back to work as before.
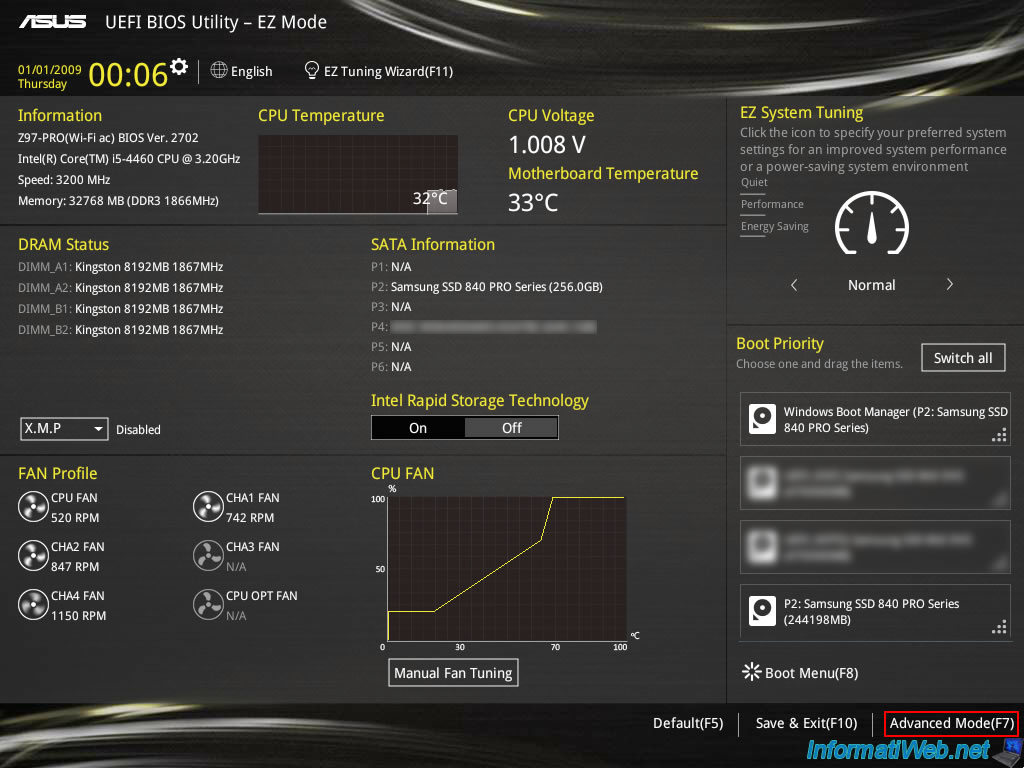
To do this, go to the advanced mode of your BIOS / UEFI firmware.
For this Asus BIOS, click on : Advanced Mode (F7).
The 1st thing to configure is the boot order.
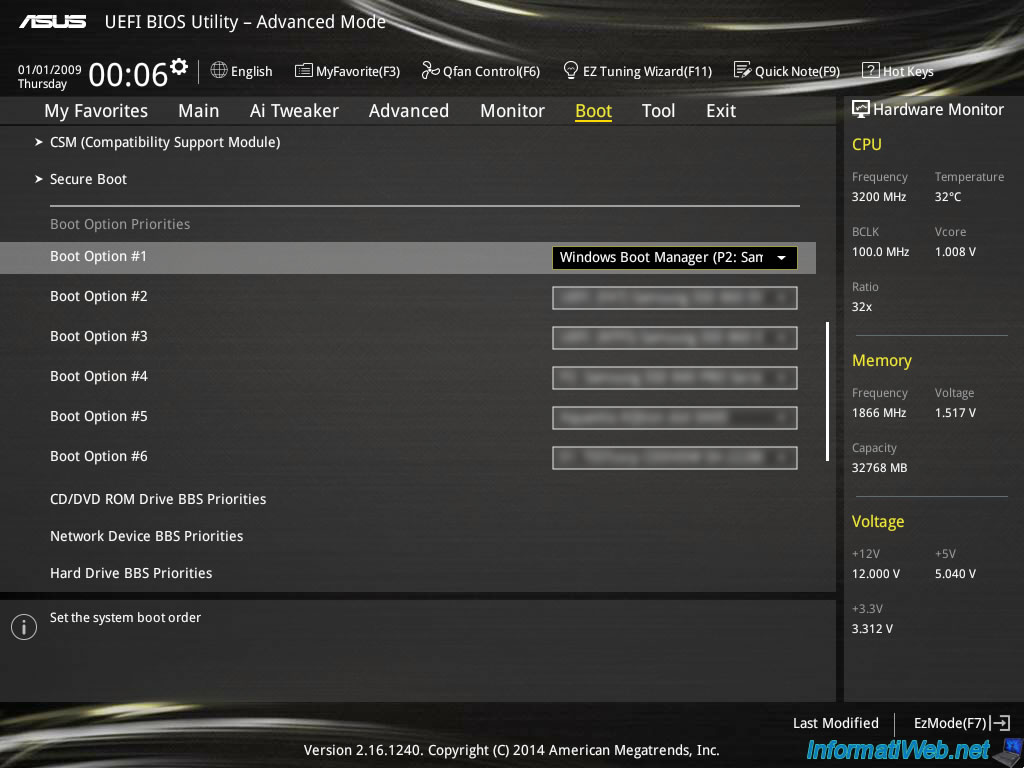
To do this, go to the "Boot" tab and locate the "Boot Option Priorities" section.
Select the hard drive or SSD where Windows is installed at the line : Boot Option #1.
If it's a recent version of Windows, you will surely spot it with its name : Windows Boot Manager ...
If you have a different BIOS, see our "Change the BIOS boot priority" tutorial.
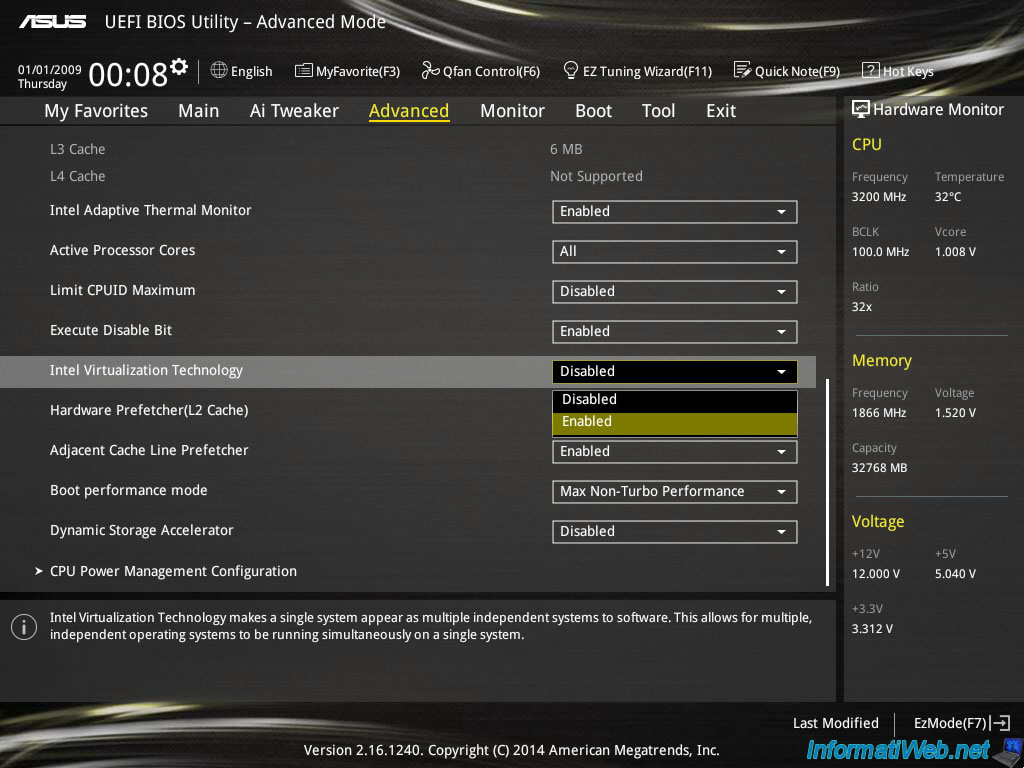
If you are using a virtualization solution, such as VirtualBox or VMware Workstation, remember to enable again the available virtualization features (if any) in your BIOS / UEFI firmware :
- processor (CPU) virtualization : Enable virtualization (Intel VT-x / AMD-V)
- I/O virtualization : Enable IOMMU or VT-d in your BIOS
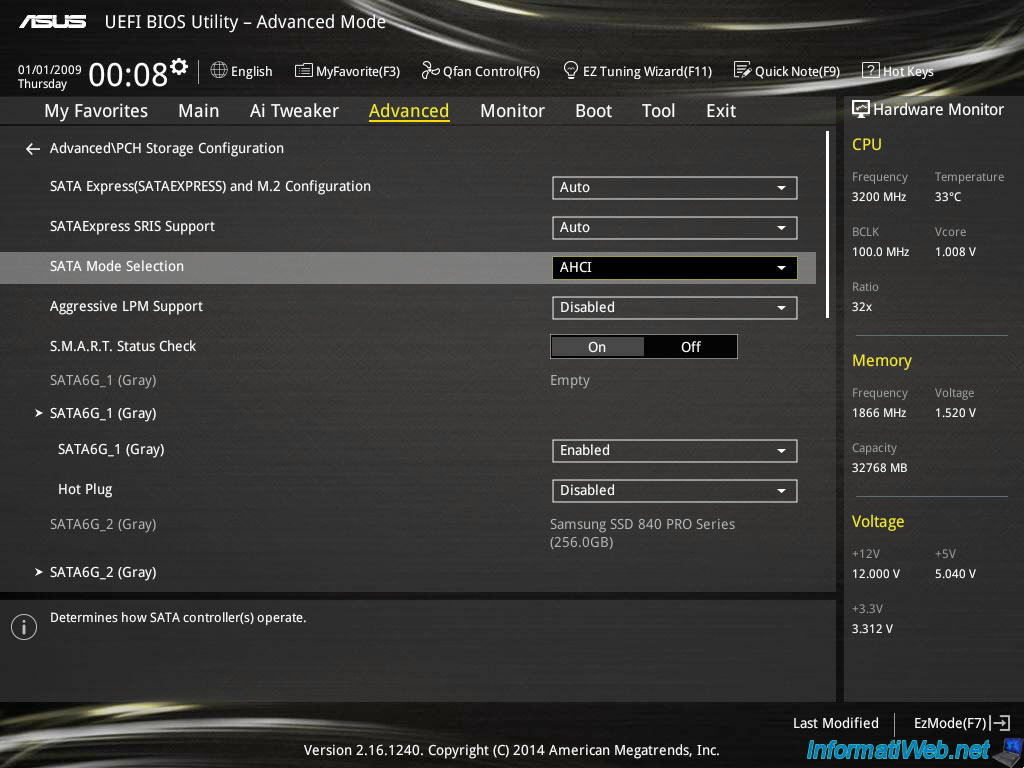
In order for your computer to start up again, it's important to reuse the controller mode that was used when you installed Windows.
To do this, refer to our tutorial : Change the hard disk controller mode.
Finally, don't forget to save the changes made.
Note : it's possible that all the modifications made don't appear here. However, they will all be saved.

3. Starting up the computer
Once the changes are saved, your computer will restart and if all goes well, the operating system installed on your computer will appear.
In our case, it's Windows 8.1.
As you can see, our computer clock has been correctly set (although we had not made the change in BIOS).
![]()
If this is not the case for you, right click on this clock (displayed in the Windows task bar) and click on : Adjust date/time.
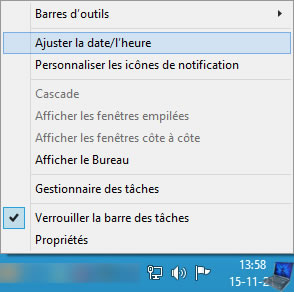
Then, go to the "Internet Time" tab and click on the "Change settings" button.
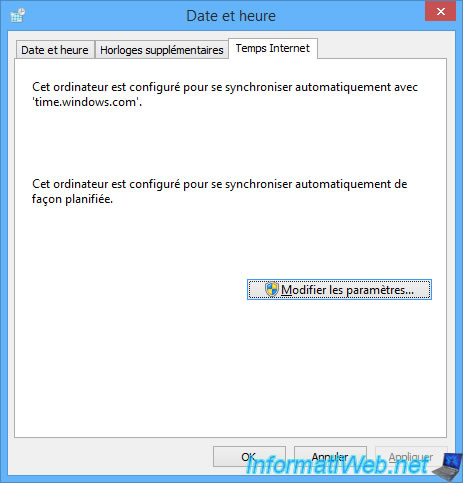
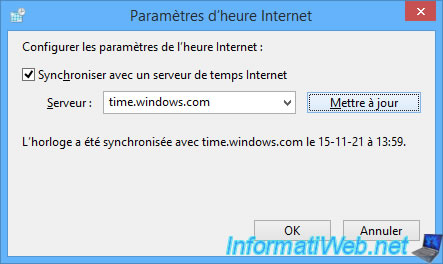
As you can see, Windows is configured by default to synchronize your computer clock with Microsoft's "time.windows.com" time server.
If necessary, click on the "Update" button to force synchronization of the clock.
Important : an incorrect date / time can cause various problems. Including the blocking of some sites since the sites available in "https://" are secured with a certificate which is only valid from one specific date to another.
If your clock is not properly set, you might have this kind of problem.
Share this tutorial
To see also
-
BIOS 10/27/2021
Automatically enable the numeric lock (num lock) when your computer starts up
-

BIOS 11/3/2021
Check if your BIOS detects your hard drives or SSDs
-
BIOS 8/23/2013
Scheduled boot by RTC event (or alarm)
-

BIOS 11/16/2021
What are the differences between a BIOS and an UEFI firmware ?

You must be logged in to post a comment