- Web
- 12 January 2014 at 20:13 UTC
-

If you purchased a VPS or you installed an Ubuntu server version, you will soon realize that it is not practical when you have to change a lot of configuration files on the command line. And the console is still less suitable when you host a website.
We will use the Eclipse program that is compatible with Windows, Mac and Linux (32 and 64 Bit) because it can work on a remote server.
In summary, every time Eclipse will download the file for you to edit and when you save your file, the modified file will be automatically sent to the server. It also allows you to work as a team on the same website. What is more convenient in some cases.
Note : This program is coded in Java, you must install the 32 or 64 bits of Java following the Eclipse version you downloaded.
- Install the "Remote System Explorer" program
- Install the package on the desired programming language
- Connection to the remote server with "Remote System Explorer"
- Enabling PHP perspective
- Create new remote project
1. Install the "Remote System Explorer" program
First, go to the "Help -> Install New Software" menu next to "Work with", select the line "Kepler - https:// ...".
Then type "Remote" in the box just below (where the text "type filter text" is displayed in gray).
Then check the boxes "Remote System Explorer End-User Runtime" and "Remote System Explorer User Actions" in the category "General Purpose Tools".
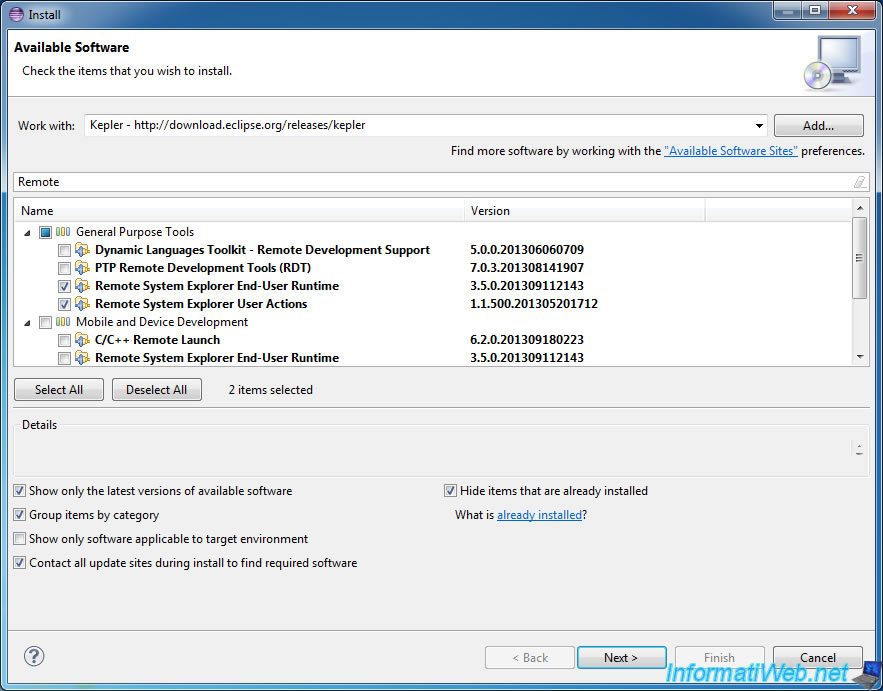
Then click "Next", accept the proposed license agreement and click "Finish".
Then restart Eclipse when prompted.

2. Install the package on the desired programming language
If the server you are connecting to host a web server, it is also interesting to install the package on the programming language you use for your website. For this, we will in this case install PHP in Eclipse.
To do this, return to the "Help -> Install New Software" menu. Reselect the line "Kepler ...".
And this time type "PHP" in the box below.
Then select the package "PHP Development Tools (PDT)" from the category "Programming Languages​​".
Then click "Next", and the same thing all the time for the rest.
3. Connection to the remote server with "Remote System Explorer"
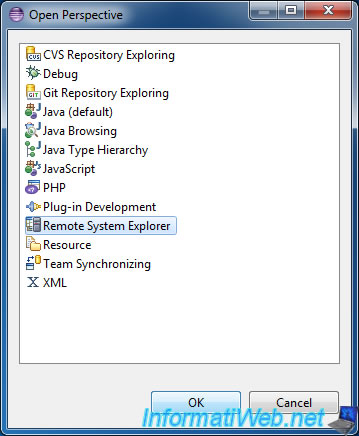
To use the "Remote System Explorer" program, you must first display the perspective of the same name.
To do this, go to the menu "Windows -> Open Perspective -> Other."
Then select the "Remote System Explorer" from the list that appears.
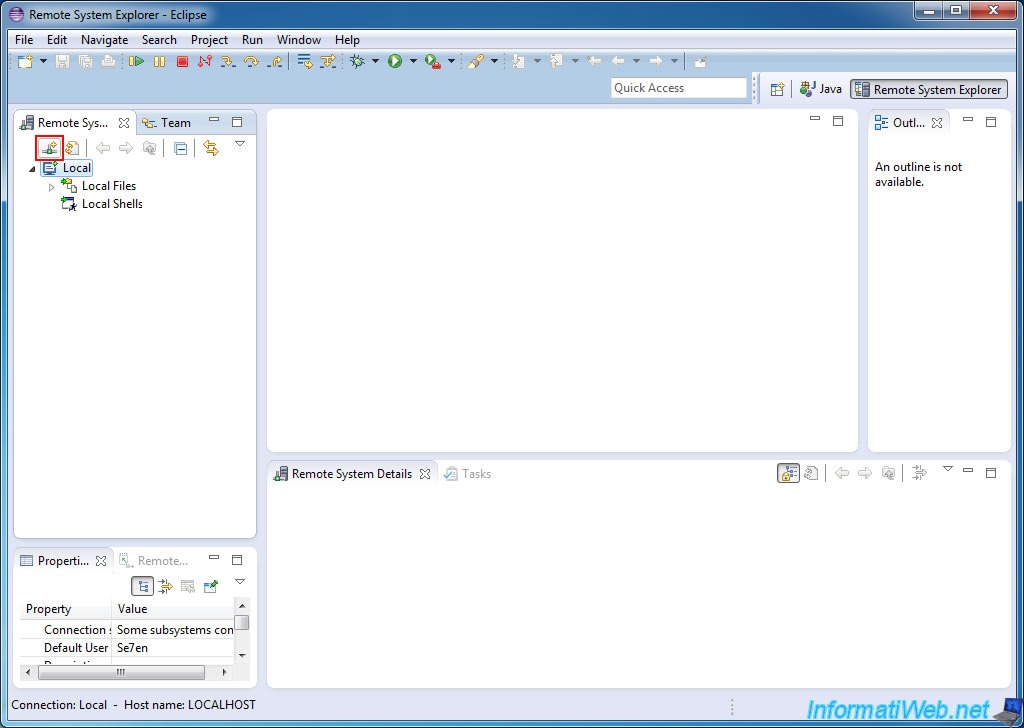
In the left column, click the first icon on the left. Circled in red in the image.
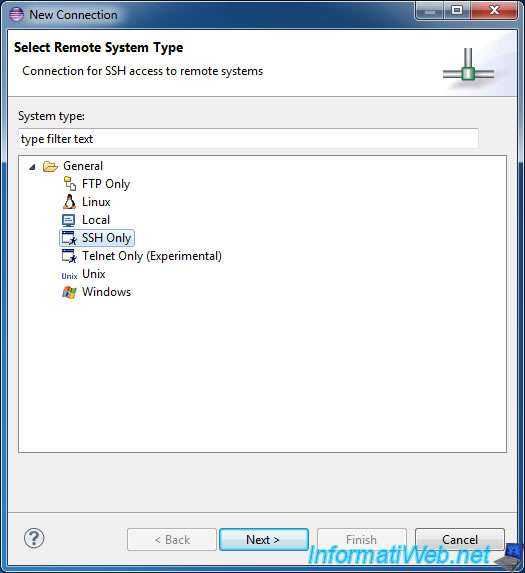
In the window that appears select the desired connection type.
For example:
- Only FTP: To connect to an FTP server.
- SSH Only - To connect to a Linux server (like a VPS Linux) via SSH connection.
In our case, we manage our Ubuntu VPS remotely by selecting the "SSH Only" type.
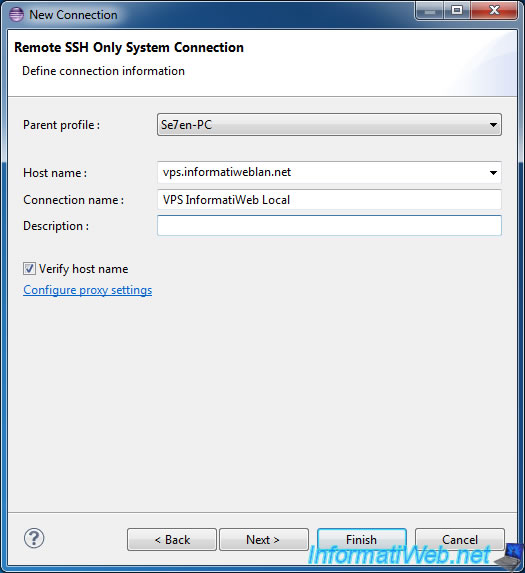
Then enter the IP address or domain name of the remote server and a name by which it will appear in Eclipse address.
Click "Finish" to let the advanced settings by default.
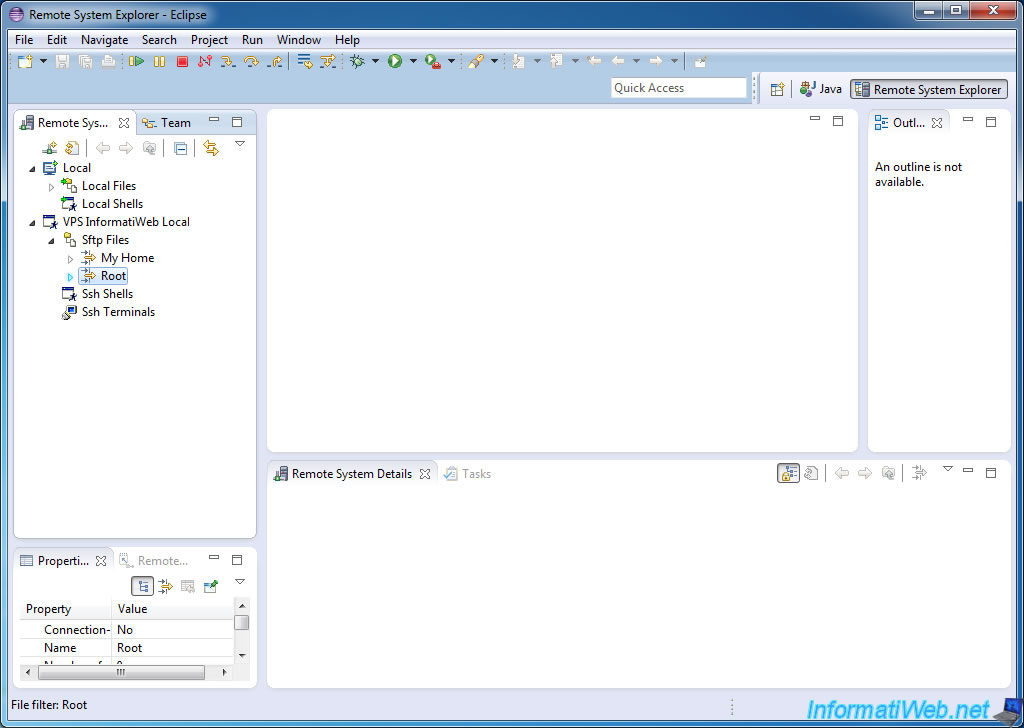
To connect to the remote via the SSH connection type Only server, go to "Server Name -> SFTP Files -> Root".
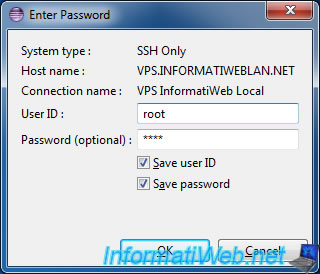
Eclipse will then ask you for a user name and password to connect to the remote server.
In the case of an SSH server, use this account on the remote machine. (The root user is allowed, but disable by default in Ubuntu)
Eclipse will then show you a window "Secure storage" to set secret questions but click "No" because we do not use.

Eclipse will then viewing the print server (he did not know before).

It will ask you if you want to create the file "known_hosts" and. "Ssh" folder that does not exist. Click "Yes".

And finally, you can access all the files on your Linux server or on your VPS. If the user used to connect has the necessary rights of course.
The "root" user has all rights on the server. Nevertheless, it is disabled by default in Ubuntu.
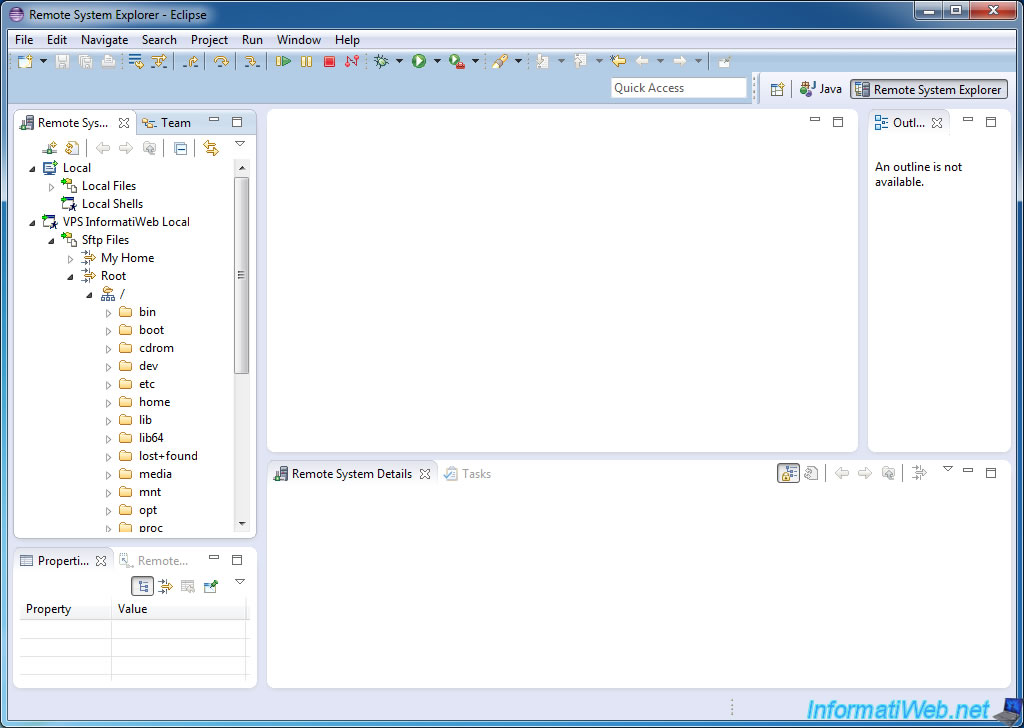
If you have installed an Apache Web server on your Linux server (or your VPS) and you want to manage the files on your website, they are in the "/var/www" folder.
You will also find the html file default Apache is posted at: http://127.0.0.1/ (or http://localhost/) via your web browser.
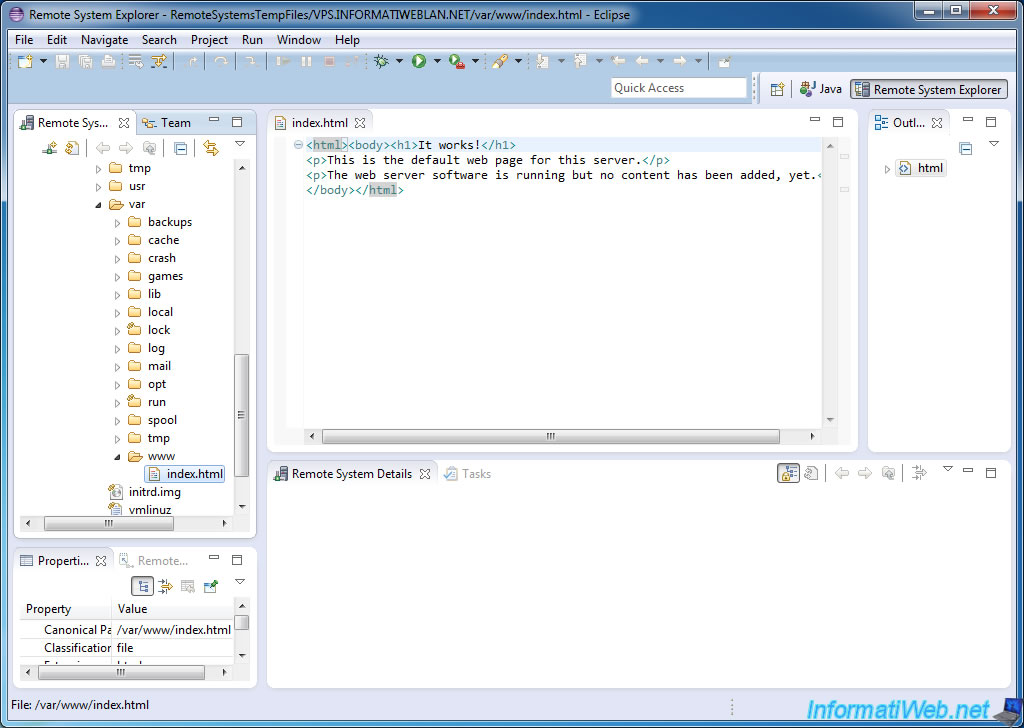
4. Enabling PHP perspective
Before creating the remote project, we will first open the perspective "PHP" in which the remote project will be displayed.
To do this, go to the menu "Window -> Open Perspective -> Other" and select "PHP" in the list that appears.
The PHP tab now appears in the top right. To return to the remote file system (for example, that your VPS), click on "Remote System Explorer".
![]()
5. Create new remote project
Now that you have access to your entire server via SSH connection , we will now create a new remote project. Ie only the folder you selected will be displayed (and its subfolders) in the list of your projects in Eclipse. Warning: This is only used to find your way around your files and it does not copy all the remote folder on your computer.
For this remote project , we will take the case of a Web developer who only need to access the www folder where all the files in its website.
In this case, right-click on the "www" folder and click "Create Remote Project".
Note: A small window will appear for a few seconds , the time to retrieve the list of files and folders in the selected folder.
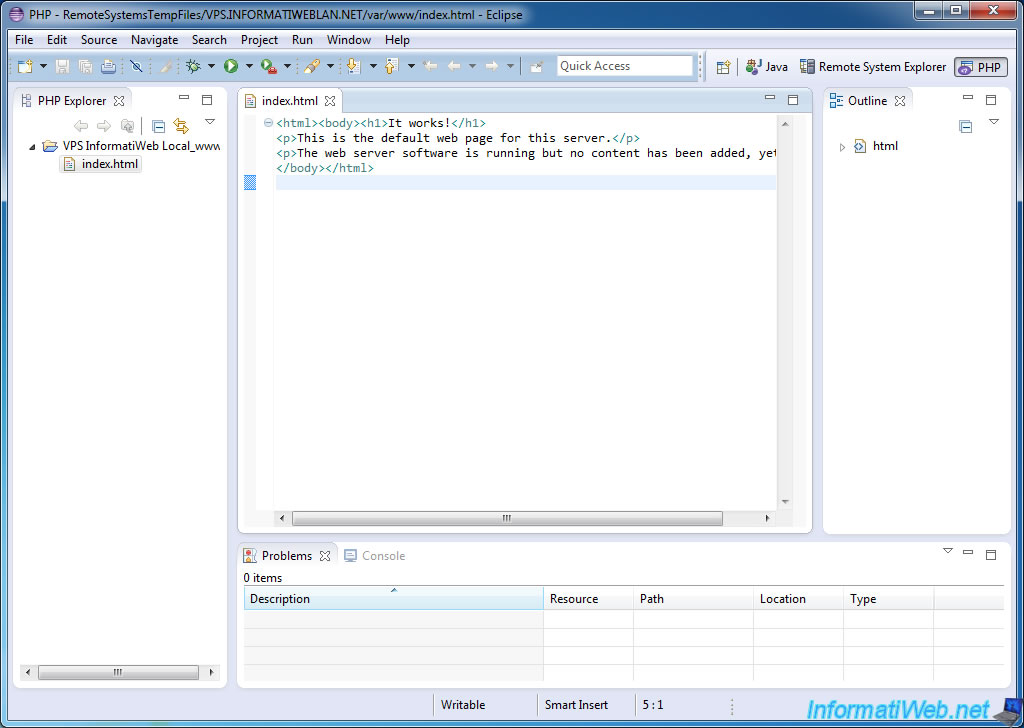
Back then in the PHP perspective via buttons earlier (see previous picture) . Now you will find a project named "[Server Name]_[name of the selected folder]".
Share this tutorial
To see also
-
Web 5/26/2018
Avoid common problems of HTTPS
-

Web 11/3/2013
Configure and secure your wireless network
-

Web 11/3/2018
Transfer a .net domain from LWS.FR to OVH
-

Web 7/22/2013
Transfer a .net domain from OVH to LWS.FR
You must be logged in to post a comment