- Windows
- Windows 10
- 24 January 2026 at 11:02 UTC
-

Usually, it's often advised to keep your computer up to date by installing updates for Windows and installed programs.
However, automatically installing Windows updates as soon as they are released is often a bad idea (including in business).
UPDATE 24/01/2026: the tutorial has been updated to also disable automatic updates on Windows 10 v22H2 (latest version of Windows 10).
- Blue screens and crashes due to Windows updates
- Disable automatic updates via GPO (Win 10 Pro / Enterprise)
- Disable automatic updates by disabling the Windows Update service (any edition)
- Disable automatic updates on Windows 10 v22H2
1. Blue screens and crashes due to Windows updates
Some new versions and many updates were problematic when they were released.
You can easily verify this by searching for "windows update blue screen" in Google.

2. Disable automatic updates via GPO (Win 10 Pro / Enterprise)
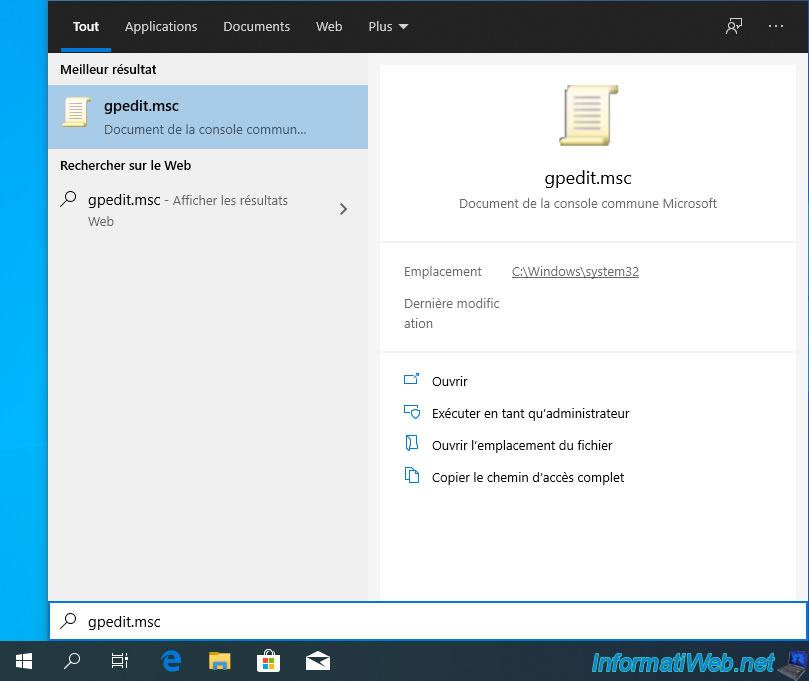
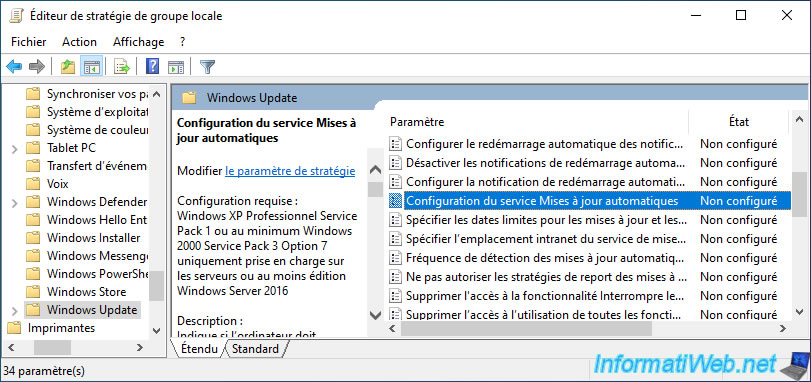
If you have a Pro or Enterprise edition of Windows 10, you can use the "gpedit.msc" tool (local group policy editor) present by default on Windows (minimum pro edition).
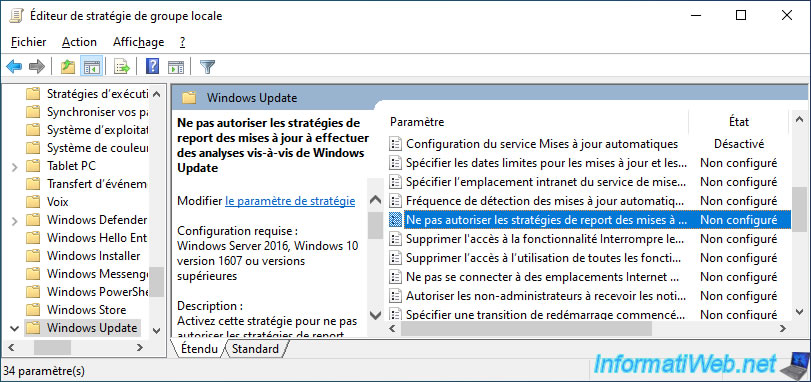
Then, go to "Computer Configuration\Administrative Templates\Windows Components\Windows Update" and double click on the "Configure Automatic Updates" policy.
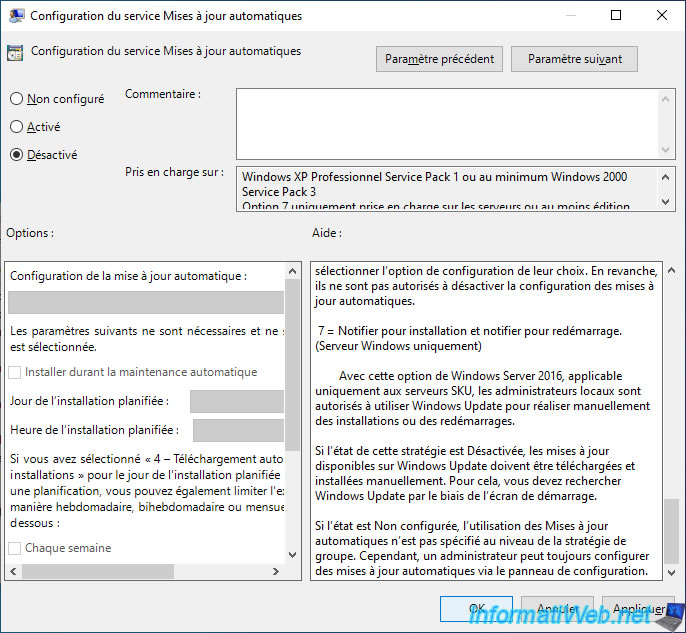
To turn off checking for and automatically installing updates on Windows 10, select "Disabled" for this policy.
As indicated at the end of the description of this group policy, when this policy is disabled, updates for Windows will have to be checked manually.
Warning : this therefore only blocks the automatic search for Windows updates, but it doesn't prevent you from manually launching the search for Windows updates from the settings of Windows 10.
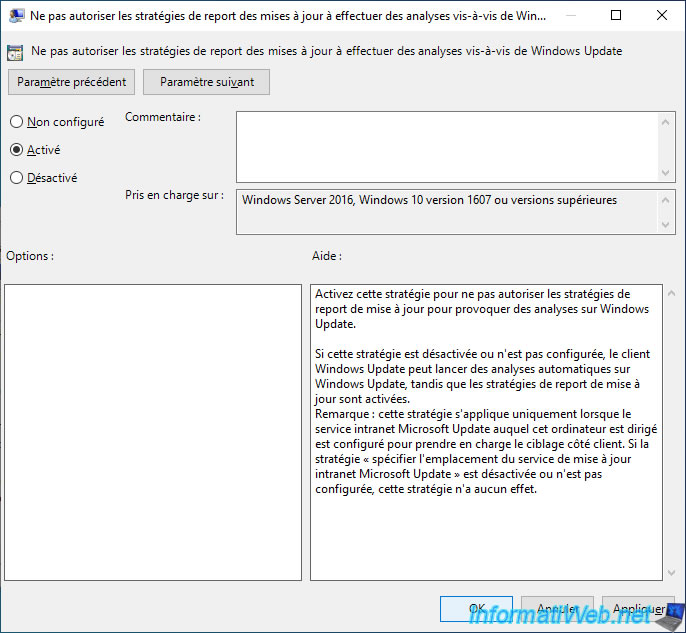
To prevent Windows 10 from causing it to check for updates after some time (several days, several weeks, ...), we recommend that you enable the "Do not allow update deferral policies to cause scans against Windows Update".
Select "Enabled" and click OK.
Once the above policies are configured, you need to force the policy update on your computer.
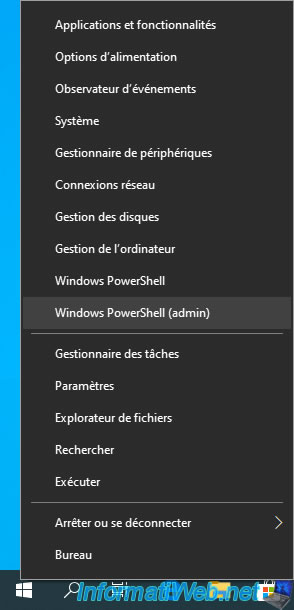
To do this, open a command prompt (cmd) as administrator or right-click on the start button, then click : Windows PowerShell (admin).
In the window that opens, type this command :
Batch
gpupdate /force
Which will display this :
Plain Text
Updating policy...

Computer Policy update has completed successfully.
User Policy update has completed successfully.
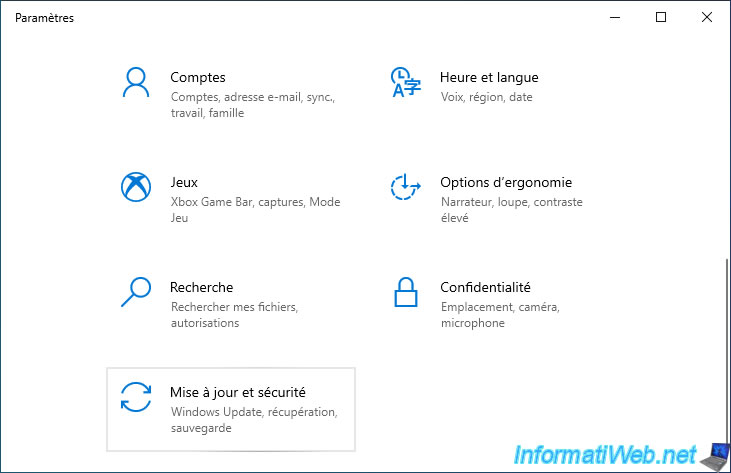
Then, go to Windows 10 settings.
Then, in : Update & security.
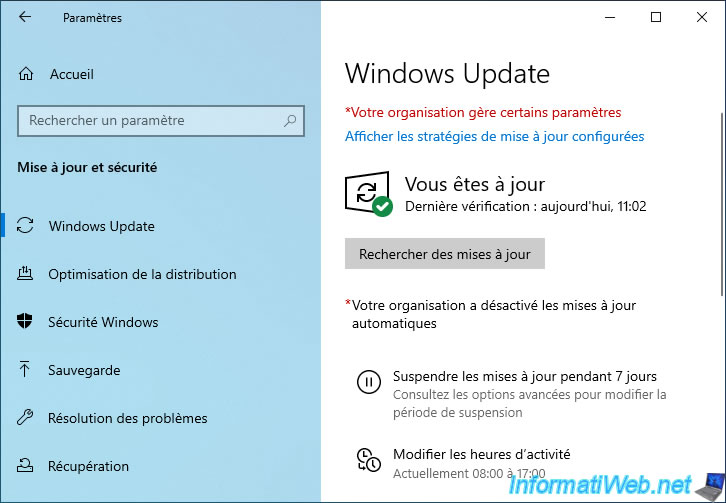
As you can see, the "*Some settings are managed by your organization" message appeared in red.
A little further down, you will also see the line "*Your organization has turned off automatic updates".
Click on the "View configured update policies" link.
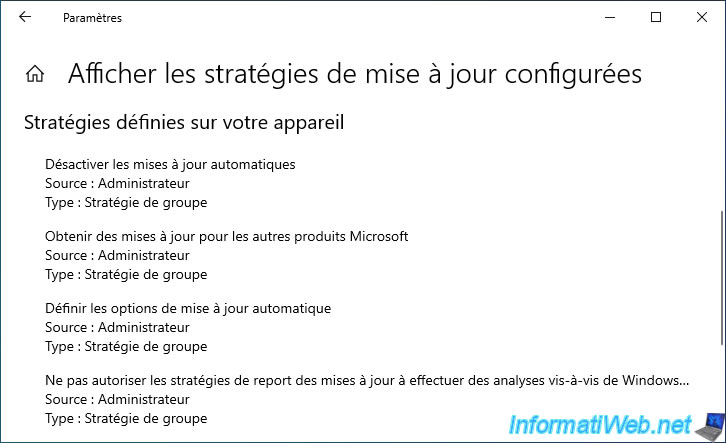
Here, you will see that several policies have been applied on your computer (including those configured via gpedit.msc) :
- Disable automatic updates
- Get updates for other Microsoft products
- Set Automatic Update options
- Do not allow update deferral policies to cause scans against Windows Update
As expected, only the automatic check for Windows 10 updates has been disabled.
But, the "Check for updates" button is still present.
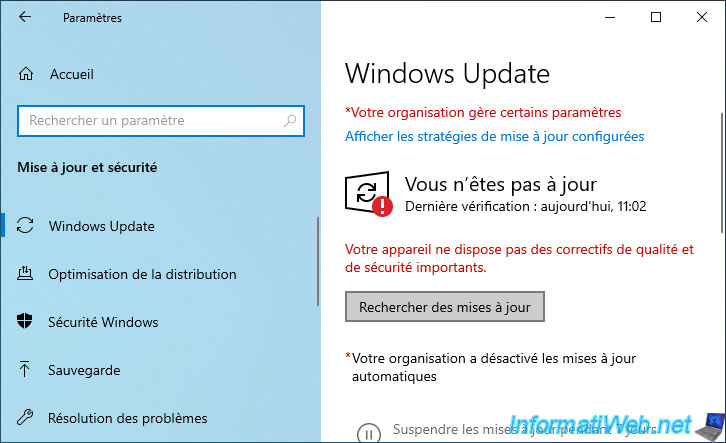
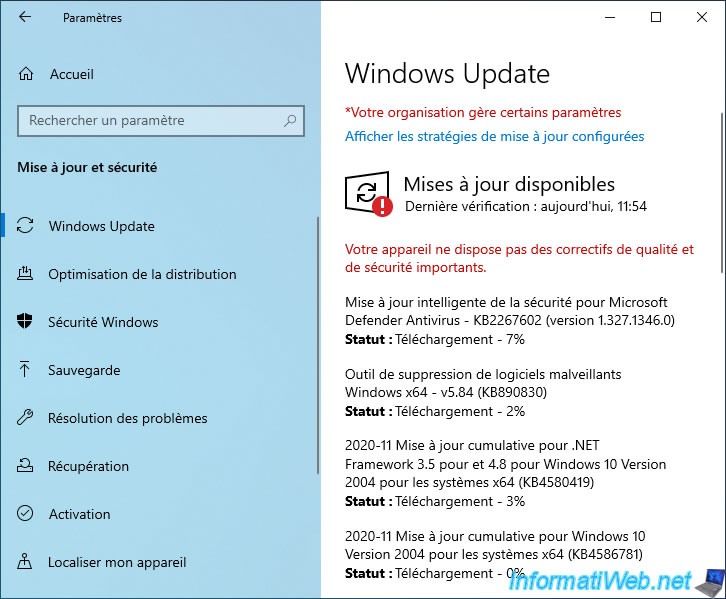
If you click this button, Windows will check for new updates.
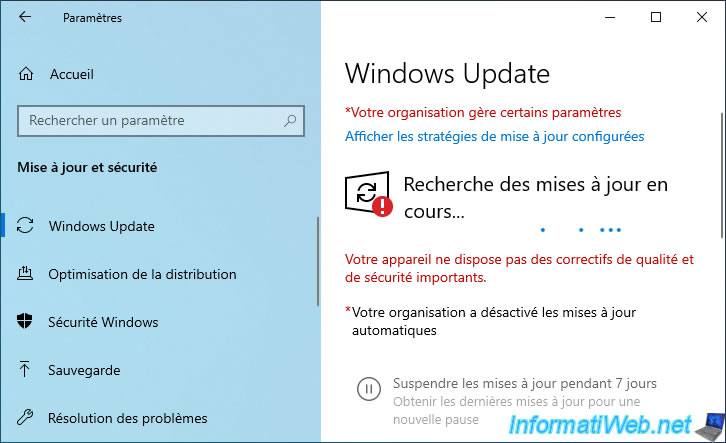
Once Windows updates are found, Windows 10 will download them automatically.
3. Disable automatic updates by disabling the Windows Update service (any edition)
The easiest unofficial solution that works no matter what edition of Windows 10 is to stop and disable the "Windows Update" service present in Windows 10.
To do this, search for "Services" and launch the application of the same name.
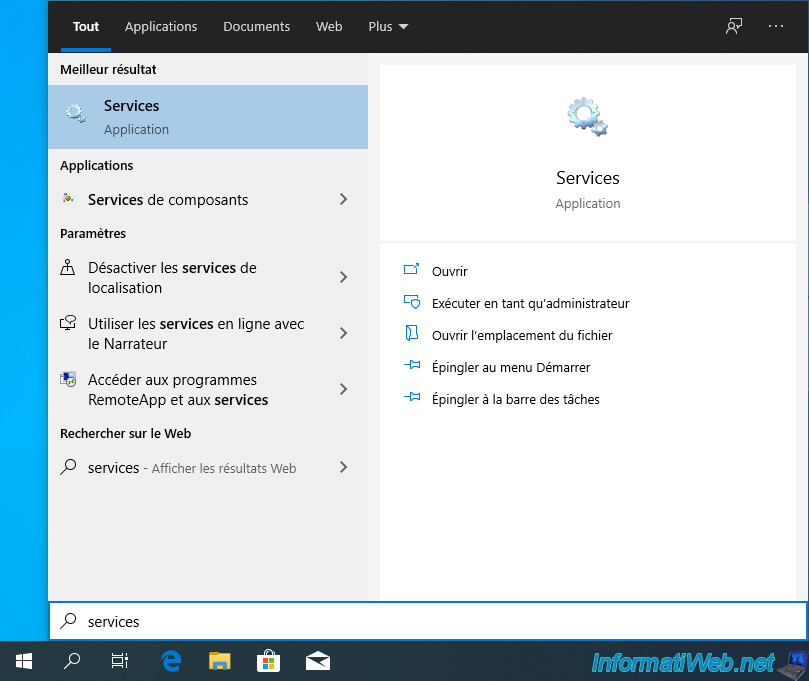
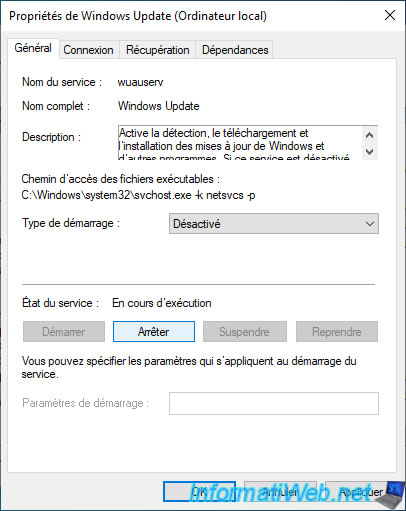
In the list, locate the "Windows Update" service and double-click on it.
As you can see on the left, once the service has been selected, the "Windows Update" service allows you to allow the detection, download and installation of updates for Windows and other programs (such as Office, for example).
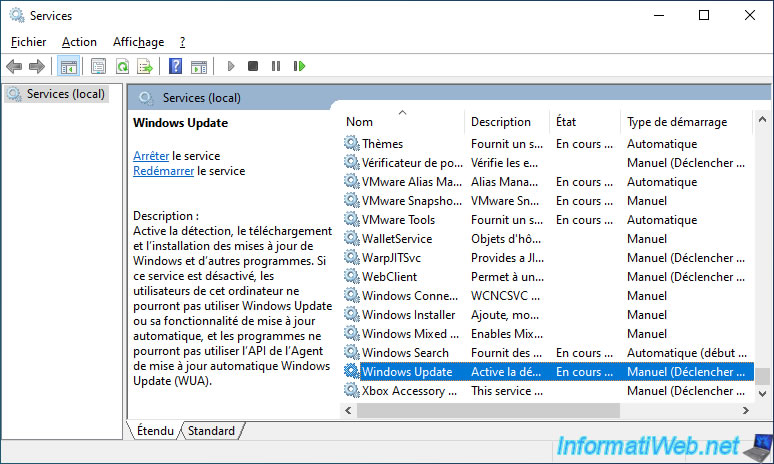
Disable this service, click "Apply", then stop it. (In this order, to prevent the service from restarting instantly after it's manually stopped.)
Then, click on OK.
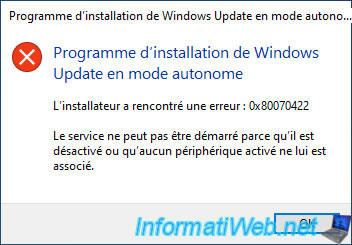
Warning : as long as the "Windows Update" service is disabled, manual installation of Windows update files (available in ".msu" format) will no longer be possible.
If you attempt to run a ".msu" file on your computer, you will always receive the error below.
To fix the problem, change the startup type of this service from "Windows Update" to "Manual" (which is its default), then relaunch your ".msu" file.
Once Windows Update is installed, remember to disable this service again so that Windows Update does not automatically download updates in the background.
Windows Update Standalone Installer
Installer encountered an error: 0x80070422.
The service cannot be started, either because it is disabled or because it has no enabled devices associated with it.
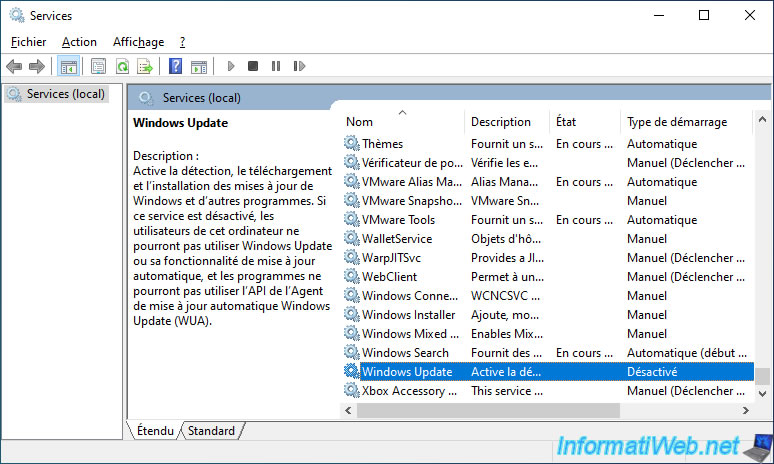
As you can see, the "Windows Update" service is now disabled.
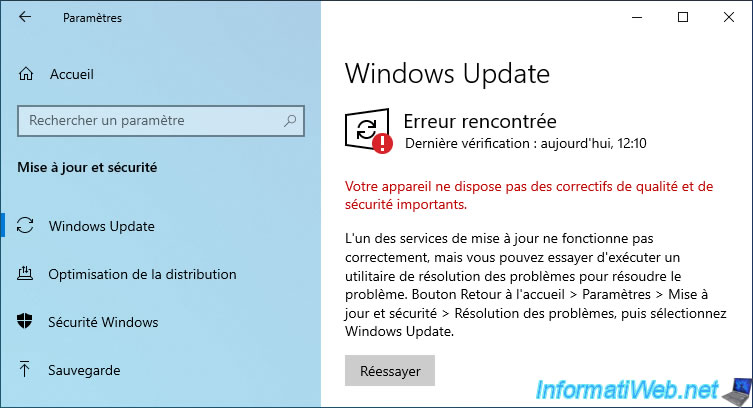
If you go to Windows 10 settings -> Update & Security, you will see an error message appear on Windows 10 (version 2004 and 2009).
This is normal, given that the "Windows Update" service is stopped and Windows 10 can't start it since this service is disabled.
Plain Text
One of the update services is not running properly, but you can try to run a troubleshooter to fix the problem.
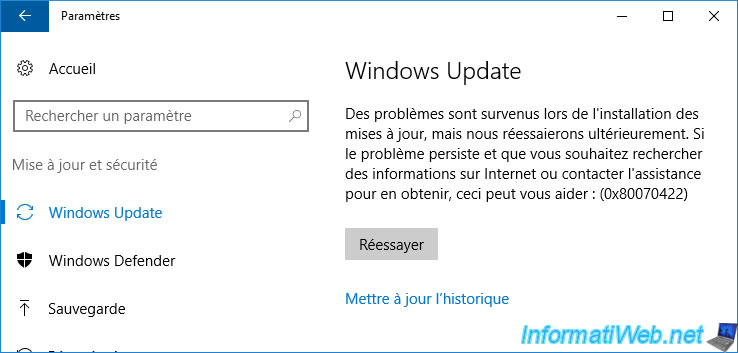
If you try to run the check for automatic updates on an older version of Windows 10 (version 1607 to 1909 included), you will see this error message :
Plain Text
There were some problems installing updates, but we'll try again later. If you keep seeing this and want to search the web or contact support for information, this may help: (0x80070422).
4. Disable automatic updates on Windows 10 v22H2
To disable automatic updates on Windows 10 v22H2, refer to the steps above.
Then, also follow these steps (otherwise, updates will continue to install on this new version of Windows 10).
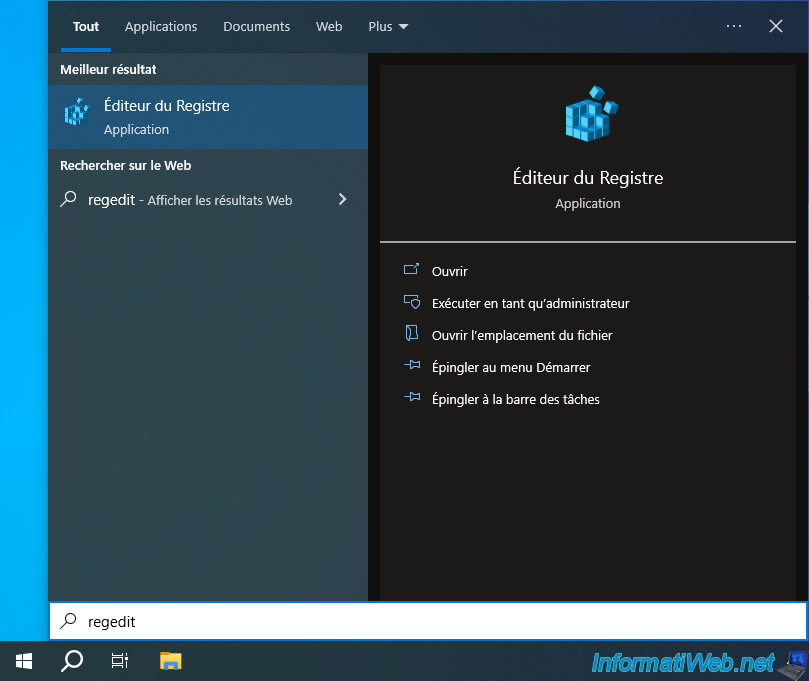
Open the Start menu and type "regedit".
Then, launch the Registry Editor that appears.
The Windows 10 registry editor appears.
Go to the key (folder) : HKEY_LOCAL_MACHINE\SOFTWARE\Policies\Microsoft\Windows\WindowsUpdate\AU.
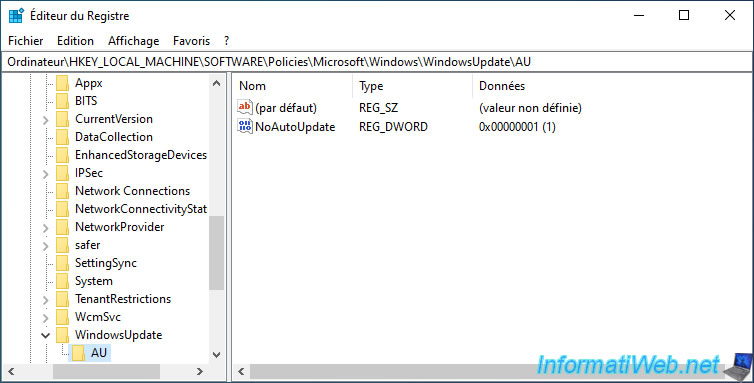
In the right-hand section, right-click and select "New -> DWORD 32-bit Value".
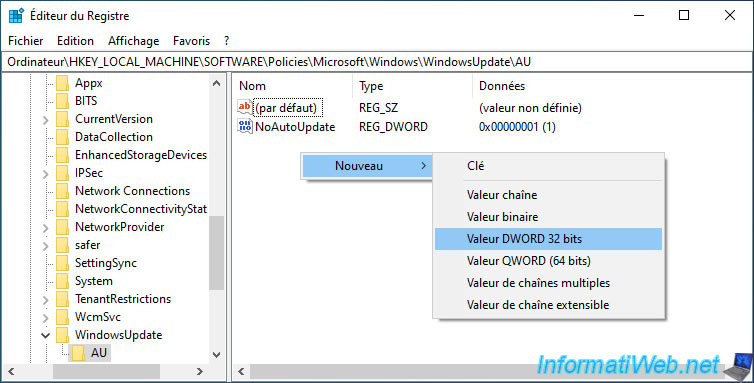
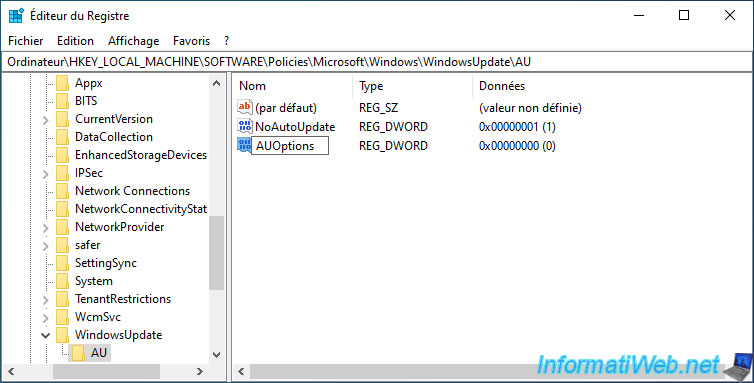
Enter "AUOptions" as the name for this 32-bit DWORD value.
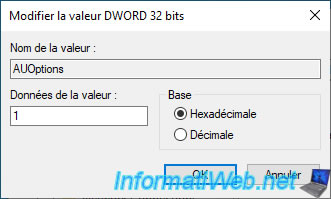
Then, double-click on it.
Enter the number "1" as the value data and click OK.
You now have a data item "AUOptions" whose value is "1".
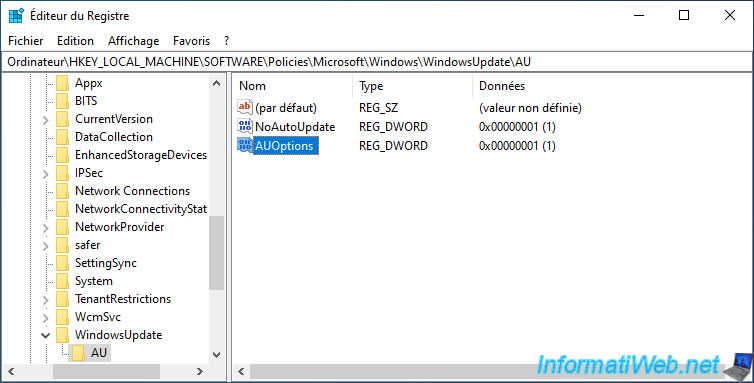
For this registry change to be taken into account by Windows Update, you will need to restart your computer.

Share this tutorial
To see also
-

Windows 3/8/2022
Upgrade from Windows 10 to Windows 11 (from DVD)
-

MultiBoot 6/17/2024
VHD/VHDX multiboot with Windows 8.1 and Windows 10
-

Windows 12/11/2023
Windows 10 / 11 - Share encrypted data with EFS
-
Windows 4/14/2025
Windows 11 / 10 / 8.1 / 8 - Upgrade a storage space (software RAID)
You must be logged in to post a comment