- Windows
- Windows 10, Windows 11
- 23 June 2018 at 17:43 UTC
-

- 1/4
On Windows 10 and Windows 11, it's possible to share folders in a public way, but also in a secure way (by hiding and/or protecting them with a username and password).
- Set up a workgroup
- Disable Windows auto sleep
- Enable and allow file sharing
- Quick sharing
- Create a hidden network share
- Create a password-protected network share
1. Set up a workgroup
Before you can share folders on Windows 10 or Windows 11, you must first create a workgroup and move your PCs into it.
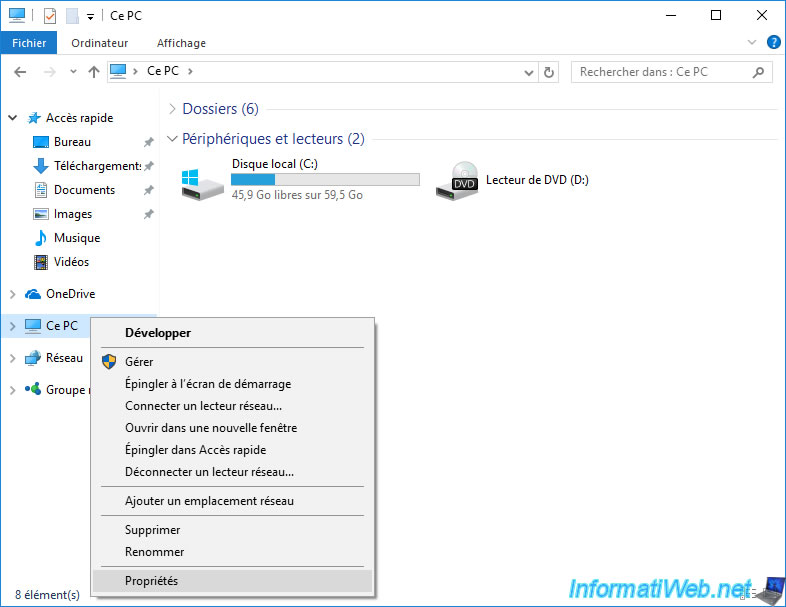
To do this, open the Windows file explorer and right-click "Properties" on "This PC".
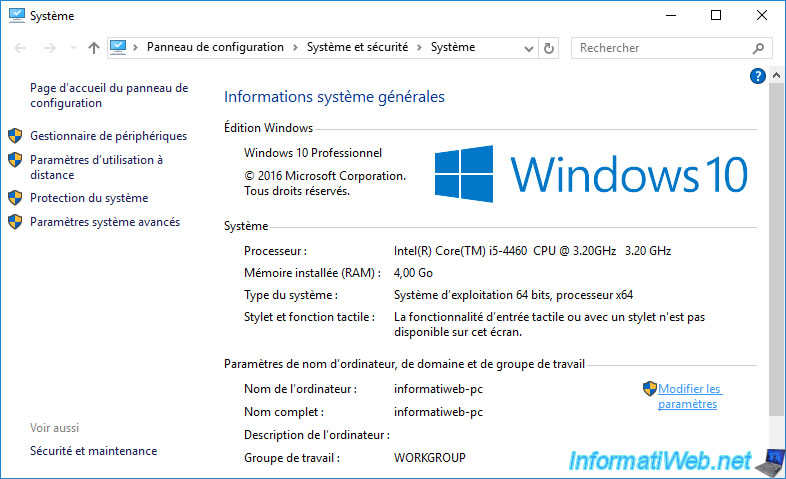
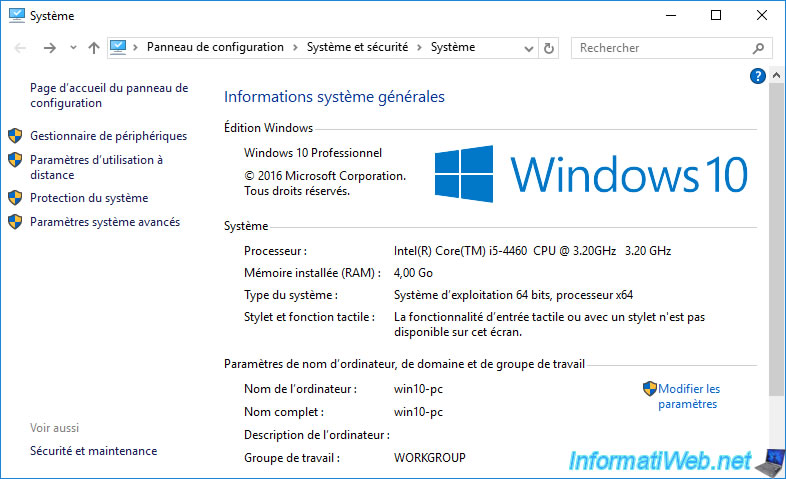
On Windows 10, the "View basic information about your computer" window is displayed.
Click on the "Change settings" link.
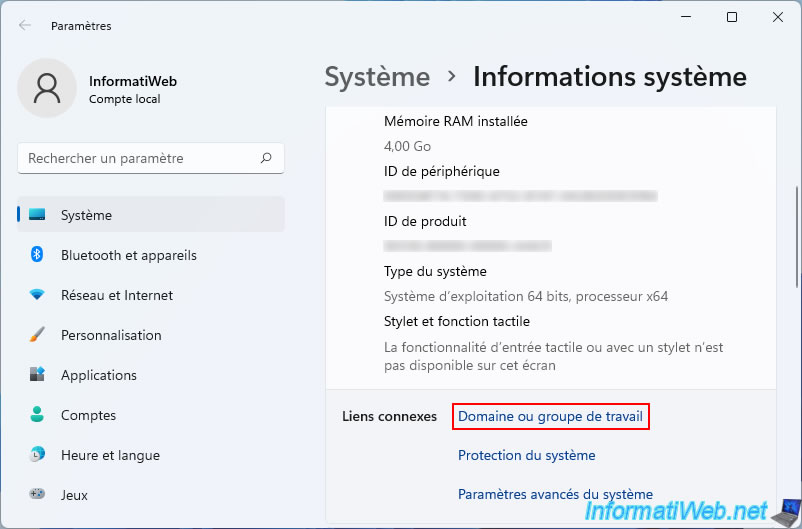
On Windows 11, the "Système > About" window is displayed.
Click on the "Domain or workgroup" link.
In the "Computer Name" tab, you will see again the name of your computer and in which workgroup it is.
To edit these informations, click "Change".
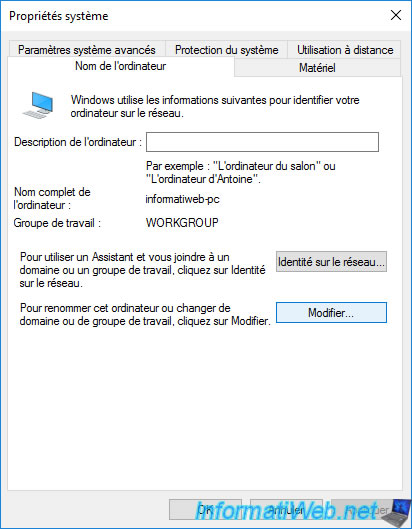
Change the name of your computer and its workgroup if necessary.
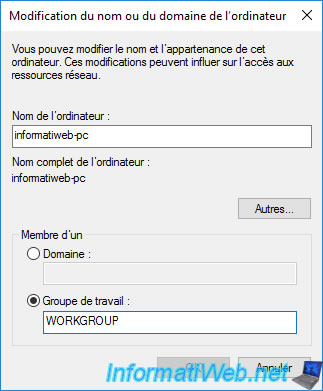
Do the same on the other computers on the network.
2. Disable Windows auto sleep
By default, Windows is set to go to sleep automatically from a moment.
This may make your shared folders inaccessible if you don't use the PC on which your files are stored.
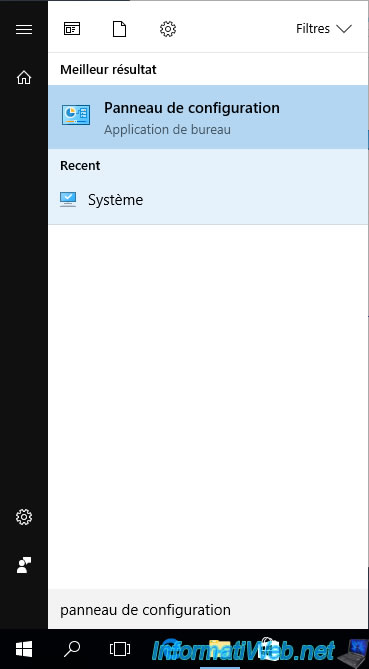
To begin, open the start menu and type "Control Panel". Then, start the program of the same name.
In the control panel that appears, go to : System and Security -> Power Options.
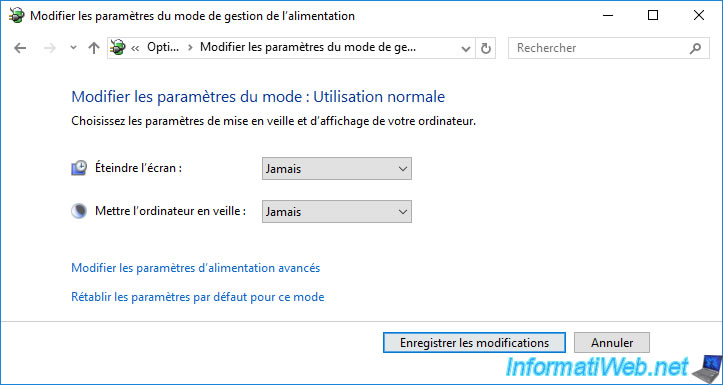
Then, click "Change when the computer sleeps".
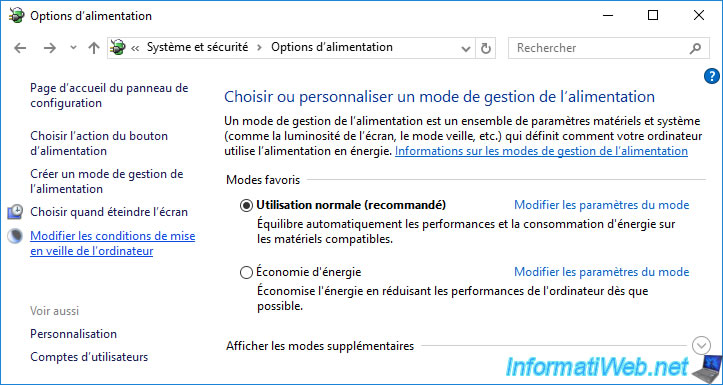
Select at least the "Put the computer to sleep: Never" option.
3. Enable and allow file sharing
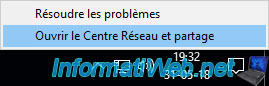
To enable file sharing, right-click on the "Network" icon and click "Open Network and Sharing Center".
On recent versions of Windows 10 (including 2004 version), the option has changed and is now : Open Network & Internet settings.

If you have a recent version of Windows 10, you will then need to click on "Sharing options".
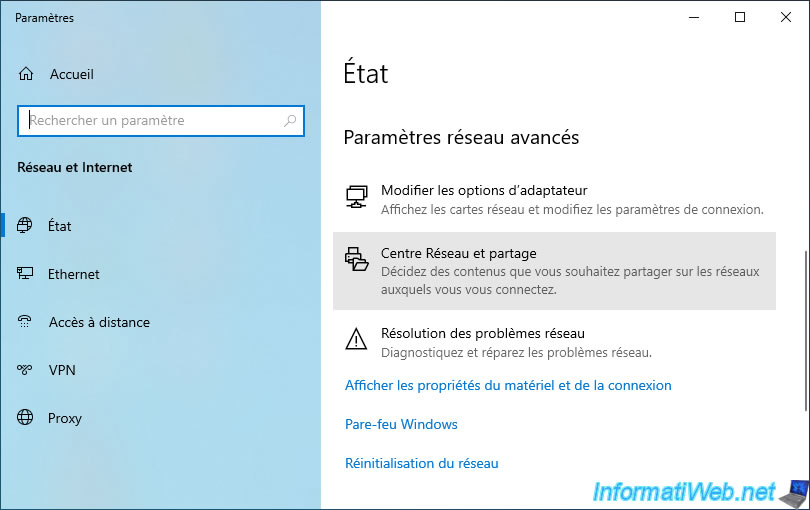
Or on Windows 10 and 11, open the Control Panel and go to : Network and Internet.
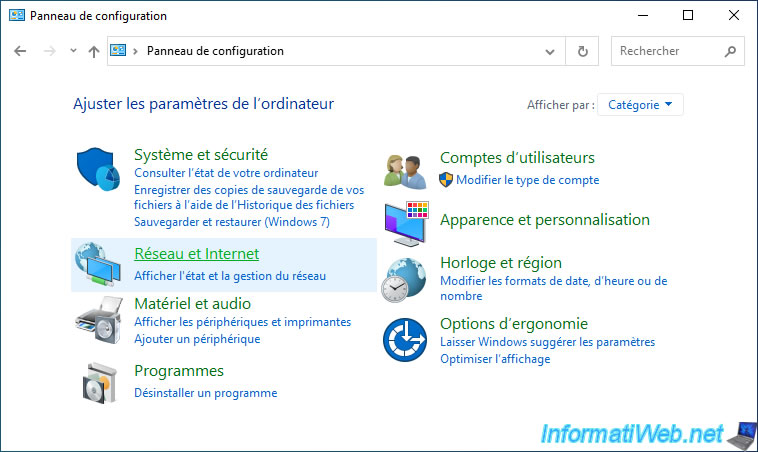
Then, in : Network and Sharing Center.
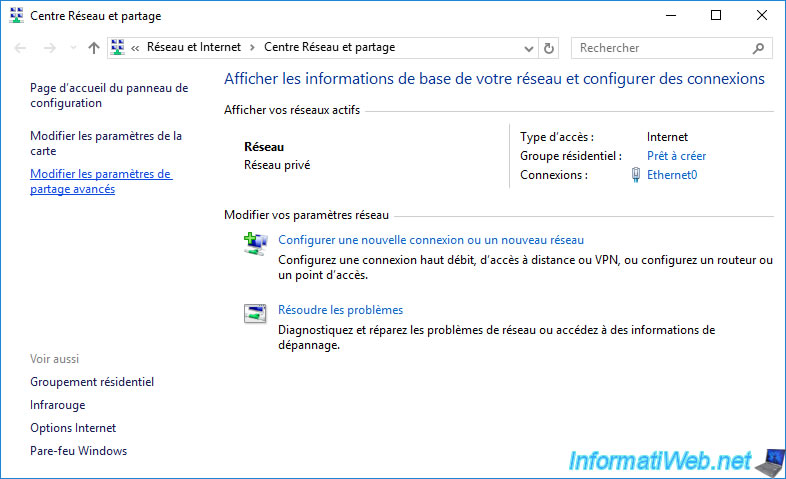
In both cases, you will arrive in the Windows 10 or 11 Network and Sharing Center.
Then, click on "Change advanced sharing settings".
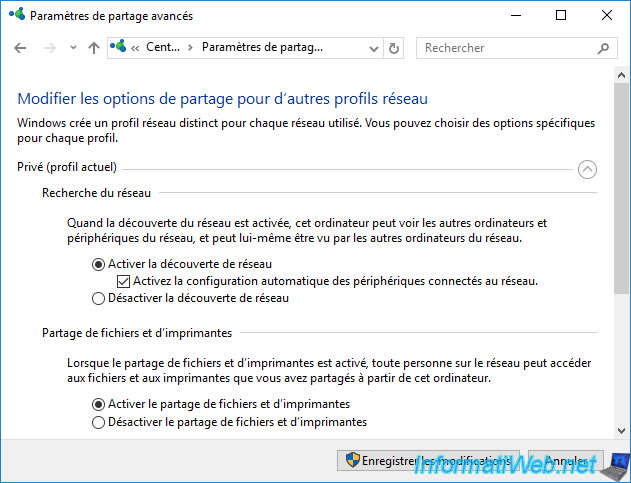
Select the options "Turn on network discovery" and "Turn on file and printer sharing".
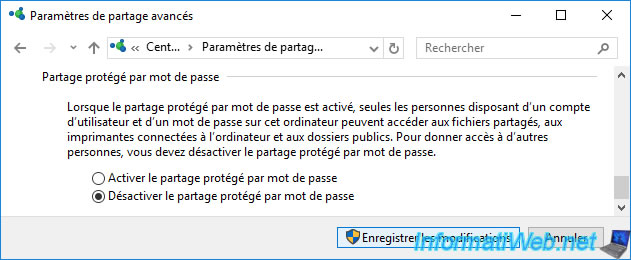
In the "All Networks" section, also select the option "Turn off password protected sharing".
In the firewall settings, check if the "File and Printer Sharing" feature is allowed for private networks.
Note : to access this list, go to Control Panel -> System and Security -> Windows Firewall -> Allow an app or feature through the Windows Firewall.
On recent versions of Windows 10 and on Windows 11, go to Control Panel, then to : System and Security -> Windows Defender Firewall -> Allow an app or feature through Windows Defender Firewall.

Share this tutorial
To see also
-
MultiBoot 5/28/2017
Multiboot Windows 7 / 10 / Win RE based on syslinux
-
Windows 1/27/2025
Windows 10 - Disable window snapping suggestions
-

Windows 12/11/2023
Windows 10 / 11 - Share encrypted data with EFS
-

Windows 4/12/2022
Windows 11 - Delete an old network profile
You must be logged in to post a comment