- Windows
- Windows 7
- 11 April 2022 at 14:18 UTC
-


When you connect your computer (desktop or laptop) to a new wired (Ethernet) or wireless (Wi-Fi) network, Windows 7 creates a new network profile.
Which can become annoying if you connect, for example, to a lot of wireless networks (Wi-Fi) with your laptop PC.
This is why Windows 7 tends to show you "Network x" for wired (Ethernet) networks.
- Delete a network profile (wired or wireless) from the Network and Sharing Center
- Delete the network profile of a network from the command line or from the registry
1. Delete a network profile (wired or wireless) from the Network and Sharing Center
On Windows 7, it's possible to easily delete old network profiles that you no longer need.
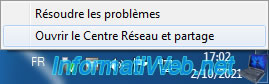
To do this, right-click "Open Network and Sharing Center" on the "Network" icon present in the taskbar (next to the clock).
In the "Network and Sharing Center" that appears, click on the icon of the network to which you are connected.
In this case, we click on the small house on the left.
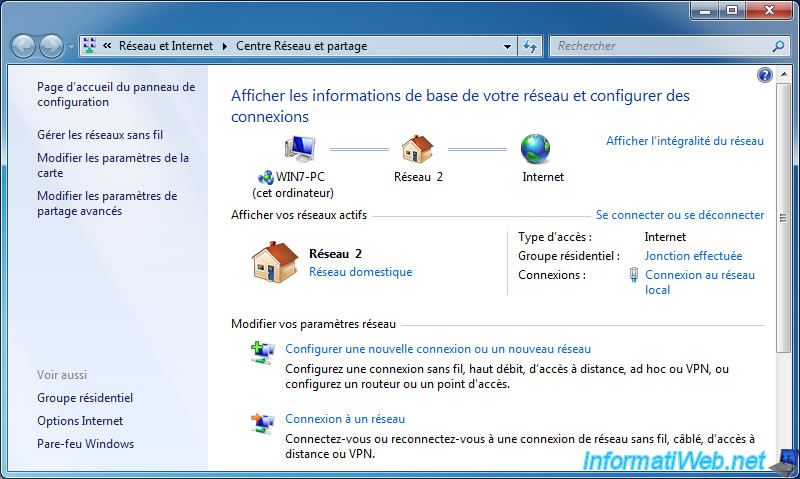
In the "Set Network Properties" window that appears, click on the "Merge or delete network locations" link.

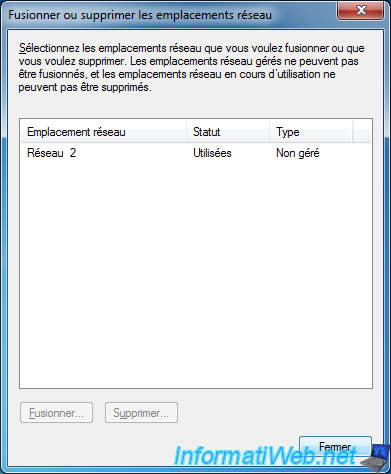
A "Merge or delete network locations" window will appear with the list of networks (wired and wireless) to which you have already connected in the past.
The network or networks to which you are currently connected appear with the status "In use".
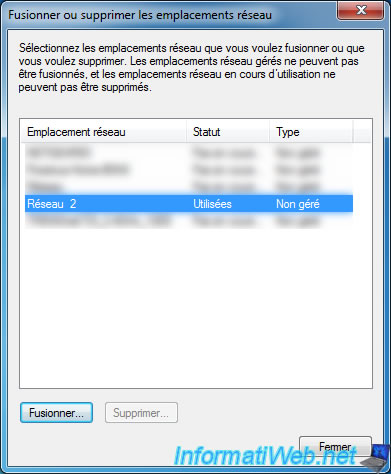
To delete old network profiles that you no longer need, select them and click the "Delete" button.
Note : to select several network profiles at once, hold down the CTRL key and click on the desired network profiles.
Or hold down the "SHIFT" key and click on the 1st and last network profile to delete.
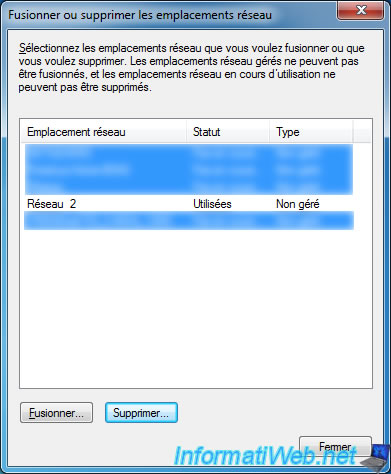
Answer "Yes" to the question "Are you sure you want to delete the selected network locations?" which appears.
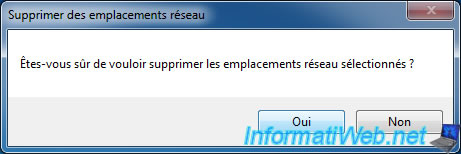
Click Close.
If you wish, you can change the name and icon of the network you are currently connected to.
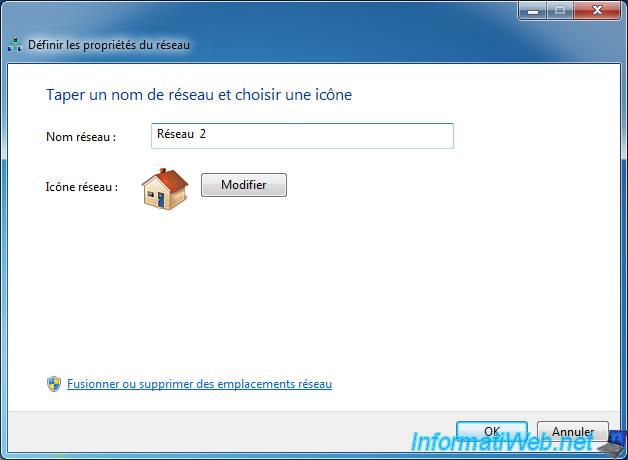
Then, click OK.

If you changed the name of the network, it will change in the Network and Sharing Center.

2. Delete the network profile of a network from the command line or from the registry
To do this, refer to the end of our tutorial for Windows 10.
Share this tutorial
To see also
-

Windows 1/28/2017
Speed up your computer (ReadyBoost)
-
Windows 5/19/2025
Windows 11 / 10 / 8.1 / 8 / 7 - Create a software RAID with dynamic disks
-

Windows 2/6/2023
Windows 11 / 10 / 8.1 / 8 / 7 - Disable User Account Control (UAC)
-
Windows 8/9/2022
Windows 7 / 8 / 8.1 / 10 / 11 - Create a virtual Wifi network
You must be logged in to post a comment