- BIOS
- 06 August 2015 at 08:38 UTC
-

Most motherboards "mid-range" or "high range" sold currently, include a RAID controller. Depending on the motherboard that you buy, you can create different types of RAID.
For those who do not know it, a RAID allows you to use multiple hard disks to increase: security (prevents loss of data in case of a hard disk crash), performance (by writing some data on a hard drive and the other on other hard drives), or both (security and performance).
In general, you can use one of these RAID levels :
- RAID 0 : Improves performance by writing half of the data on the first hard drive, then, the other half on the second hard drive.
- RAID 1 : Mirror mode. Improves security of your data by storing the same data on two hard drives selected during the creation of the RAID. Thus, if a hard disk die, your data will be safe on the other hard disk.
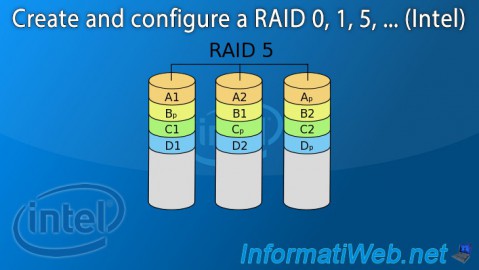
- RAID 5 : Combination of RAID 0 (Performance) and RAID 1 (Security).
With a RAID 5 :
- the half of the data is written on the first hard drive
- the other half is written on the second hard drive
- and the parity (a correction code to recalculate the lost data) is stored on the third hard drive
Example with numbers : HDD 1 (value 1), HDD 2 (value 5) et parité (value 6). 1+5=6. If the HDD 2 die, I know that he possessed the value 5 because 6-1 = 5. - RAID 10 : It is also a combination of RAID 0 and RAID 1. Its advantage compared to RAID 5 is that it can support a failure of two hard disks against one single failure hard drive for RAID 5.
Important :
- the RAID controller integrated in motherboards isn't considered as a true RAID, but a hybrid RAID or pseudo-hardware. Indeed, the RAID is configured in the RAID controller BIOS, but since it has no dedicated memory, the controller will use the RAM of your motherboard. So, you can buy a few extra gigabytes of RAM to reduce or remove this constraint.
- it's recommended to use identical drives or with a same size.
- be aware that some hard drive manufacturers create hard drives for various uses. This is the case for Western Digital and Seagate as you will see in our article : Create your own configuration - Choose your hard drives
- motherboard change (or the change of RAID controller) may impose to rebuild the RAID entirely if the RAID controller is different from the previous motherboard. A BIOS update can also cause this problem. So, we don't recommend using this technology in a professional environment and we don't recommend you to update the BIOS of your motherboard after creating the RAID volume. If you want to update the BIOS of your motherboard, do it before creating your RAID.
Tutorial realized with a ASUS Z97-PRO WI-FI AC motherboard. Nevertheless, the procedure is the same for motherboards using a "Intel Rapid Storage Technology" RAID controller.
- Configure the hard disk controller
- Create the RAID volume
- Initialize the RAID volume
- Check and repair in case of problems
1. Configure the hard disk controller
Before you begin, you must configure the hard disk controller in the BIOS of your motherboard. By default, this controller is set to "IDE" (for older computers) or "AHCI" (for new computers). To use the RAID technology of your motherboard, you must set it to RAID.
Warning : If you switch from IDE to RAID, Windows certainly show you a blue screen STOP at startup. The only solution is to reinstall Windows after the change of controller. If you switch from AHCI to RAID, this shouldn't be a problem.
If necessary, refer to our tutorial : Change the mode of the hard disk controller
2. Create the RAID volume
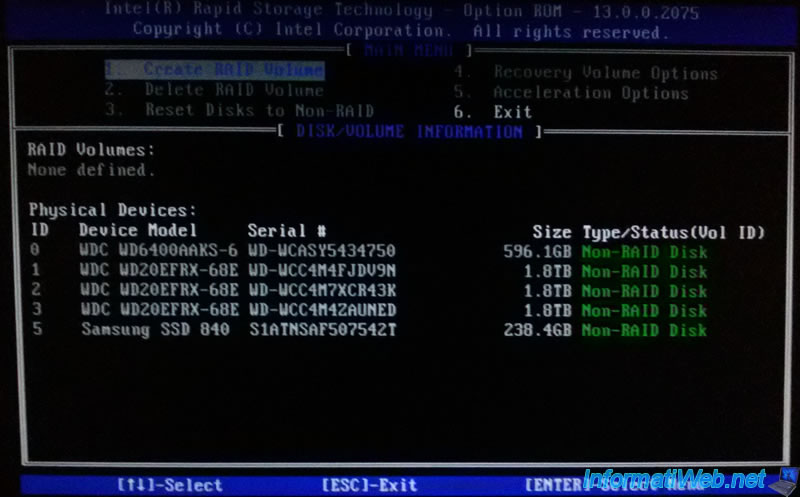
Once the controller is configured to "RAID", restart the computer. Upon restart, you'll have an "Intel Rapid Storage Technology" screen that will appear with a black background.
As indicated on the screen, hold down the CTRL + I (this is an "i" uppercase).
A screen like this will appear. Select "1. Create RAID Volume" and press "Enter".
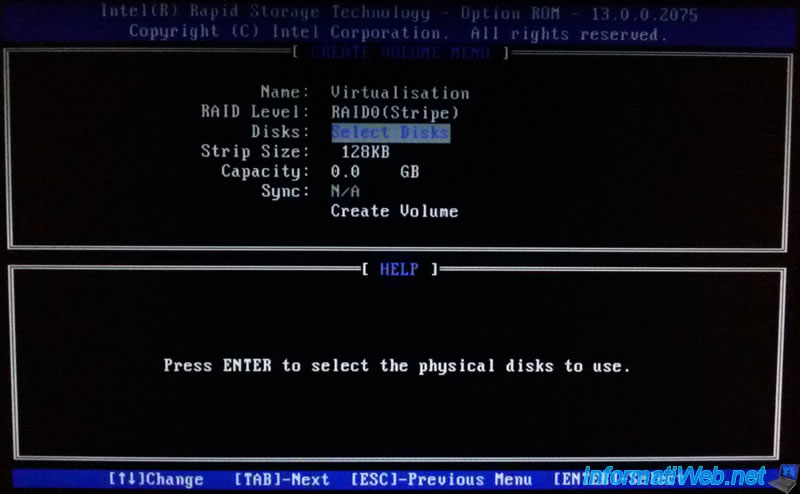
Specify a name for this volume, move on "Select Disks" and press "Enter".
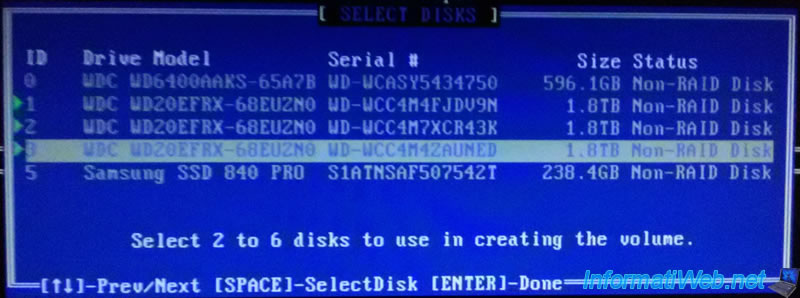
Select hard drives to use for the RAID volume by pressing the space bar.
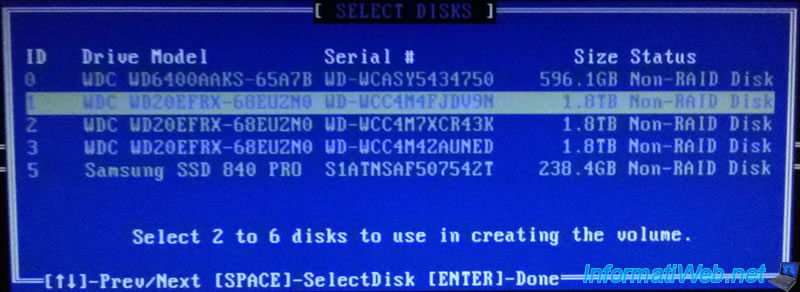
In our case, we will create a RAID 5 (allowing us to combine performance and security). So, we select 3 hard drives.
Press "Enter" to confirm your choice.
Select the RAID level that you want to use.
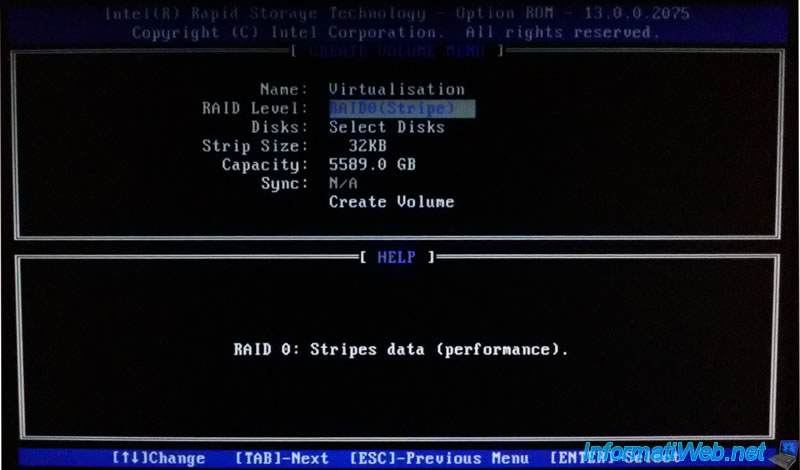
In our case, we will create a RAID 5 (Parity).

Create the volume by pressing Enter.
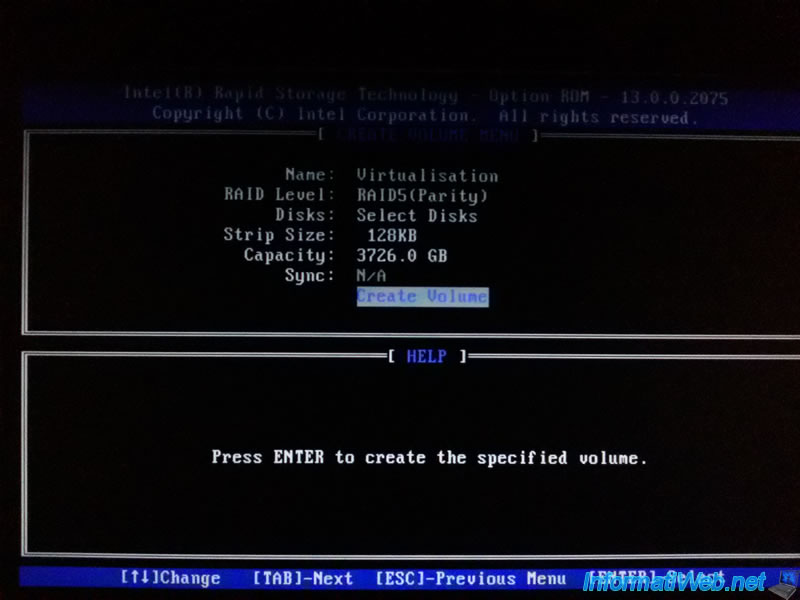
The wizard warns you that data on the selected drives will be lost. Press "Y".

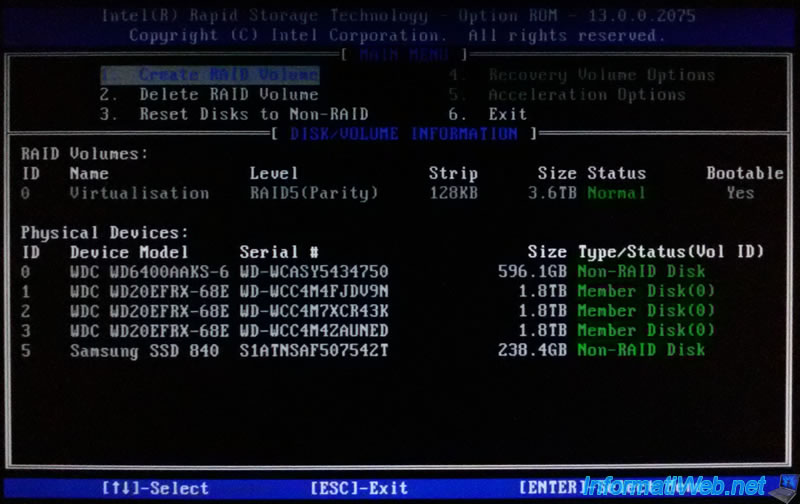
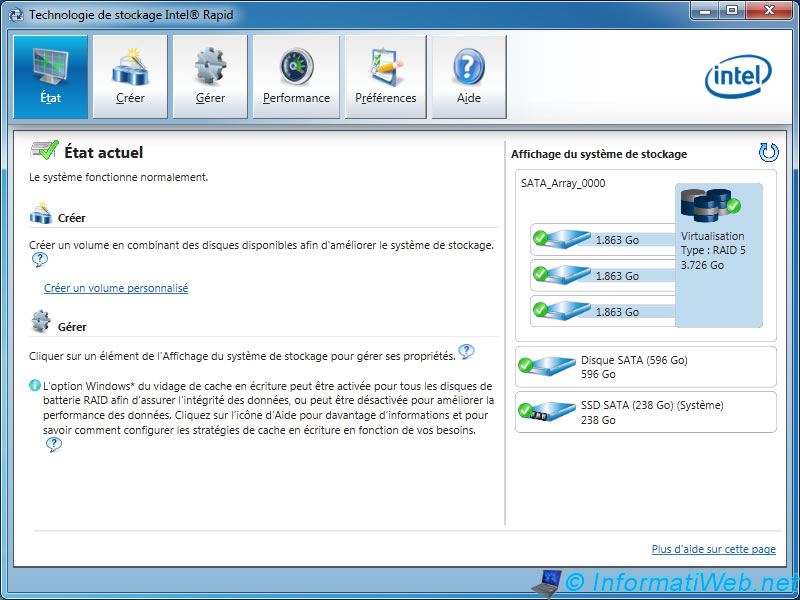
Now, our 3 "Western Digital (WDC WD20EFRX-68E / WD RED)" hard drives are members of the RAID volume with the ID "0".
The volume 0 is our volume "Virtualization / RAID5 (Parity)".
3. Initialize the RAID volume
To initialize a RAID volume, use the "Intel Rapid Storage Technology Driver software" program available on the driver CD or on the motherboard manufacturer's website.
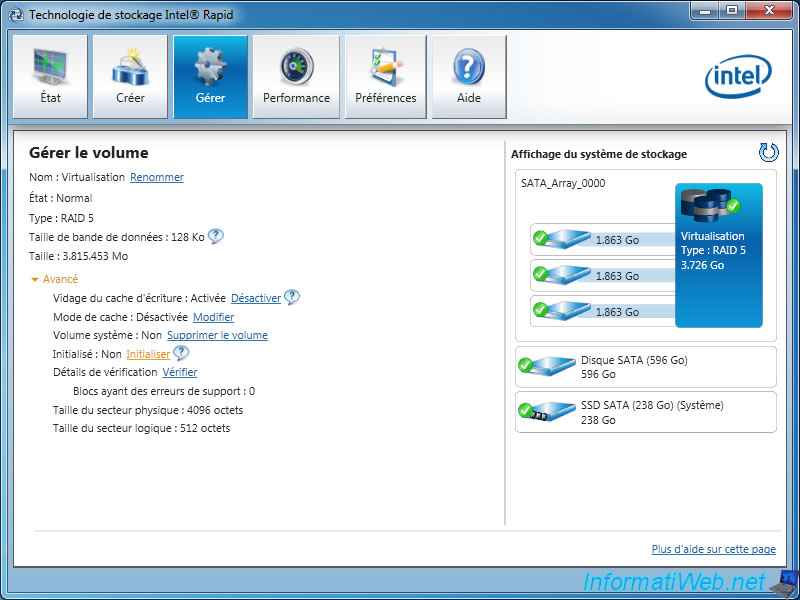
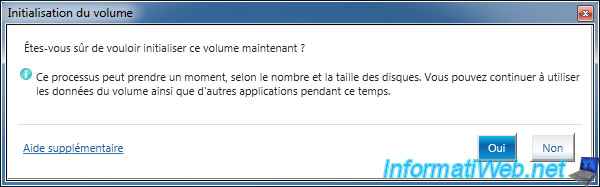
Once the program is installed, go to "Manage" and click "Initialize".
Click "Yes".
Warning : This process takes time (even a long time). It depends on your computer performance and the number of hard drives associated with this RAID volume.
During initialization, the ![]() icon of Intel Rapid Storage ... will be like this :
icon of Intel Rapid Storage ... will be like this : ![]() .
.
Once initialized, the line "Initialized" will be "Yes".

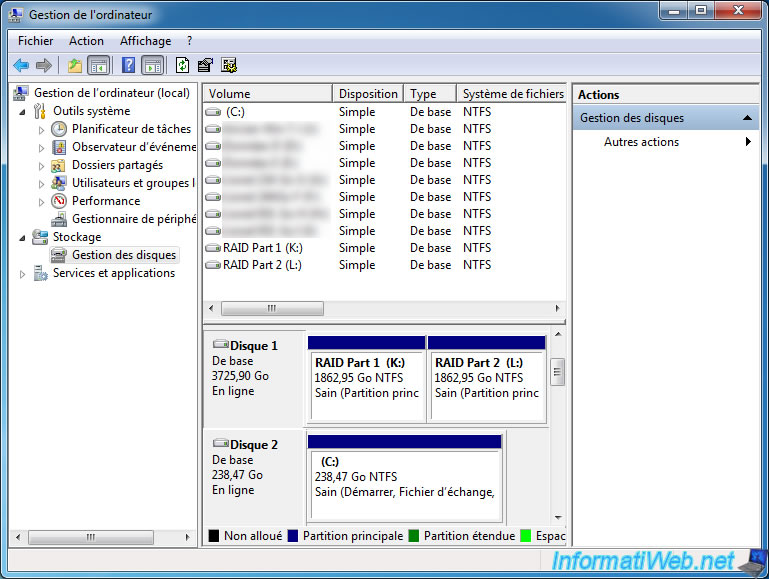
Since the RAID is created at the motherboard level (hardware RAID controller even if it doesn't offer the same advantages that a true hardware RAID), Windows sees only one hard drive (which doesn't really exist). In reality, this hard drive (that we had partitioned into 2 partitions for our needs) is our RAID volume containing 3 hard drives.
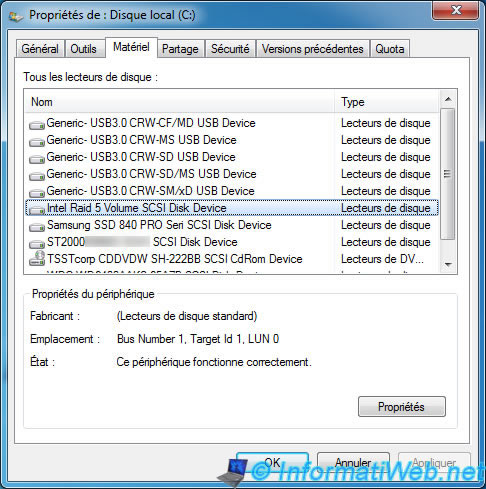
To prove that Windows sees the RAID volume and not real hard drives used for the RAID volume, here is a screen printing of hardware seen by Windows.
As you can see, Windows sees the volume "Intel RAID 5 Volume SCSI Disk Device" but he doesn't see the 3 Western Digital hard drives that compose it.
Note : To access this window, right-click on a partition of the workstation (or computer) -> Properties -> tab "Hardware".
Now, our RAID is ready to use.
4. Check and repair in case of problems
Now, what is happening in case of problems ?
Whether it's a hardware issue or a Windows crash, the RAID controller detects a problem on your RAID volume at computer startup. If you open the Intel program, you will see the line "RAID Volume Name : Check and repair ...".
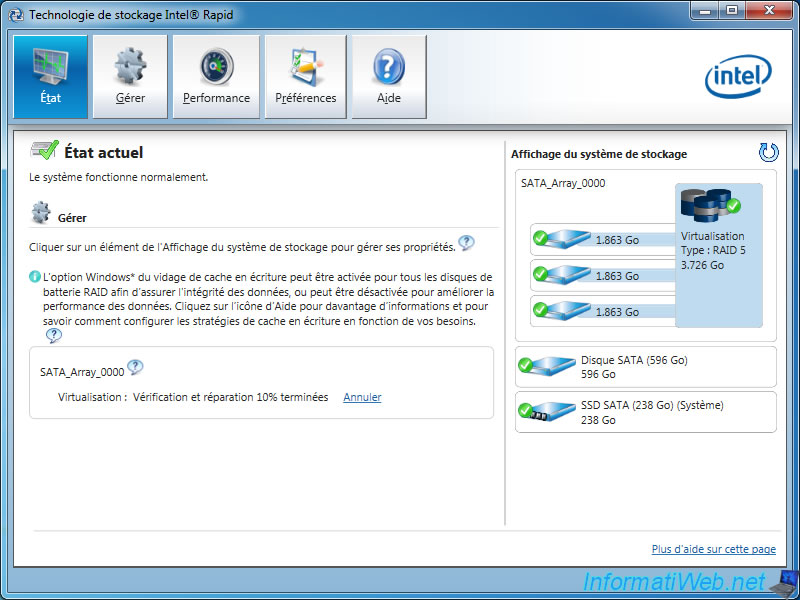
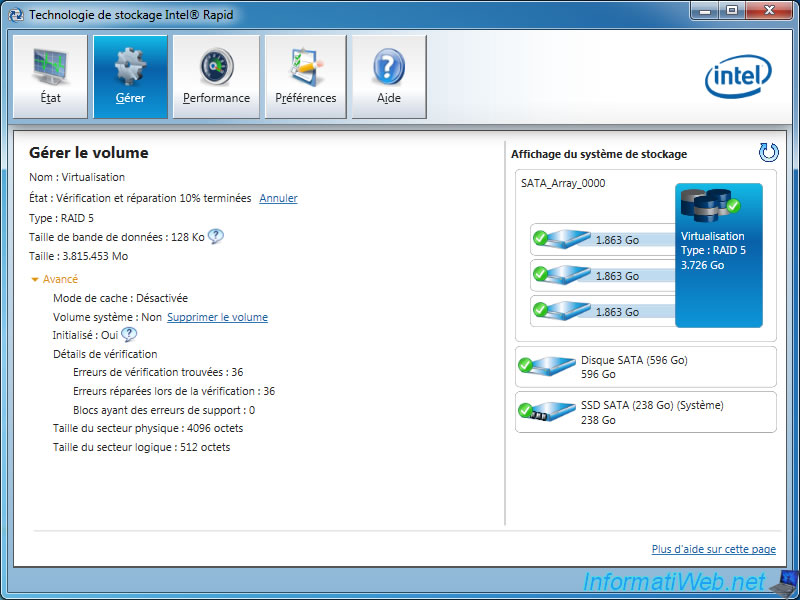
In the "Manage" tab, you will see the number of errors founded and corrected. This is possible due to the parity of the third hard drive. In the case of a RAID 0, you will lose data.
As you can see, the state is "Check and repair ...".
When the repair is completed, the state will return to "Normal".

Share this tutorial
To see also
-
BIOS 1/26/2013
Change the BIOS boot priority
-

BIOS 11/25/2015
Enable IOMMU or VT-d in your BIOS
-
BIOS 6/10/2018
Flash the BIOS of your Intel NUC Skull Canyon
-
BIOS 11/18/2016
Reset your BIOS settings
You must be logged in to post a comment