ASUS WL-330NUL - A mini router, network adapter, hotspot, ...
- Articles
- 09 April 2014 at 14:14 UTC
-

- 5/5
9. Secure wireless networks emitted by the mini router WL-330NUL
Now that we have explained all the possibilities, we will explain how to configure wireless networks emitted by the mini router "WL-330NUL".
First, this device emits 2 Wifi networks :
- The private network "WL-330NUL-Private-xxxx" : password protected and enabled by default.
- The guest network "WL-330NUL-Guest-xxxx": may be protected by password and / or filtered. Disabled by default.
The mini router can operate as the Box provided by the ISPs :
- The private network is your local network
- The guest network is the hotspot that is also protected by password. The login is in this case provided by the ISP.
9.1. Secure private wireless network
To begin, we will configure the private Wifi network because its configuration is basic.
To secure it, go to the address "http://192.168.2.1/" and type your supervisor code.
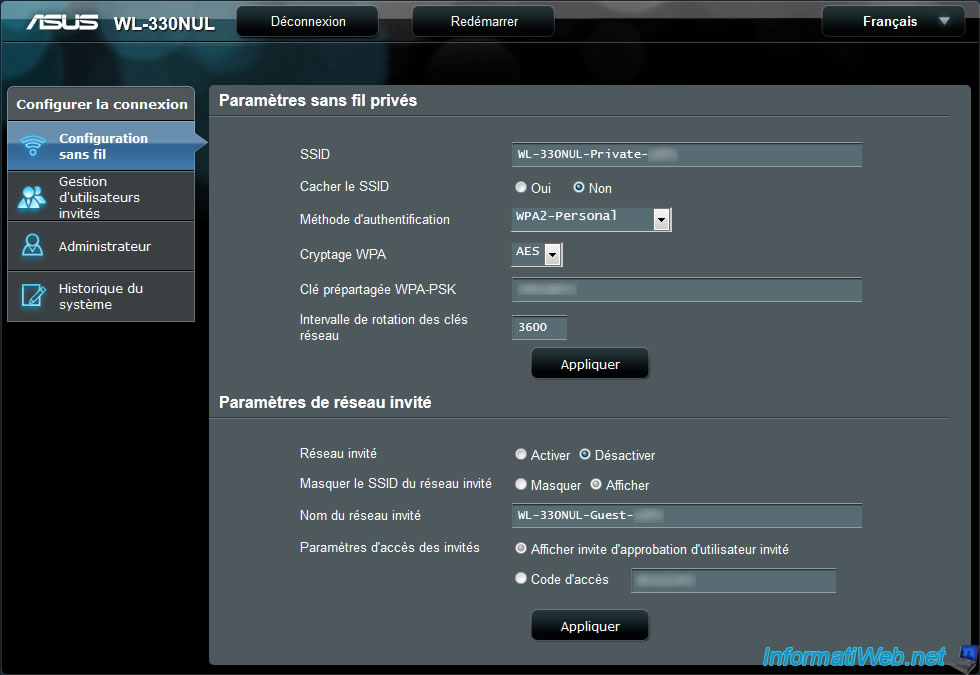
Then, go to the "Wireless configuration" menu.
By default, this wireless network is protected by a password. This password is the same as your supervisor code
Here are some explanations on the configuration of the wireless network :
- SSID : This is the name of the wireless network to be displayed on other devices (computer, smartphone, tablet, ...)
- Hide SSID : Hide WiFi network. When devices look for Wi-Fi networks available in the area. The Wifi network of the mini router will not be displayed. So the user must know the name and the password of the wireless network.
- Authentication Method : Choose the security of your network :
1) Open System : Insecure
2) Shared Key : Security WEP (64 or 128 bits). Not recommended because this protection can be hacked easily. But it enables older devices to connect to the wireless network.
3) WPA-Personal / WPA-Auto-Personal : WPA security. Better than WEP.
4) WPA2-Personal : WPA2. Better than WEP and WPA.
- WEP / WPA : Encryption type. 128 bits is better then 64 bits.
- WEP / WPA-PSK : Password of the WiFi network. By default, this is the supervisor code.
- Rotation Interval Network Keys : Leave the default value.
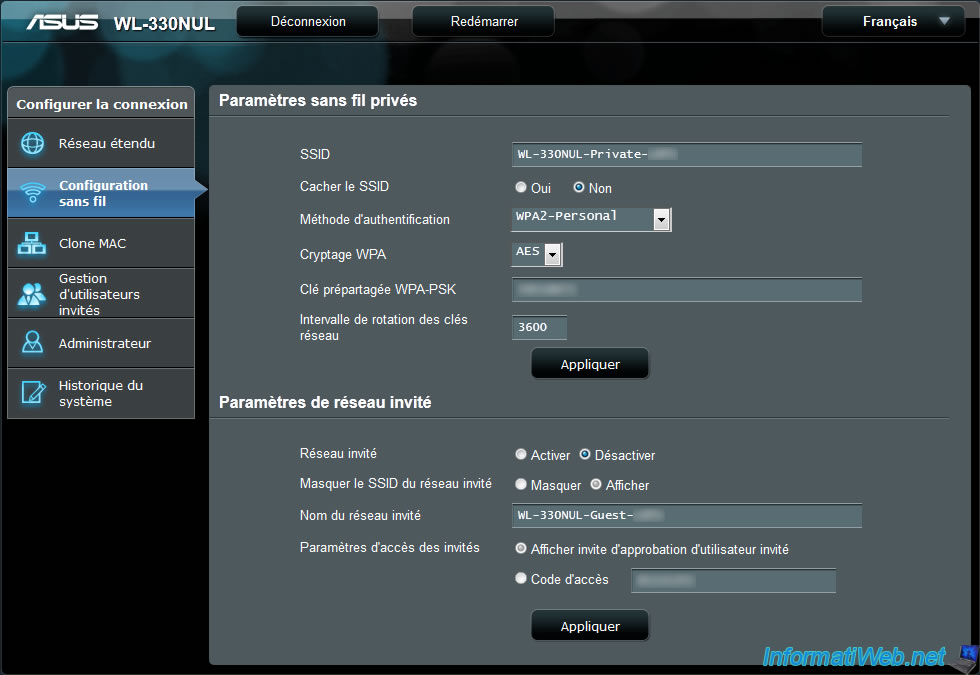
When you click Apply, the mini router will be temporarily disconnected from the network.
If you have changed the parameters of the private WiFi network, your computer doesn't automatically reconnect since the parameters (name, password, ...) may be not the same.

Once configured, users who know the password for the network can connect without problems.
9.2. Secure guest wireless network
The guest WiFi network is more complicated to configure as it can be secured in two ways :
- With an access code
- With a system of requests that the administrator will then accept
In 2 cases, the WiFi network will not be secured by WEP or WPA.
For Internet access, the user must :
- enter an access code
- Or send a request to the administrator
9.2.a. Enable the guest wireless network
By default, the guest network is disabled. To activate the wireless network, go to the address "http://192.168.2.1/" and type your supervisor code.
Then, go to the "Wireless configuration" menu and watch the "Guest network settings". In this section, check the "Enable" box.

9.2.b. Secure guest wireless network by a password
To secure the guest network by a password, select "Access Code" and change the password.
Note : If you wish, you can also hide the wireless network by checking the box "Hide guest network SSID : Hide".
When a user attempts to access the Internet, the Internet browser will be redirected to the page : http://router.asus.com/ ...
On this page, the user must specify the password that the administrator has defined in advance.
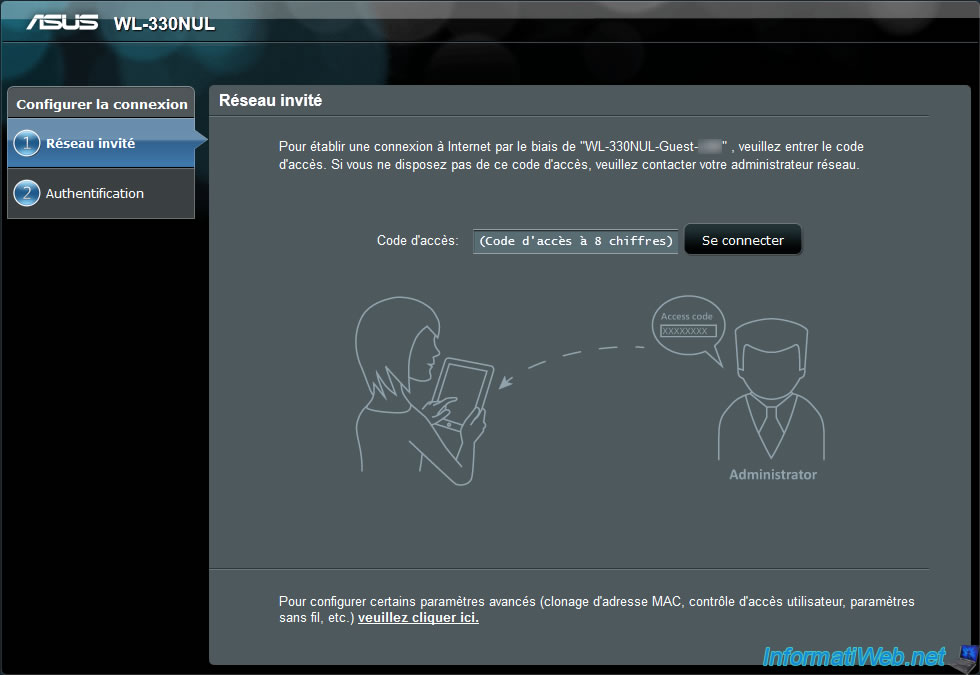
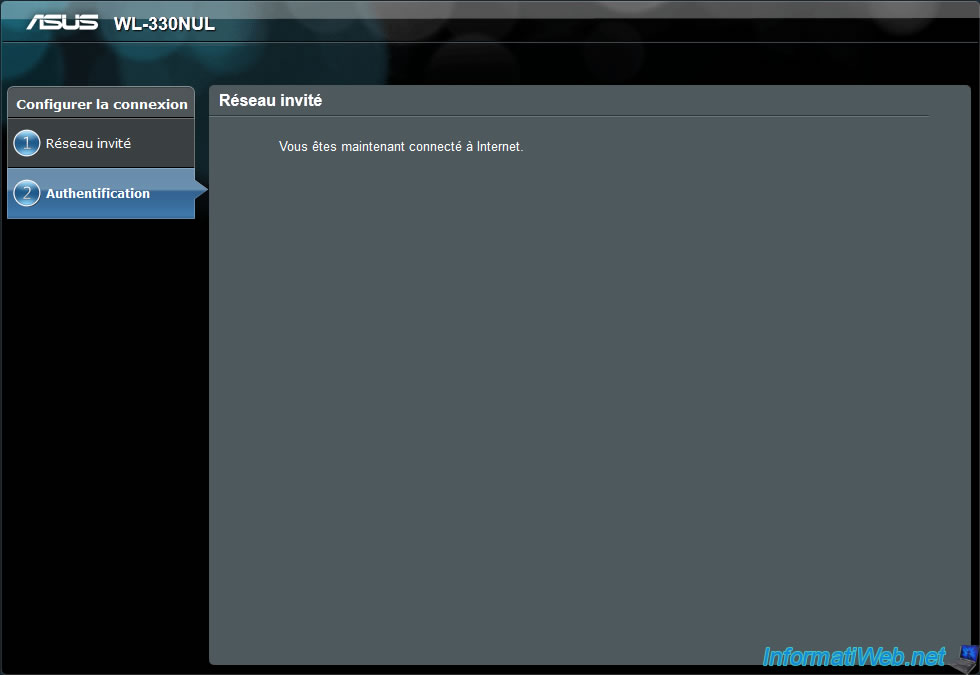
If the user typed the correct access code, the mini router show him "You are now connected to the Internet".
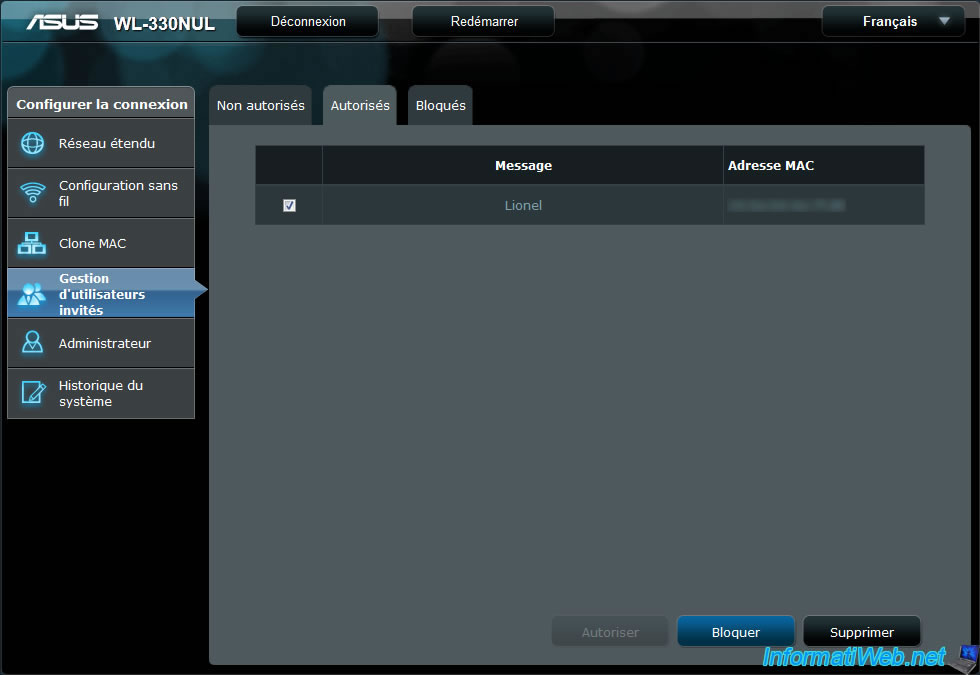
Since there is a guest network, you have the ability to block users by the "Guests users management" page.
On this page, go to the "Authorized" tab. The list of allowed users to connect to Internet appears.
To block a user, select the check box and click the "Block" button.
Now, the user will be disconnected (after few seconds) from WiFi network and can no longer connect to this wireless network (even if knows the access code).
Note : The message will be every time "Access Code" unlike the image below. But the principle is the same.
9.2.c. Secure the guest wireless network by a system of requests
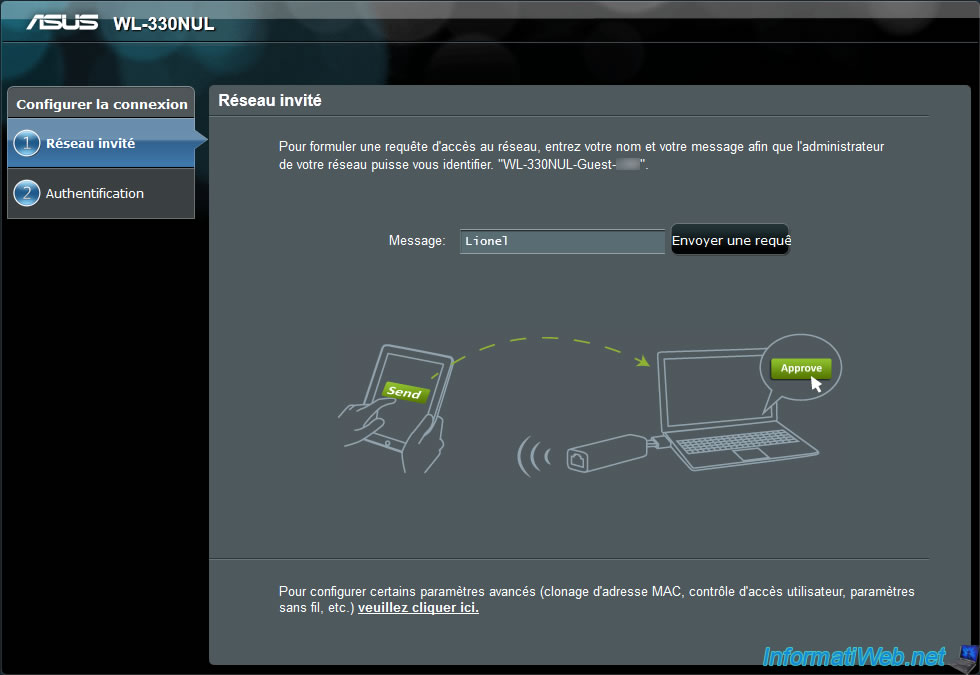
To secure the guest network through a system of requests, select "Show invites guest user approval" and click "Apply".
When a user attempts to access the Internet, its Internet browser will be redirected to the page : http://router.asus.com/...
On this page, the user must specify a message or its name.
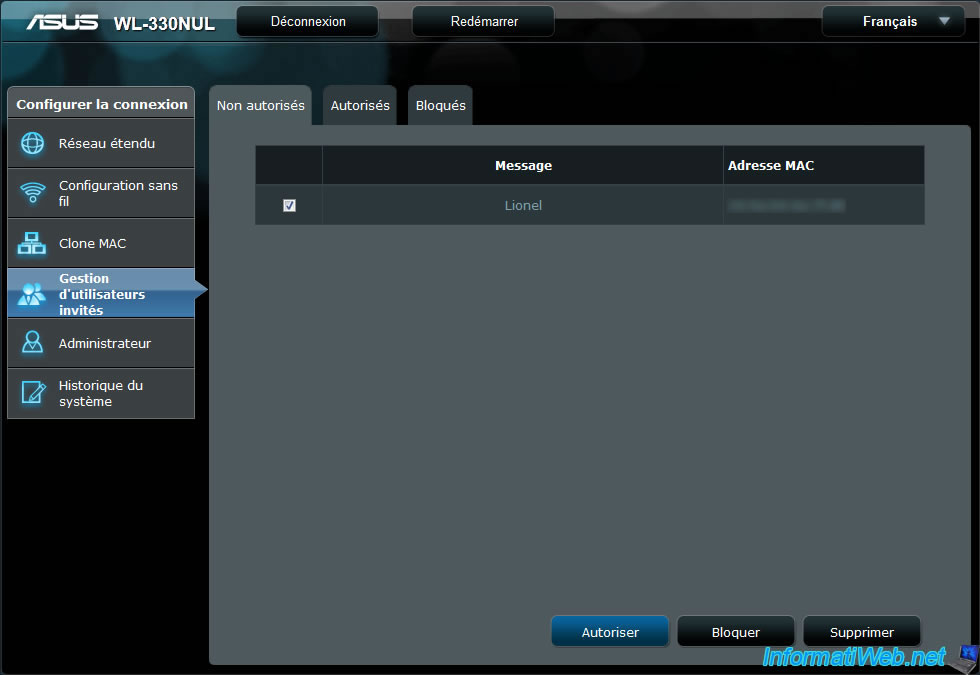
The administrator must then go to the administration of the mini router.
In the "Guest User Management", go to "Not allowed" tab. Check the box in front of the message or user name. And click the "Allow" button.
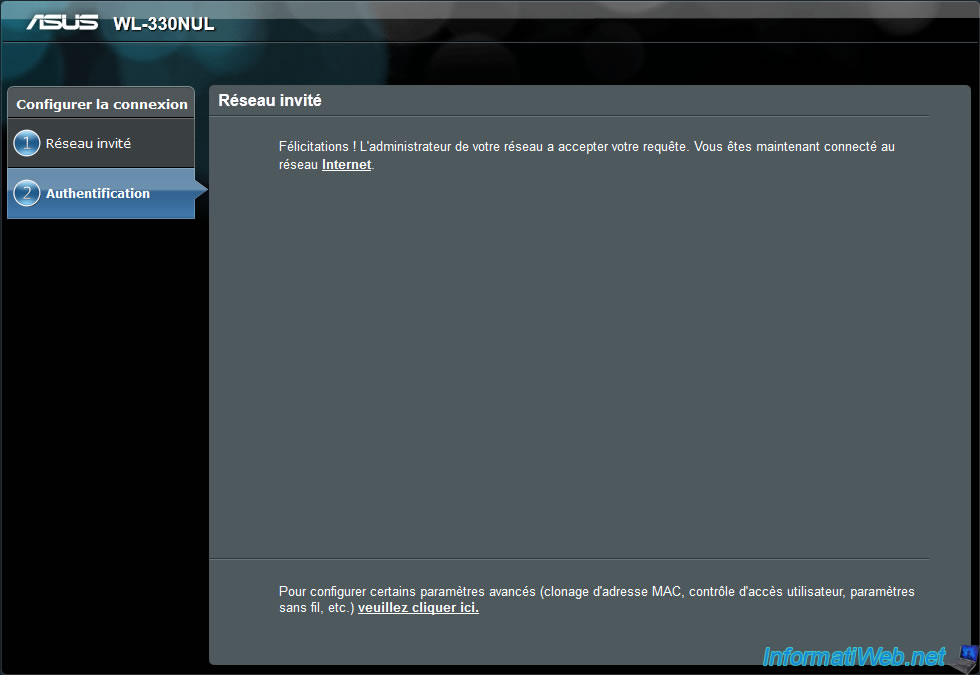
Once the administrator has authorized the user, the user's web browser show him the following message : "Congratulations ! The administrator of your network has accepted your request. You are now connected to the Internet".
Share this tutorial
To see also
-
Articles 9/24/2016
Bluetooth receiver KBT001081
-

Articles 10/19/2013
Need a web hosting ?
-

Articles 7/1/2018
What is the virtualization ?
-

Articles 2/12/2013
Why not install several AV simultaneously
No comment