Connect a SATA or IDE hard drive to USB 3.0 using a Nedis adapter
- Articles
- 18 November 2024 at 17:39 UTC
-

- 3/3
6. Using an IDE hard drive via USB 3.0
6.1. Connecting an IDE hard drive to USB
Finally, this "nedis" adapter will also allow you to recover data that you may have lost on very old IDE hard drives.
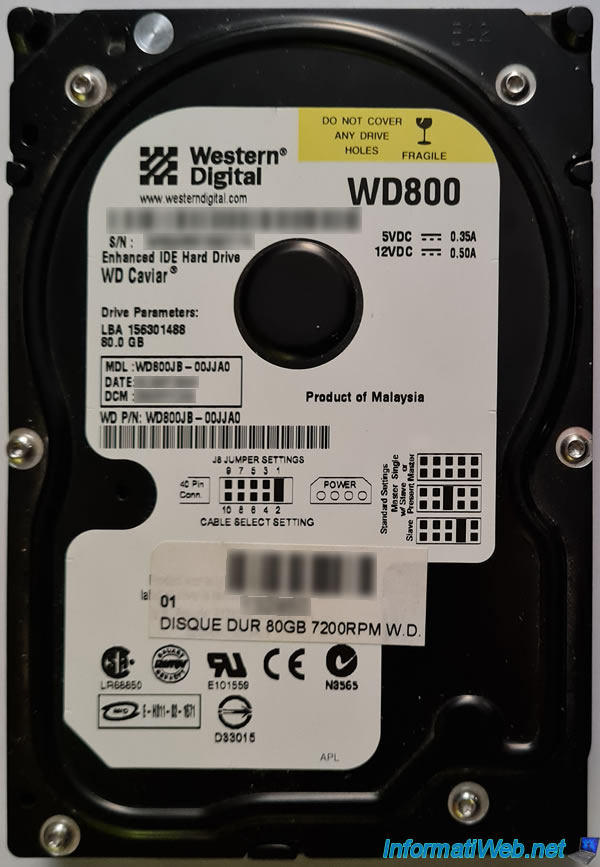
Like the Western Digital hard drive recovered from the parents' family PC and on which we couldn't store much, to be honest.
Even the connection at the time (thanks to jumpers) was complicated depending on the brand with this "main/secondary" and "master/slave" system which limited you to 4 IDE hard drives per PC.
That said, given the price of hard drives at the time, this wasn't really a problem.
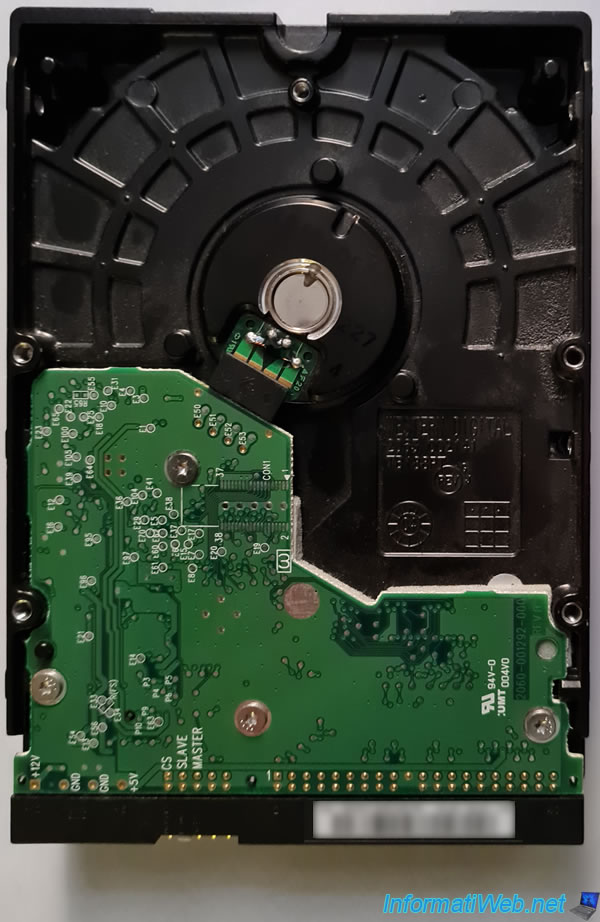
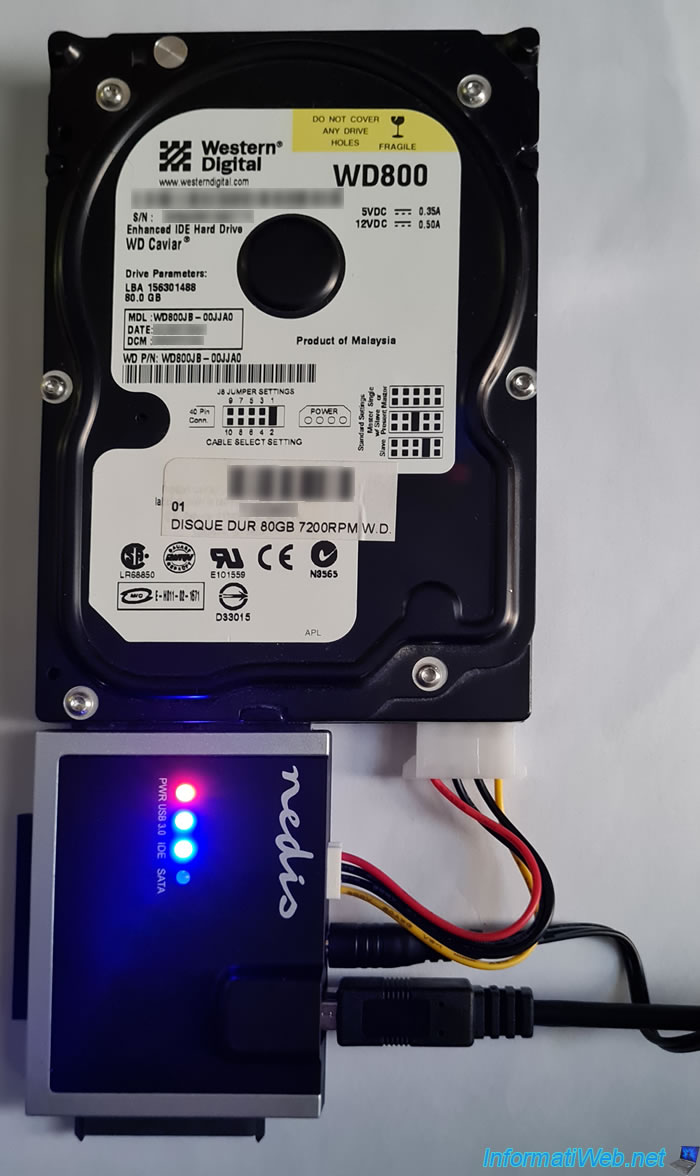
Here is the back of this IDE hard drive.
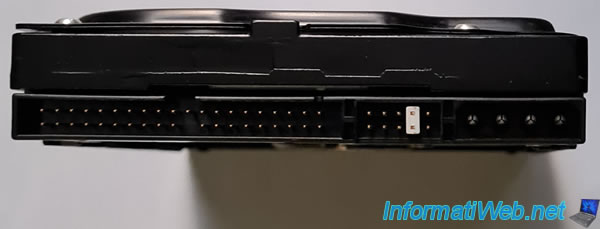
Here are the connectors seen from the front:
- the large IDE connector of 40 or 44 pins depending on the IDE hard drive used: for data transfer.
- the small connector in the center with the white plastic jumper: for configuring the hard drive as "main/master", "main/slave", ...
2 hard drives cannot be configured the same way, otherwise it would not work. - the small connector on the right with 4 pins: for the power supply of the IDE hard drive.
The power connector for IDE hard drives was a Molex connector.
To connect an IDE hard drive, plug it into the appropriate IDE connector on the case, then also plug in the small additional power cable with the Molex connector and the colored wires: red (+5V), black (earth = 0V) and yellow (+12 V).
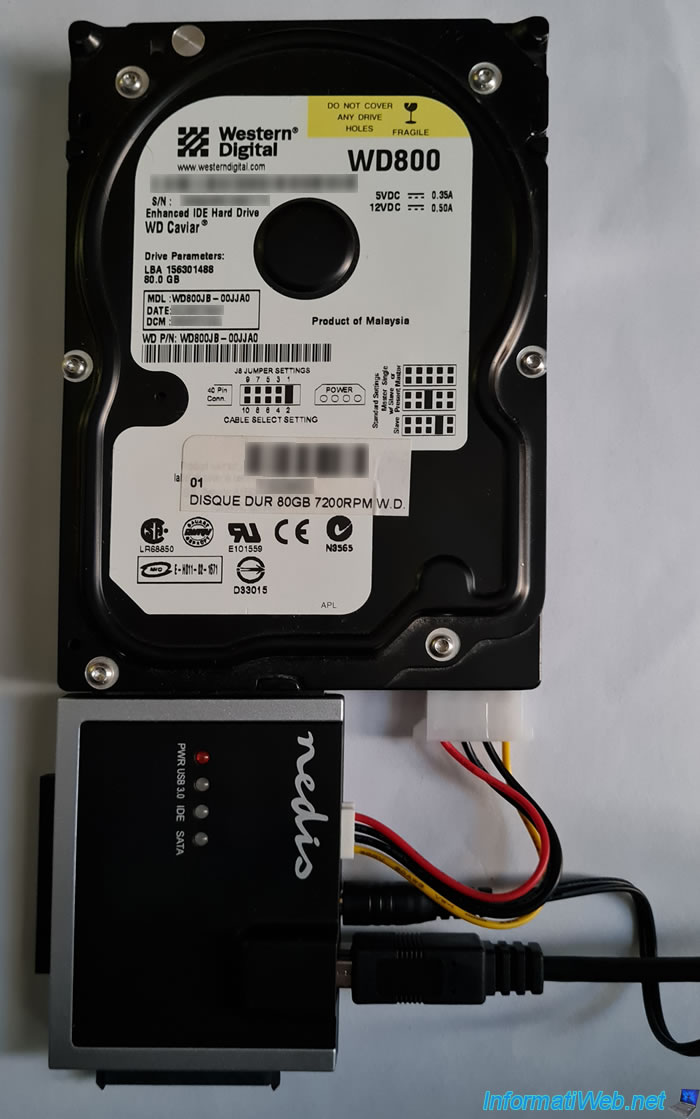
Then, plug in the transformer from the "nedis" box and you will see that 3 LEDs light up:
- PWR: power supply to the box.
- USB 3.0: USB 3.0 cable plugged in for data transfer.
- IDE: indicates that the IDE hard drive is plugged in.
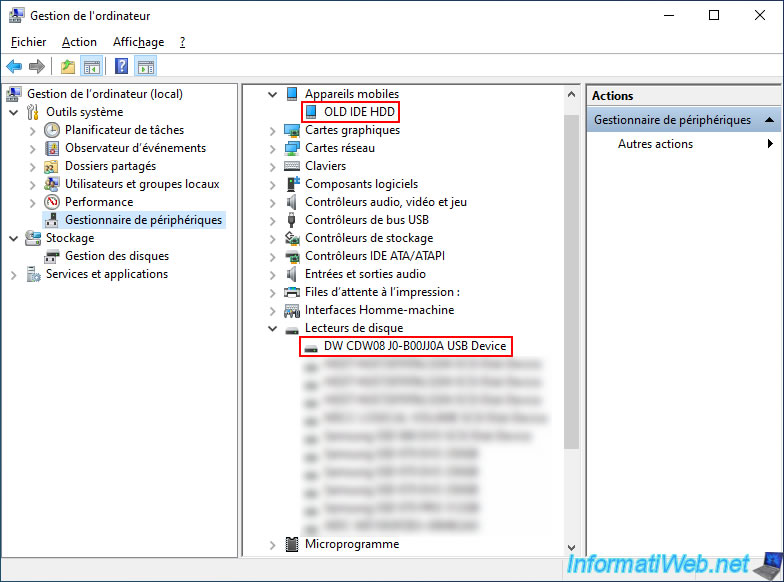
6.2. IDE hard drive connected via USB recognized by Windows 10
For the IDE hard drive, it will be recognized as a "DW CDW08 J0-B00JJ0A USB Device".
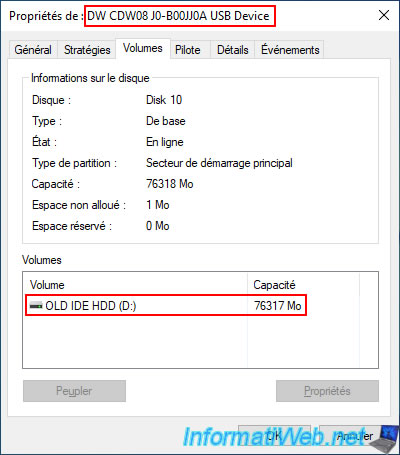
As before, double-click on this device or right-click "Properties" on it, go to the "Volumes" tab and click: Populate.
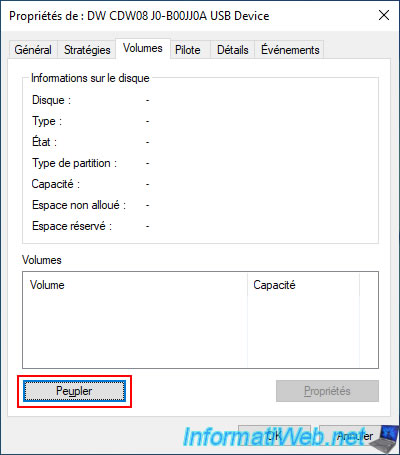
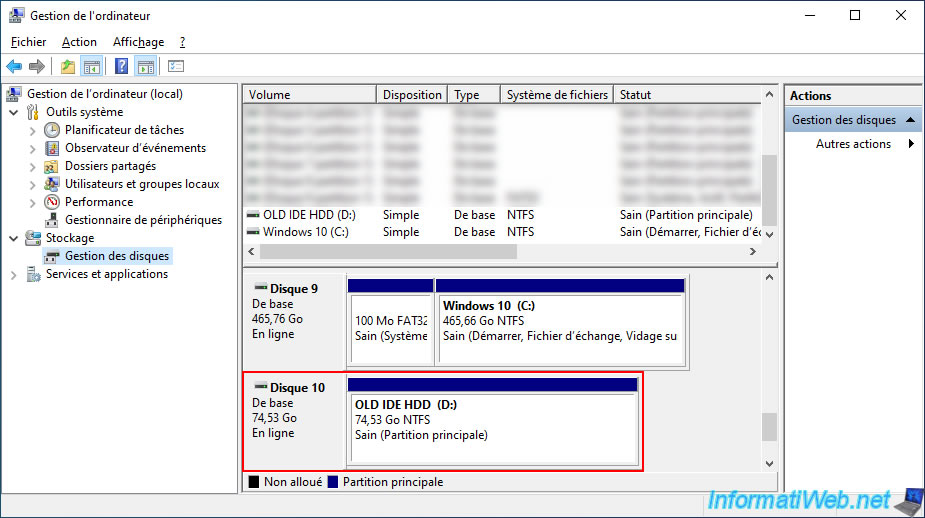
The partition(s) present on your IDE hard drive will appear in the list.
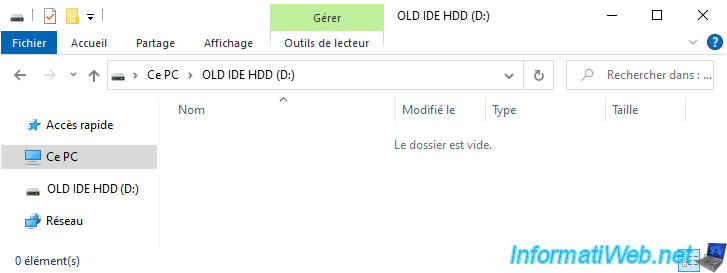
The partition(s) of your IDE hard drive will also appear in file explorer.
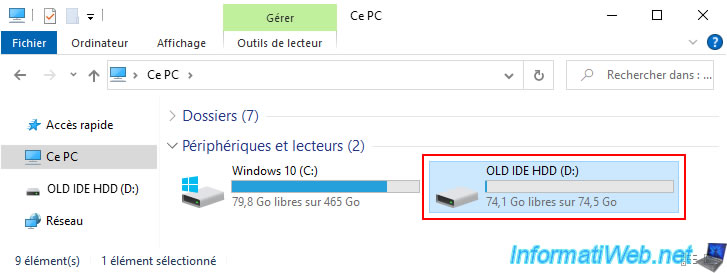
For the content, it will also appear.
Note: in our case, we have erased this old hard drive in the meantime.
As before, your IDE hard drive will be recognized as a local drive.
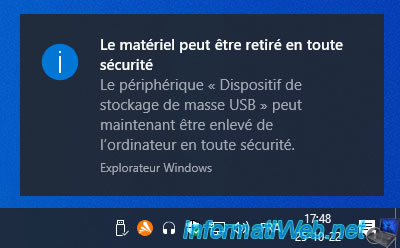
Before unplugging your hard drive, use Windows' eject function again using the USB drive icon in your taskbar.
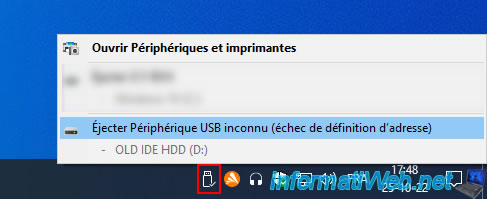
Once the IDE hard drive connected via USB has been ejected, the "Safe To Remove Hardware" message will appear.
Share this tutorial
To see also
-
Articles 2/17/2017
Corsair Flash Padlock 3 - Secure USB key with hardware encryption
-
Articles 3/27/2017
Intel NUC Skull Canyon - Install Windows 7 (with USB 3.0)
-
Articles 11/25/2024
WD My Passport - Encrypted external (USB) hard drive
-

Articles 8/6/2014
Zalman ZM-VE300 - Virtual CD drive
No comment