Configure your computer's BIOS to boot in UEFI mode (firmware)
- BIOS
- 30 November 2021 at 19:55 UTC
-

- 2/2
4. MSI BIOS (American Megatrends)
If you have an MSI laptop PC with an UEFI firmware, here's how to configure its BIOS (American Megatrends).
To enter the BIOS of your MSI laptop PC, press the "Delete" key several times on your keyboard when it starts up.
4.1. Boot in UEFI mode
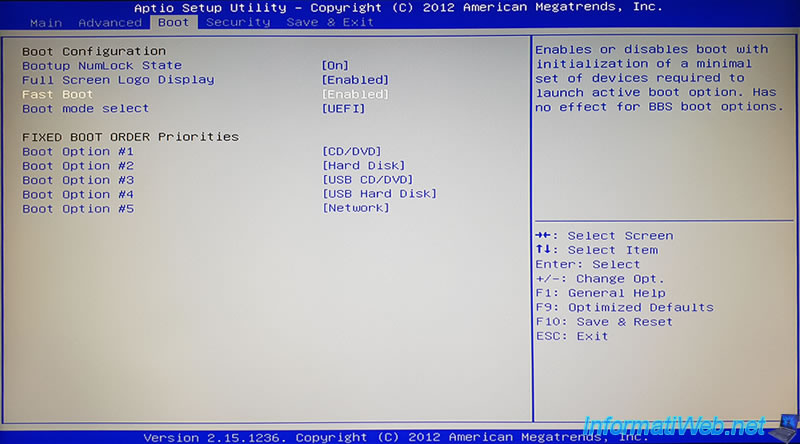
Once you are in the BIOS of your MSI laptop, go to the "Boot" tab, select the "Boot mode select" option and press Enter.

Select "UEFI" and press Enter to validate.

When you start your laptop in UEFI mode, you can enable Secure Boot to secure booting.
To do this, go to the "Security" tab, then in : Secure Boot menu.
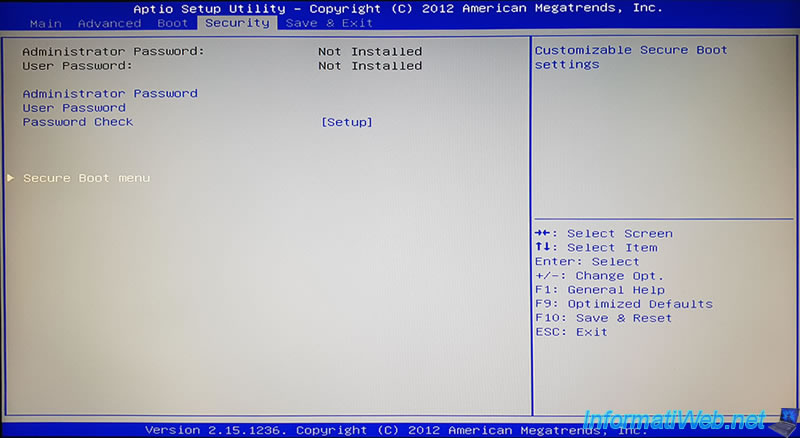
Enable the "Secure Boot Control" option to enable secure boot.
Note : the value displayed in black for the "Secure Boot" option doesn't update in real time. Only when you enter the BIOS.
Important : the Secure Boot is not supported by Windows 7. It's only supported by Windows 8, 8.1, 10 and later (more recent).
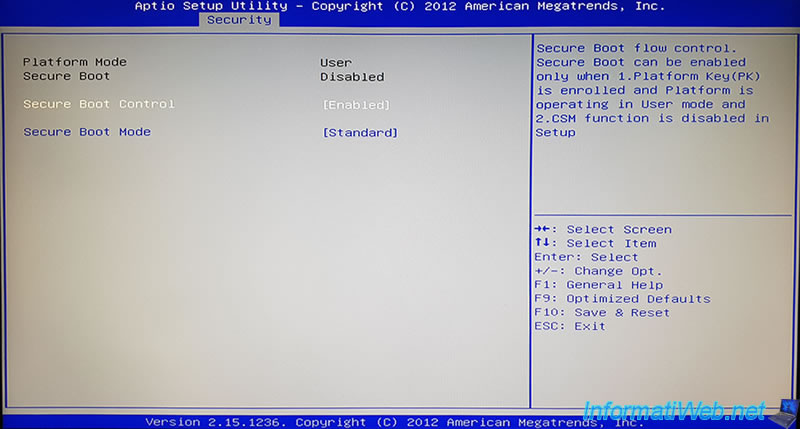
If the value of the "Boot mode select" option was different from "UEFI", this warning will be displayed.
Plain Text
CSM is Loaded !
Disable the CSM in Setup and try again after Reboot
The reason is simply that Secure Boot is only possible in UEFI mode.
But since we just selected "Boot mode select : UEFI", we can ignore this warning.

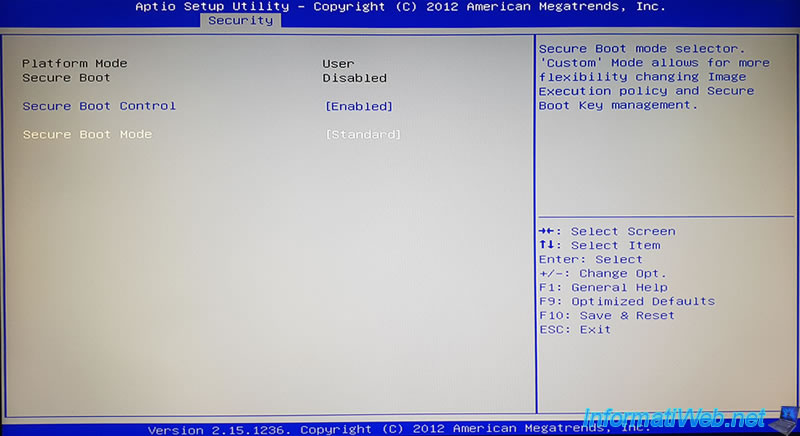
For the "Secure Boot Mode" option, leave it on "Standard".
Optional : UEFI already makes it possible to speed up the startup, but you can also speed up the startup of your computer a little more by enabling the "Fast Boot" option in the "Boot" tab.

4.2. Change the boot order
Now that your MSI laptop is configured to boot in UEFI mode, you need to configure the boot order of it to :
- boot first on your internal CD/DVD drive (to install Windows)
- boot second on your internal hard drive
Select "Boot Option #1" and press Enter.
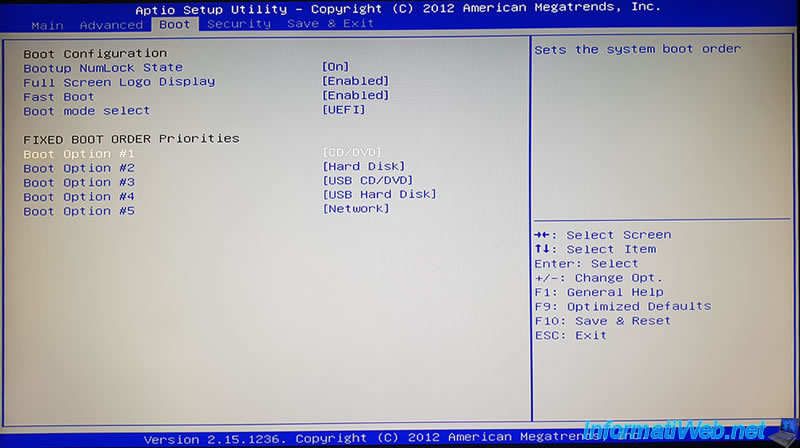
Select "CD/DVD" (which corresponds to the built-in CD/DVD drive of your MSI laptop PC).

Then, select "Boot Option #2" and press Enter.
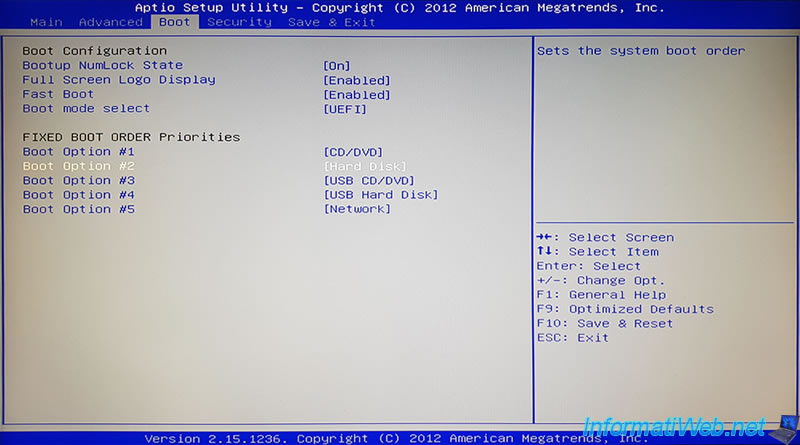
Select "Hard Disk" (which corresponds to the internal hard drive of your MSI laptop PC).

Finally, go to the "Save & Exit" tab and select "Save Changes and Reset" to save the changes.
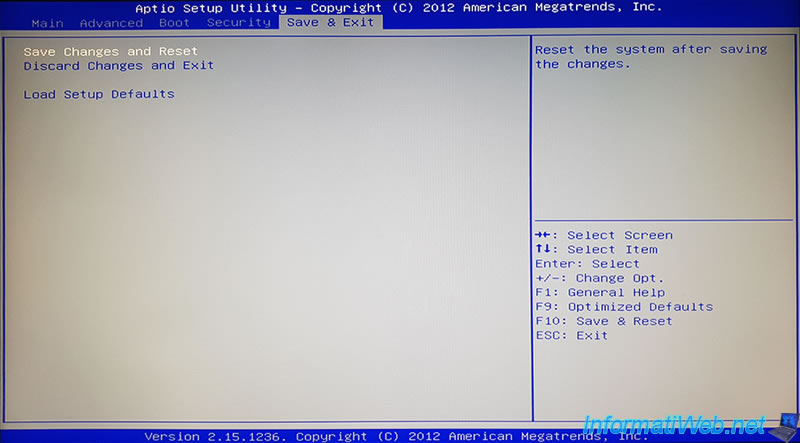
Confirm saving the changes.

Share this tutorial
To see also
-

BIOS 3/19/2016
Asus - The computer doesn't boot - DRAM_LED on
-

BIOS 1/4/2022
Change the graphics card (GPU) initialized by default
-
BIOS 8/6/2015
Create and configure a RAID 0, 1, 5, ... (Intel)
-

BIOS 1/11/2022
Enable the TPM 2.0 module on your motherboard
No comment