- BIOS
- 18 November 2016 at 11:34 UTC
-

When you enter the BIOS of your motherboard, you can modify many things (see the "BIOS" category of our site for interesting options).
But if you no longer know what you have changed or if you lose the BIOS password you have set up a long time ago, the simplest solution is to reset the BIOS of your computer.
For that, there are several possibilities, but the last solution must be used only as a last resort.
- Is it risky to reset the BIOS
- Temporarily removing the battery from the motherboard (desktop PC)
- Use the Load Defaults feature of the BIOS
- Official manufacturer solutions
- Use a third-party program (risky, so to use as a last resort)
1. Is it risky to reset the BIOS
Yes and no.
No, because this will not make your computer permanently unusable.
And not if you have never changed an advanced setting in your BIOS.
But yes in some cases :
- If you changed the hard disk controller before resetting the BIOS, you will need to restore the correct value by following these steps : Change the mode of the hard disk controller
Otherwise, a STOP blue screen will be displayed each time Windows starts. - If you are using virtualization technologies such as VirtualBox or VMware, you will need to enable the processor virtualization : Enable virtualization (Intel VT-x / AMD-V)
- If you had enabled the RAID technology of your motherboard. In this case, follow this : Create and configure a RAID 0, 1, 5, ... (Intel)
- If you had changed a setting necessary for the proper functioning of your system. But, if not, there is no risk.
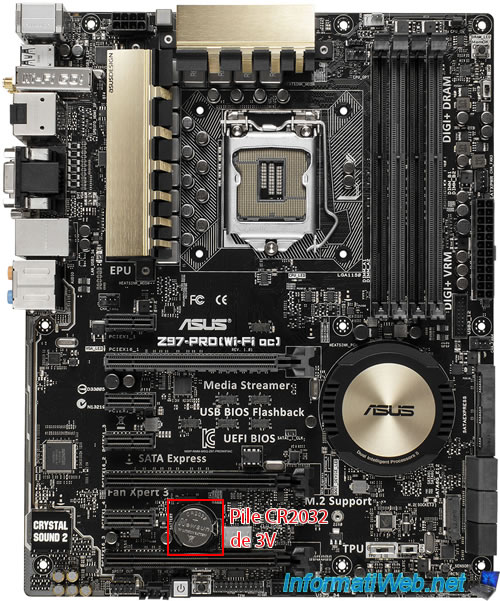
2. Temporarily removing the battery from the motherboard (desktop PC)
The easiest and least risky solution is to :
- Unplug the power plug from your computer
- Then, remove the battery of the motherboard for at least 30 seconds.
Then, clip it back on the motherboard (in the correct position) and start your computer.
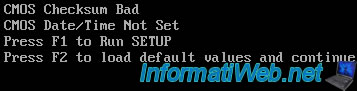
Notez qu'il est possible qu'un message "CMOS Checksum Bad" s'affiche une fois au démarrage.
Dans tous les cas, il faudra :
- rentrer au moins une fois dans le BIOS (via la touche indiquée ou la touche habituelle (DEL, SUPPR, F2, ...) si ce message ne s'affiche pas)
- puis, quitter le BIOS en sauvegardant les changements (même si vous n'en avez pas fait).
Note that a "CMOS Checksum Bad" message may appear once at startup.
In all cases, it will be necessary to :
- return at least once in the BIOS (by using the key indicated or the usual key (DEL, F2, ...) if this message is not displayed)
- then quit the BIOS by saving the changes (even if you have not done a changes).
Note : if this message appears every time you start up, the battery is discharged. In this case, buy a new CR2032 battery (3 volts).
Then, your computer will restart correctly.
3. Use the Load Defaults feature of the BIOS
And finally, the 3rd solution to reset the BIOS is to use the "Load Setup Defaults", "Load Fail-Safe Defaults" or "Load Optimized Defaults" option present in all BIOS.
Typically, this option is in the "Exit" (or Quit) tab of your BIOS.
3.1. Phoenix BIOS
If you have a PhoenixBIOS, enter in the BIOS by pressing F2 when you start your computer.

Then, go to the Exit tab and choose the "Load Setup Defaults" option.
Then, press Enter.
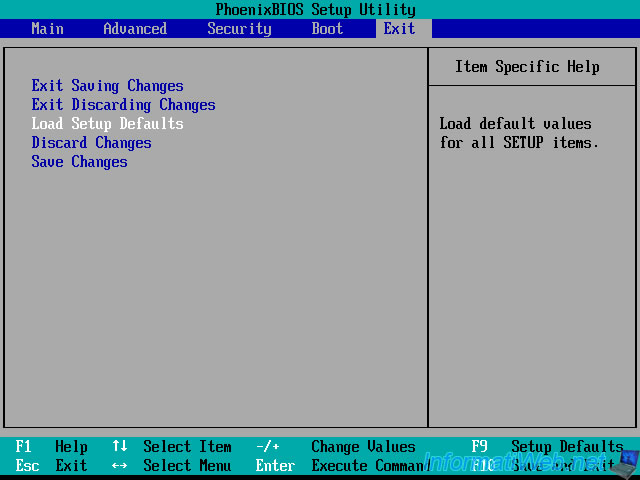
Select "Yes" and press Enter.

Finally, select "Exit Saving Changes" and press Enter.
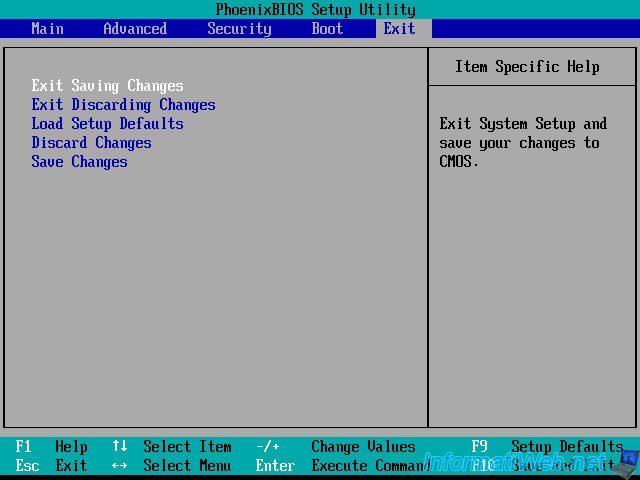
Select Yes and press Enter.

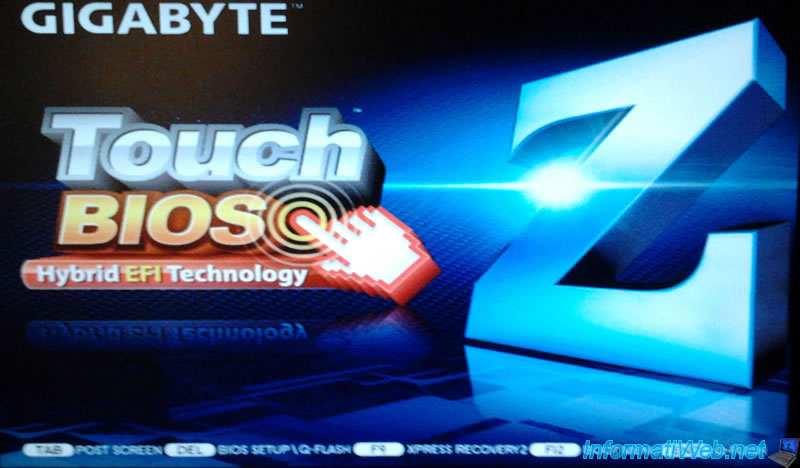
3.2. BIOS Award
If you have an Award BIOS, press the DEL key of your keyboard when you start your computer.
Then, select the "Load Optimized Defaults" option and press Enter.
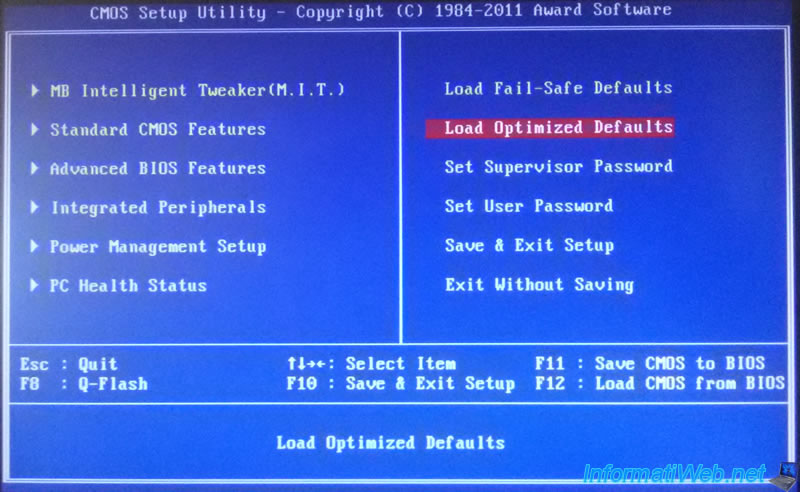
Type Y, then press Enter.

If the computer does not restart, press F10 (Save & Exit Setup).
Then, type Y, and then press Enter to save the changes.

3.3. BIOS UEFI Asus (blue)
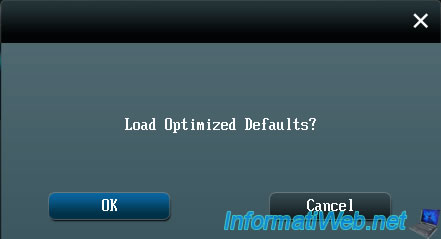
If you have an Asus motherboard with a BIOS that looks like this, you will find a "Default (F5)" button at the bottom right of the screen.
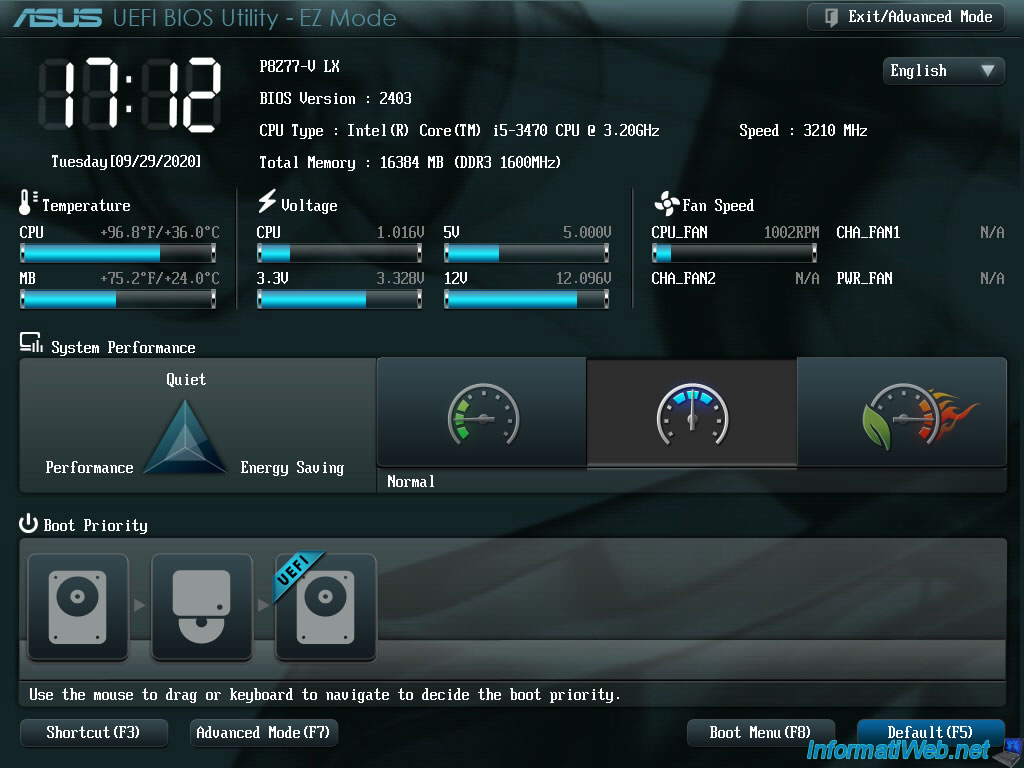
A small window will appear with the "Load Optimized Defaults?" message.
Click OK.
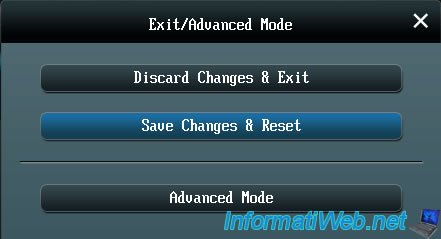
Then, click on the "Exit/Advanced Mode" button at the top right.
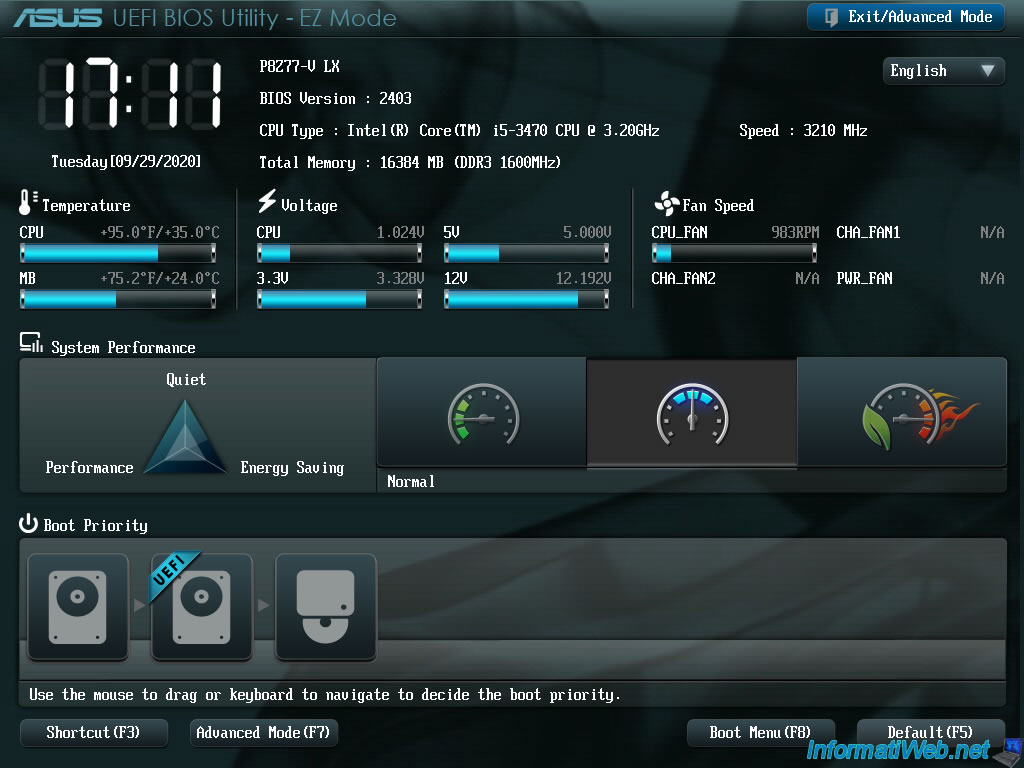
Then, click on : Save Changes & Reset.
3.3. BIOS UEFI Asus (yellow/grey)
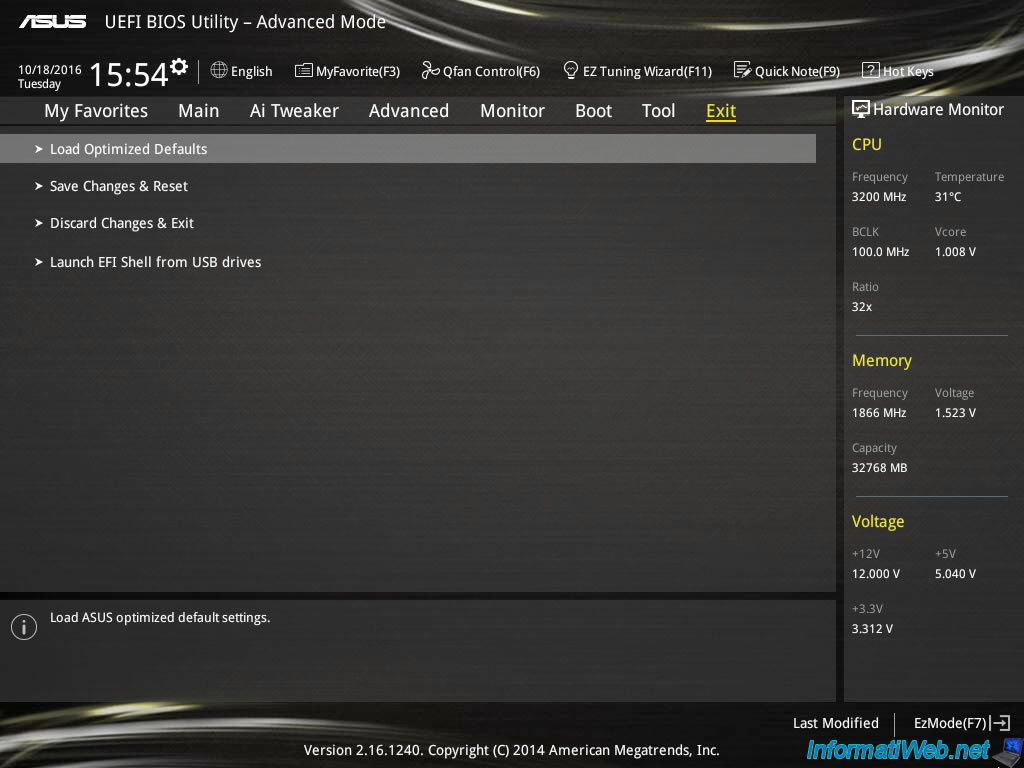
If you have an Asus motherboard with this type of BIOS, press DEL or F2 when you start your computer to enter in the BIOS.
Then, if you are in the EZ Mode, you will find the "Default" option at the bottom of the screen. (Keyboard shortcut : F5).
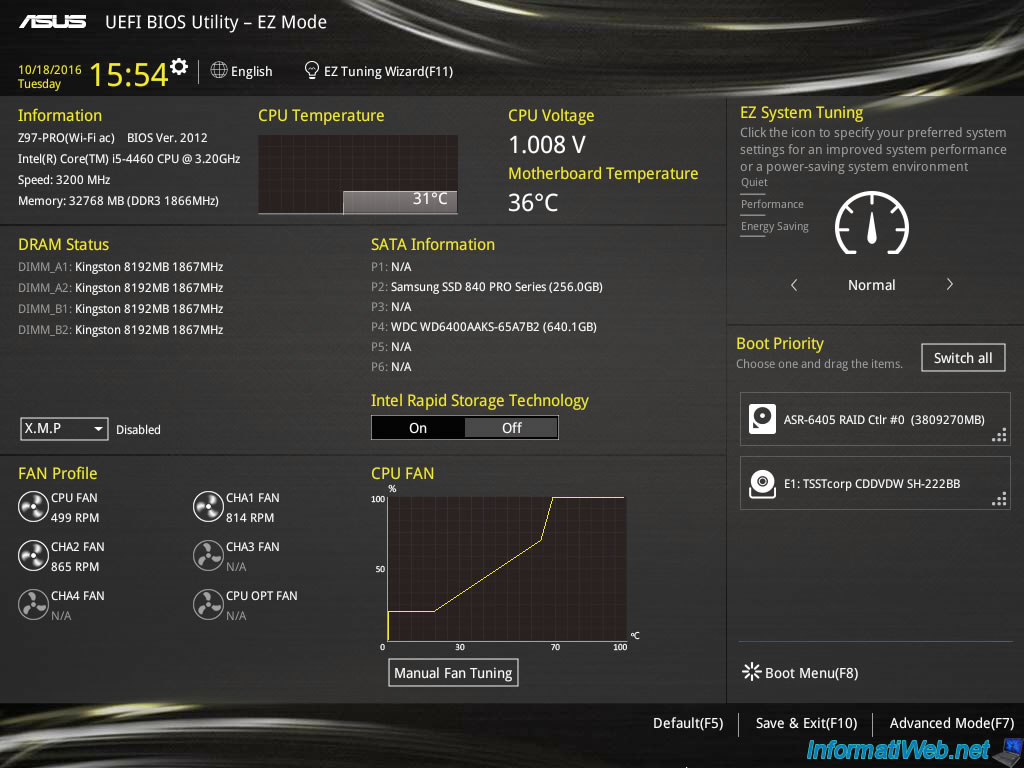
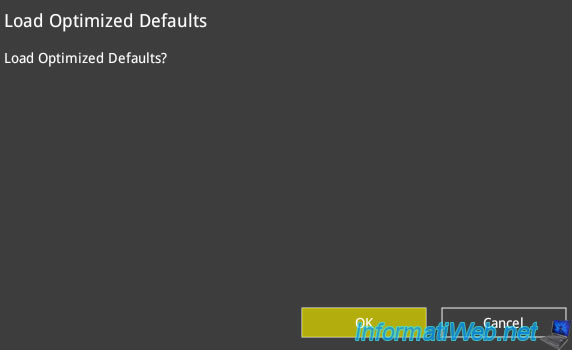
If you are in the advanced mode, go to the "Exit" tab and click "Load Optimized Defaults".
Confirm by clicking OK.
Then, click "Save Changes & Reset" to save the changes.
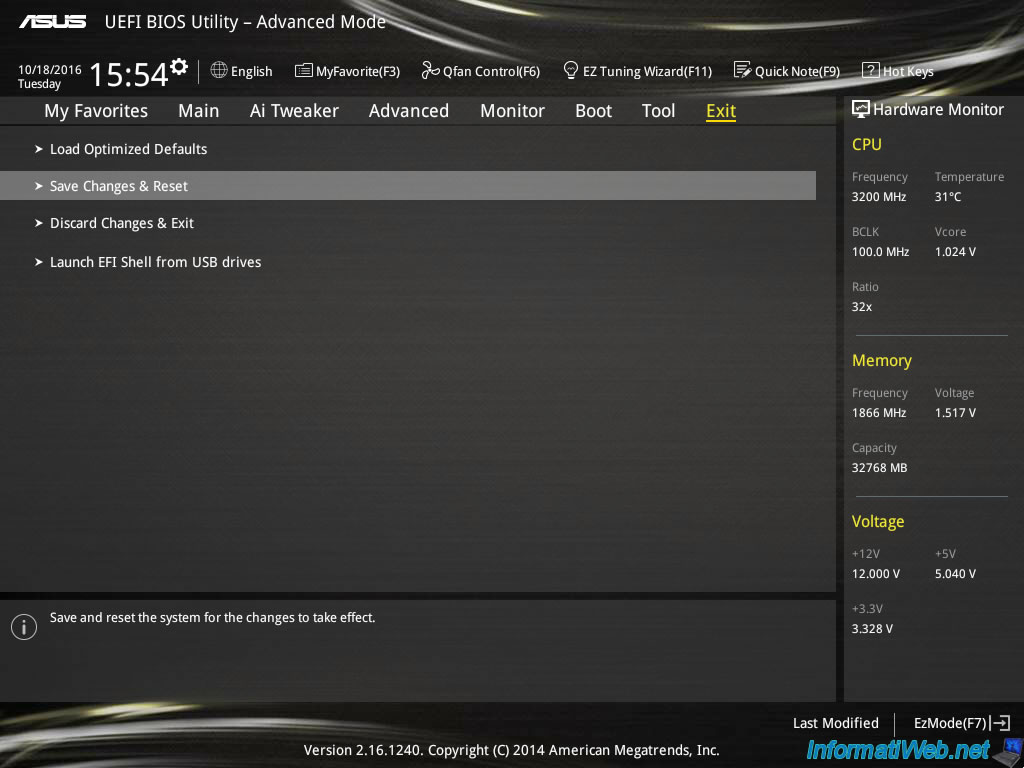
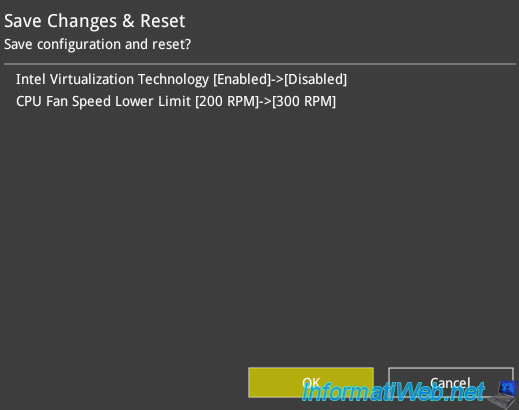
The BIOS will tell you which settings will be restored to their original values.
Click OK and the computer will restart normally.
4. Official manufacturer solutions
4.1. Packard Bell
If you have a Packard Bell laptop, know that there is an official (but paid) solution. You need to send your laptop for repair to allow Packard Bell to remove the password of your BIOS.
See the "Removing a BIOS password" page of their online support.
5. Use a third-party program (risky, so to use as a last resort)
If your motherboard BIOS is password-protected, but you can not remember it, the only option is to use a special program.
Since this is not an official program provided by the manufacturer of your motherboard, there may be a risk.
This solution is to be used only as a last resort and we can not be held responsible if your computer becomes unusable after you use this program.
On the "Ultimate Boot CD" live CD (which is free), you will find the "WipeCMOS" program which will allow you to erase the settings of the BIOS.
This will restore the BIOS to its default settings the next time you start your computer. (This will be done automatically)
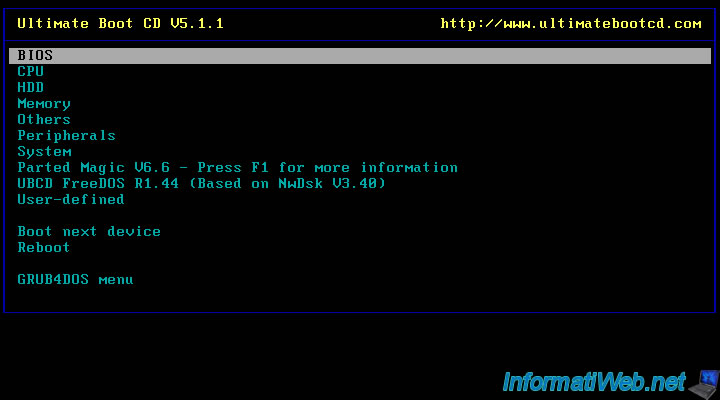
First, burn the Ultimate Boot CD live CD from the iso file to a CD, and then boot your computer on this bootable CD.
In the menu that appears, select "BIOS" and press "Enter".
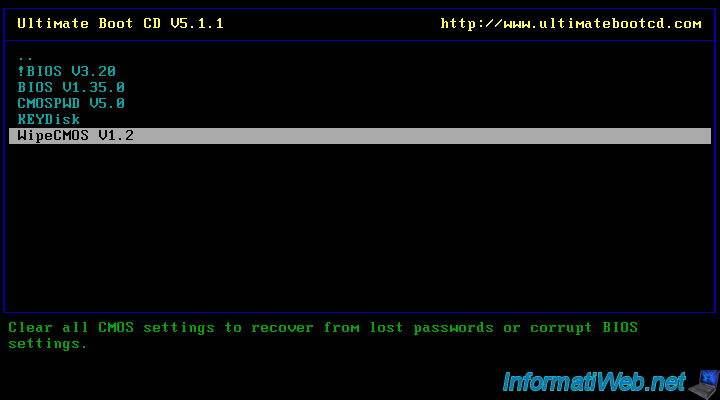
Then, select the "WipeCMOS" program and press Enter.
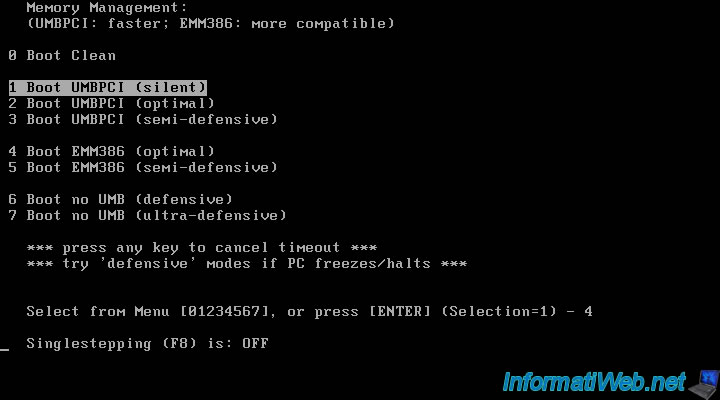
This menu is displayed for a few seconds.
Wait or press Enter to skip this menu.
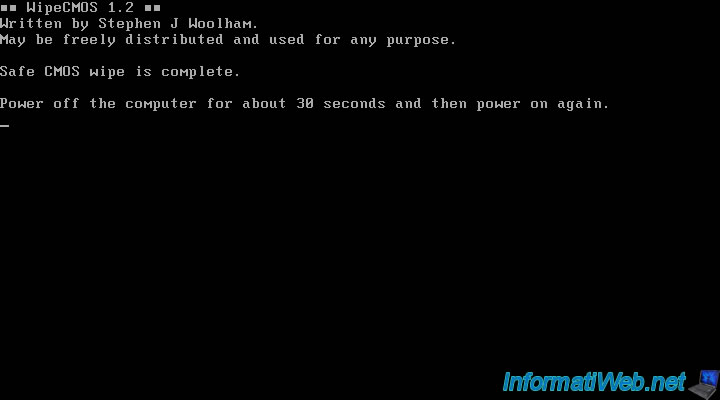
The "WipeCMOS" program (which is a DOS program) is displayed.
Press S to clear the BIOS settings securely.

If the program can clear the BIOS settings, the "Safe CMOS wipe is complete" message will be displayed.
Share this tutorial
To see also
-

BIOS 12/18/2023
ASUS ROG MAXIMUS XIII HERO - Enable internal graphics card (iGPU)
-
BIOS 12/7/2021
Asus X551C - Change the boot order of its BIOS
-

BIOS 1/4/2022
Change the graphics card (GPU) initialized by default
-
BIOS 1/29/2016
Flash the BIOS of an Asus motherboard (via Asus EZ Flash 2)
You must be logged in to post a comment