Store your passwords securely with Bitwarden (online or self-hosted)
- Security
- 06 July 2026 at 08:14 UTC
-

- 2/10
3.3. Send encrypted data via the Bitwarden website
On the Bitwarden website, you will find a "Send" section that will allow you to send files or text that will be encrypted.
This way, only the recipient will be able to read this data thanks to the right password (if any) and within a certain time (if necessary).
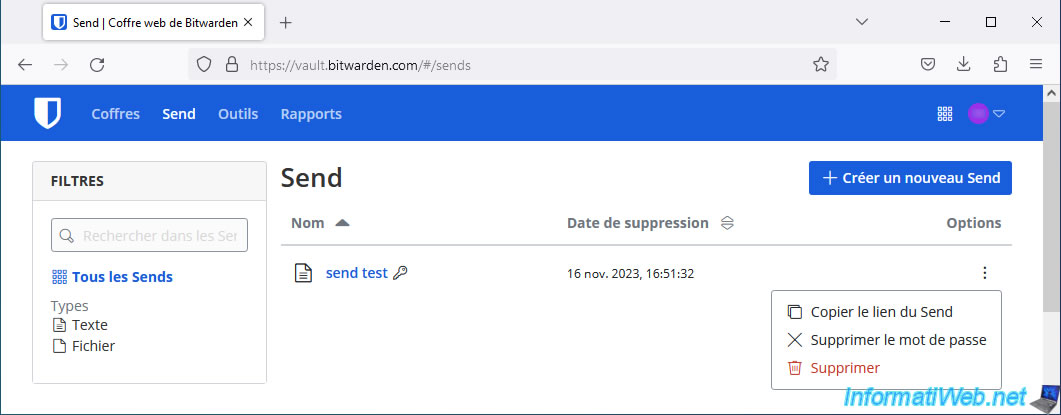
To use this system, go to the "Send" tab and click on: Create a new Send.
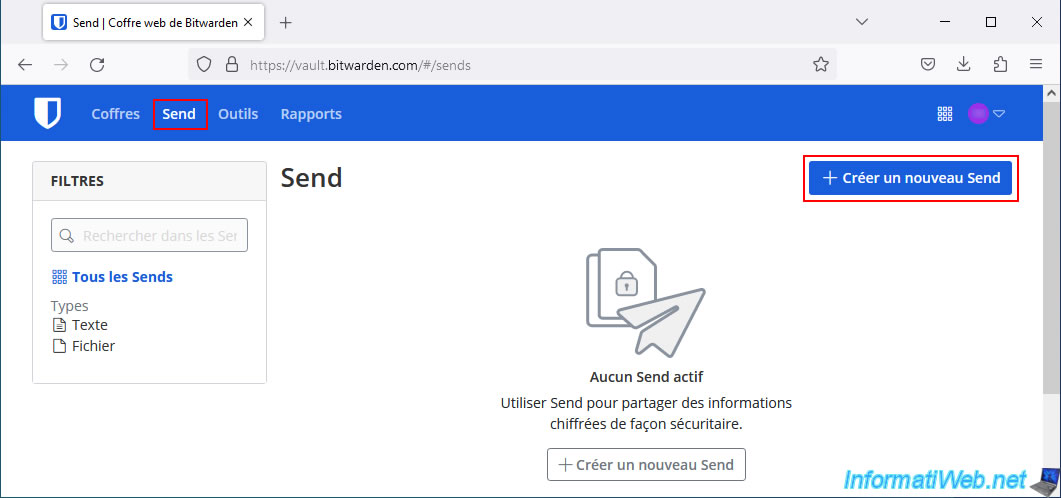
In the "Create a new Send" window that appears, fill in the following fields:
- Name: specify on what name this "Send" will appear in your Bitwarden account.
- What type of Send is this?: select "Text" in this case. Although you can also send any file.
- Text: if you selected "Text" above, type the text that the recipient will be able to see.
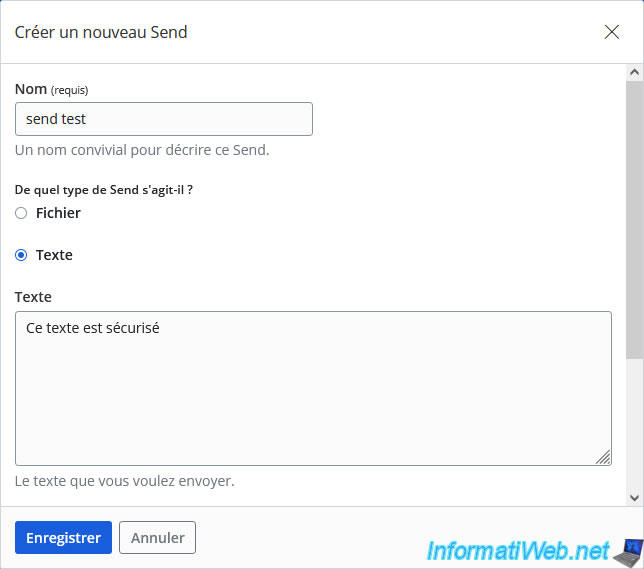
In the "Options" section, you can define:
- Deletion date: time after which the "Send" will be automatically deleted.
The time can be set between 1 hour and 30 days or can be specified manually by indicating a date. - Expiration date: time after which the "Send" will expire.
The values for the time choice are identical to the previous option. - Maximum number of accesses: a maximum number of openings for this Send. So, for example, you could send something to someone and limit the number of accesses to 1 so that only this person can open it.
Then, a hacker or another person who would recover the link (in the recipient's emails or in the history of the web browser used) would not be able to access it. - Password: require a password to access the content of this Send.
Then, click Save.
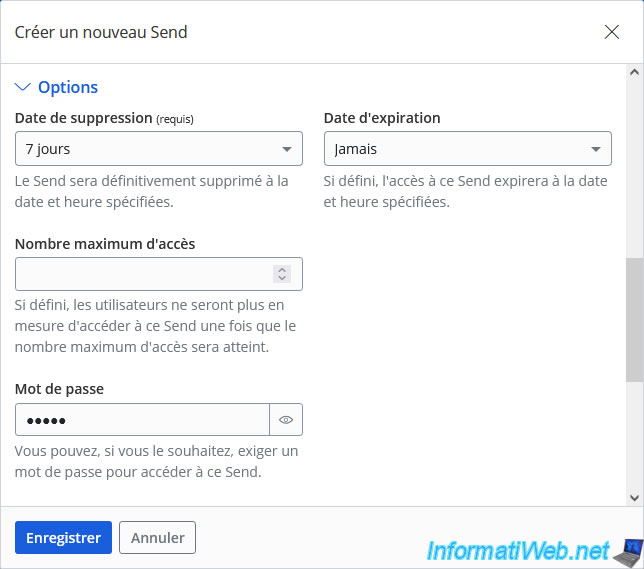
A "Send created" notification will appear.
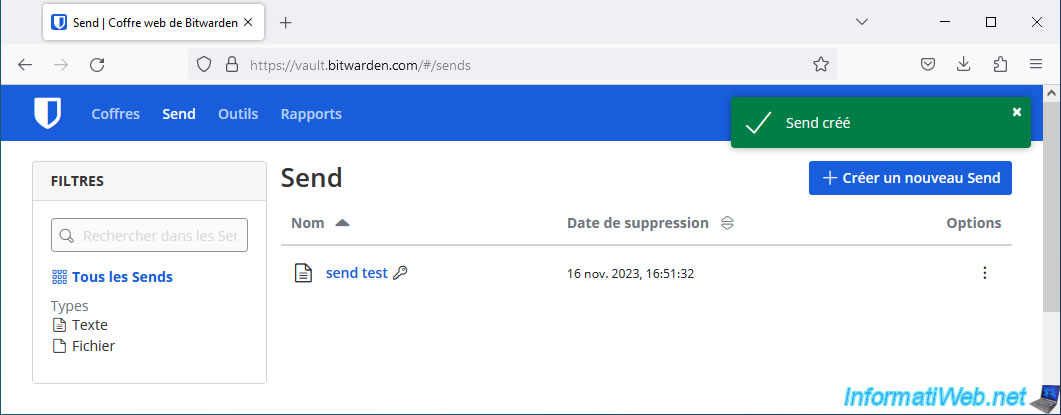
To get the link of this "Send", click on the "..." icon and click on: Copy Send link.
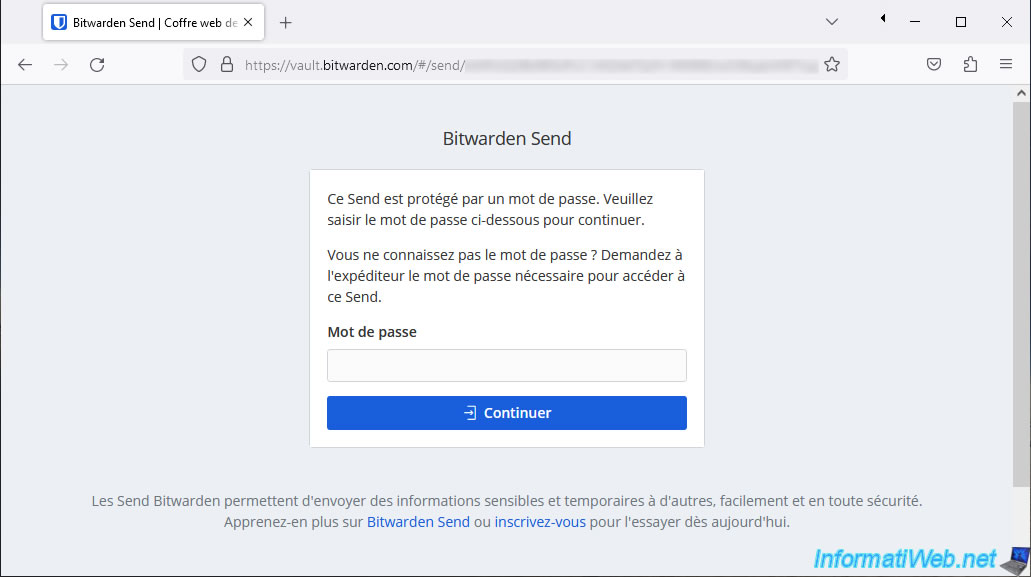
When the recipient tries to access your "Send", if it is password protected, this will be displayed.
Plain Text
This Send is password protected. Please enter the password below to continue.
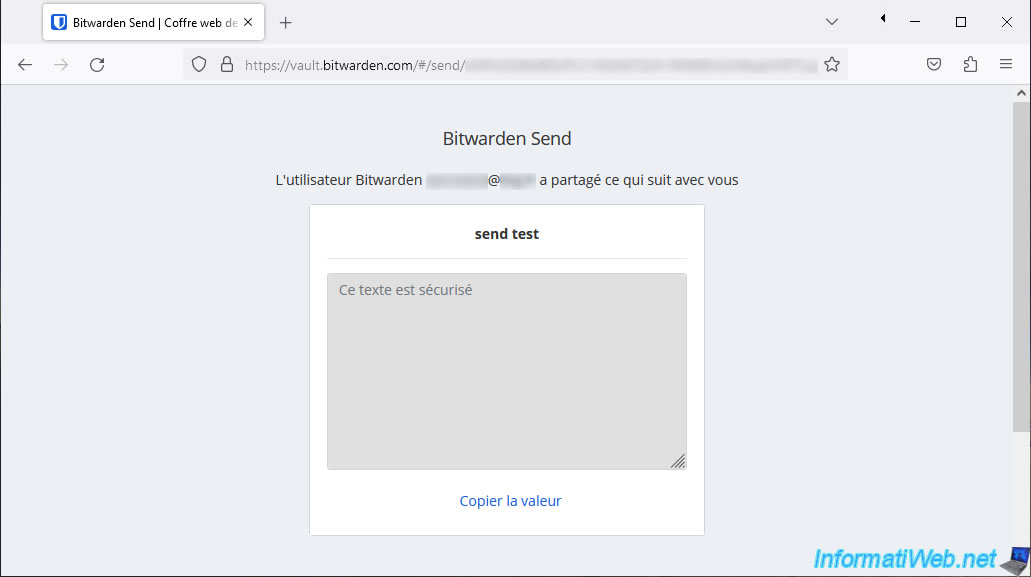
If the password is correct, the content of the Send will appear.
Note that Bitwarden also tells you the email address of the person who created this Send.
3.4. Generate secure passwords via the Bitwarden website
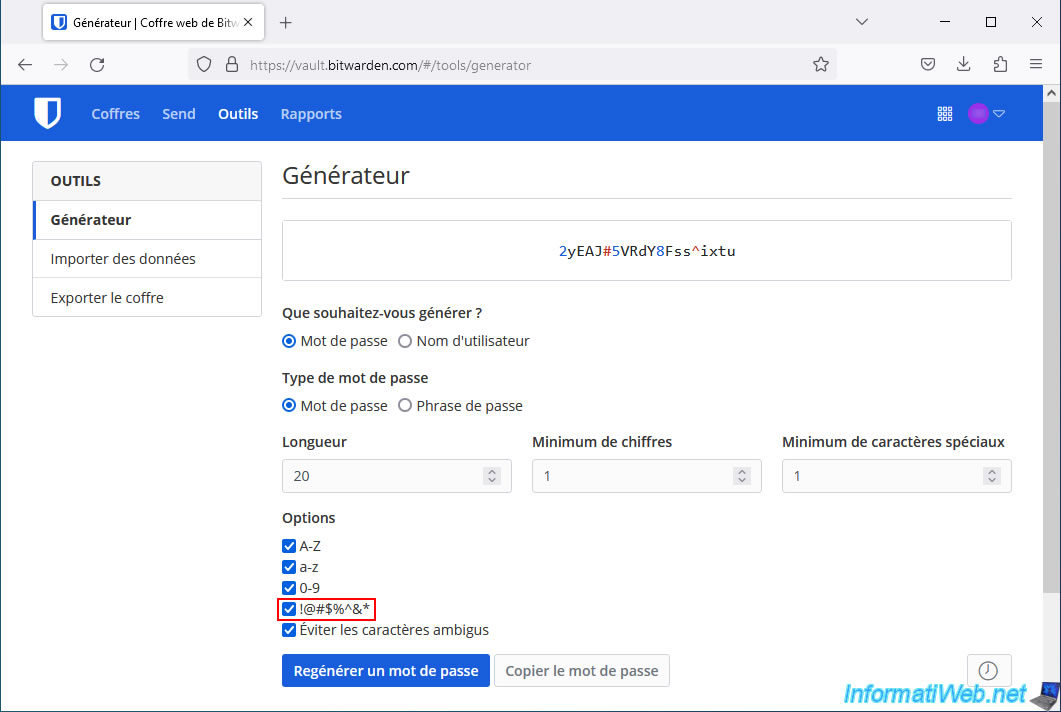
To generate strong (complex) passwords, you can use Bitwarden's password generator available in the "Tools" tab.
By default, Bitwarden will generate a unique password of 14 characters long using uppercase and lowercase letters, as well as numbers.
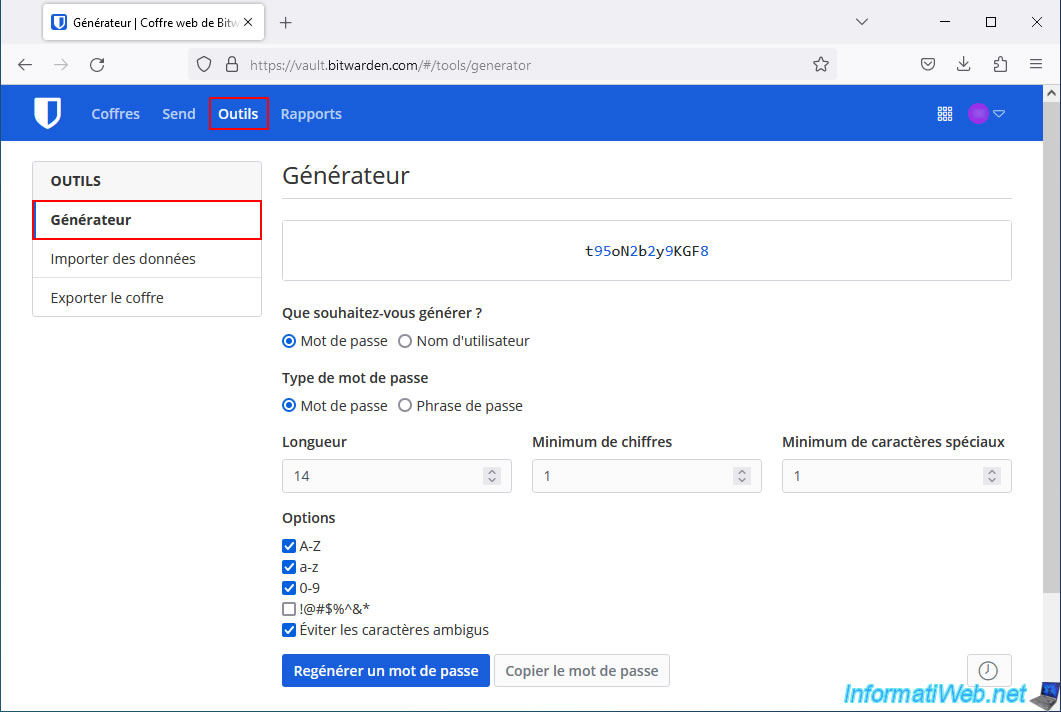
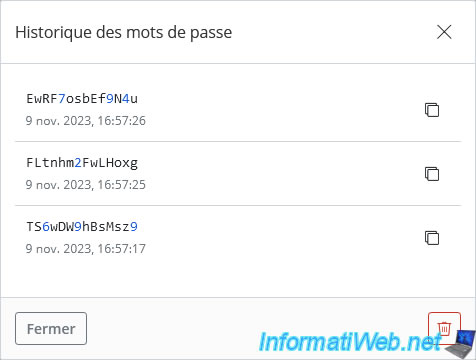
If you click on the icon located at the bottom right, you will be able to see the history of the passwords you have generated.
If necessary, click on the trash can icon (at the bottom right) to delete this history.
To generate even more secure passwords, you can add special characters (however, some sites do not accept them, which is a shame).
3.5. Import credentials from another password manager
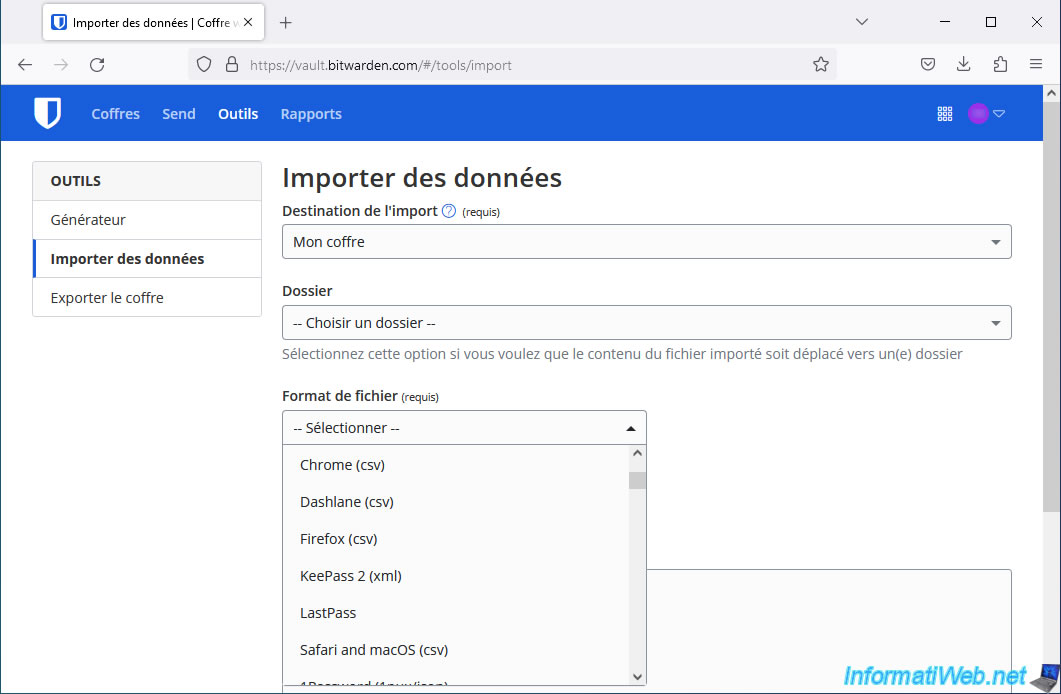
To avoid manually adding your account credentials or adding them one by one via the extensions available for different web browsers, Bitwarden allows you to import your credentials from many popular password managers. For example: those integrated into Google Chrome or Mozilla Firefox or from the KeePass password manager (which we already told you about previously).
To import data from another password manager, select:
- Import destination: your Bitwarden vault where you want to add your accounts.
By default, you already have a vault named "My vault". - Folder: if you want, you can import your accounts into a specific folder of your Bitwarden account instead of placing them at the root of your Bitwarden vault.
- File format: select the password manager and the source file format from which Bitwarden should import your accounts.
- Select the file to import: click "Choose file" and select the necessary file on your computer.
- or copy/paste the content of the file to import: if the credentials are exported in text format, you can paste this text into the large box, rather than importing the corresponding file.
3.6. Export Bitwarden vault
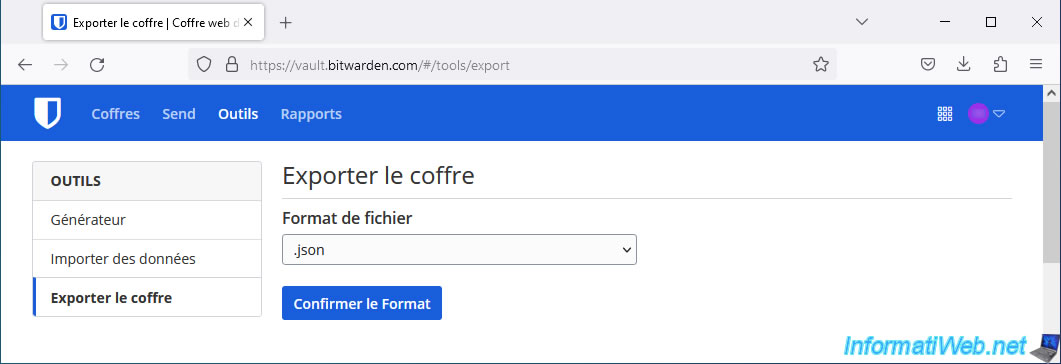
In case you have been using Bitwarden password manager for a while and want to switch to another password manager, you can export your Bitwarden vault in JSON format (encrypted or not) or CSV format to be able to import your accounts quickly into another password manager.
3.7. Security reports
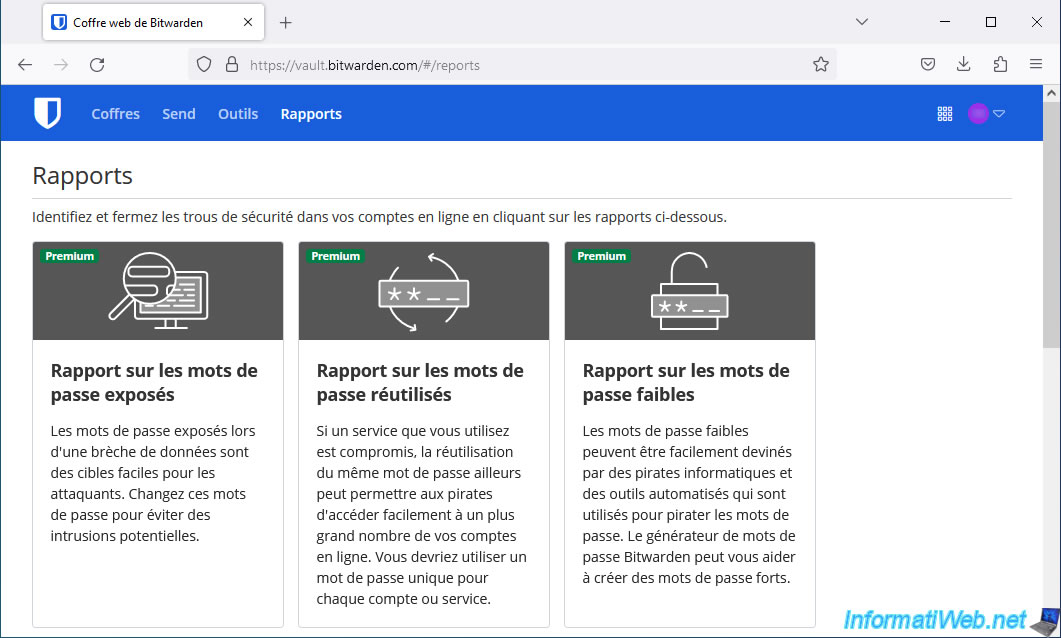
To improve your online security, Bitwarden offers several reports allowing you to:
- to change passwords that may have been leaked (during hacking of known website servers)
- to change passwords that you may have reused
- to change passwords that are weak.
- to favor the use of HTTPS protocol instead of HTTP for websites where you are registered.
- to use 2-factor authentication when possible.
- to check for leaks of certain identifiers to change them before it is too late.
Warning : only the last option is free.
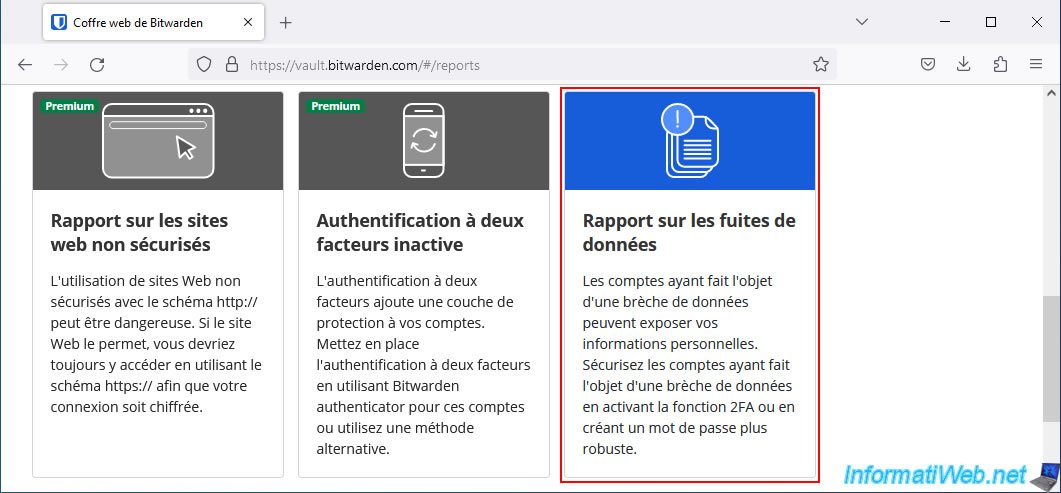
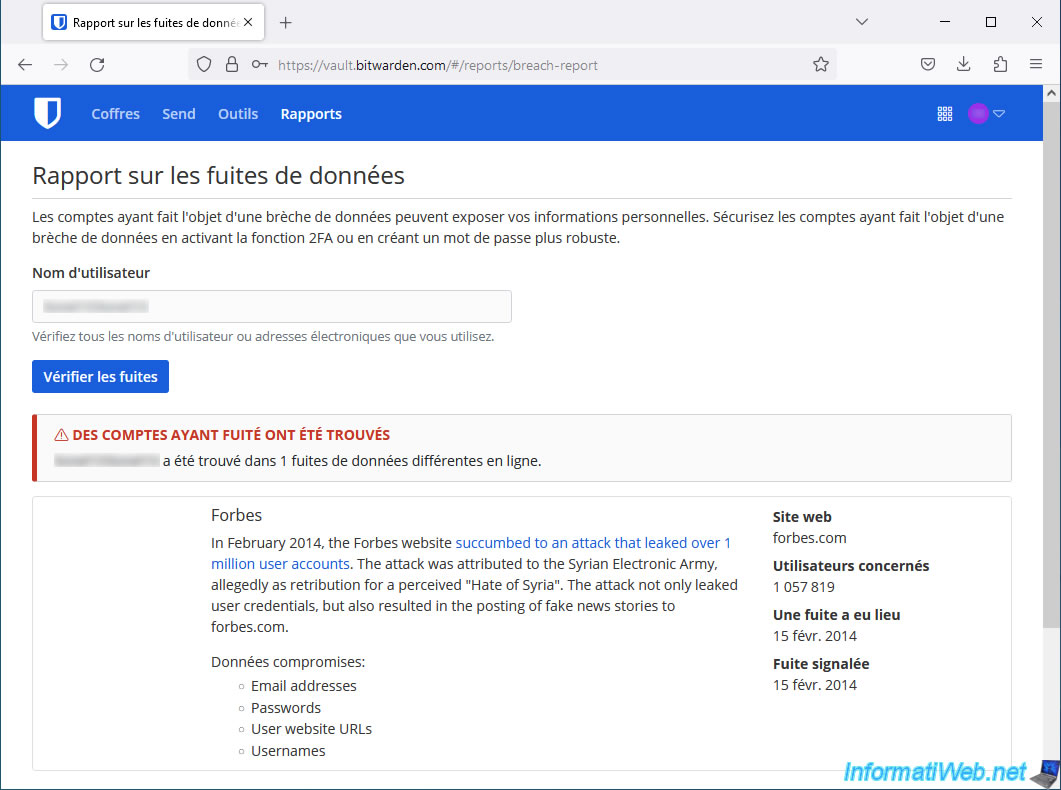
If you want, you can enter a username to see if it has been leaked in the past or not.
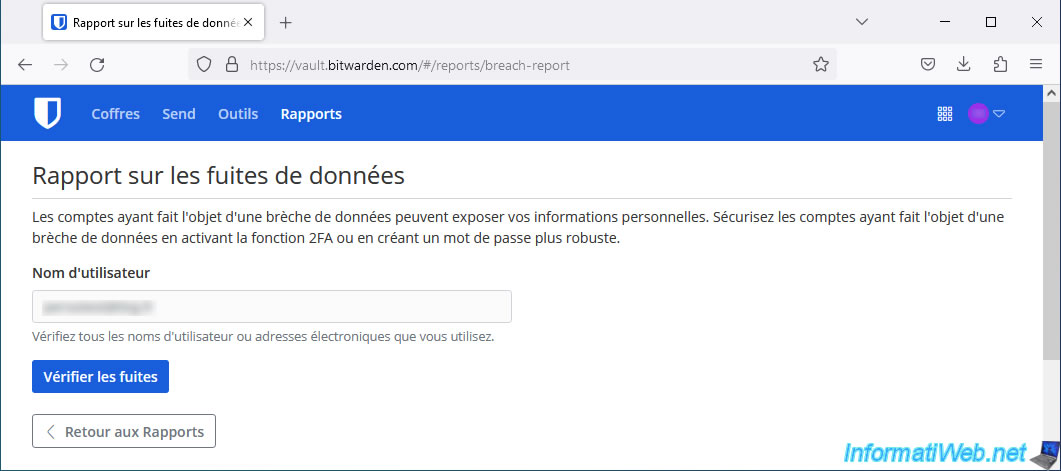
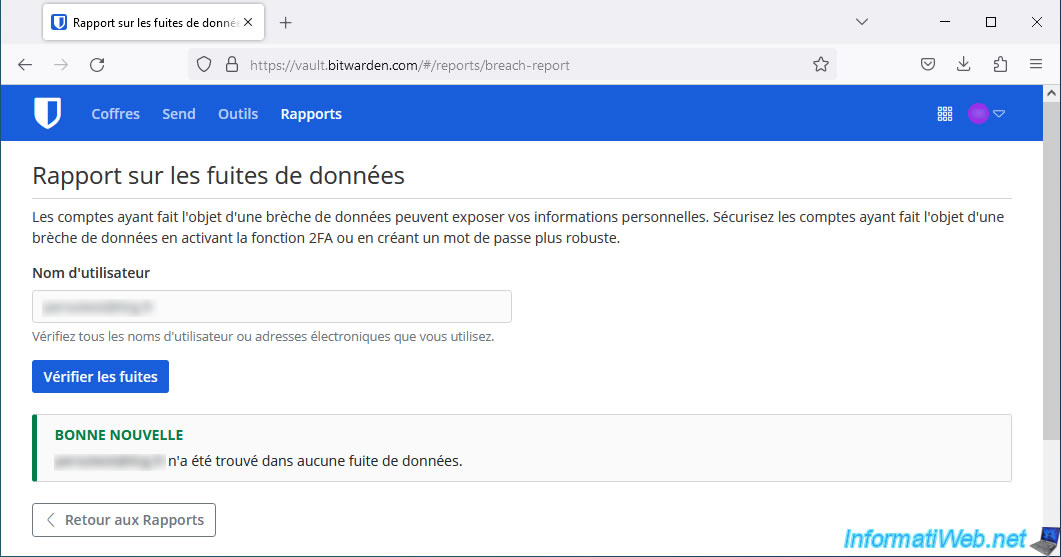
If the username or email address is not part of a data breach, you will see the message "Good news: [username or email address] was not found in any data breach".
Otherwise, Bitwarden will tell you what data leaks occurred for the specified username or email address.
Plain Text
Leaked accounts have been found.
[username or email address] has been found in 1 different data leaks online.
3.8. Bitwarden account settings
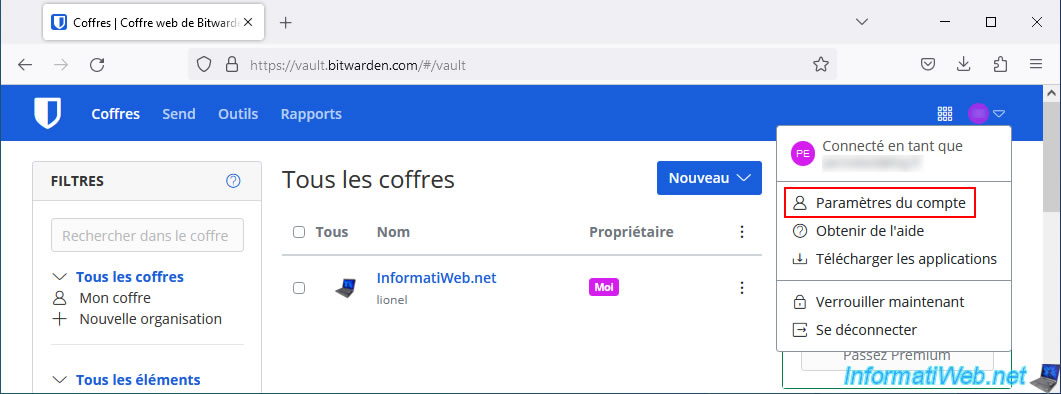
To access your Bitwarden account settings, click on the colored circle at the top right, then on: Account Settings.
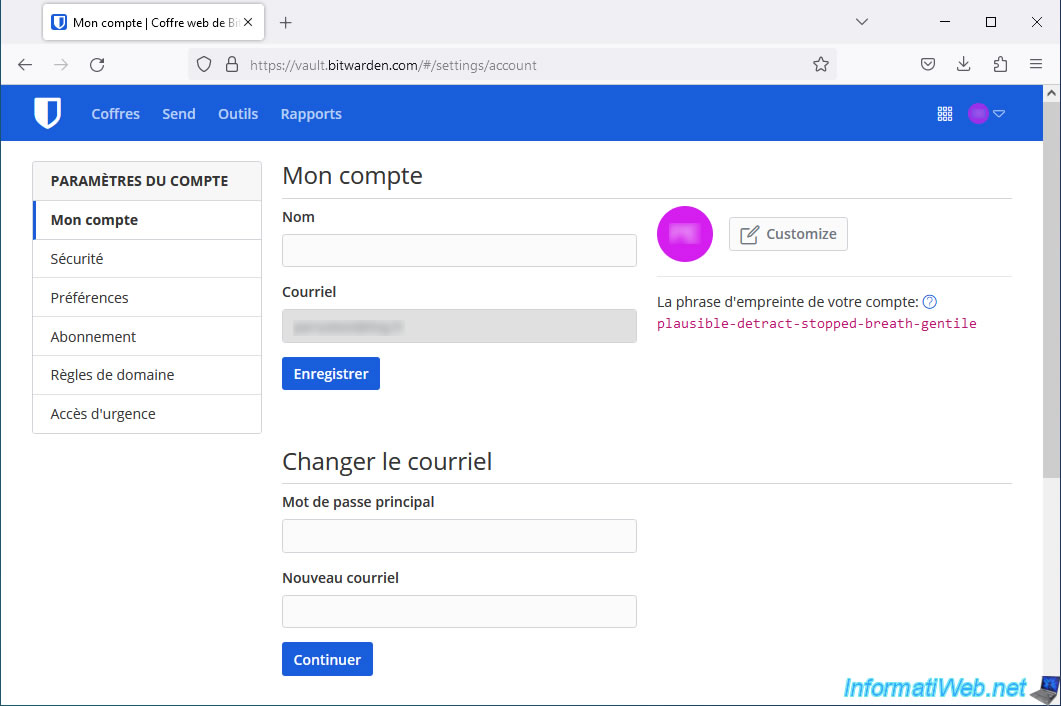
In "My Account", you can change your name, as well as the email address linked to your Bitwarden account.
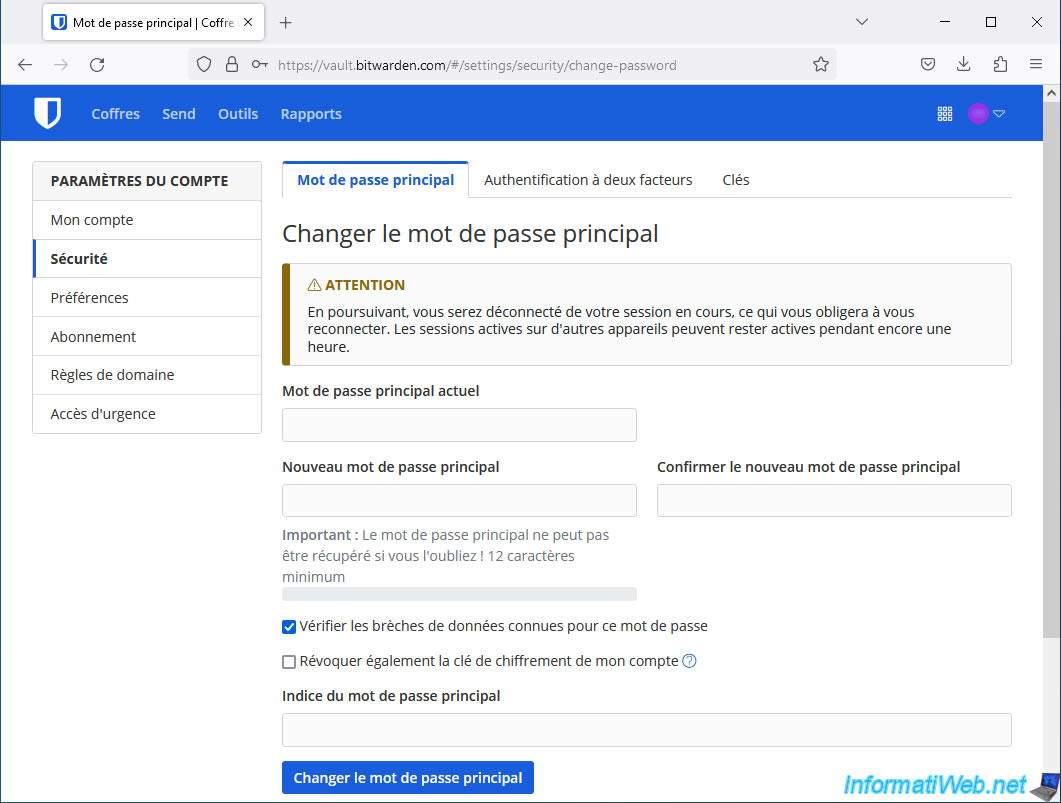
In "Security", you can change your master password (if needed).
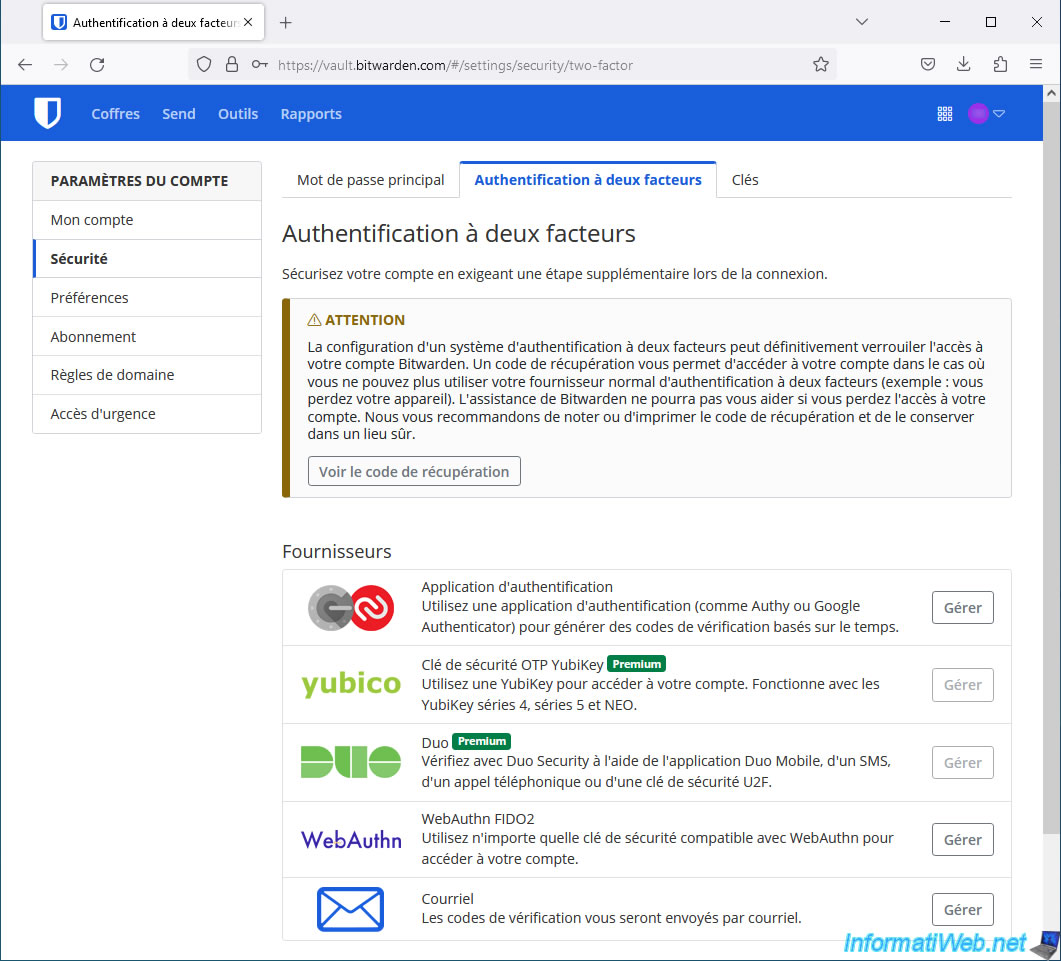
In "Security -> Two-Factor Authentication", you will be able to enable two-factor authentication for your Bitwarden account using:
- Authentication apps, such as: Authy or Google Authenticator.
- YubiKey OTP security keys.
- Duo Security
- FIDO2 WebAuthn
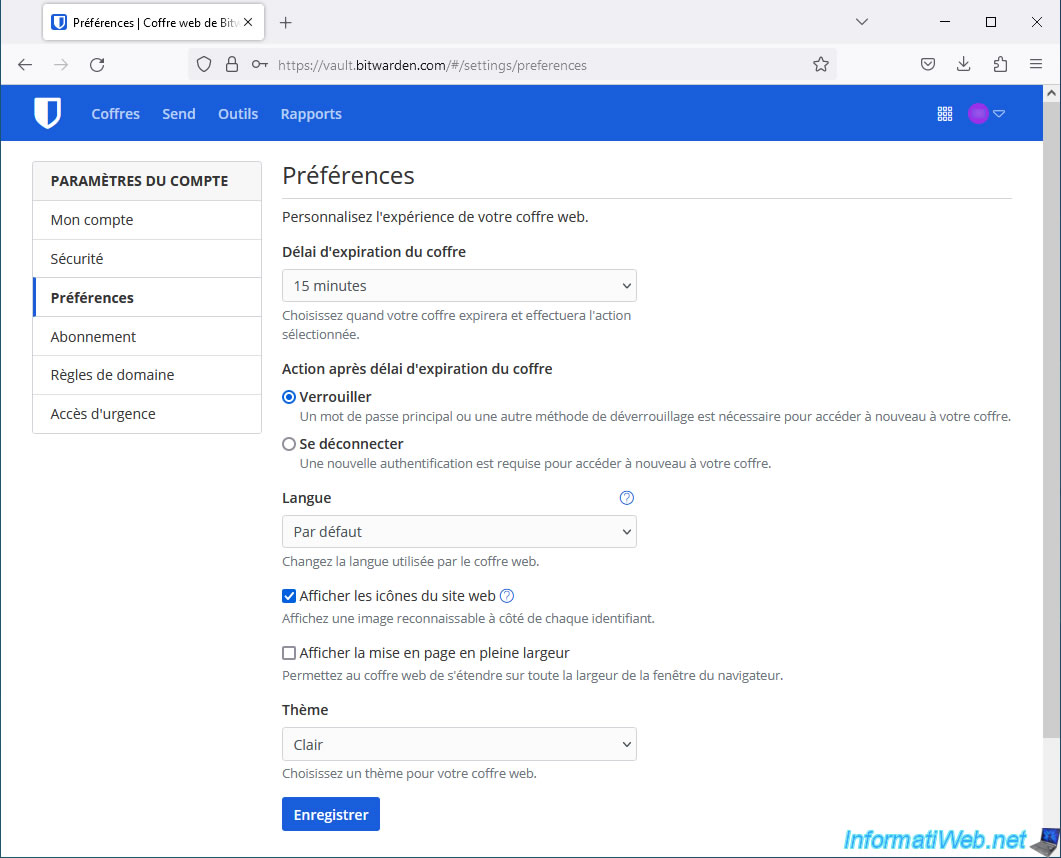
In "Preferences", you can set the expiration time of your Bitwarden vault, as well as choose the action performed once this time has passed.
If needed, you can change the language of your Bitwarden account.
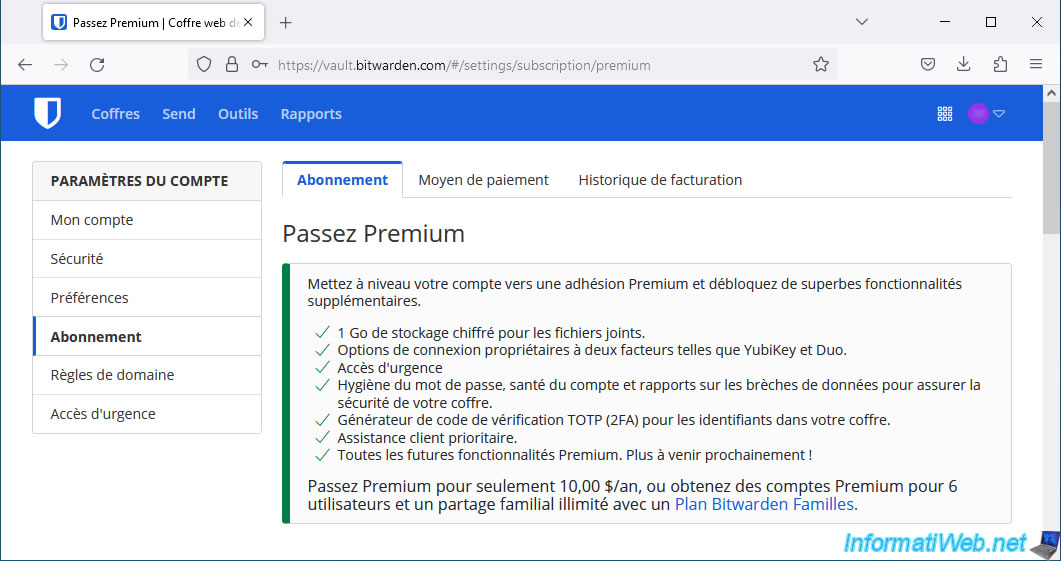
In "Subscription", you will see the benefits of Bitwarden's Premium subscription.
Including: password verification to prevent data leaks, the use of 2-factor authentication through Yubikey or Duo, and the generation of TOTP (2FA) verification codes for accounts stored in your Bitwarden vault.
Bitwarden's Premium subscription costs only $10 per year.
Share this tutorial
To see also
-
Security 6/26/2015
Automatically uncheck adwares with Unchecky
-
Security 12/18/2012
Delete adwares and clean your web browsers
-
Security 5/25/2014
Protect yourself from the Crypto Locker ransomware
-
Security 6/5/2016
Secure your Internet connection (VPN)
No comment