Store your passwords securely with KeePass Password Safe
- Security
- KeePass
- 18 November 2023 at 15:10 UTC
-

- 4/7
10. Extensions to install in your web browsers for simplified use
The extensions that we will offer you are very popular and therefore reliable. These extensions will allow you to create and use entries with much more simplicity than with the features integrated by default in KeePass.
In general, these extensions connect to the KeePass program via a plugin available on the official website.
10.1. Kee for Mozilla Firefox
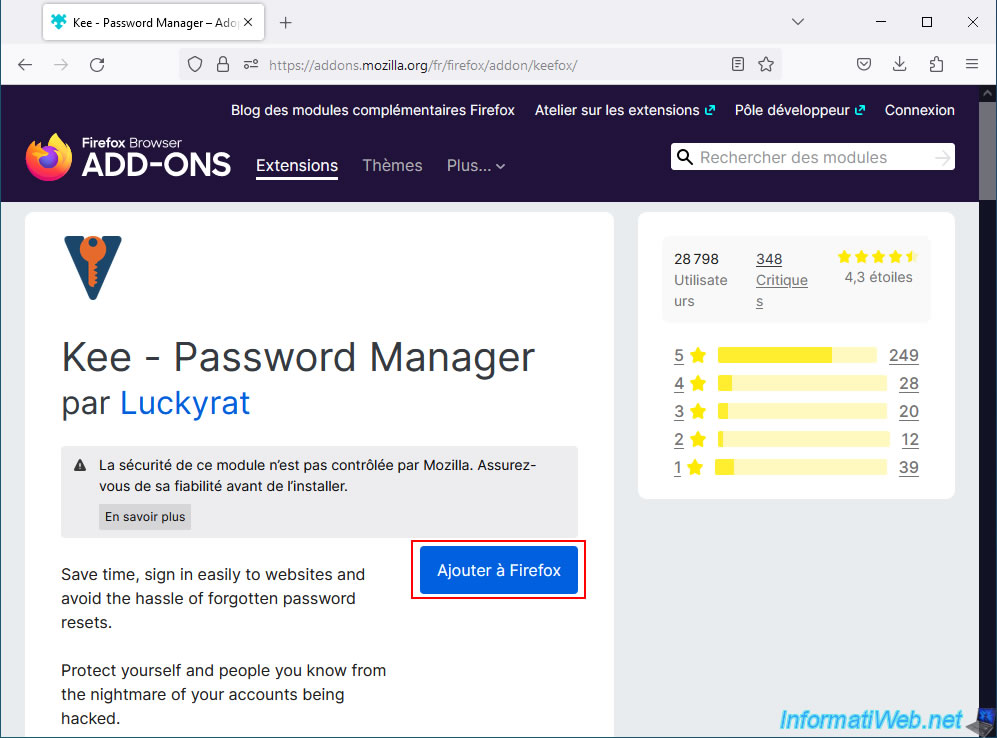
For "Mozilla Firefox", download the "Kee - Password Manager" extension (formerly KeeFox) from the official website of modules for this web browser.
To do this, click on the "Add to Firefox" button.
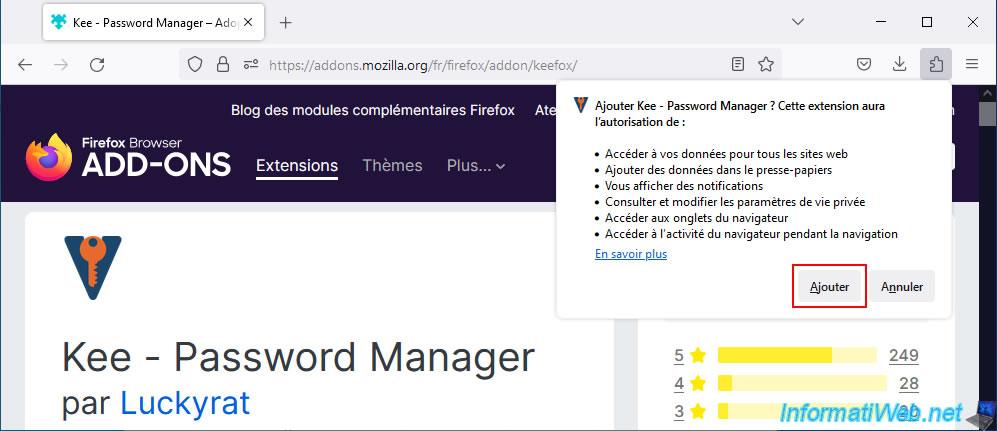
Then click on the "Add" button to confirm the installation of this "Kee - Password Manager" extension.
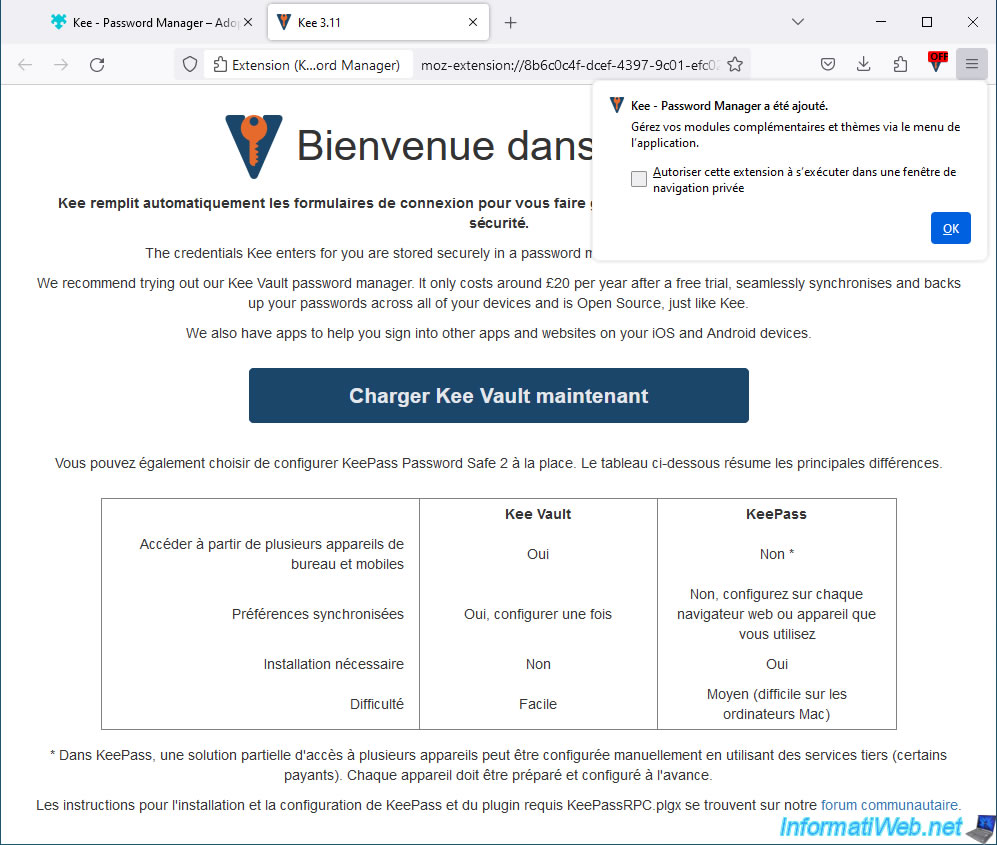
The "Kee - Password Manager" extension has been added.
At the bottom of this page (internal to the "Kee - Password Manager" extension), you will find a "community forum" link which will explain how to install the plugin required for Keepass (which you will see in the image in this tutorial).
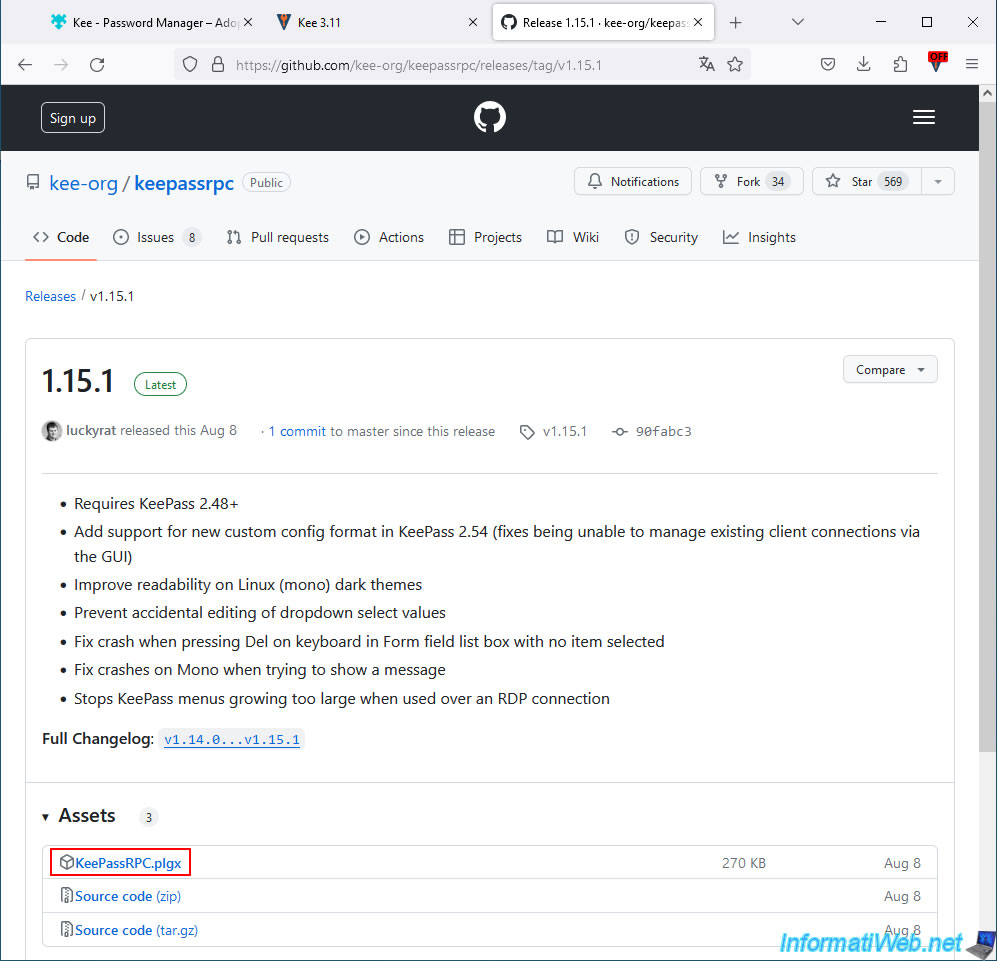
On the "Installing Kee with KeePassRPC for KeePass Password Safe (instructions)" page that appears, you will find the "latest release page" link which will allow you to download the latest version of the "KeePassRPC" plugin required for KeePass.
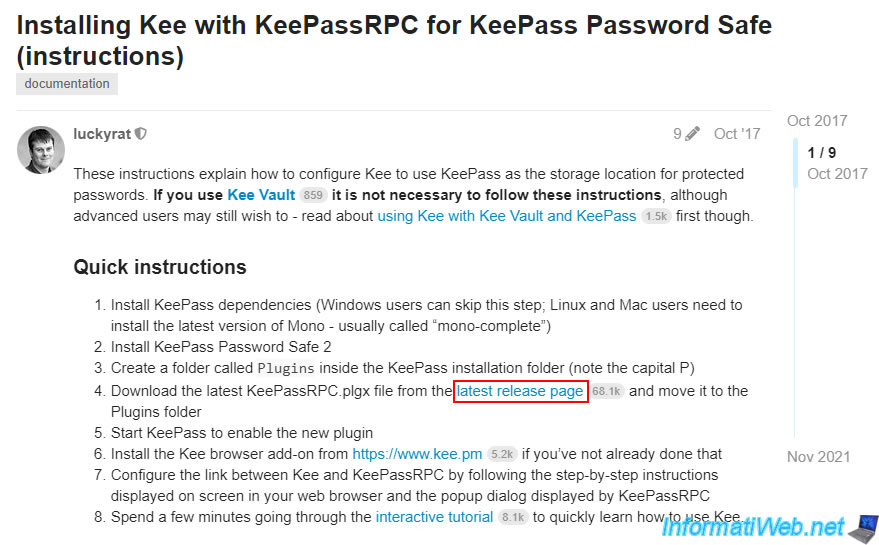
The link provided by the author of the Kee extension will send you to Github where you simply download the "KeePassRPC.plgx" file.
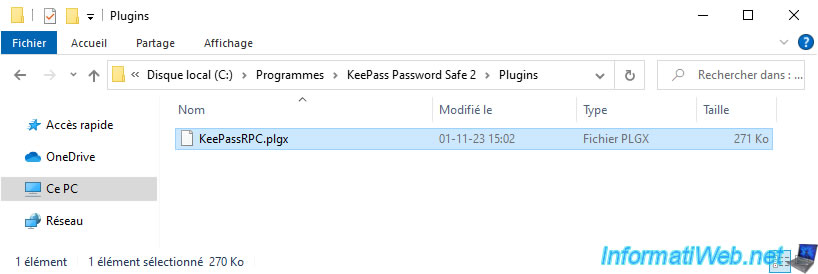
Copy the downloaded "KeePassRPC.plgx" file to the "Plugins" folder of "KeePass".
Default: "C:\Program Files\KeePass Password Safe 2\Plugins".
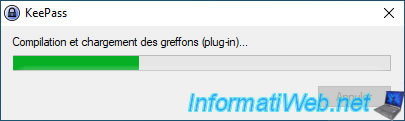
Once the file has been copied, relaunch KeePass and it will detect the new plugin.
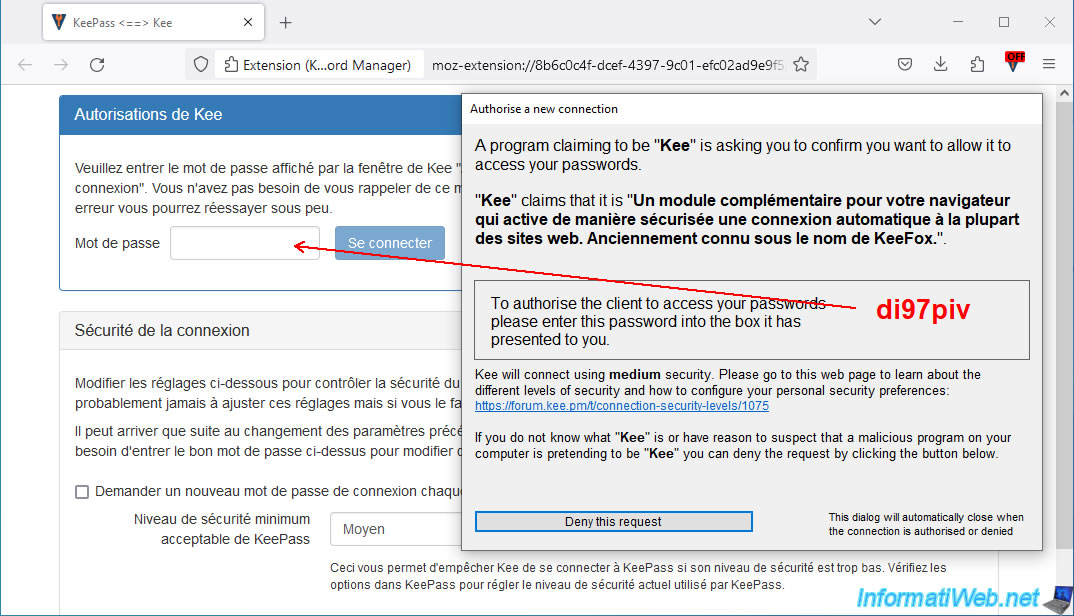
Once KeePass has fully launched, an "Authorize a new connection" window will automatically open.
As noted at the beginning of point 10 of this tutorial, the extension tries to connect to KeePass via a plugin. To authorize this connection, copy the password written in red, in the small window with an empty box.
Then click "Connect" and wait for the large window to disappear automatically.
Since we have already created the password database, click "No thanks, I will use an existing KeePass database".

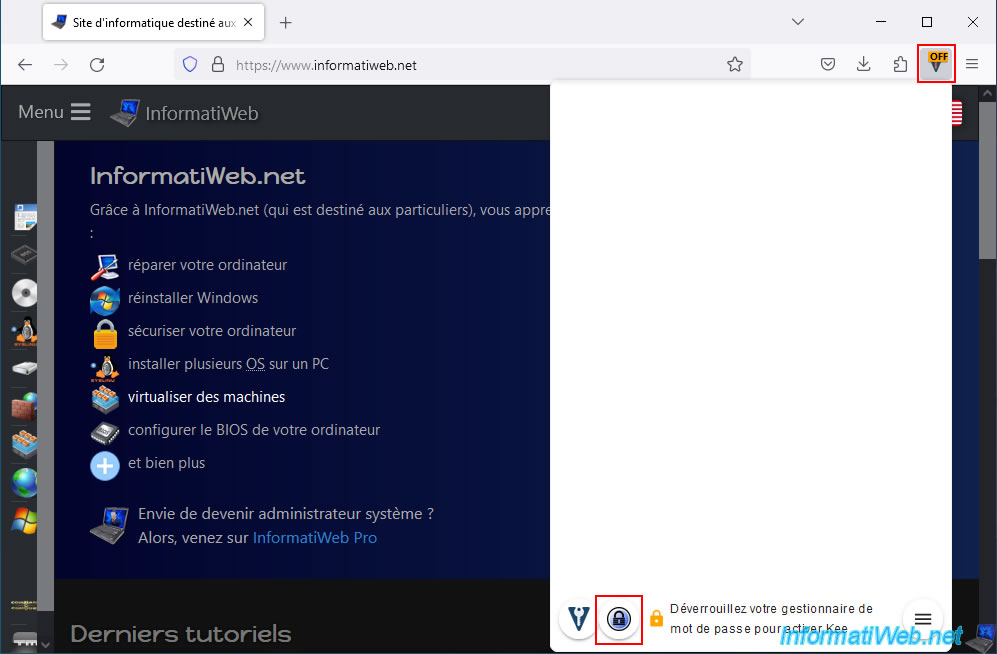
When KeePass is locked, the "Kee" extension does not have access to your database. Hence the appearance of the word "OFF" on an orange background on the Kee icon.
To access it, click on the "Kee" extension icon, then on the "KeePass" icon at the bottom of the popup.
Plain Text
Unlock your password manager to activate Kee.
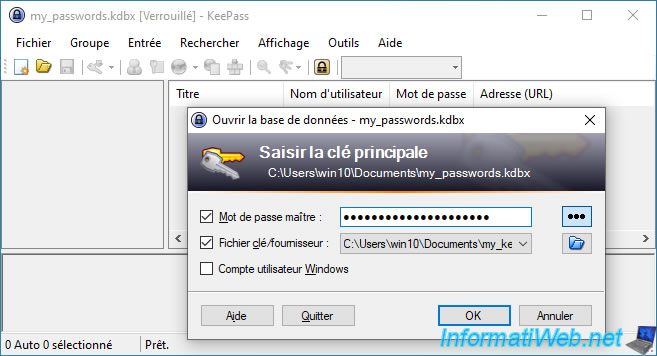
Enter your master password in the "KeePass" window that appears and click OK.
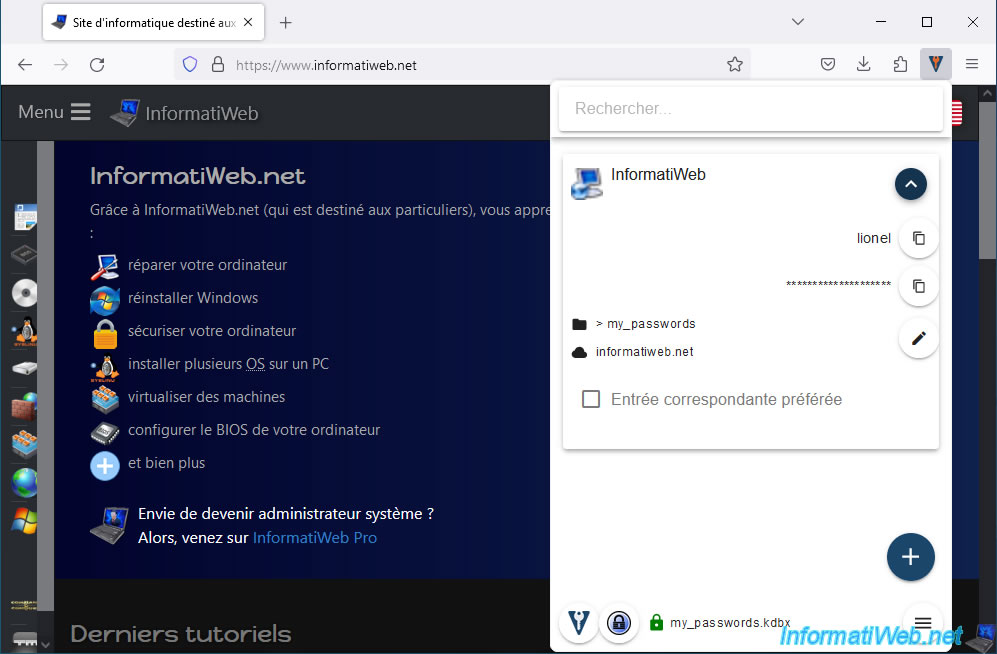
Now that KeePass is unlocked, when we go to our site, KeeFox displays the corresponding entry in its popup.
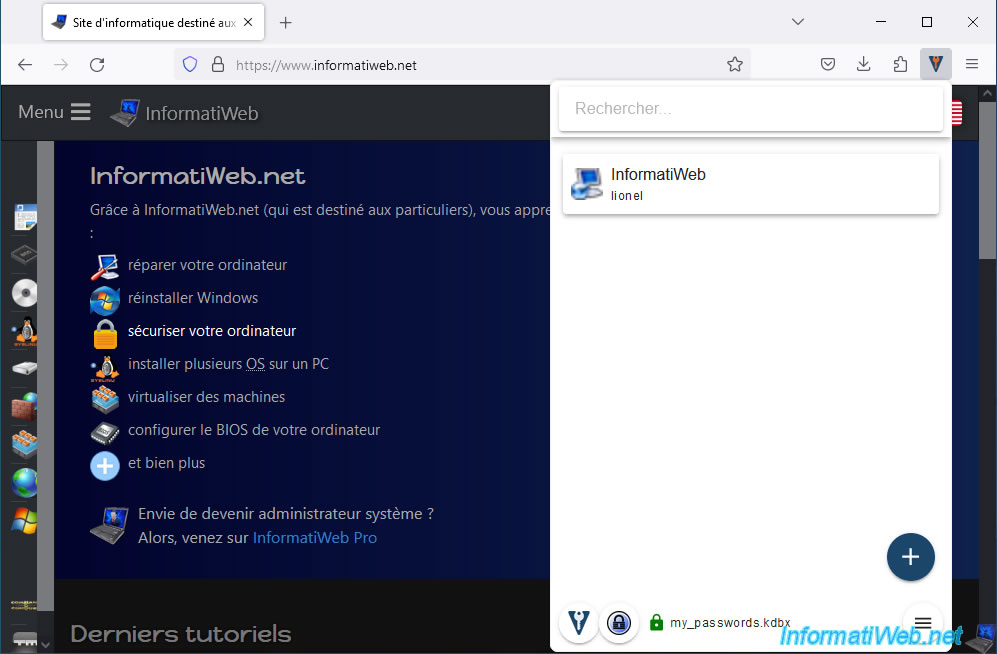
If you click on an entry detected by the "Kee" extension, you will be able to see the username, location and domain of the associated site, as well as manually copy the username and password saved in KeePass.
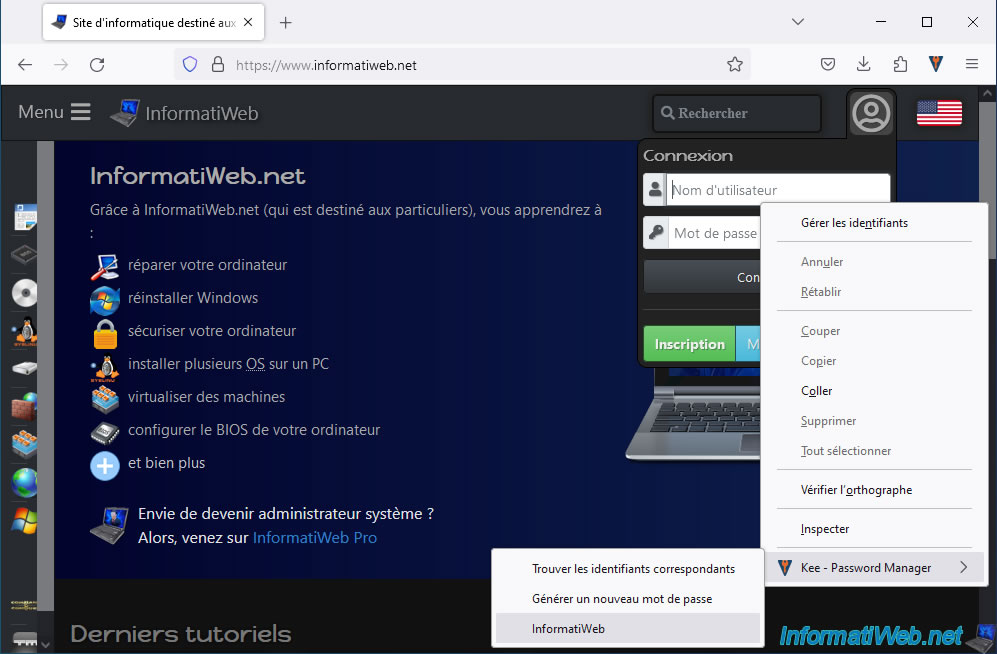
If you right-click in the "Username" box of the site where you wish to connect, you will see a "Kee - Password Manager" submenu appear asking you to generate a new password (if necessary) or to use the identifiers whose user name is proposed in this menu.
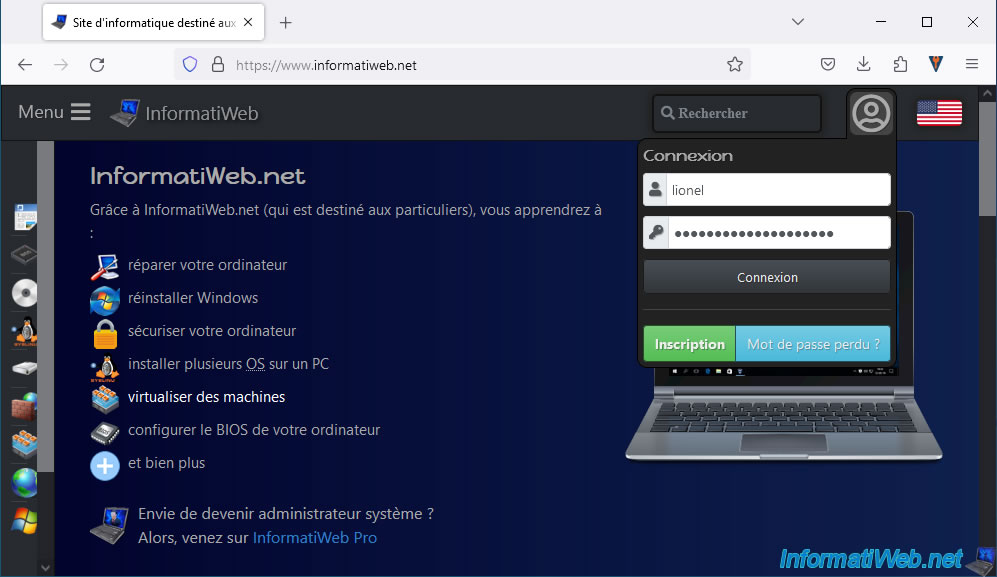
If you click on the username proposed by the "Kee" extension and which corresponds to an entry previously created in KeePass, the "Username" and "Password" fields of the desired site will be filled with your username and password for this site.
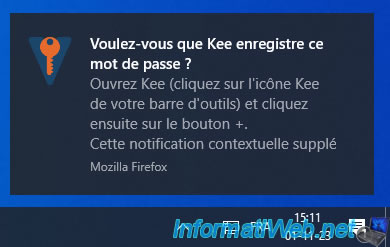
On Windows 10, when you connect to a site, the "Kee" extension will display a notification at the bottom right of your screen to tell you how to quickly save the username, password, ... in a new KeePass entry.
To do this, simply, once connected to the desired site, click on the "Kee" extension icon, then on the "+" icon located at the bottom right of this extension's popup.
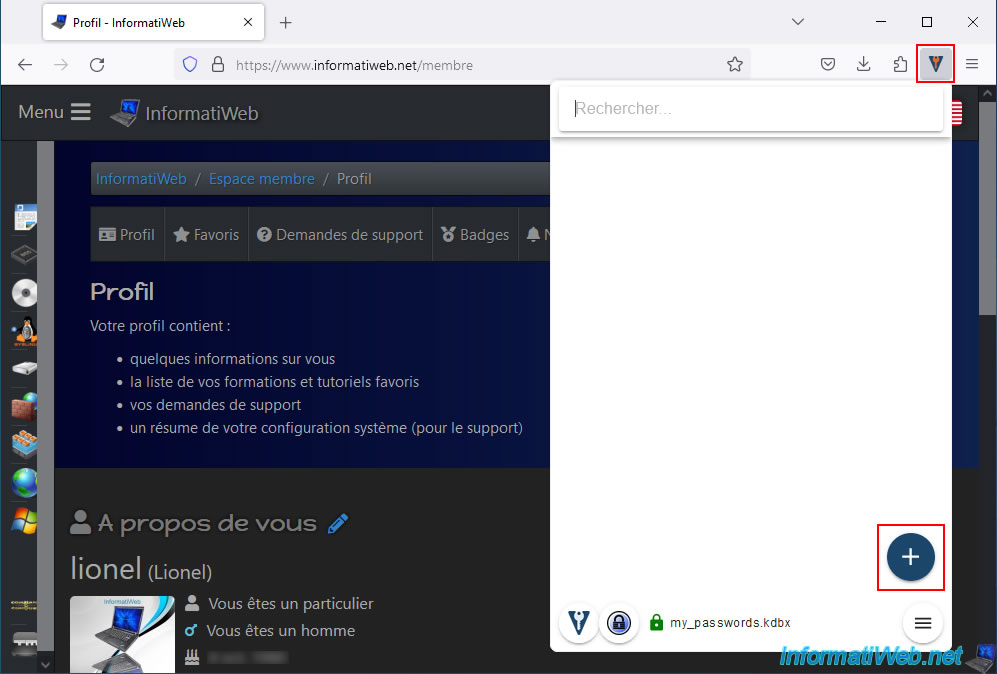
By default, the extension will pre-fill the 3 requested fields: Title, username and password.
Edit the entry title if desired to avoid long titles, then click: Next.
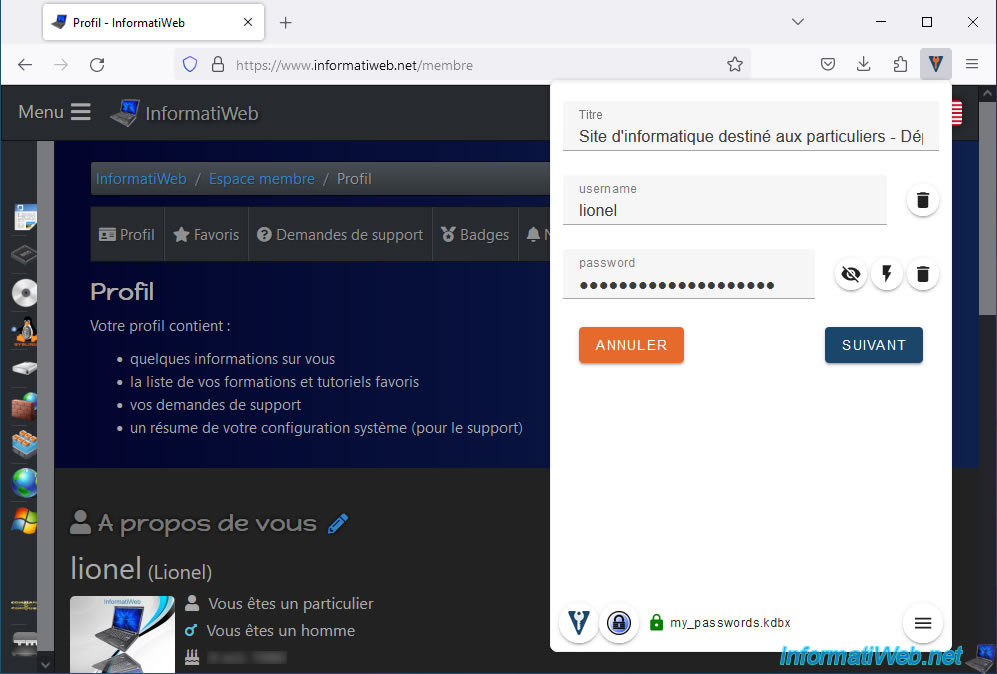
Select where you want to save this new entry in KeePass, then click Save.

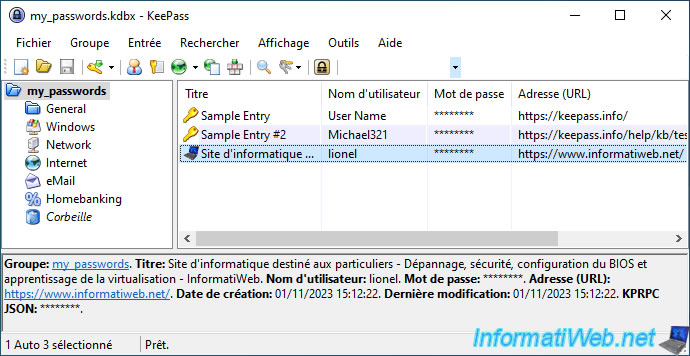
In KeePass, you will see that the desired entry has been added.
Note: the URL was also automatically added in the KeePass entry, although it did not appear in the "Kee" extension popup.
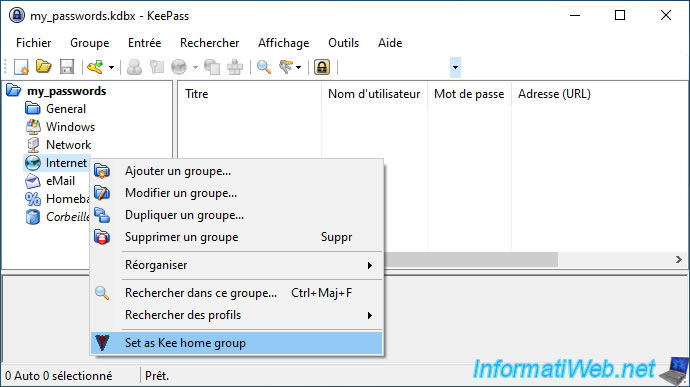
Finally, note that you can restrict Kee's visibility by setting a folder as the home group for Kee.
So this extension will only have access to entries located in this folder and its subfolders only.
To do this, in KeePass, right-click on the desired folder, then click on: Set as Kee home group.
No comment