- Windows
- USB keys
- 26 August 2024 at 14:26 UTC
-

When you perform some operations on USB key due to some random issues, sometimes you find it hard to access or its capacity has decreased.
In this tutorial, you will see how to reset your USB key to fix all possible software issues in one fell swoop.
1. Problems encountered
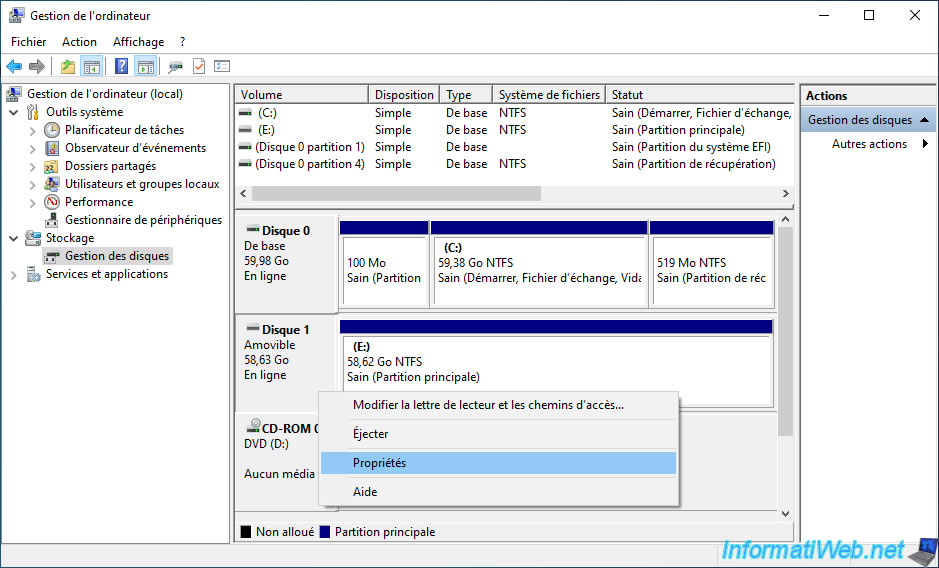
As you can see, in our case, we have an USB key with a theoretical capacity of 64 GB (58.63 GB visible on Windows 10).
Note that this small difference is normal and that it depends in particular on the file system (NTFS, exFAT, ...) which is on this USB key.
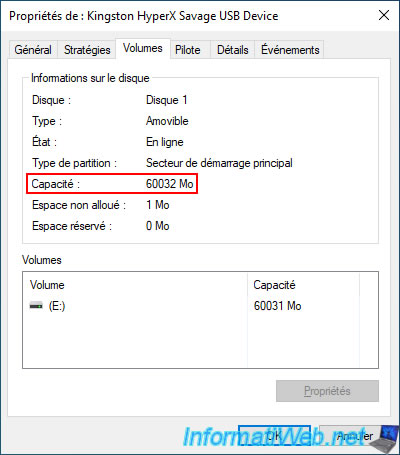
If we right-click "Properties" on our USB key (recognized as "Removable Disk" in Windows), we can see the model of it in the title and its capacity (60032 MB in our case).
The problem is that by performing certain manipulations (including the creation of a recovery drive on Windows, for example), you will see that the capacity of your USB key will decrease.
Note that this is a software limitation and can be fixed by following the next step in this tutorial.
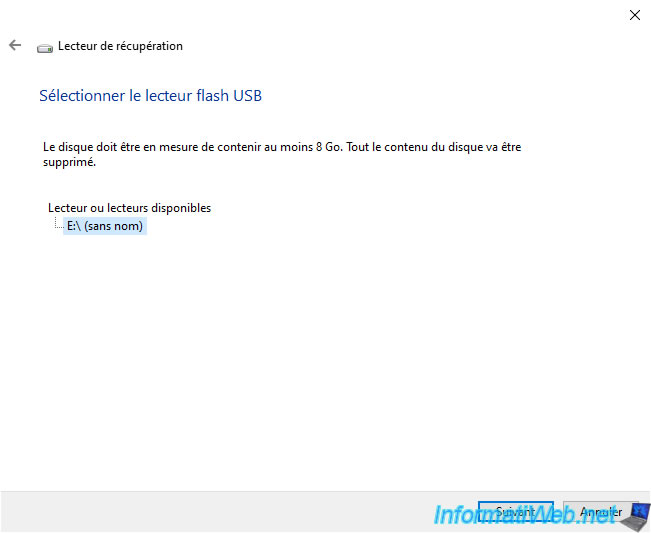
As you can see, while creating a recovery drive on Windows 10, Windows changes the partition table of your USB key and the partition is limited to 32GB.
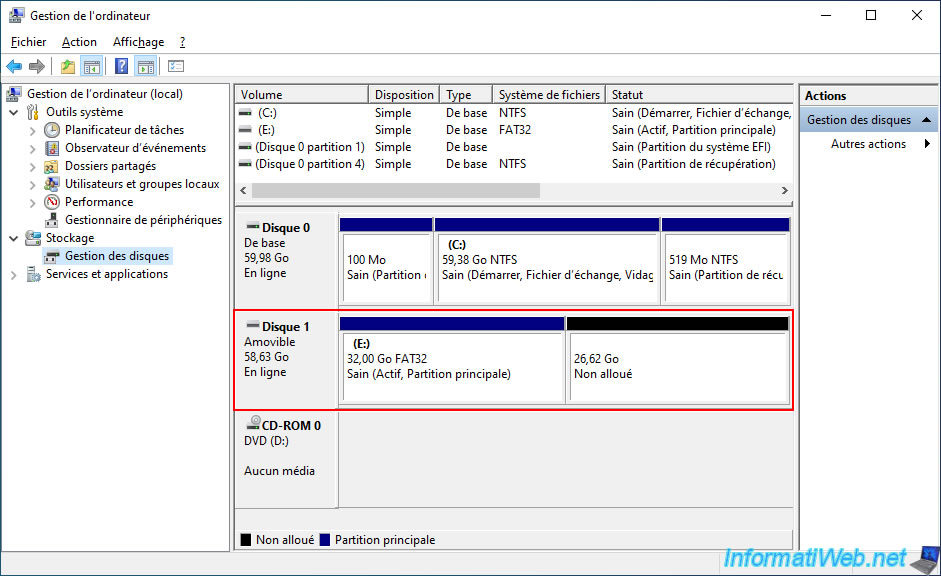
As a result, your 64 GB USB key (for example) appears with a maximum size of 32 GB.
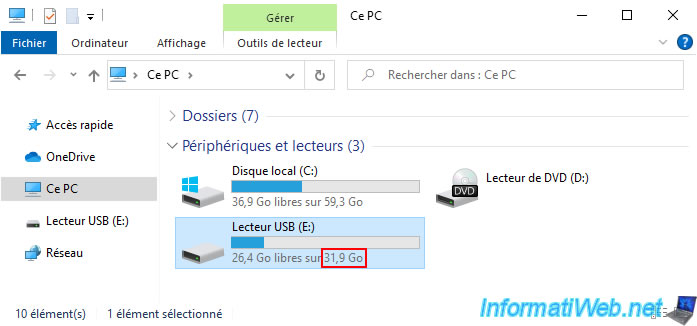
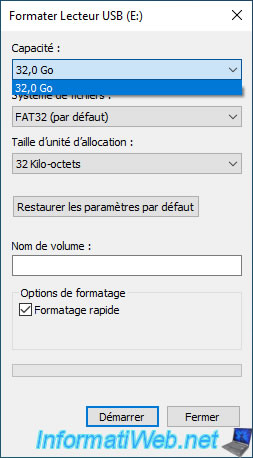
And if you try to format your USB key, the capacity will remain 32 GB (and not 64 GB which corresponds to the real capacity of your USB key).
This is explained by the fact that Windows only offers you to format the partition of your USB key.
Since the partition size was set to 32 GB by the recovery drive creation utility, you will be left with 32 GB of disk space.
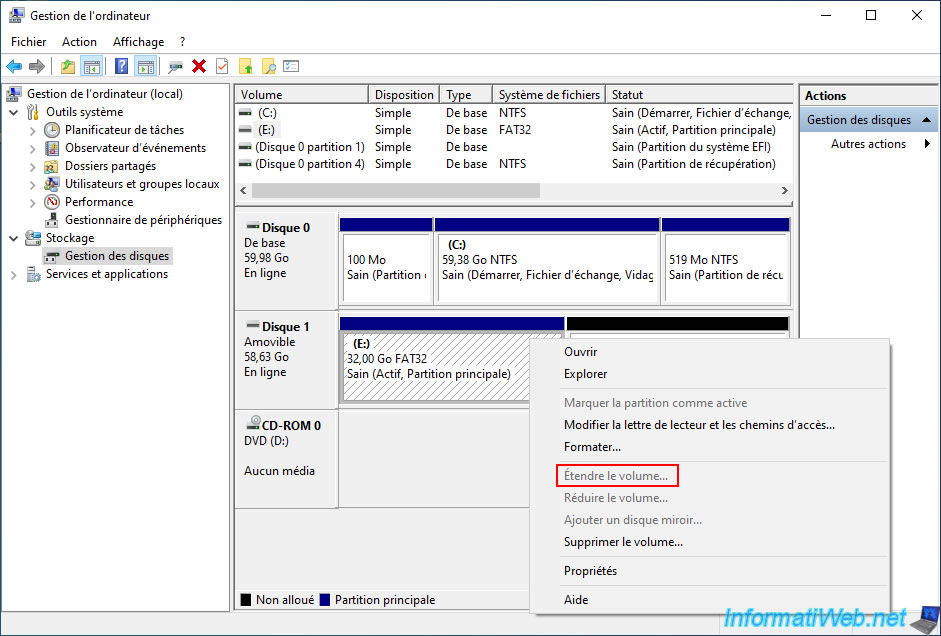
If you open the "Computer Management" console (by right clicking "Manage" on "This PC" or "Computer" in File Explorer) and go to "Disk Management" you will see that the "Extend Volume" option is grayed out for removable disks (USB keys, ...).
2. Quickly reset your USB key with DiskPart
To quickly reset your USB key back to its original capacity, you will need to use the "DiskPart" command line utility built into all versions of Windows.
To do this, start by opening a command prompt (cmd.exe) as an administrator.
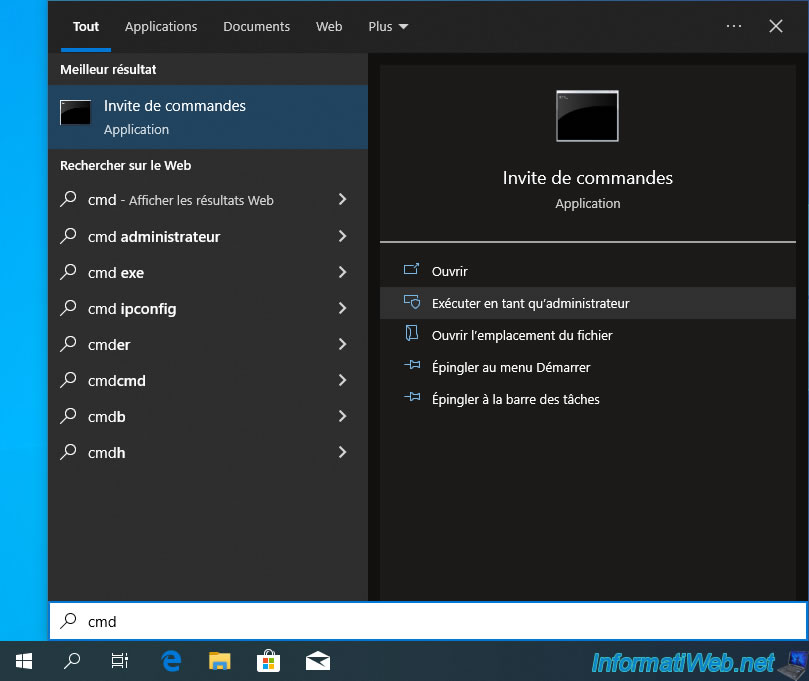
Click "Yes" when the "User Account Control" (UAC) window appears.
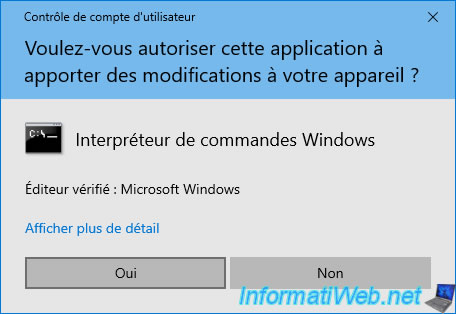
In the command prompt that appears, launch the "DiskPart" utility by typing:
Batch
diskpart
Plain Text
Microsoft DiskPart version 10.0.19041.1

Copyright (C) Microsoft Corporation.
On computer : INFORMATIWEB-PC

DISKPART>
List the disks present on your computer.
Note that the disk numbers are the same as those visible in Windows Disk Management.
Batch
list disk
In our case, we can see 2 disks:
- Disk 0: in 99% of cases, this is the system disk where Windows is installed.
- Disc 1: our 64 GB USB key.
Plain Text
  Disk ###   Status         Size     Free     Dyn  Gpt
  ---------  -------------  -------  -------  ---  ---
  Disk 0     Online           60 GB  1024 KB        *
  Disk 1     Online           58 GB    26 GB
You can follow the changes to the commands used in the remainder of this tutorial by leaving Windows Disk Management open if you wish.
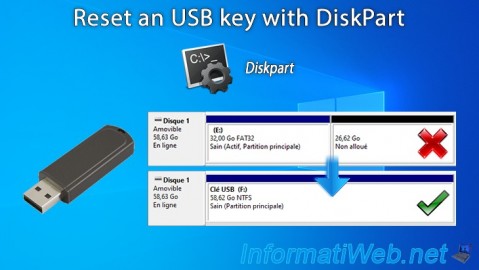
At the moment, we can see that our 58.63 GB USB drive only has a 32 GB partition.
The rest is unallocated space and therefore unusable at this time.
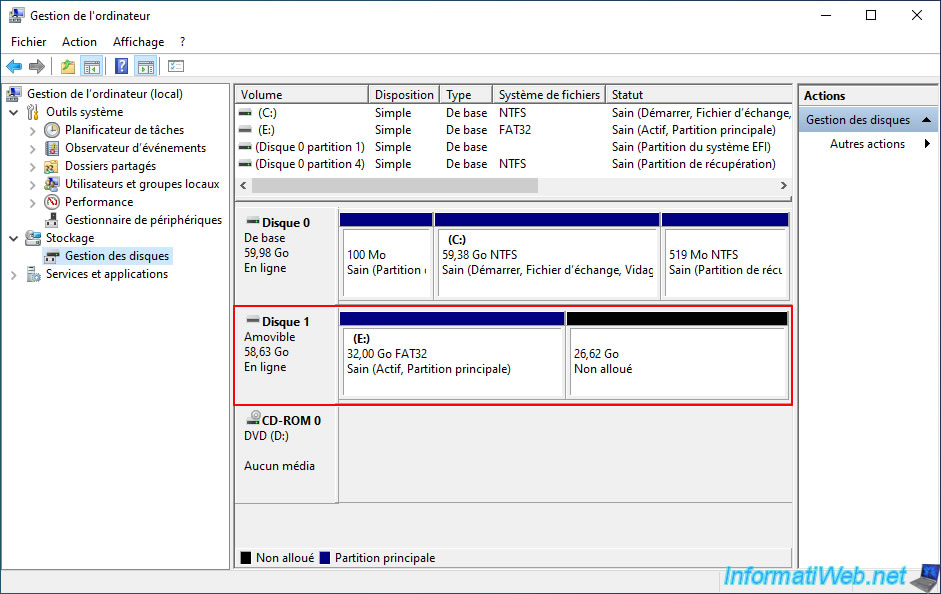
To begin, you must select the disk corresponding to your USB key so that the following commands are applied on it.
Which gives in our case:
Batch
select disk 1
Plain Text
Disk 1 is now the selected disk.
Then, clean your USB key.
Warning : make sure you have selected the right disk using the previous command before using the "clean" command.
Indeed, erasing the partition table will be instantaneous and the data cannot be recovered (unless you use data recovery software that supports this case, such as File Scavenger).
Batch
clean
Plain Text
DiskPart succeeded in cleaning the disk.
This erases the partition table of your USB key. This will have the effect of showing only unallocated space on it and making it temporarily disappear from the file explorer.
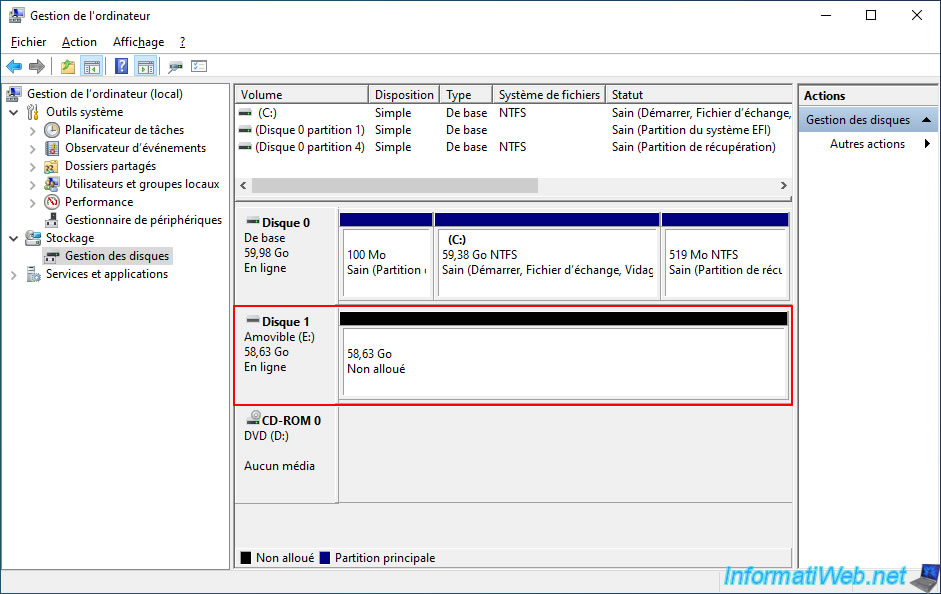
Create a single primary partition on the entire disk space of your USB key to be able to store data there.
Batch
create partition primary
Plain Text
DiskPart succeeded in creating the specified partition.
Perform a quick format in NTFS of this partition (for example).
Note: you can later change the file system used by right-clicking "Format" on your USB key from the file explorer, if you wish.
Batch
format quick fs=NTFS label="Clé USB"
Plain Text
  100 percent completed

DiskPart successfully formatted the volume.
Assign it the 1st letter currently available on your computer using the command below.
Note: assigning a letter to the partition is necessary for it to appear in the file explorer.
Batch
assign
Plain Text
DiskPart successfully assigned the drive letter or mount point.
Quit DiskPart.
Batch
exit
Plain Text
Leaving DiskPart...
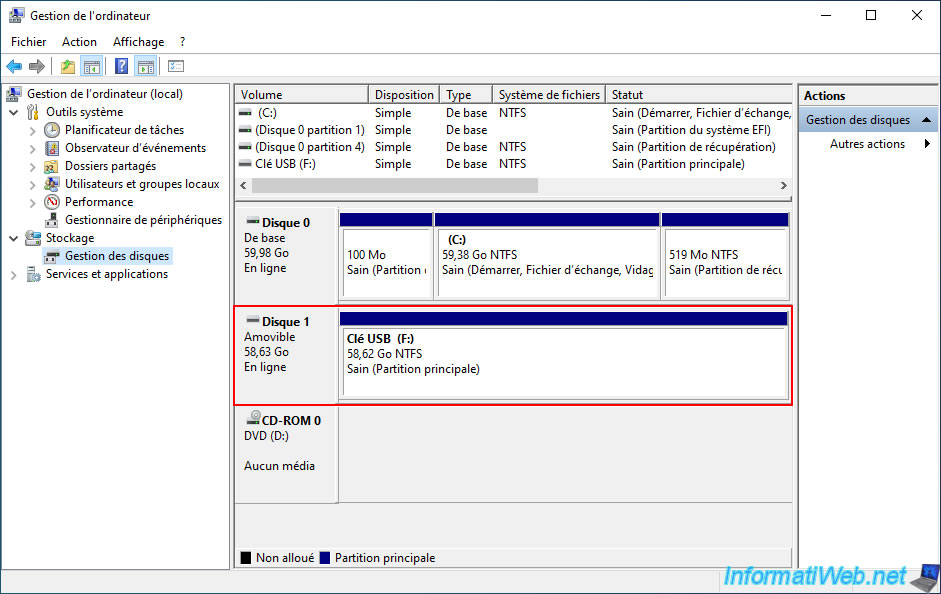
If you open File Explorer, you will see that the real capacity of your USB key has been restored.
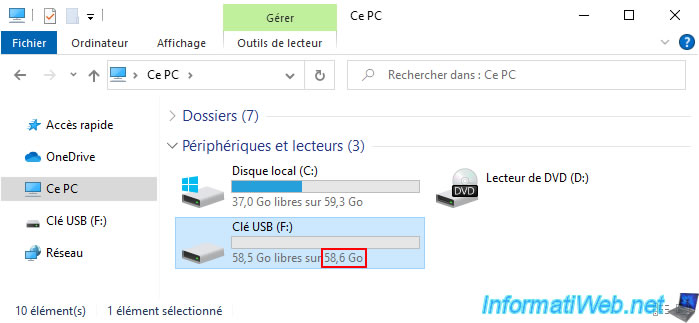
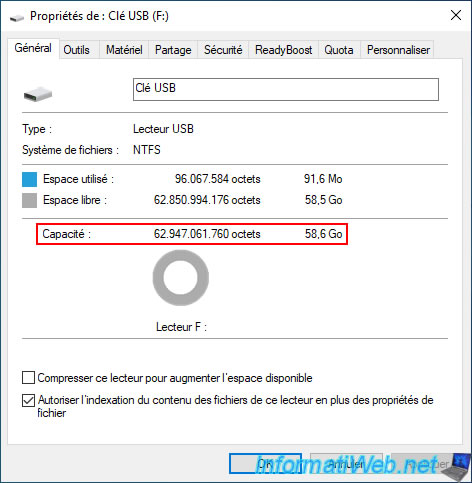
If you right-click "Properties" on your USB key in File Explorer, you'll see its capacity appear again.
Share this tutorial
To see also
-
Others 9/18/2012
Create a bootable USB key
-
Articles 2/8/2017
Kingston DataTraveler Locker+ G3 - Secure USB key
-
Articles 11/2/2014
Some practical infos about USB storage devices
-
Windows 2/27/2017
WTG - Windows workspace on USB key
You must be logged in to post a comment