- Windows
- USB keys
- 09 September 2024 at 13:26 UTC
-

By dint of using your USB key, writing data to it, erasing it, plugging it in and unplugging it, it is quite possible that problems will arise one day.
The 1st possible problem is an error in the file system of your USB key.
Which can prevent you from accessing certain files, preventing you from modifying them, preventing you from writing data to certain places on your USB drive, or even running out of free space for no apparent reason.
To try to solve this problem, simply repair the file system by following our tutorial: Check and repair the file system on Windows.
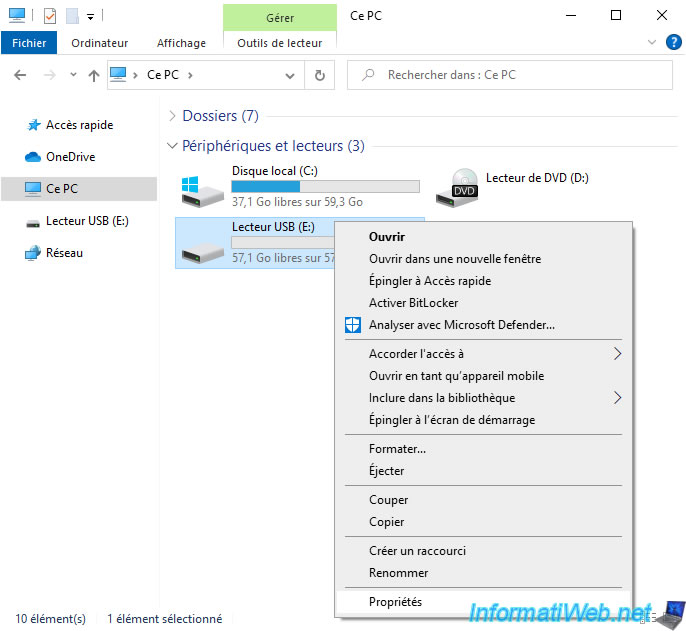
Note: you will have to right-click "Properties" on your USB key visible in the file explorer and follow what is explained in the tutorial cited above.
The 2nd possible problem is an error outside of the main partition of your USB key, or even damaged blocks on the memory chip of your USB key.
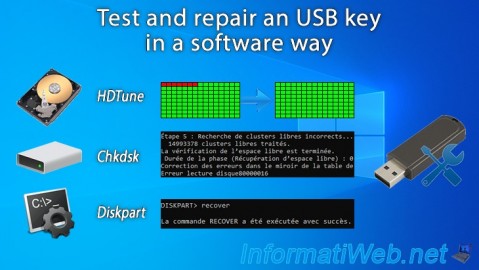
To find out and try to fix the problem (if possible in your case), follow the steps below.
- Test the sectors of your USB key with HD Tune
- Attempt to (quickly) repair the filesystem from the Windows GUI
- Deep scan and repair file system from command line (automatic)
- Recover disk using DiskPart
- Rescan the file system of your USB key with chkdsk
- Test the sectors of your USB key again with HD Tune
1. Test the sectors of your USB key with HD Tune
HD Tune is a free software allowing in particular to test the sectors of your USB key.
To do this, download and install this software, then plug in your USB key.
Once your USB drive is plugged into your computer, launch HD Tune and select your USB key from the list available at the top of the window.
In our case, it is a 64 GB SanDisk USB key.
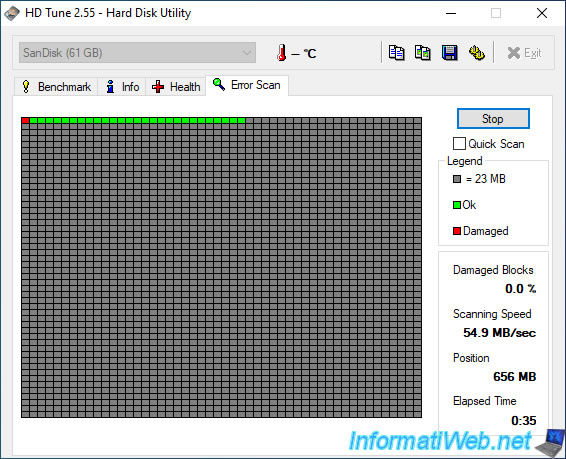
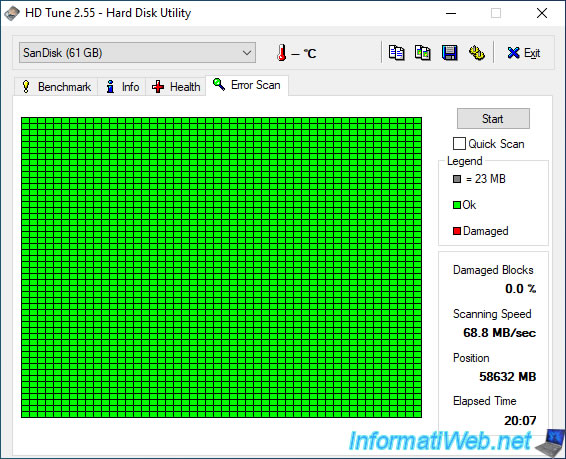
Then, go to the "Error Scan" tab and click the "Start" button.
Warning : this process may take some time depending on the capacity (size) of your USB key, as well as its performance.
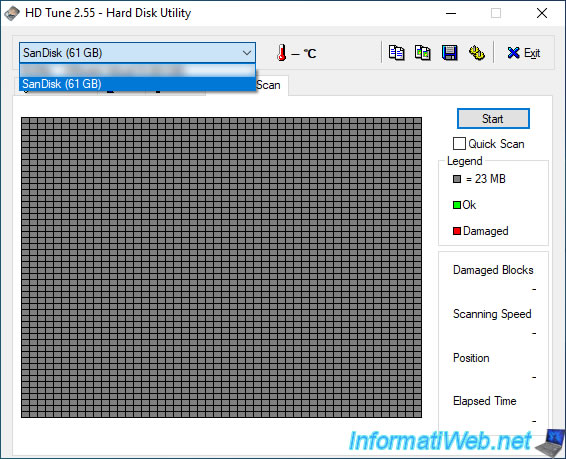
Wait while your USB key is tested.
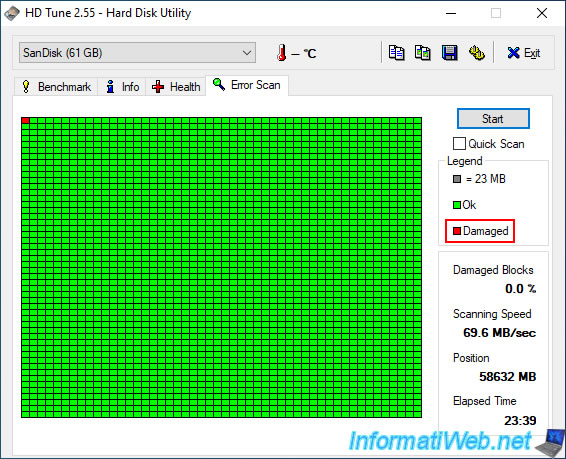
After the test is completed, you will see whether any data blocks are damaged on your USB or not.
As shown in the legend to the right:
- red blocks are damaged blocks.
- green blocks are OK.
As you can see, in our case, the 1st data block of our USB key is damaged.
Which is problematic given that this is where the list of files (MFT for Master File Table) is located, as well as a copy of it (copy of the MFT) and system-specific information of files used.
In other words, if the 1st block is too damaged, it is possible that the data is no longer accessible. Unless you try to recover them using data recovery software, such as File Scavenger or Recuva, for example.
2. Attempt to (quickly) repair the filesystem from the Windows GUI
To attempt a quick file system repair from the Windows GUI, right-click "Properties" on your visible USB key in File Explorer.
Then, in the "Tools" tab, click on the "Check" button.
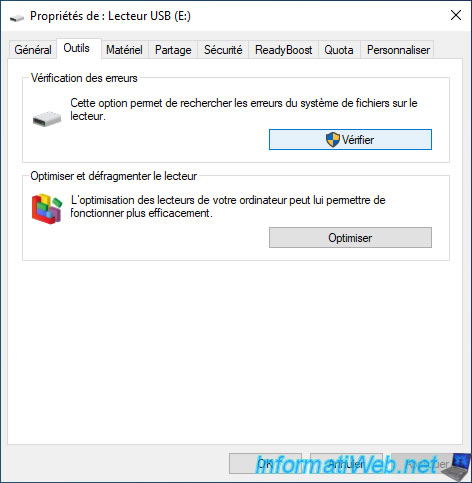
Depending on the version of Windows you are on, the options offered may vary.
However, the operation remains the same.
In Windows 7, check the 2 available boxes and click on "Start".
In Windows 8 and 8.1, click "Analyze drive".
In Windows 10, click "Analyze and repair drive".
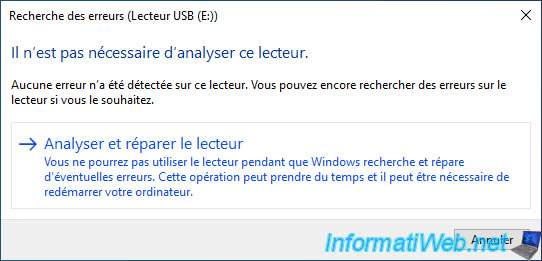
Windows analyzes the file system of your USB key and tries to repair the errors found if necessary.
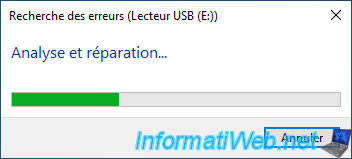
However, the test performed from the Windows graphical interface is not complete.
Windows will only perform the first 3 steps which are quite quick.
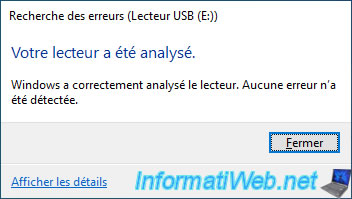
As you can see, in our case, Windows did not detect an error in the file system.
However, there are, as you will see in the rest of this tutorial.
3. Deep scan and repair file system from command line (automatic)
To scan and repair the file system in depth the file system of your USB key, you will need to use the command line utility "chkdsk" present since Windows 7.
To do this, open a command prompt (cmd.exe).
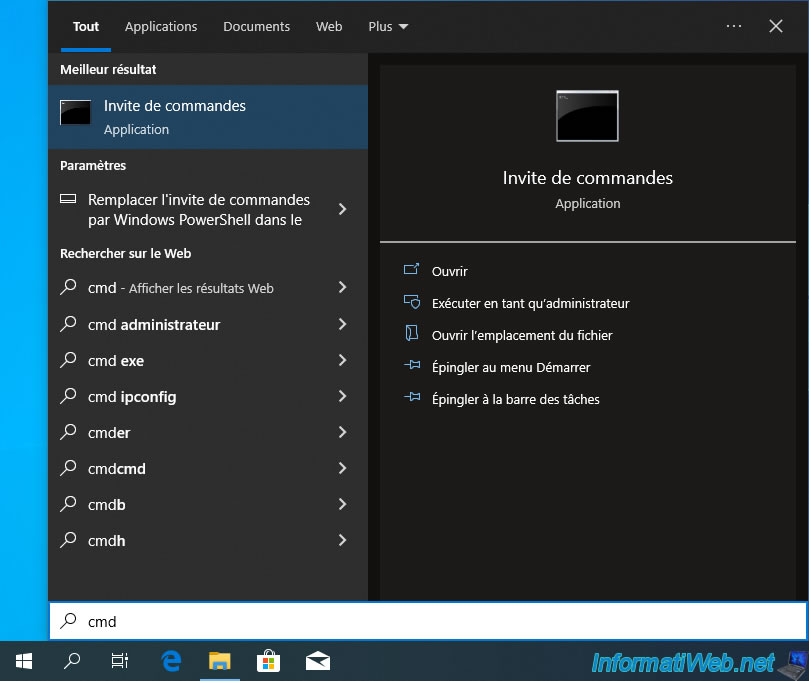
In this command prompt, simply type the command below replacing "X" with the letter assigned to your USB key (visible in the file explorer).
In our case, our USB key has the letter "e".
- parameter "e:": specify the letter of your USB key
- parameter "/f": allows the correction of errors detected on the disk.
- parameter "/r": search for bad sectors on your USB key to be able to repair them later with the parameter "/f".
Batch
chkdsk e: /f /r
As you can see, the "chkdsk" utility will perform several operations:
- Stage 1: Examining basic file system structure.
- Stage 2: Examining file name linkage.
- Stage 3: Examining security descriptors.
- Stage 4: Looking for bad clusters in user file data.
- Stage 5: Looking for bad, free clusters ...
These steps can take time and especially steps 4 and 5.
This is the reason why only the 3 steps are performed when you run the file system scan from the Windows GUI.
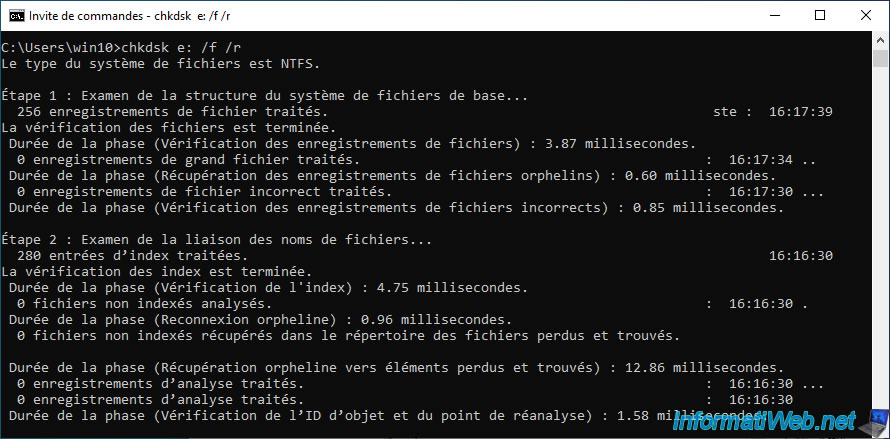

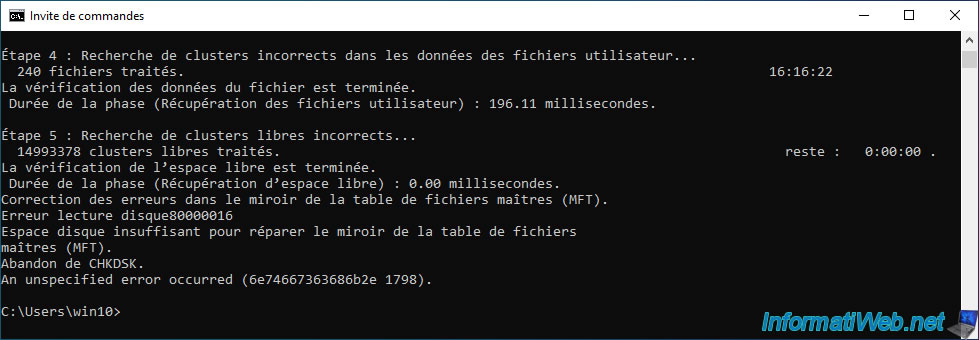
As you can see, in our case, stage 5 of this "chkdsk" utility allowed us to detect errors in the master file table (MFT). Which was predictable given that it is the 1st block of our USB key that is damaged.
This is also logical given that this hidden file $MFT is necessarily very used to know the files present on your USB key, and this in any folder of it.
Unfortunately, in our case, the "chkdsk" utility was unable to repair this MFT.
Nevertheless, the problem is software and can therefore be fixed by starting from scratch.
This still allows you not to buy an USB key in this case.
Plain Text
Fixed errors in the Master File Table (MFT) mirror.
Abandonment of CHKDSK.
An unspecified error occurred (6e74667363686b2e 1798).
4. Recover disk using DiskPart
In the "DiskPart" command line utility present in Windows, there is a "recover" command which allowed us to solve our problem.
To do this, in your command prompt, type the command below to launch "DiskPart".
Batch
diskpart
Next, list the disks present on your computer.
Batch
list disk
Plain Text
  Disk ###   Status         Size     Free     Dyn  Gpt
  ---------  -------------  -------  -------  ---  ---
  Disk 0      Online          60 GB  1024 KB        *
  Disk 1      Online          57 GB      0 B
Select the disk corresponding to your USB key.
In our case: disk 1.
Note: you can also refer to the numbers indicated in the Windows disk management available in the Windows "Computer Management" console.
Batch
select disk 1
Plain Text
Disk 1 is now the selected disk.
Type the command below.
Batch
recover
Plain Text
The RECOVER command completed successfully.

Quit DiskPart.
Batch
exit
5. Rescan the file system of your USB key with chkdsk
Launch again the analysis and the repair of the file system of your USB key thanks to chkdsk via the following command.
Note: again, replace the letter "e" with the letter assigned by Windows to your USB key.
Batch
chkdsk e: /f /r
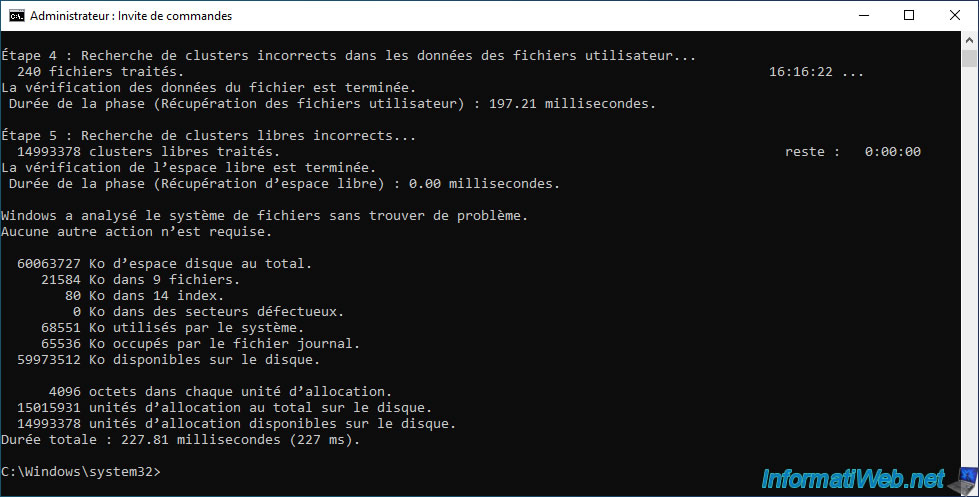
As you can see, this time the file system scan completes successfully without detecting any problem.
Which means that your USB key is normally repaired.
6. Test the sectors of your USB key again with HD Tune
Launch the "HD Tune" software again, go to the "Error Scan" tab, select your USB key and click "Start".

Wait while your USB key is retested.

As you can see, your USB key has been repaired since no red blocks appear.
Share this tutorial
To see also
-

Articles 2/17/2017
Corsair Flash Padlock 3 - Secure USB key with hardware encryption
-
Others 9/18/2012
Create a bootable USB key
-
Security 6/13/2014
DiskCryptor - Encrypt your USB key
-
Windows 8/26/2024
Reset an USB key with DiskPart
You must be logged in to post a comment