- Windows
- Windows 10
- 15 August 2022 at 14:16 UTC
-

- 1/2
On Windows 10, it's possible to very easily and very quickly create a WiFi access point using any compatible WiFi network card.
- Prerequisites
- Enable the mobile hotspot
- Configure the mobile hotspot
- Know which network card is shared by the mobile hotspot
- Choose which network to share
- Connecting to the mobile hotspot
- Resolve the conflict between the hosted wireless network (Virtual Wifi) and the mobile hotspot
1. Prerequisites
The only prerequisite is to have a WiFi network card (in PCIe or in USB format).

2. Enable the mobile hotspot
To enable the mobile hotspot available on Windows 10, click on the "Notifications" icon at the bottom right of the screen, then on the "Mobile hotspot" option (framed in red on the image below).
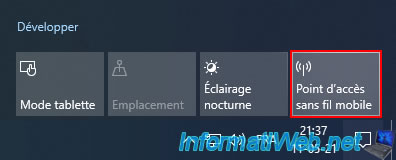
If you don't see this option, click "Expand".
Now, you should see this option.
If you don't see it, you don't have a WiFi network card, its driver is not installed or your WiFi network card is disabled in the Windows Device Manager.
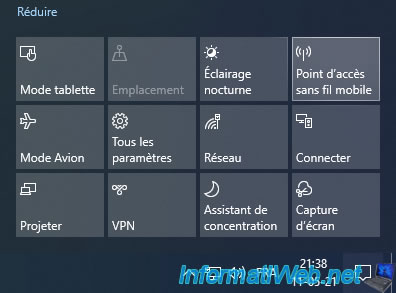
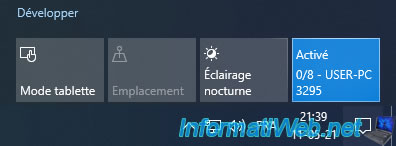
Once you click on this "Mobile hotspot" option, it will turn blue and the word "Enabled" will appear for a few seconds.
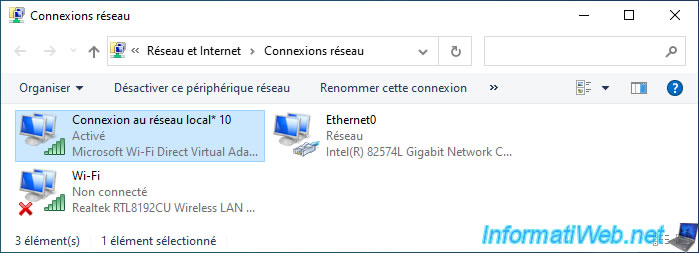
Once the mobile hotspot is enabled, a new virtual network card will appear in your computer's network connections.
As you can see, this new "Local Area Connection* 10" corresponds to : Microsoft Wi-Fi Direct Virtual Adapter.
3. Configure the mobile hotspot
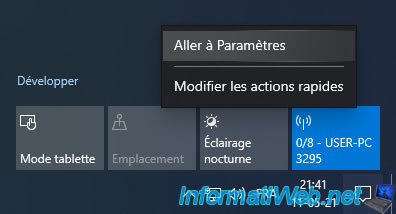
To change the settings of this mobile hotspot, right click on this option and click "Go to Settings".
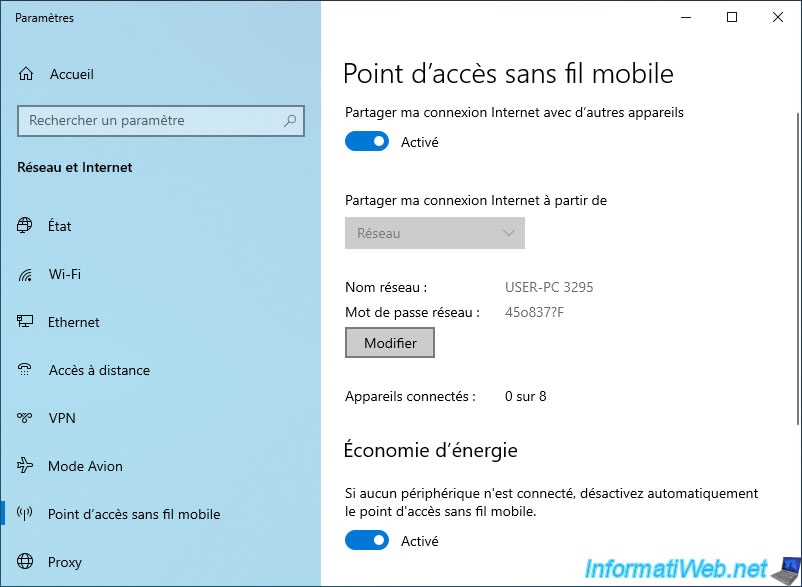
A "Mobile hotspot" window appears.
As you can see, the "Share my Internet connection with other devices" is enabled and this one is currently sharing our Internet connection from the network named "Network".
Windows currently uses an automatically generated network name and network password.
To change the name (SSID) of the Wifi network and its password, click on the "Edit" button.
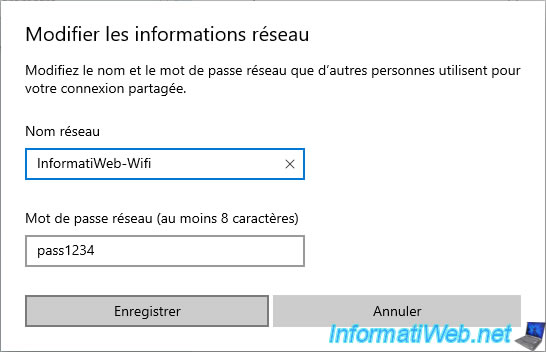
Change the name and password of this Wifi network and click on Save.
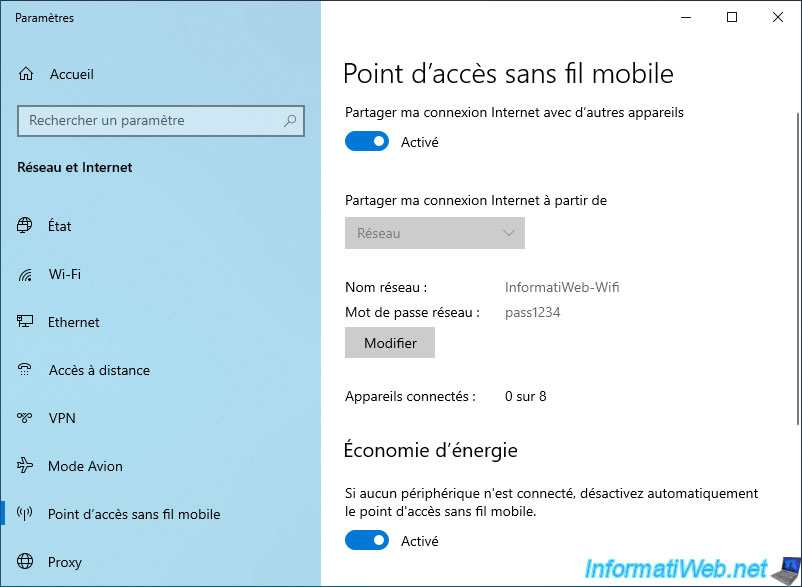
Now, these informations have changed.
4. Know which network card is shared by the mobile hotspot
By default, Windows tells you that the Internet connection is shared from "Network".
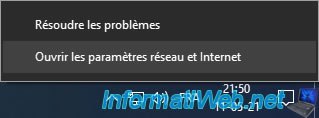
To find out which network card corresponds to this network name, right-click on the network icon in the taskbar (next to the time) and click on : Open Network and Internet settings.
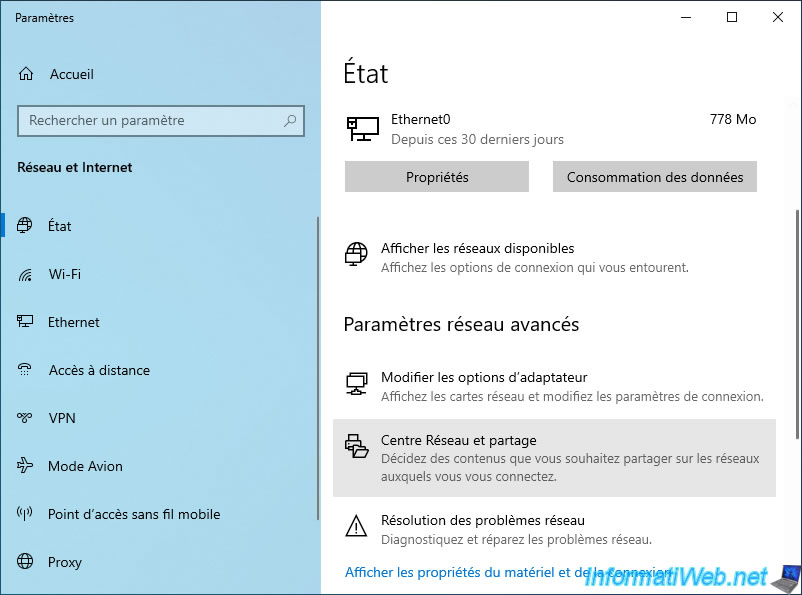
Go down a little and click on : Sharing Options.
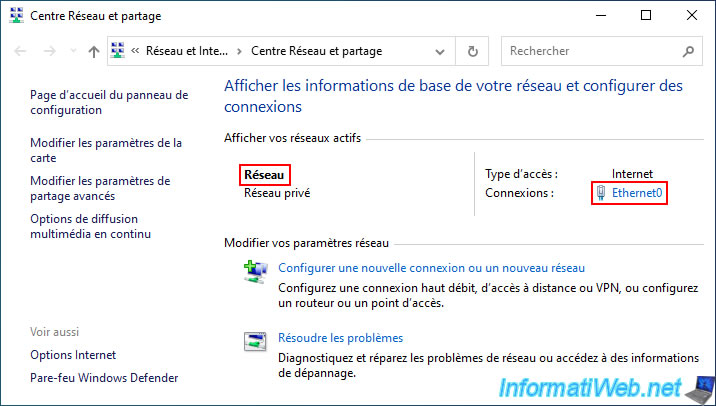
In this "Network and Sharing Center", Windows tells you the name of the network(s) to which you are connected (in this case : Network) and the network card that corresponds to each of them (in this case : Ethernet0).
Then, click on the "Details" button.
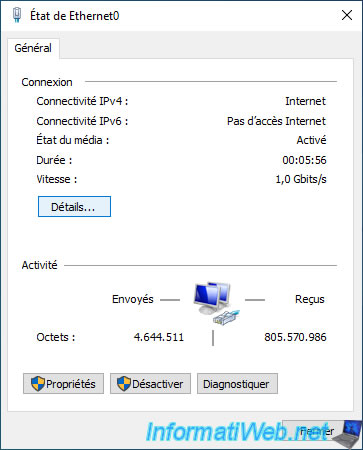
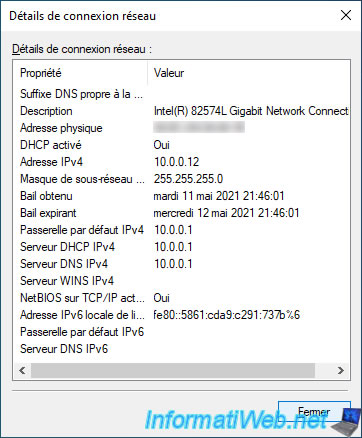
In the network connection details that appear, you will be able to see :
- Description : the name of the network card
- IPv4 Address : the IPv4 address currently assigned to it
Share this tutorial
To see also
-
Windows 1/29/2021
Enable God mode on Windows
-
Windows 1/20/2025
Windows 10 - Disable distribution of updates on the local network
-
Windows 2/3/2025
Windows 10 - Tabbed file explorer (via Files)
-
Windows 9/21/2021
Windows 8 / 8.1 / 10 / 11 - Switching from IDE to AHCI without reinstalling Windows
You must be logged in to post a comment