Create a Windows PE 3.0 (or 3.1) image
- Windows
- 03 December 2012 at 21:05 UTC
-

- 2/2
3.3. Start one or more programs on the boot of Windows PE
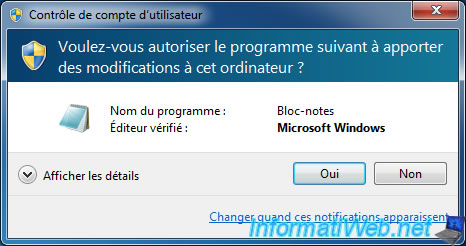
Then, to automatically launch one or more programs at Windows PE startup, you must create a script named "Winpeshl.ini" and save it in the "C:\Windows\system32" folder. Given that the file must be saved in the Windows folder, you will need administrator rights. To do this, go to the Start menu -> Accessories and right click on "Notepad". Then, click "Run as administrator".
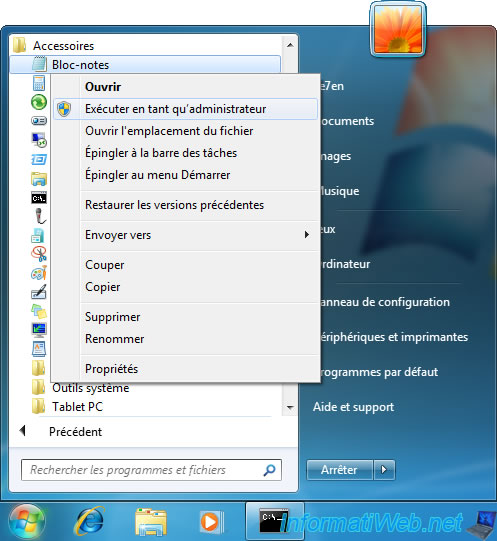
Click "Yes".
To create this configuration file just type "[LaunchApps]" in the first line and then the path to the file to run at startup (one path per line).
As you can see, it is possible to use environment variables (surrounded by %). It's also advisable to use.
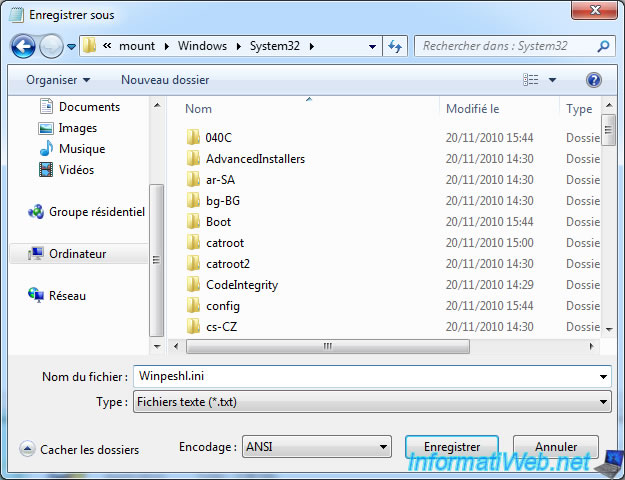
Once done, click "File -> Save As".
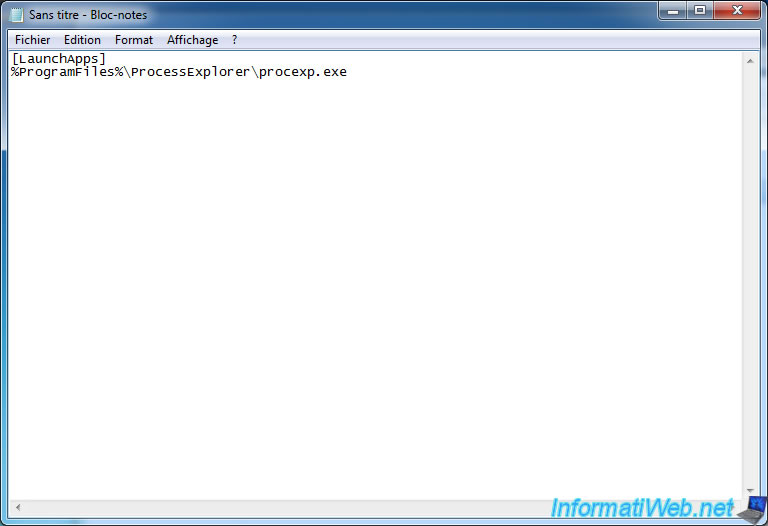
Go to "C:\winpe_x86\mount\Windows\System32", specify "Winpesh.ini" and click "Save".
This file will be used by the (Shell WinPE) "Winpesh.exe" program.
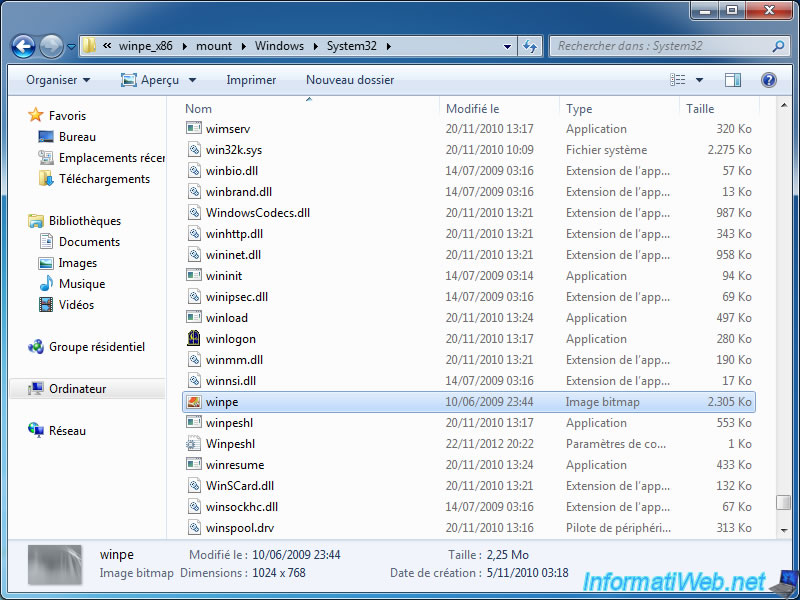
3.4. Changing the default wallpaper
To change the wallpaper just replace the file "C:\winpe_x86\mount\Windows\System32\winpe.bmp" by respecting the dimensions desired image ... the original. Your image should be "1024x768" pixels and be saved in BMP (Bitmap) format.
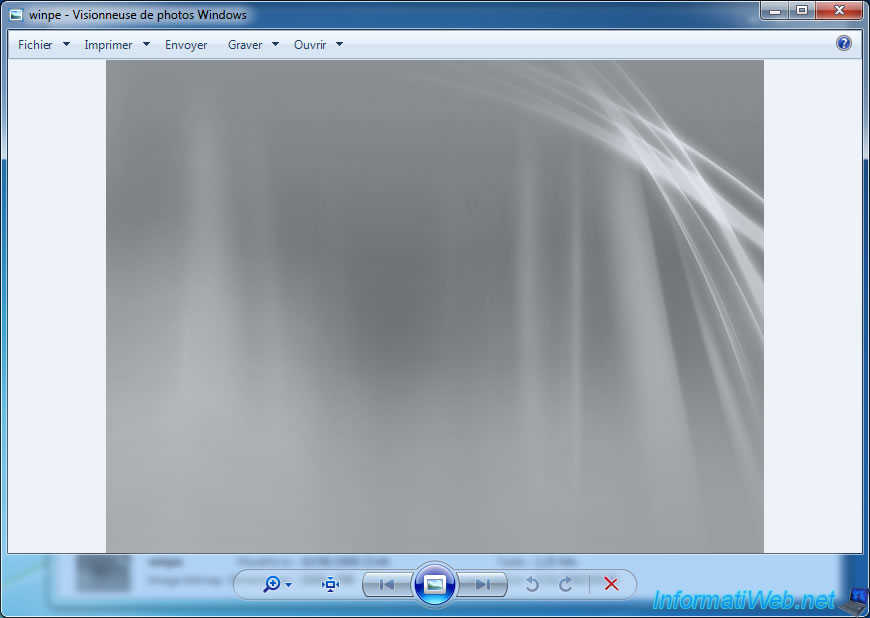
Here is the Default Wallpaper
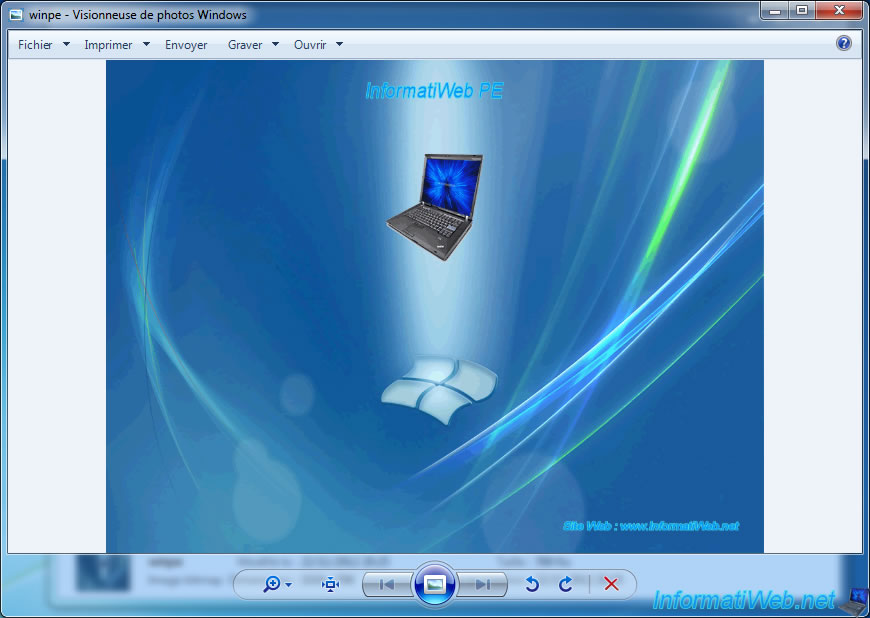
And our Wallpaper.
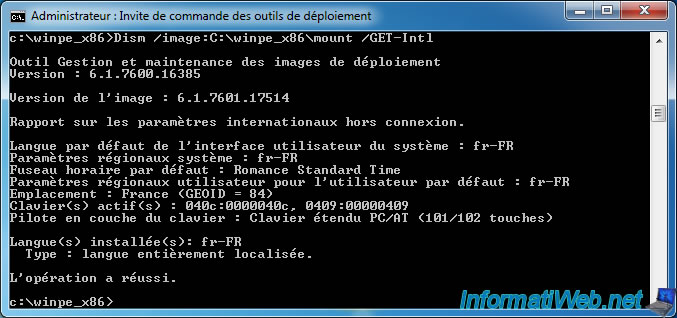
3.5. Adjusting system settings (keyboard language and others)
To find the system settings of your Windows PE image, use the following command :
Batch
Dism /image:C:\winpe_x86\mount /GET-Intl
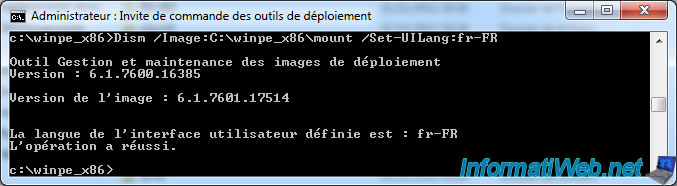
To change the language of the user interface (UI), use the following command :
Batch
Dism /Image:C:\winpe_x86\mount /Set-UILang:fr-FR
Note : fr-BE value does not exist, which is why we used the value "fr-FR".
To change the language of "non-Unicode programs" and font settings, use the following command :
Batch
Dism /Image:C:\winpe_x86\mount /Set-SySLocale:fr-BE

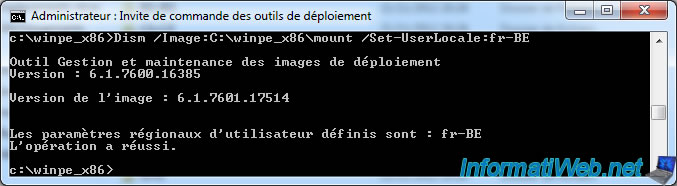
To change the sort order by default, the date format, devices, use the following command ... :
Batch
Dism /Image:C:\winpe_x86\mount /Set-UserLocale:fr-BE
Then, to change the language on your keyboard, it will use a value of digits and letters. To do this, we must go in the Windows 7 registry for installed indicate what value.
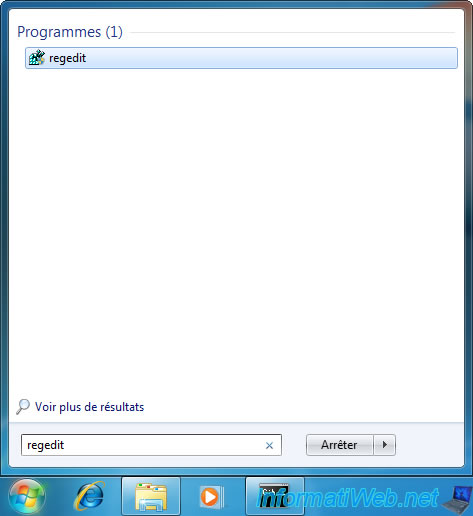
To do this, go to the Start menu and type "Regedit". Then, click Regedit that appears above.
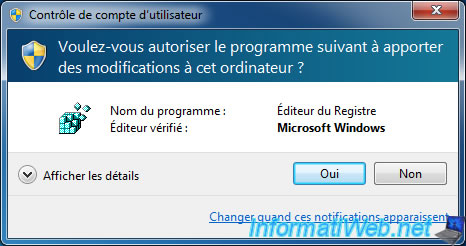
Click "Yes".
To find this value go to the "HKEY_LOCAL_MACHINE\SYSTEM\CurrentControlSet\Control\Keyboard Layouts" key. Look in all the keys in order to find the language of your keyboard. In our case, the keyboard "French (Belgium)" is in the "0000080c" key.
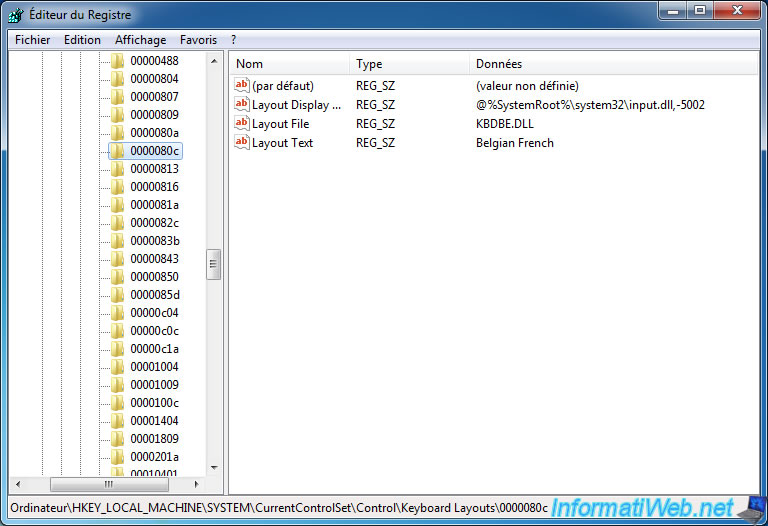
The value indicated is composed of 2 pieces : [The last 4 digits of the key name (080c in the case of keyboard "French (Belgium)")]|[The key name]
In the case of keyboard "French (Belgium)", the command is :
Batch
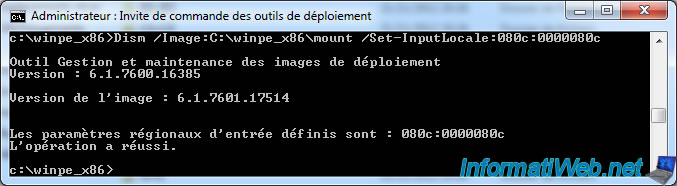
Dism /Image:C:\winpe_x86\mount /Set-InputLocale:080c:0000080c
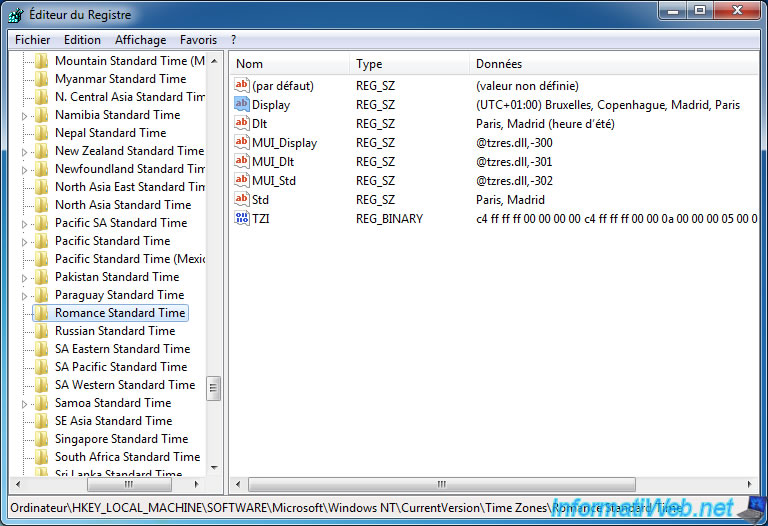
To change the time zone of your Windows PE, you must also use a name that is in the registry. The names of the "Time Zones" are in the key (HKEY_LOCAL_MACHINE\SOFTWARE\Microsoft\Windows NT\CurrentVersion\Time Zones\). To find the name that corresponds to your time zone, it should still look in all key sub.
In the case of Belgium (Capital : Brussels), it's "Romance Standard Time".
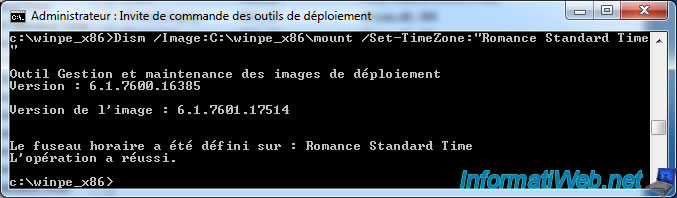
The command for Belgium is as follows :
Batch
Dism /Image:C:\winpe_x86\mount /Set-TimeZone:"W. Europe Standard Time"
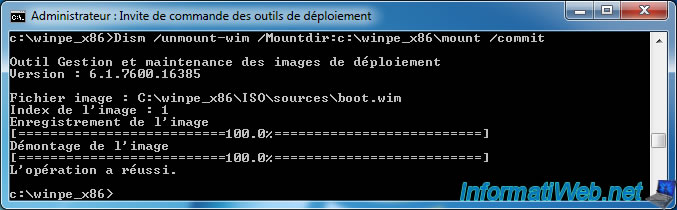
3.6. Dismounting the "wim" image and saving it
Once the configuration of Windows PE is complete, you can finally unmount the image by running the following command :
Batch
Dism /unmount-wim /Mountdir:c:\winpe_x86\mount /commit
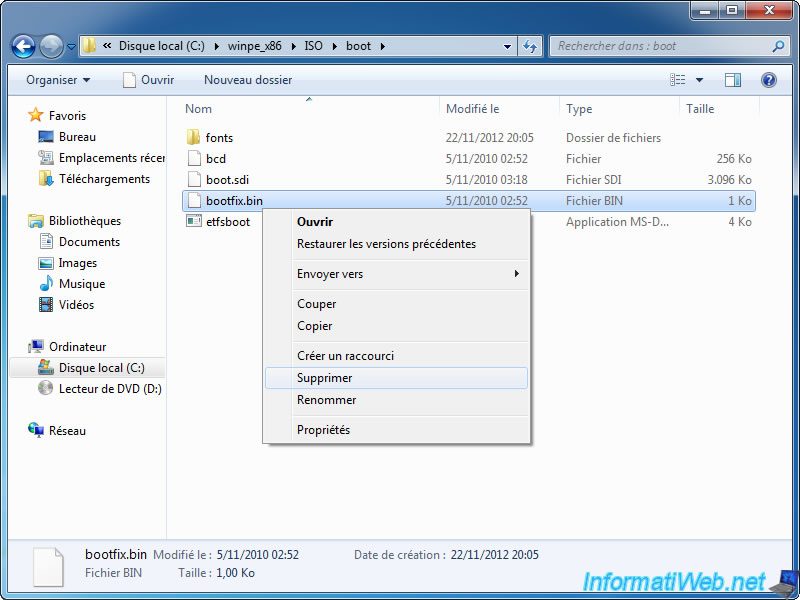
3.7. Delete confirmation message at startup (optional)
If you want to remove the confirmation message asking to press a button to start the DVD, you can just remove the "bootfix.bin" file.
3.8. Creating an ISO image of Windows PE to be burned to a DVD
It is possible to create a bootable ISO image of Windows PE via the "OSCDIMG" Microsoft program. So you can burn Windows PE on a DVD using your favorite burning software.
To do this, run the following command :
Batch
oscdimg -n -bC:\winpe_x86\etfsboot.com C:\winpe_x86\ISO C:\winpe_x86\winpe_x86.iso
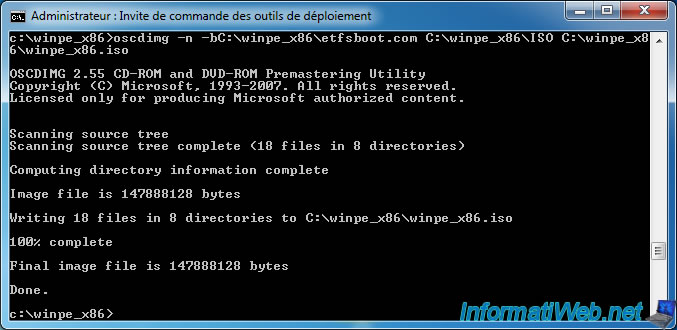
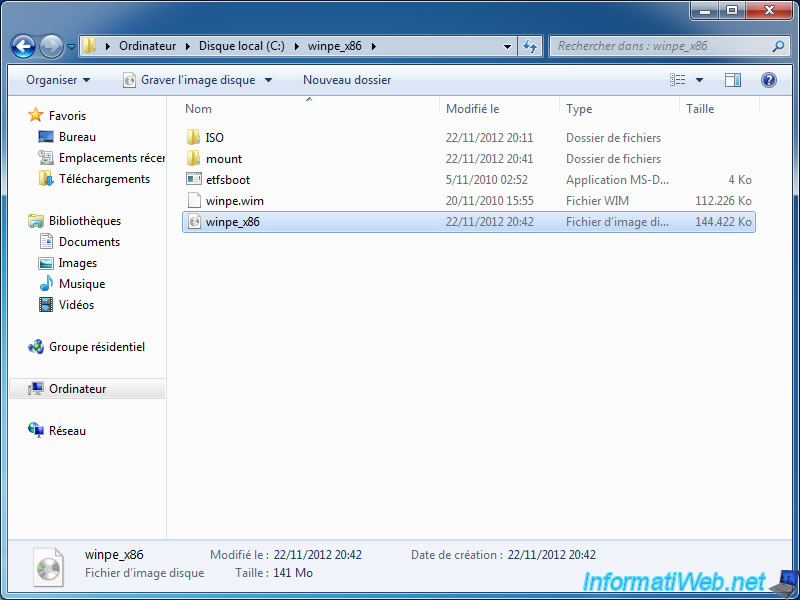
The ISO image called "winpe_x86.iso" is located in "C:\winpe_x86" folder.
Share this tutorial
To see also
-

Windows 5/3/2022
Windows 11 - Return to a local account
-
Windows 4/10/2025
Windows 11 / 10 / 8.1 / 8 - Change a physical disk of a storage space (software RAID)
-

Windows 4/4/2013
Windows 8 - Start in safe mode
-

Windows 2/27/2017
WTG - Windows workspace on USB key
No comment