- Windows
- Windows XP
- 14 March 2013 at 19:48 UTC
-

If Startup Repair or repair of Windows XP does not work, then you only have 2 options :
- Format and reinstall Windows : ie, remove everything that is on the C partition (Windows and data contained therein), and then reinstall Windows.
- Reinstall Windows next to the data. Warning : most of the data will be preserved but some risk of being deleted when reinstalling.
You can, if you wish, save your data using a Live CD before using one of these two possibilities. For this, we recommend the "Mini-XP" found on the Live "Hiren Boot CD".
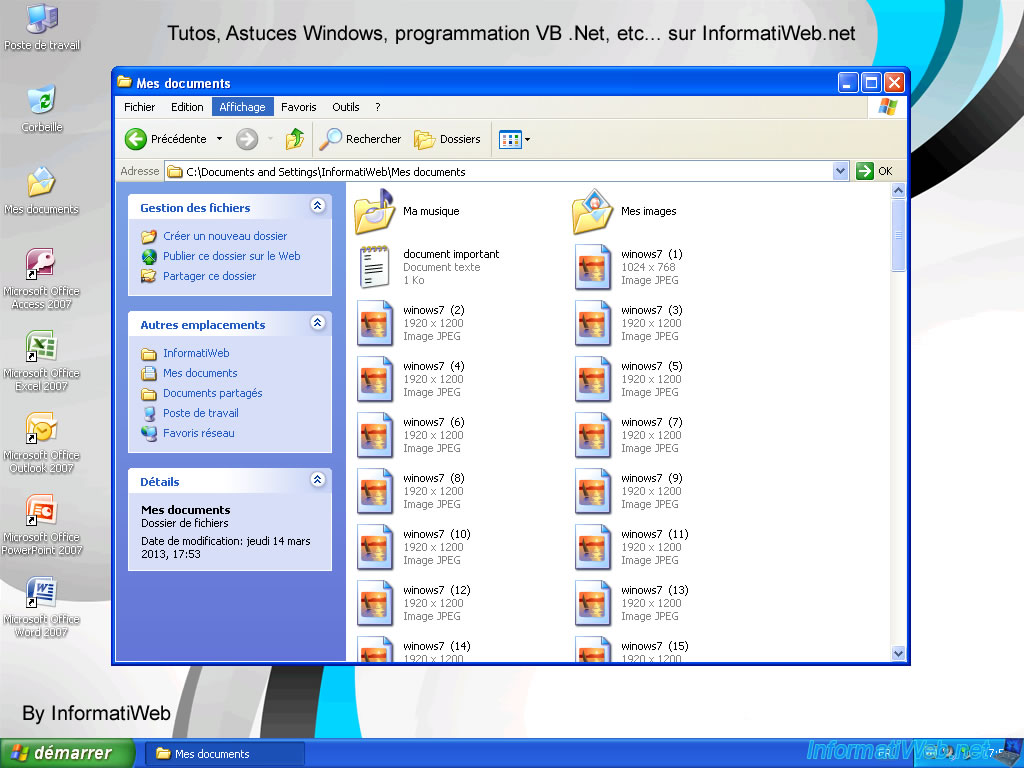
Here is the state of our computer (virtual machine in fact) before reinstalling.
Now insert the Windows XP CD into your CD drive and configure your BIOS for to boot on this CD. If you do not know how, read our tutorial "Change the BIOS boot priority".
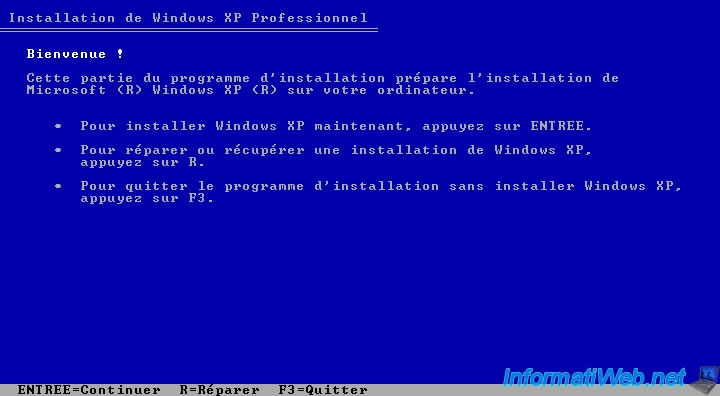
Once completed loading files, you will get to this menu. In this tutorial, this is the first option that interests us.
Then, press the "F8" key (I accept).
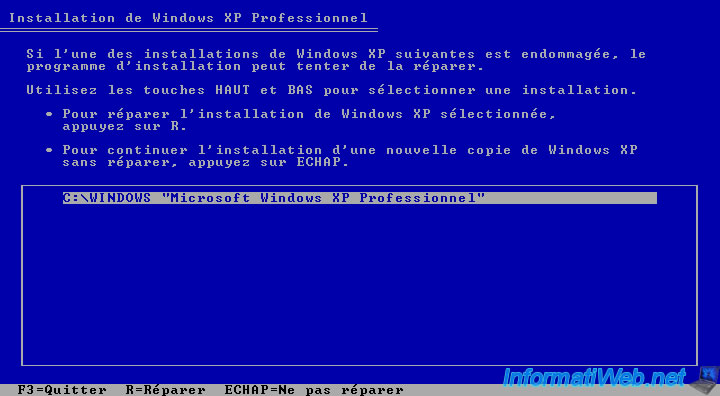
The wizard should detect your old Windows installation. If this is not the case is that it is damaged too.
Press the "ESC" key to install Windows XP nearby.
Then select the partition containing Windows XP (usually the C partition).
Note : Unlike Windows Vista, 7, ..., under Win. XP, the letter of the partition is not automatically renamed to C. Therefore you must select the first partition to install Windows to not end up with a Windows partition D or others.
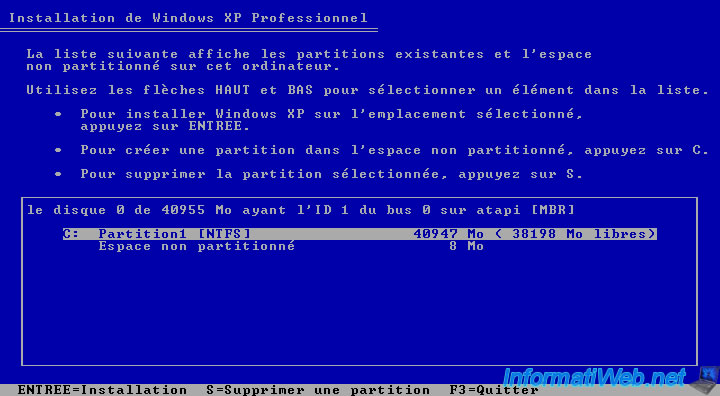
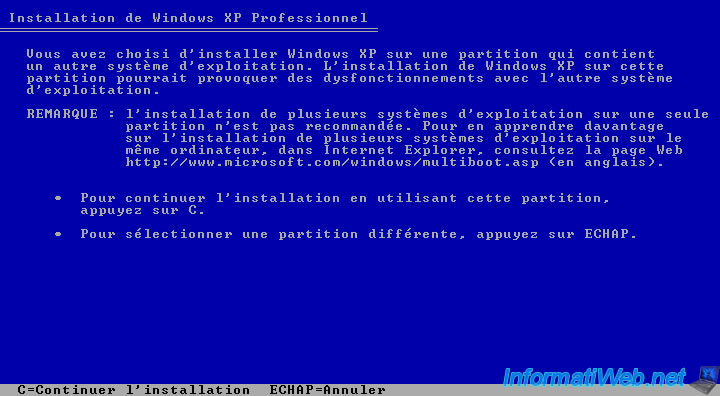
Then press the "C" key to continue the installation on the selected partition.
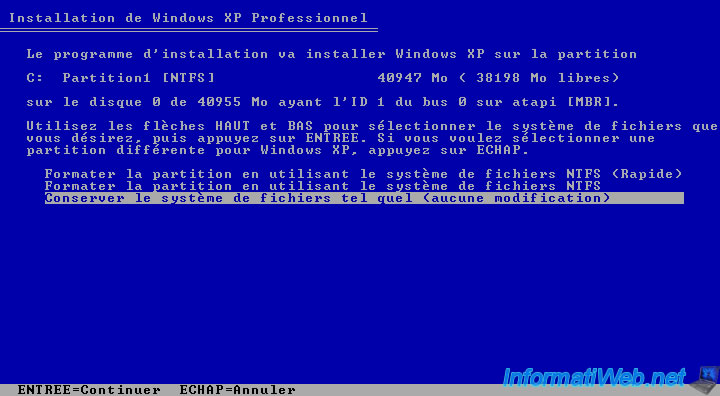
Warning is at this stage it is necessary to choose "Keep current file system intact (no changes)". By choosing this option, the installation wizard does not format the partition, and therefore the data will not be erased. Program files remain on the hard drive but they will no longer start because the registry keys and other system files have been deleted.
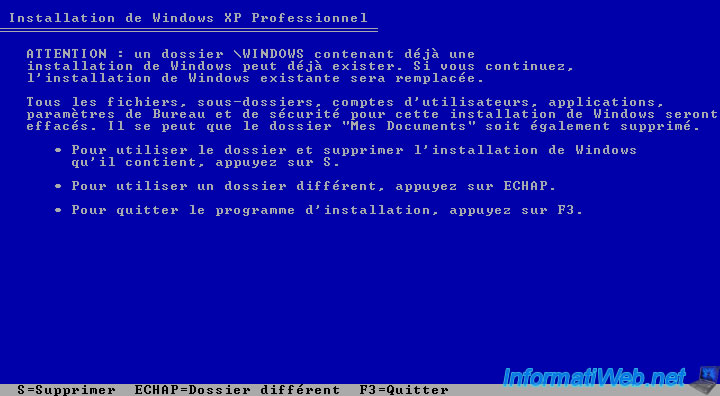
As we have chosen not to change the file system, Windows is already installed on the hard disk. The "WINDOWS" folder is always present. We will tell the wizard to install Windows XP to another folder. To do this, press the "ESC" key.
Now specify a different name for "Windows". For example : "Windows2".
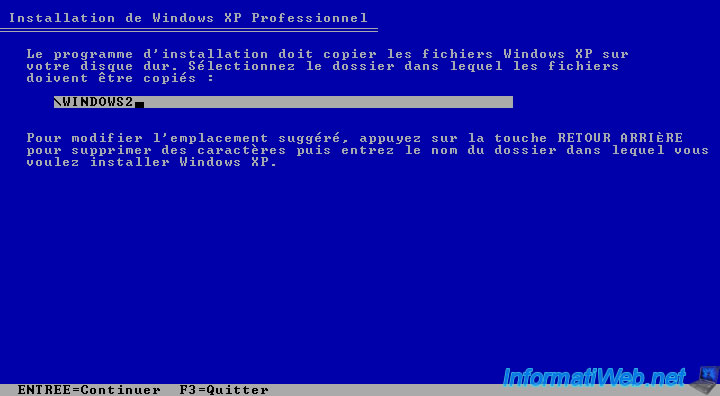
The wizard now copy the installation files to the hard disk. Then restart the computer to install Windows XP.
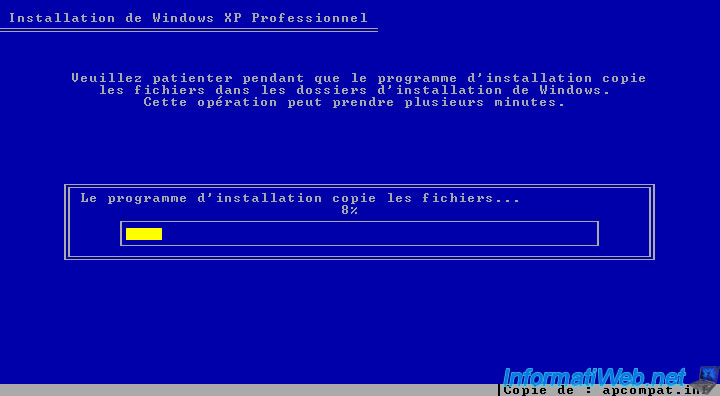
During installation, the installer will ask you some information :
- The country in which you are
- The keyboard language
- A computer name
- Define a password for the Administrator account (optional)
- ...
"Regional and Language Options" essentially allow configure the keyboard language. Click "Customize ...".
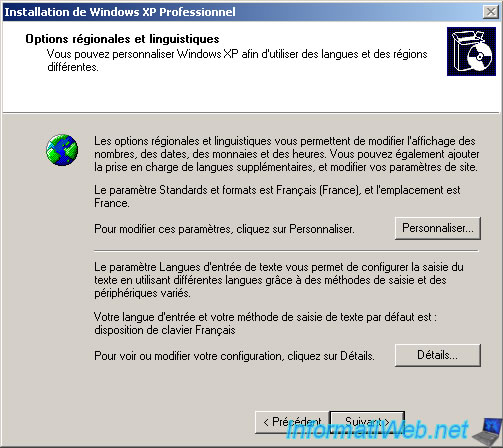
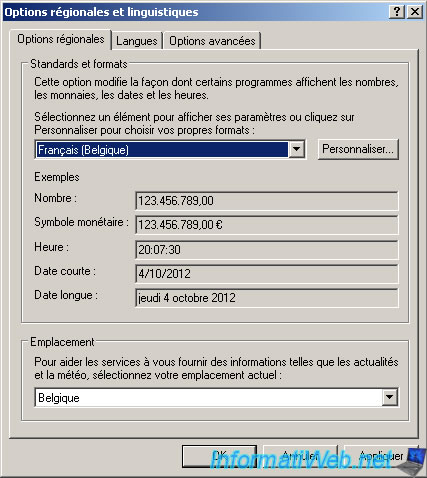
View 3 tabs to indicate your language and your country.
To add a keyboard language, click the "add" button.
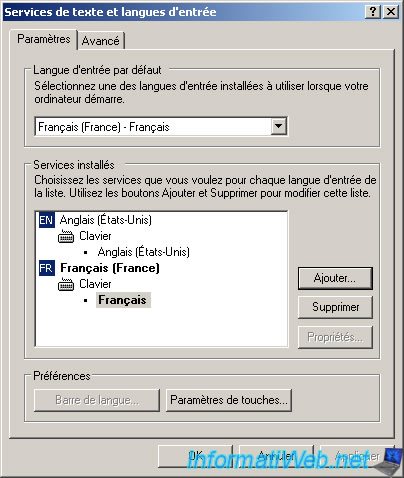
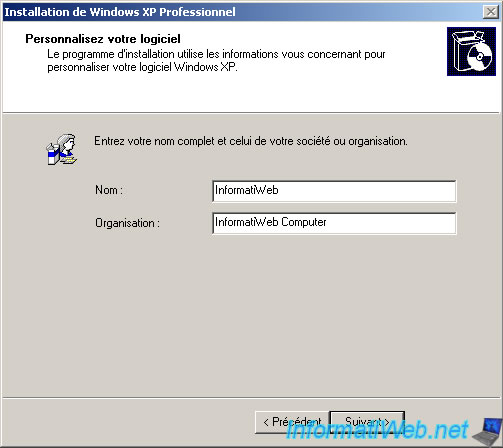
Once the language settings configured, click "Next" and enter a name and an organization.
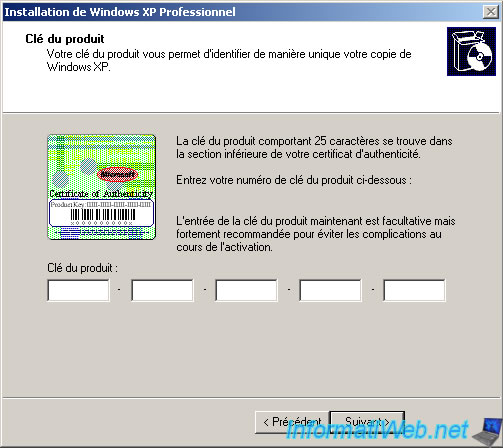
Then enter the serial number of Windows XP. If it appears disabled, you may have made ​​a mistake or it does not match the edition you are trying to install.
Note : Depending on the version of the installation CD (SP1, SP2 or SP3), it is sometimes possible to skip this step. Windows will install the trial version.
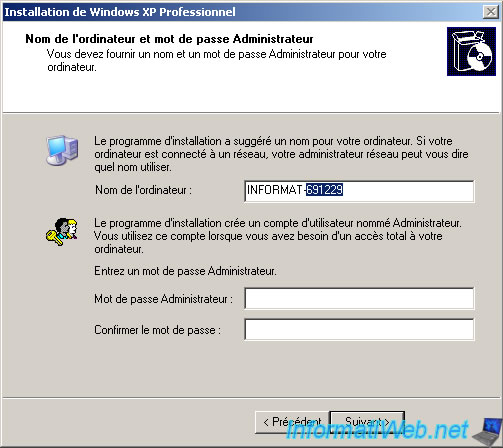
Change the name of your computer if you wish. By default, the wizard uses the beginning of the name you specified previously and adds a dash + random numbers to avoid conflicts of NETBIOS names on the network.
Then enter a password Administrator if you wish. This account is not visible by default when you start in Safe Mode.
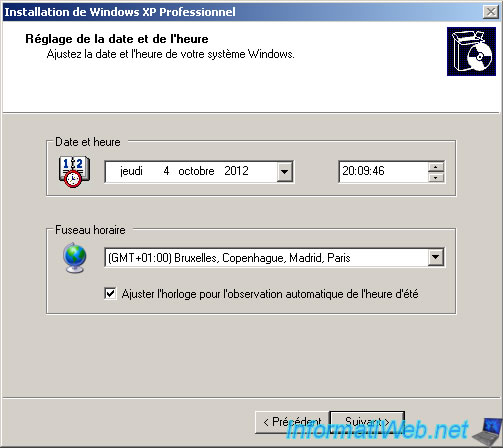
Set the date, time and time zone (if needed). These parameters are saved in the BIOS of the motherboard and are not lost when the battery "CR2032" 3V (on the motherboard) is discharged. However, this battery lasts for years before falling to 0V.
The installation continues briefly.
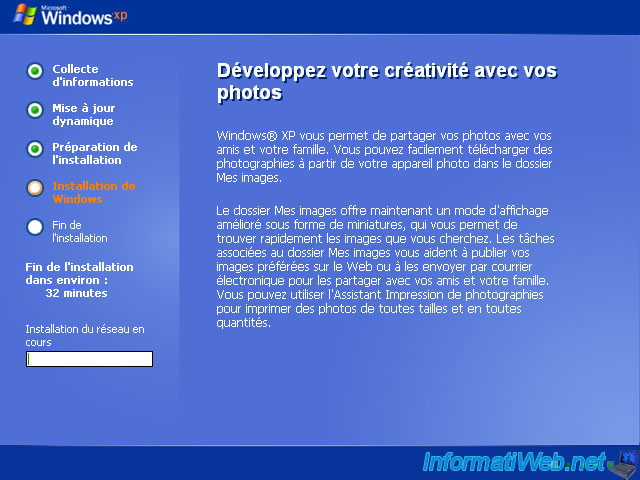
Then prompts you to configure network settings. Either you want to set a static LAN IP address to prevent it changes every x time, or you leave the default configuration. In general, you select "Default".
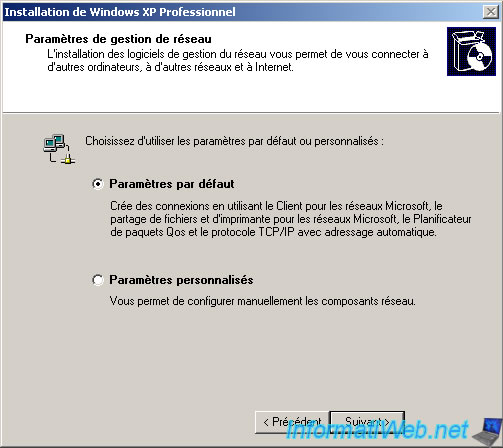
Be integrated in your computer "Working Group", which is generally the case. Either you do enter a "Active Directory" domain configured on your computer running "Windows Server" network.
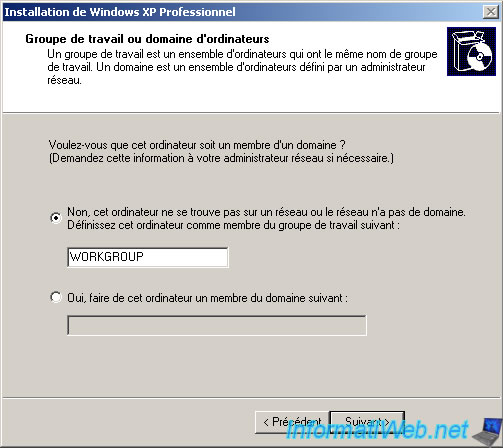
Then the installation proceeds without prompting for a certain time.
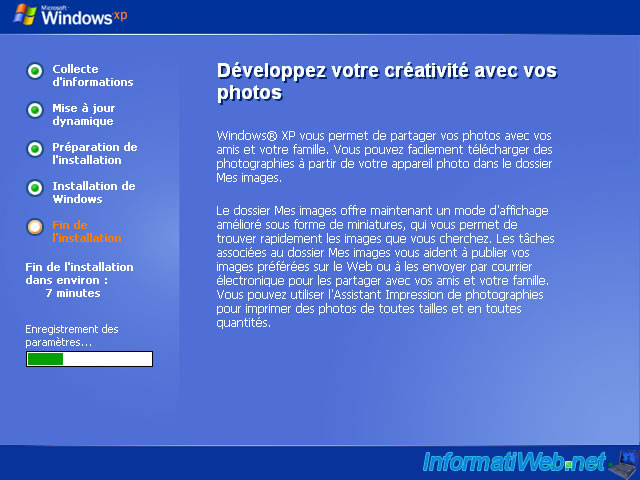
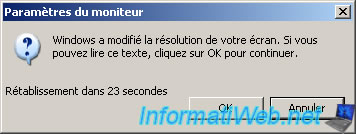
Once installation is complete, two small windows will open. Click OK two times.

The logo of "Windows XP" is displayed.
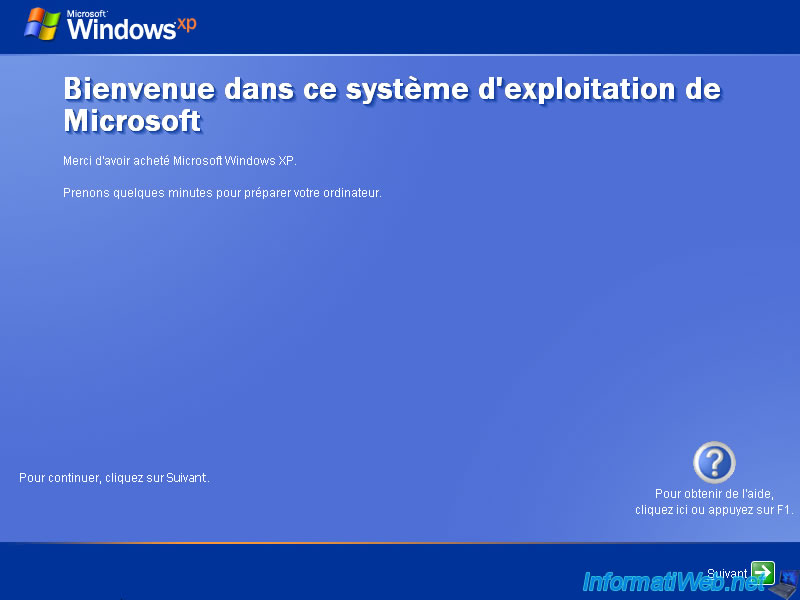
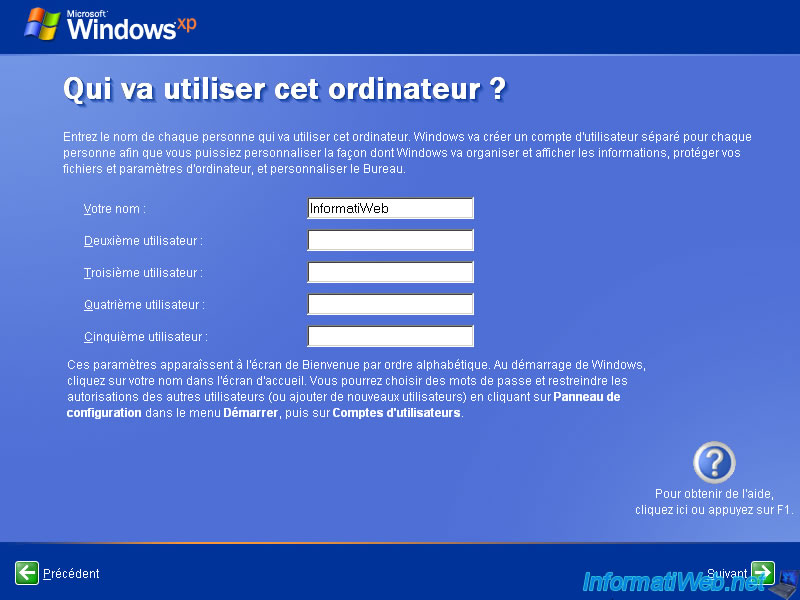
A little wizard will now ask you whether to enable automatic updates (recommended), the names of the users who will use this computer (you can create later) as well as information about the activation and register your copy of "Windows XP".
Tick ​​to keep your computer up to date and protect you from hackers "Help me to protect my PC by activate Automatic Updates (Recommended)". This does not exempt you installed Anti-virus and Firewall. The Windows firewall is integrated from the Service Pack 2.
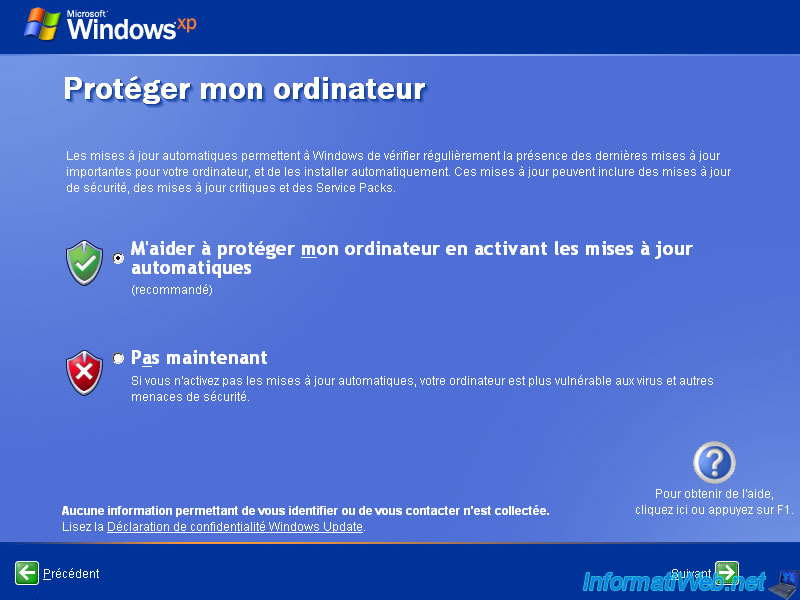
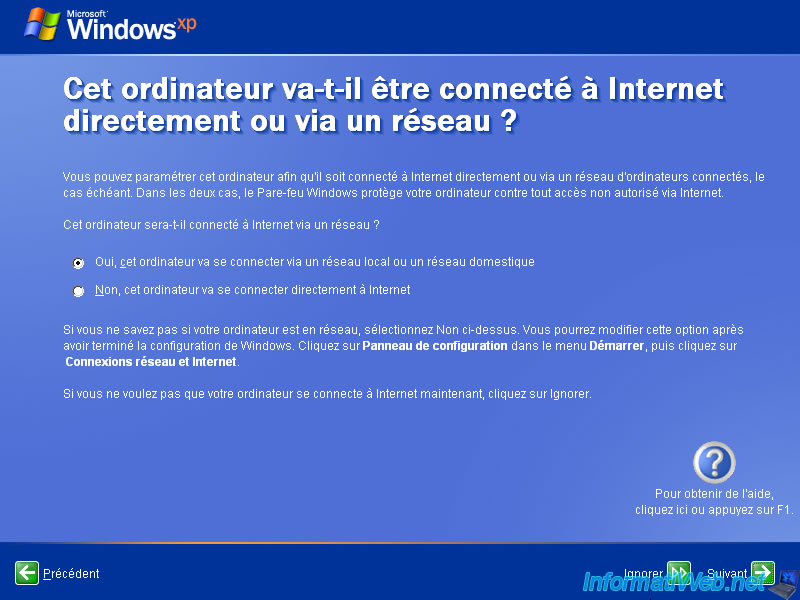
To simplify the installation of Windows, click "Ignore".
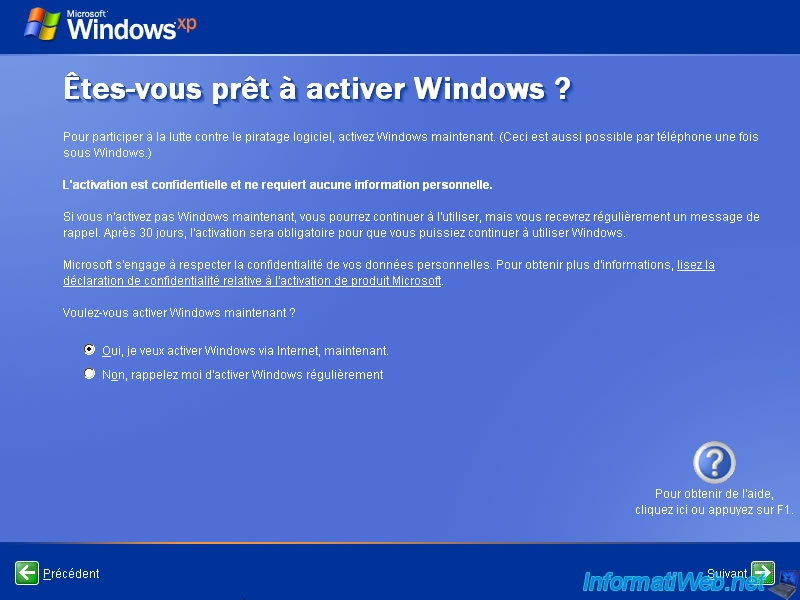
Select "Yes, let's activate Windows over the Internet now". Activation is required. Otherwise Windows will be unusable in 30 days unless it's activated at that time.
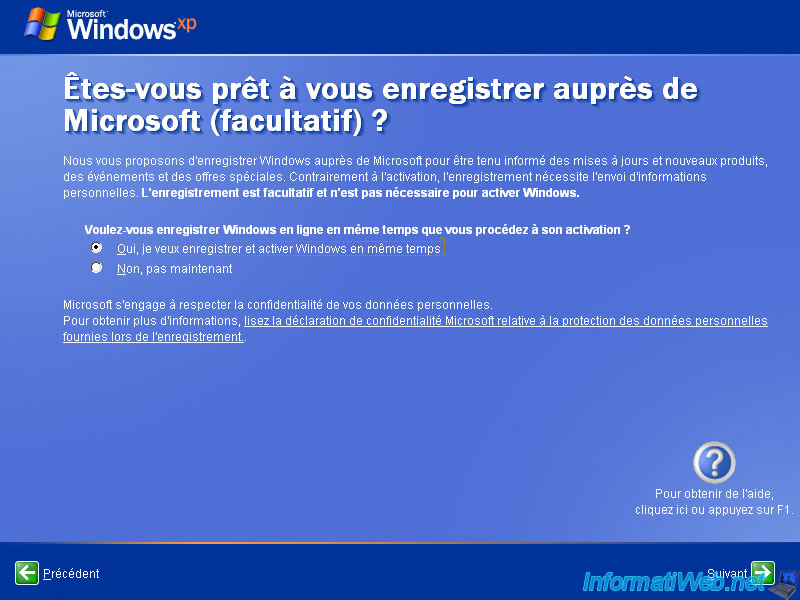
Registration is against optional. If you want to register your copy of Windows, select "Yes, I want to register and activate Windows at the same time".
Otherwise select "No, not now".
Then enter the name of user(s) to create. You can create them later if you wish
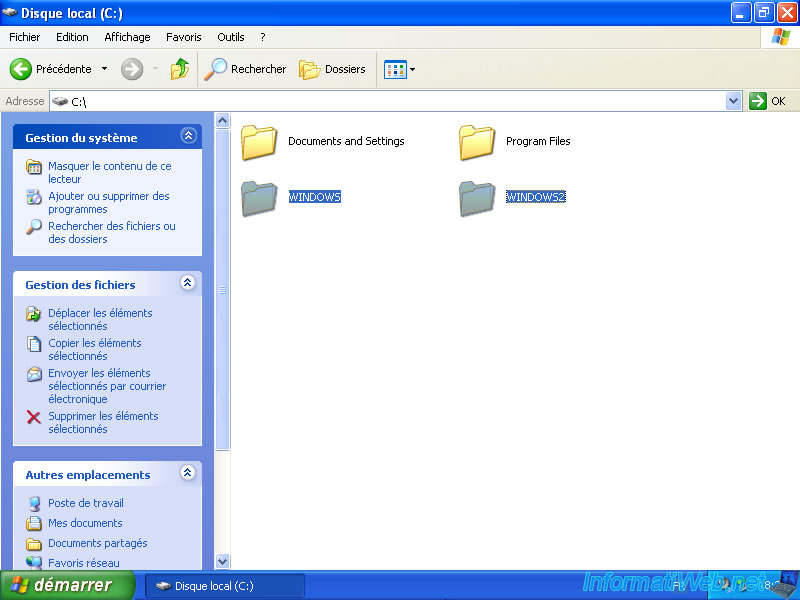
We are now on our Windows XP freshly installed next to our data. As you can see, you now have 2 folders "Windows". The former named "WINDOWS" and the new which is named with the name you specify when reinstalling. In our case it is "Windows2".
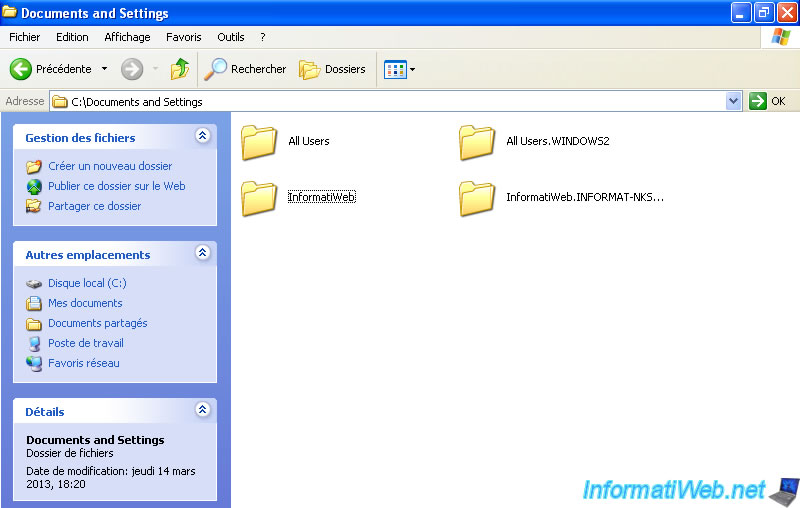
In the "Document and Settings" folder, you will find the old and new users accounts.
The old accounts kept their original names, such as : "All Users" and "InformatiWeb". And new are now named this way "[Account name].[Machine name]" or "[Account name].[Name of the new Windows folder]".
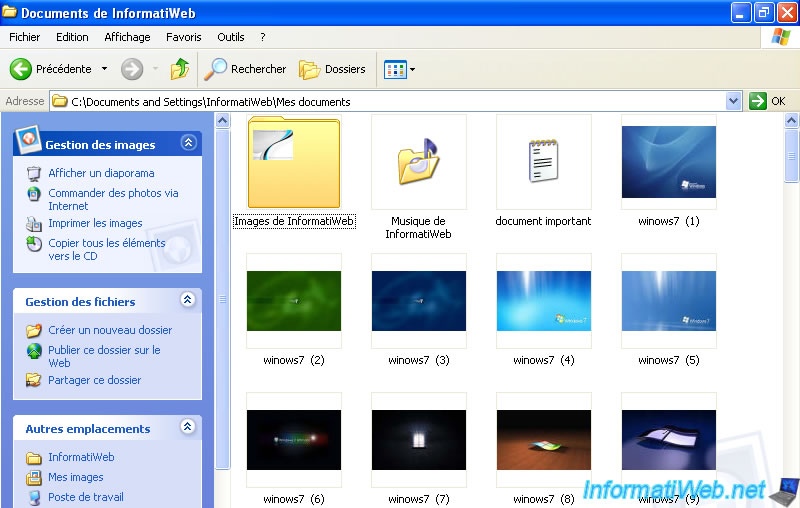
As you can see, Windows has been reinstalled with default options and programs are longer installed. Nevertheless, we still have our documents.
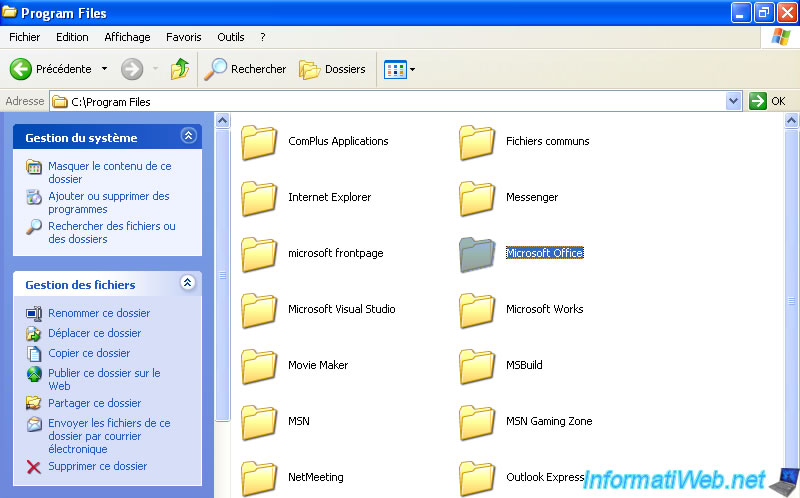
The files containing the program files that were installed are still present but they will not engage because the registry keys and other system files are not present on the hard disk.
If you try to run a program that was installed before reinstalling, you will receive an error message.
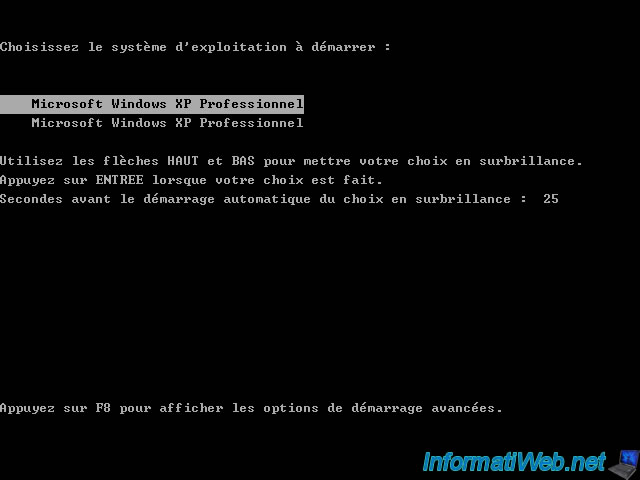
As you may have noticed, you now have a menu with two operating systems that appears at startup. This is the old and the new installation of Windows.

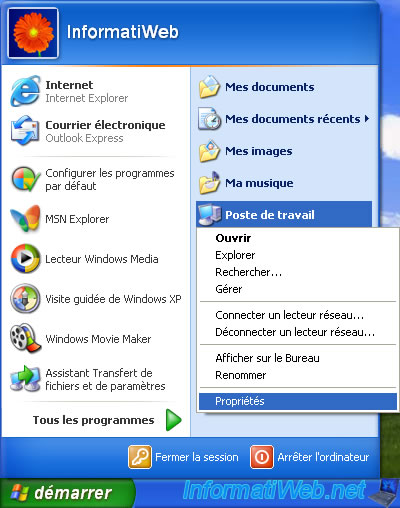
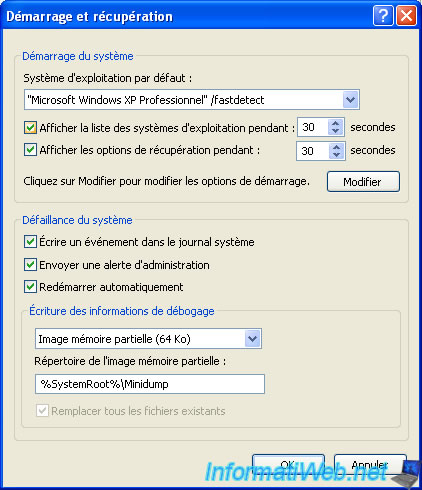
To hide this menu, right-click on "Computer" and click "Properties".
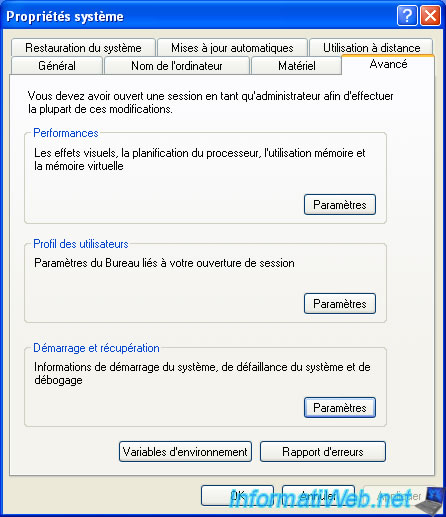
Then go to the "Advanced" tab and click the "Settings" button in the "Startup and Recovery".
Then simply uncheck "Display a list of operating systems for xx seconds" box.
Share this tutorial
To see also
-
Windows 11/11/2012
Windows XP - Formatting and reinstalling
-
Windows 3/14/2013
Windows XP - Repair installation of Windows
-

Windows 4/4/2013
Windows XP - Start in safe mode
-
Windows 11/18/2012
Windows XP - Startup repair

You must be logged in to post a comment