- MultiBoot
- GAG
- 05 August 2014 at 11:34 UTC
-

- 1/3
To create a MultiBoot, we recommend that you use "GAG" which has the advantage to install itself in the MBR (Master Boot Record), it's easy to use (use, configuration and installation) and has a clear graphical interface unlike others. One advantage is that when you boot on an OS, GAG assigned the letter "C" whether the OS No. 1, No. 2 or another.
For the procedure, we will explain this, step by step, even if it's still pretty simple but like that even beginners can succeed even if it's mostly reserved for expert.
Warning : you are aware that support for Windows XP has stopped on April 8, 2014, creating a Multiboot "XP / 7" is therefore interesting because it allows you to use old programs or old devices that do not work with Windows 7. And surf securely with Windows 7. Of course, you could use XP mode for Windows 7, but this solution creates a virtual machine so you will have lower performance in Win XP. In the case of a Multiboot you will not lose in performance.
In this tutorial, we will make a Multiboot "XP - Seven" by first installing "Windows XP" and then "Windows Seven" and GAG at the end, otherwise it would not be a Multiboot.
For partitions, we will create 3 partitions :
- Partition 1 : Windows XP
- Partition 2 : Windows Seven
- Partition 3 : Data (This one, there will be no problem of rights because no OS will be over. There will only your data)
1. Install "Windows XP" almost normally
Insert the Windows XP CD and boot on it.
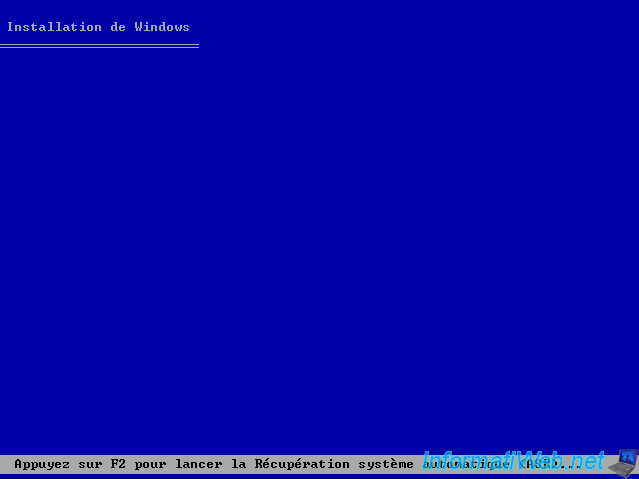
Setup loads files.
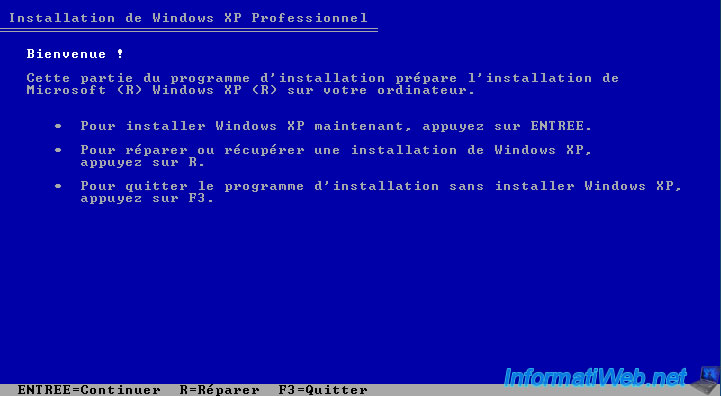
Then, he offers 3 options. Select the first by pressing "ENTER".
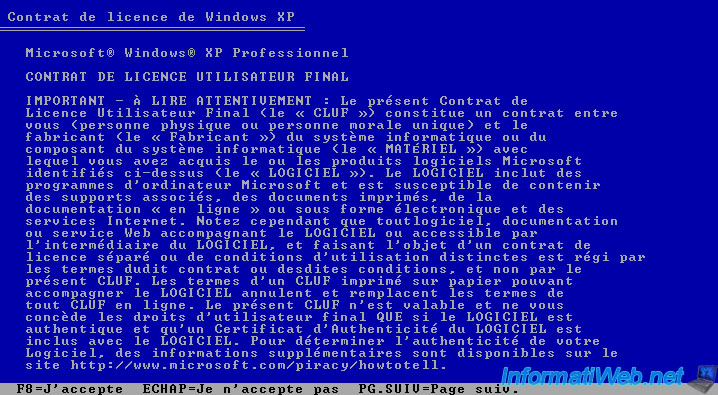
Next, accept what is displayed by pressing "F8".
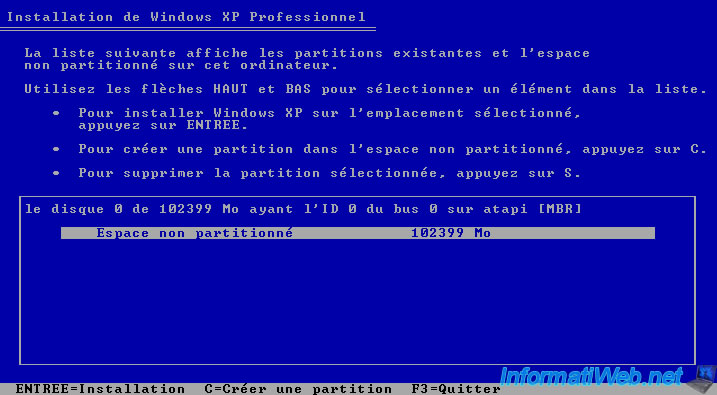
For now, we'll just create the "Partition 1 : Windows XP". To do this, press "C" as shown.
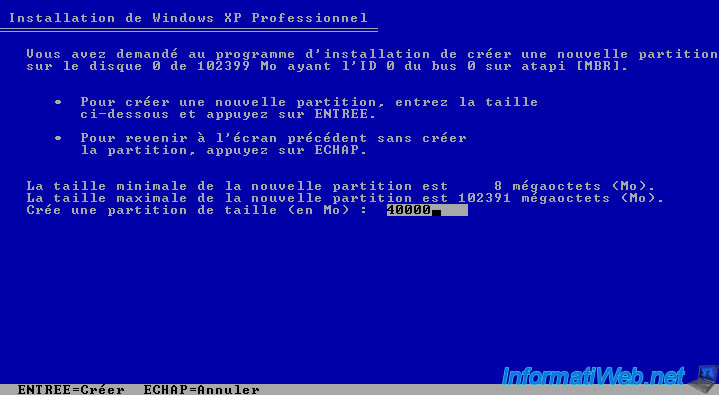
Then, specify the size of the partition to create. Here, we set 40 GB (40000 Mo) because the hard disk used have a size of 100GB. Must remember to put enough space for the OS can run but leave some space for the another OS (the "Partition 2 : Windows Seven") and the data partition (the "partition 3 : Data").
After specifying the size, press "ENTER".
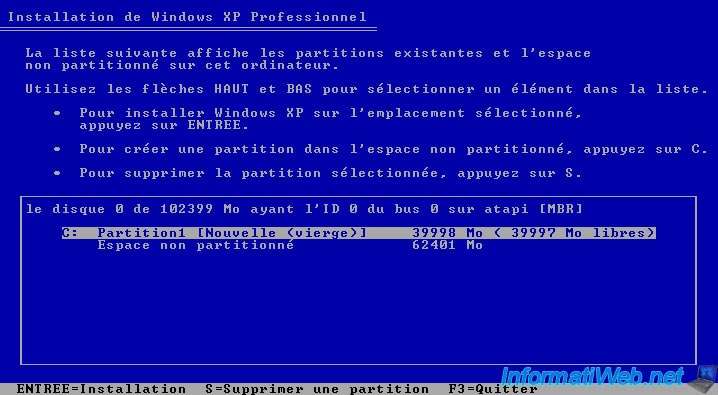
You get a partition of the size you have just entered and unpartitioned space that will be used for two other partitions that we will create later.
Now, press "ENTER" to install Windows XP normally.
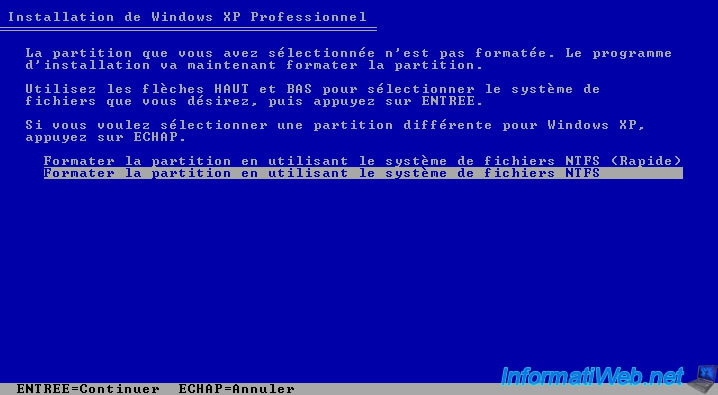
Here, if you have the choice between FAT32 and NTFS, it is recommended to choose "NTFS" for Windows XP manages rights through "NTFS rights". This is logical. Then select "Quick Format" to format the partition and create the file system.
Finally, press "ENTER" to install Windows XP normally.
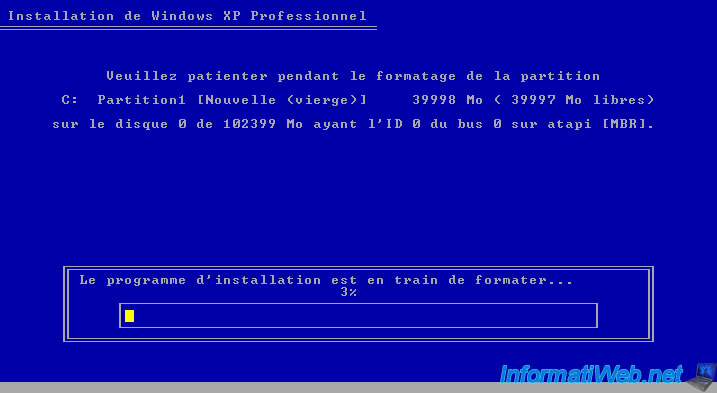
The installation go through formatting, copying the installation files on the hard disk (HDD) and finally the actual installation. Don't forget to configure the layout of the keyboard (in the regional options) when prompted.
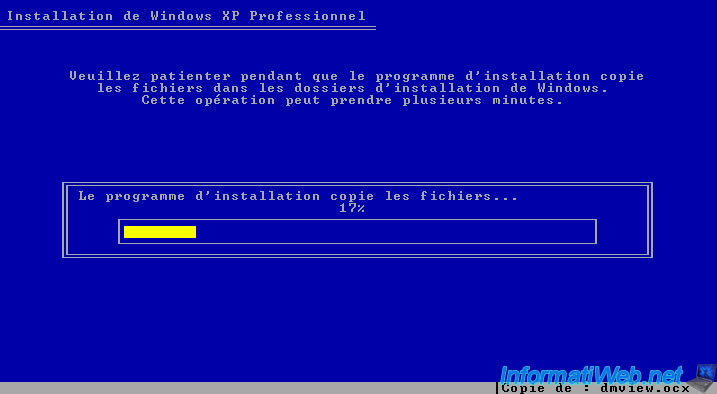
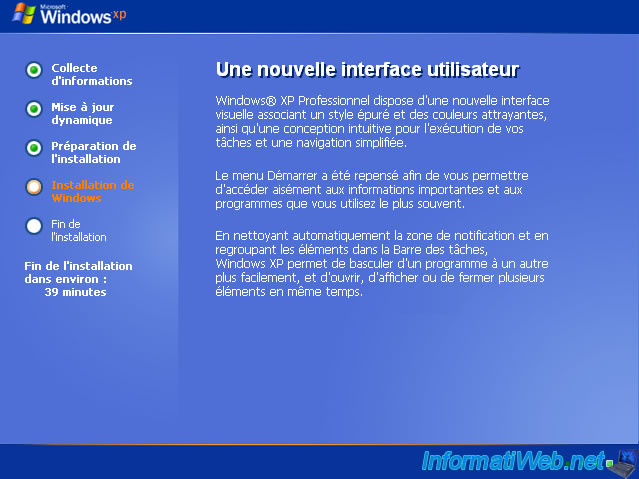
Once the installation of "Windows XP" complete, we install the drivers (Motherboard, Graphics Card, Network Card, ...) and a little configuration to create independent boots and avoid crushing boots of the OS during installation of another OS.
First, install the drivers.
Note : Having made ​​this tutorial on a virtual machine to be able to make screenshots (in and out of Windows), the drivers are provided by the virtualization software (in this case : VirtualBox which is free).
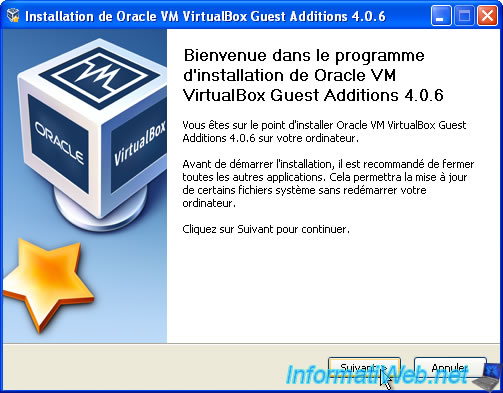
Once the driver installation is complete, we will change the Active partition. "Windows Seven" will not view the "Windows XP" install and not going to create a Microsoft multiboot.
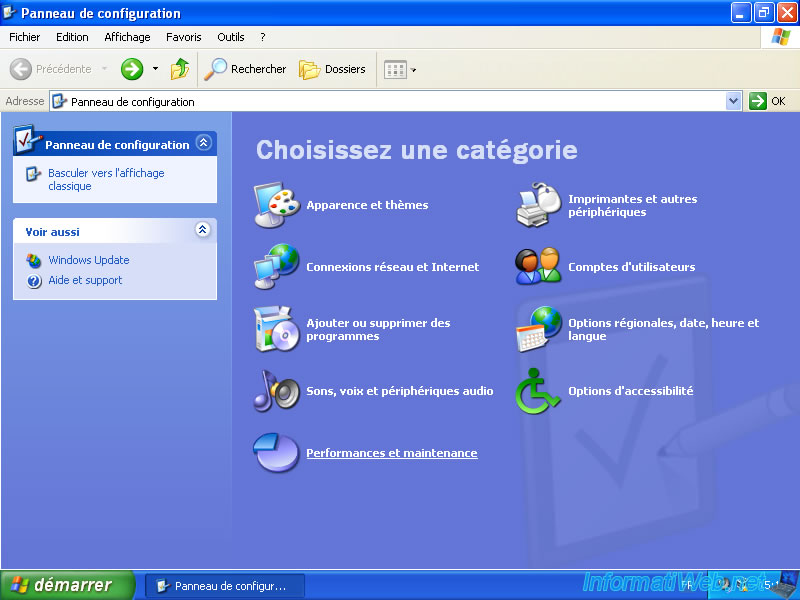
To do this, click "Control Panel".
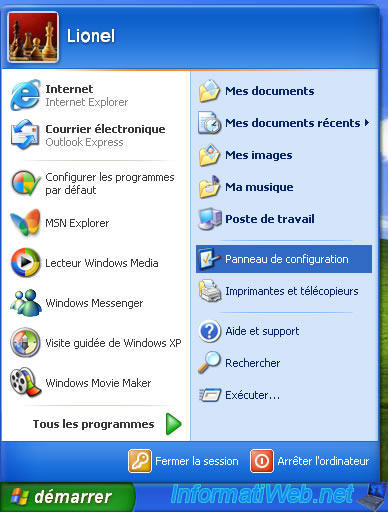
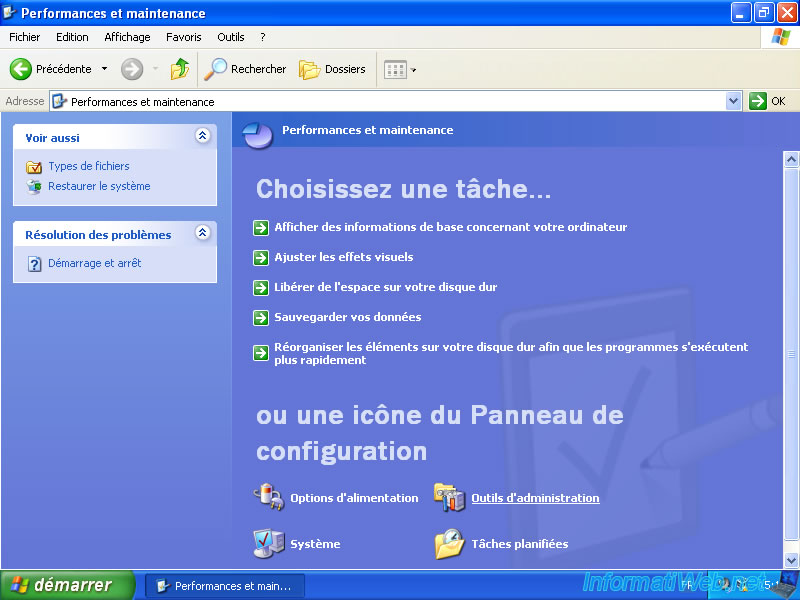
Then click "Performances and maintenance".
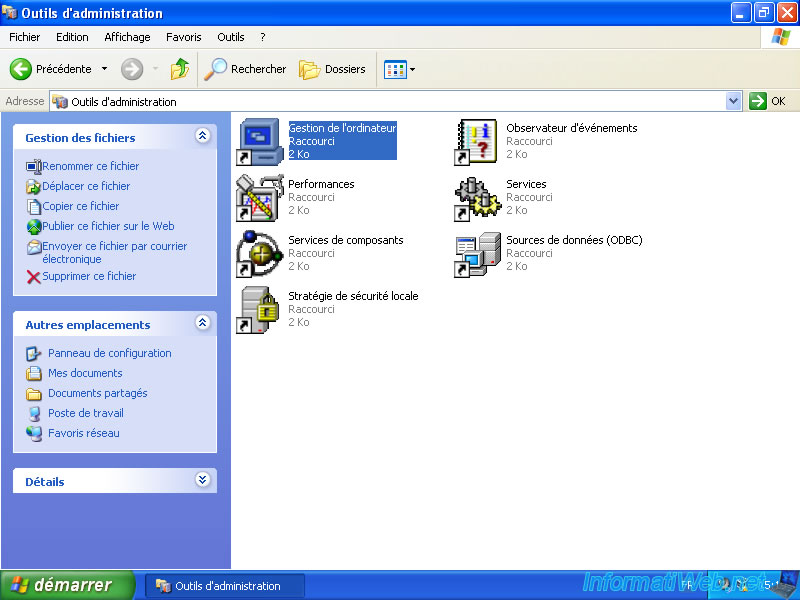
Then, "Administrative Tools".
And finally, "Computer Management".
In the list on the left, click on "Disk Management" and you get something like this :
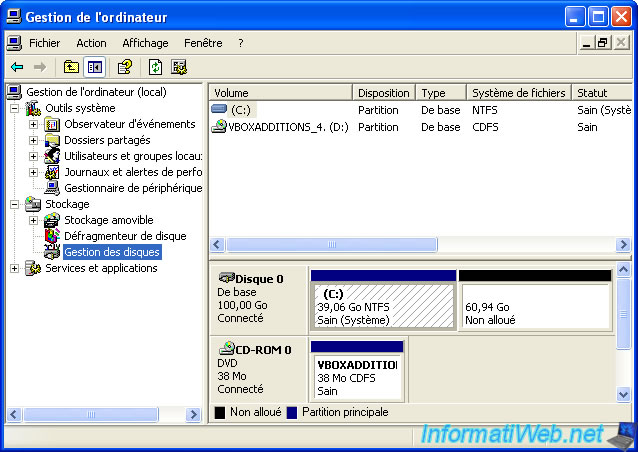
Now, for convenience, we will change the letter of your CD / DVD drive to release the letter "D" will be that of the partition "Windows Seven". To do this, right-click on the CD / DVD drive and click "Change Drive letter and paths ...".
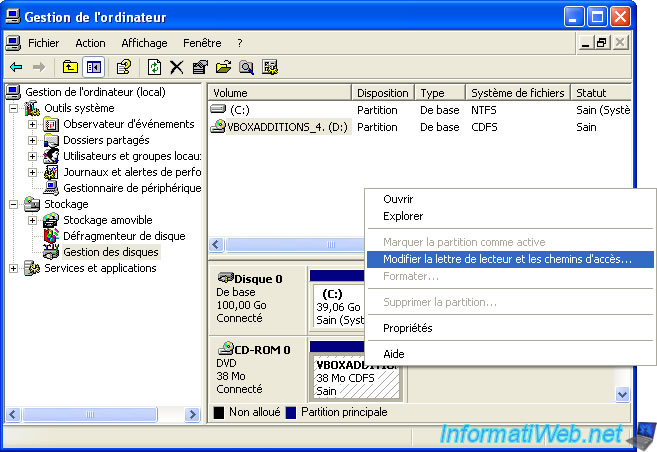
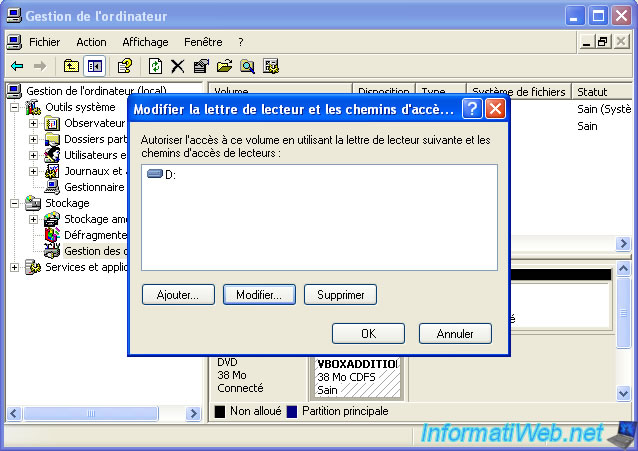
In the window that opens, click on the "Edit" button (to change the letter).
In the list, select another letter to release the "D" letter. For example "E".
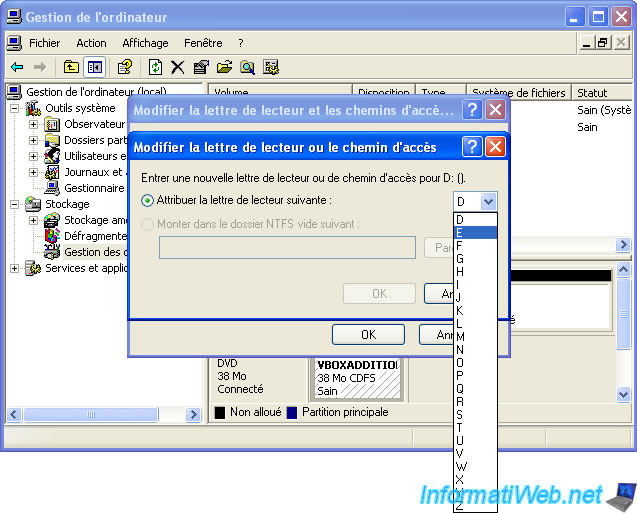
Here it asks if you really want to change the letter. Answer "Yes". Existing shortcuts (if any) will no longer valid because the letter has changed but as nothing is installed that have no negative effect.

Now, that the letter "D" is released.
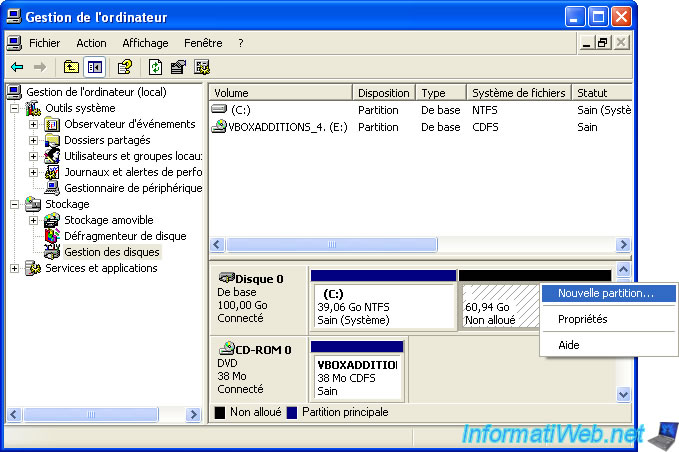
Maintenent, the letter "D" is released, we can create the second partition (which will host "Windows Seven"). To do this, right click in unallocated space and click "New Partition".
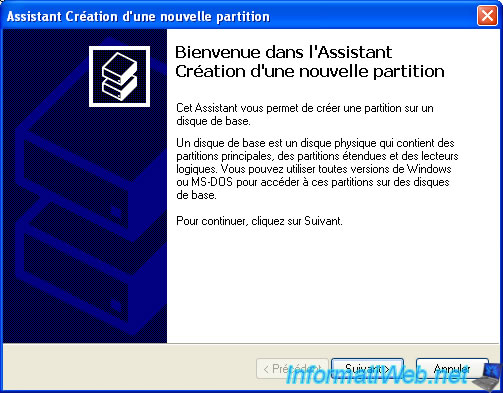
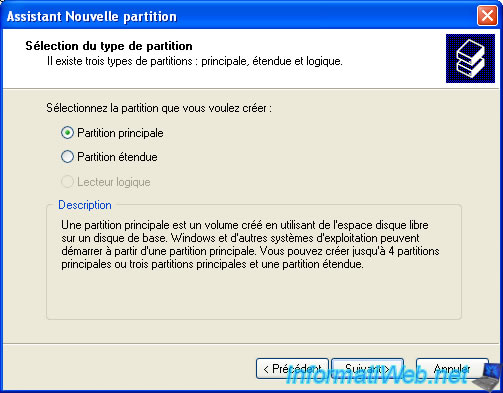
There must be a primary partition to install an OS on it. (This isn't quite true, but it's recommended because it simplifies things).
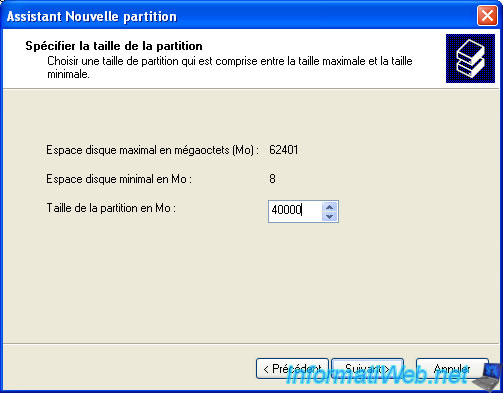
As for XP, be sure to save enough space for the OS can. But, leave space for the data partition (the "Partition 3 : Data").
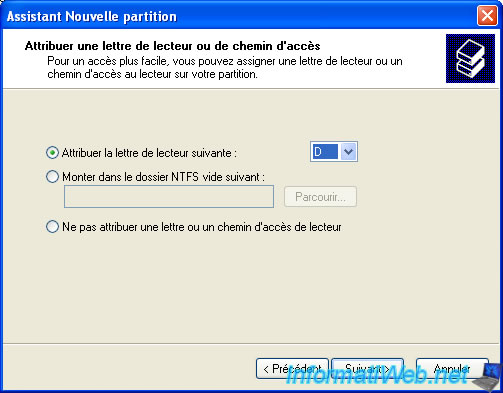
Give him the letter "D".
Here, check the "Don't format this partition" because "Windows Seven" automatically format the partition before the installation.
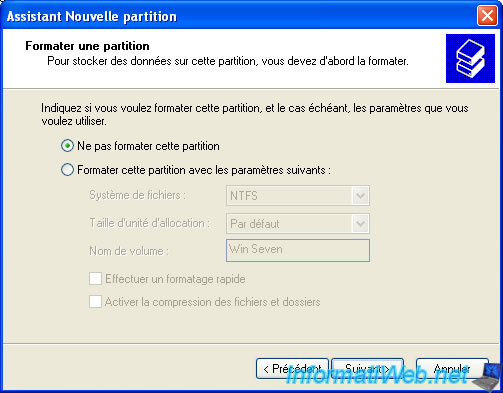
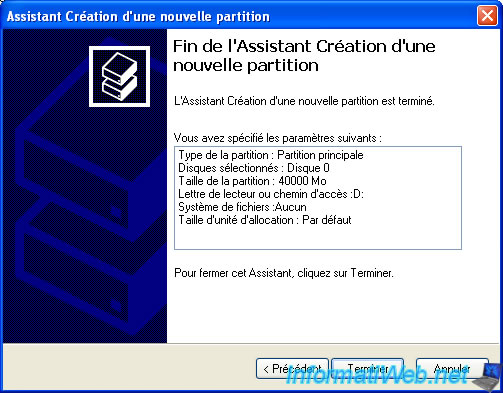
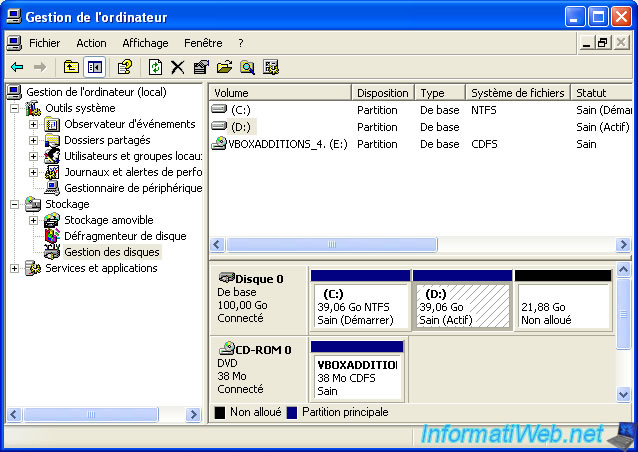
Now, right-click on the partition "D" where we will install "Windows Seven" and click "Mark Partition as Active". CAUTION : Don't forget to put the "Windows Seven" DVD in the CD/DVD drive before restarting the PC because it will not restart on XP any more before installing "GAG" to create the Multiboot.
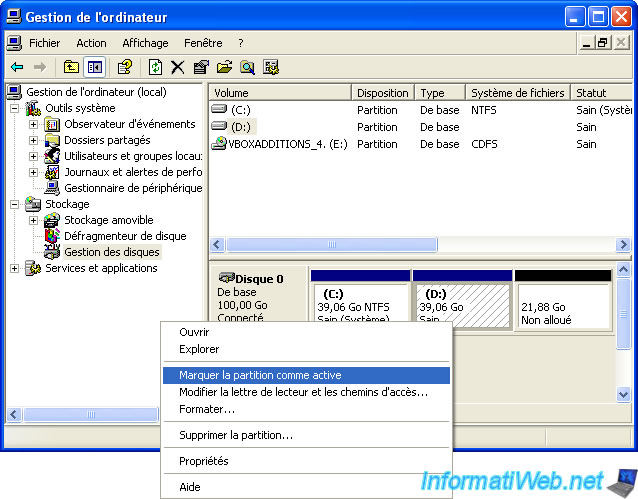
This message alerts you change the active partition while an OS (Windows XP) is installed on another partition that you mark as active and therefore the PC will not start on Windows XP. That is why you must insert the Windows Seven DVD before restarting (as mentioned above).
Click "Yes".

Now that you have marked the partition "D" as active, reboot to install "Windows Seven".
You must be logged in to post a comment