- Other
- Moonlight
- 03 March 2025 at 09:54 UTC
-

- 1/2
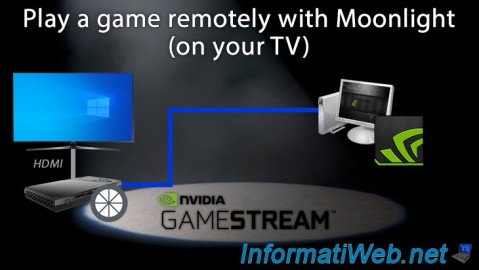
With Moonlight (which is free) and NVIDIA GeForce Experience's "GameStream" feature, you can play your games remotely from another PC.
This can also allow you to install your games on your PC in your bedroom (for example) and play on the living room TV (at home or at your parents' when they are not using it) by connecting a simple mini PC to it.
Given that recent TVs all have an HDMI connector and that mini PCs are becoming more and more common and therefore less expensive, you can easily set up this solution at home.
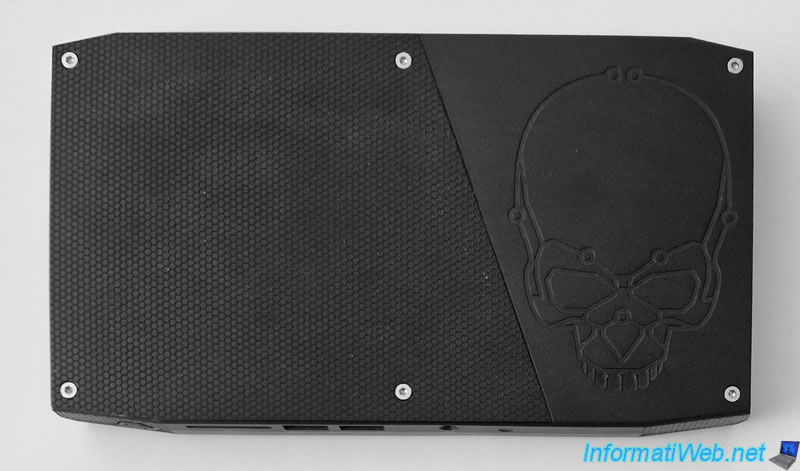
In our case, we reused one of our mini PCs "Intel NUC Skull Canyon (NUC6I7KYK)".
- Enable NVIDIA GeForce Experience GameStream feature
- Install Moonlight on the client PC
- Set up remote access via VNC (optional)
- Adding a game to the remote PC
- Using a Bluetooth headset to play on your TV
- Hardware used to play on our Samsung TV
- Connect your mini PC to your TV
- Play a game installed on a remote PC on your TV via Moonlight
1. Enable NVIDIA GeForce Experience GameStream feature
To start, you will need to enable the GameStream feature of NVIDIA GeForce Experience.
For this, refer to our tutorial: Moonlight - Play a game remotely (via NVIDIA GameStream).
As you can see, in our case, this "GameStream" feature is compatible with our hardware since the "Ready" status appears for it.
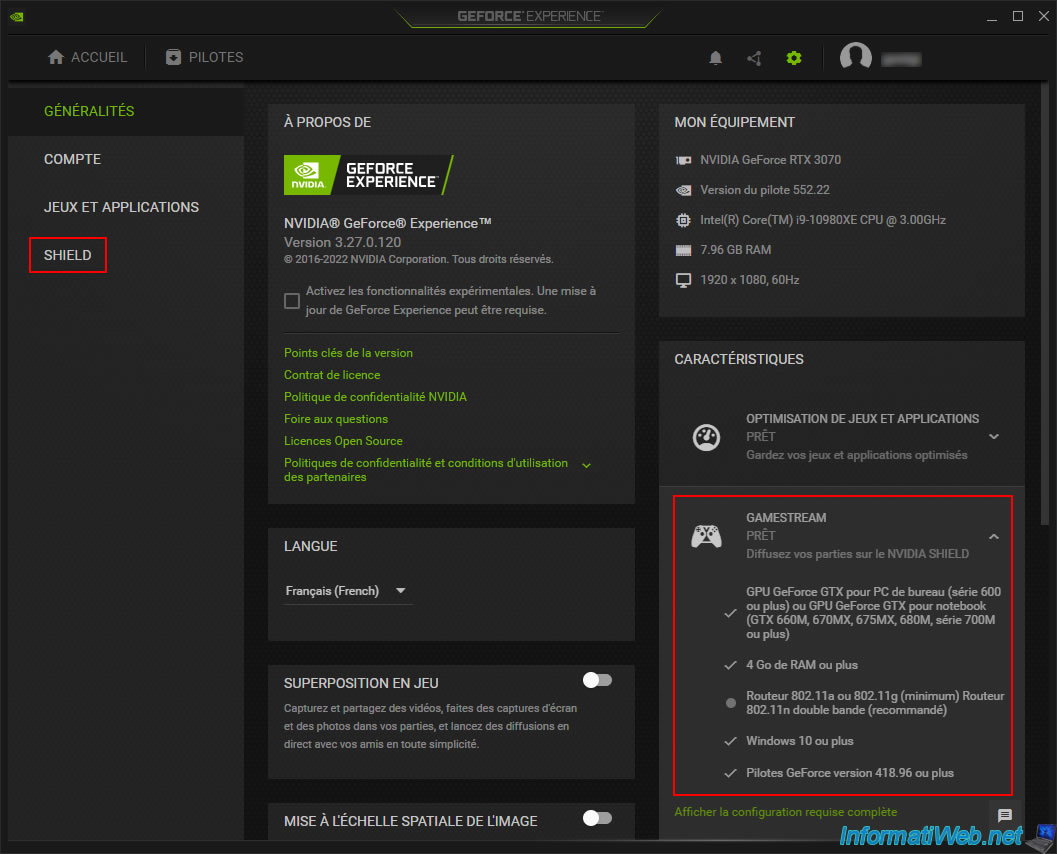
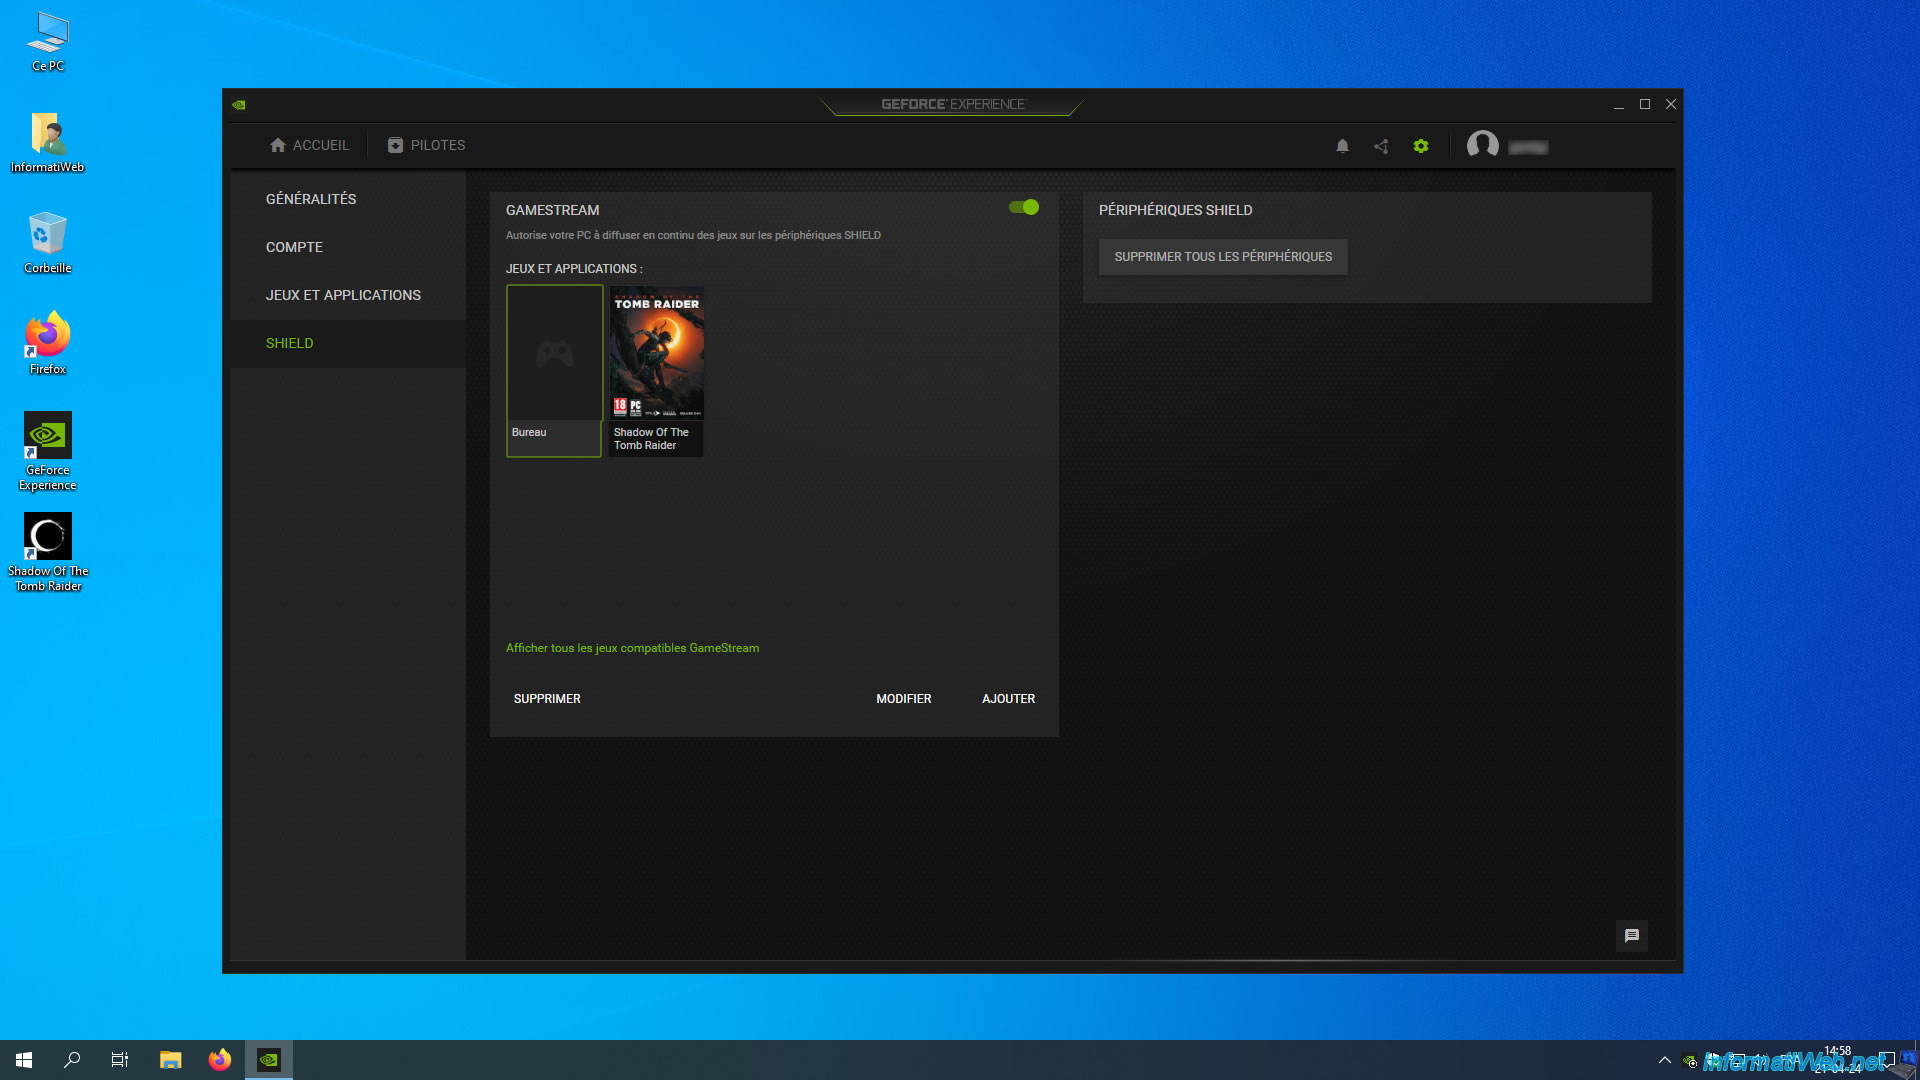
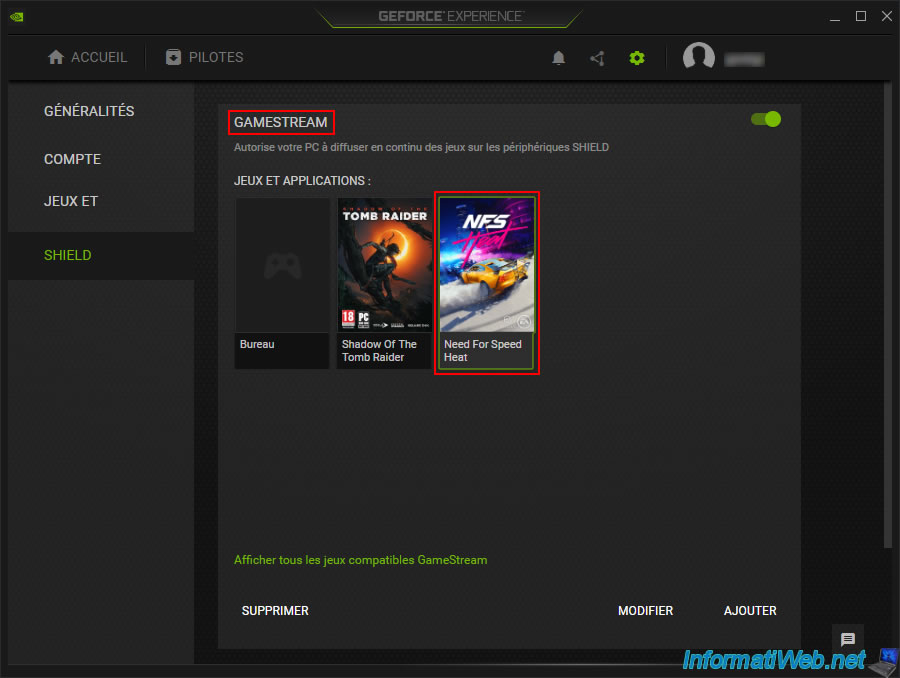
Next, don't forget to enable the "GameStream" option in the "SHIELD" section of NVIDIA GeForce Experience and add the games you want to access remotely.
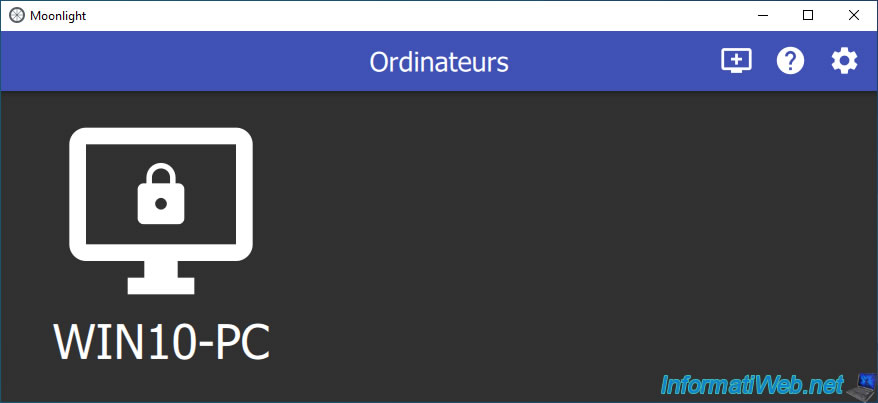
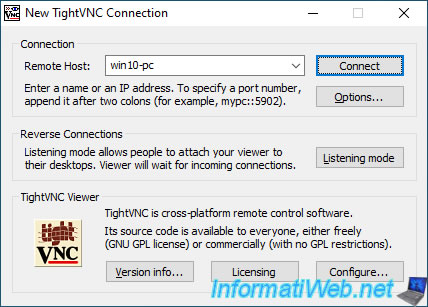
2. Install Moonlight on the client PC
On your client PC, you just need to download and install the "Moonlight" program (as explained in the tutorial mentioned above).
3. Set up remote access via VNC (optional)
As you may have already seen in the tutorial mentioned above, when you use "Moonlight" with the NVIDIA GeForce Experience "GameStream" feature, you will have to type a code to associate your client with your "server" PC.
To avoid having to go back to the remote PC (which is convenient if you only have one keyboard and one mouse at home), we suggest you add a free remote access via VNC.
This will allow you to type the requested code on the remote PC without having to physically move.
This will also allow you to remotely modify settings in the NVIDIA GeForce Experience "GameStream" feature if you wish without having to go back to the remote PC.
To do this, install the TightVNC server and client as explained in our tutorial: Moonlight - Play a game remotely (validate NVIDIA GameStream code remotely).
Important : you CANNOT use Windows Remote Desktop (RDP), as it is incompatible with NVIDIA's "GameStream" feature.
TightVNC Server must be installed on the remote PC where your games are installed and where you have enabled NVIDIA's "GameStream" feature.
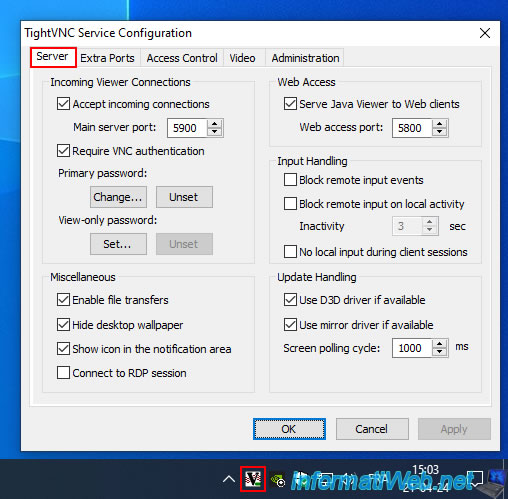
The TightVNC client (TightVNC Viewer) must be installed on the client PC that you will connect, in this case, to your TV.
4. Adding a game to the remote PC
To test the stability and fluidity of this solution, we used a car racing game.
In our case: Need for Speed HEAT.
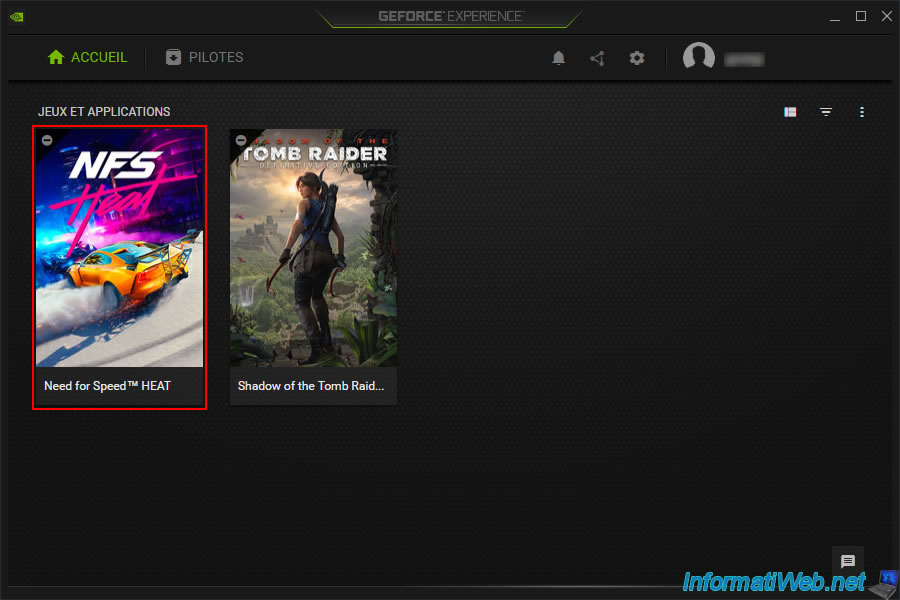
If you have installed a new game, don't forget to add it in the "GameStream" feature configuration as your games need to be added manually for this feature.
5. Using a Bluetooth headset to play on your TV
For the sound of your game, you have several possibilities:
- either you use your TV's built-in speakers.
Which is possible if you are at home and which does not require any configuration since the sound from the mini PC will pass through the HDMI cable connecting your mini PC to your TV. - or you use a Bluetooth headset that you pair with your TV.
Again, since the sound goes through the HDMI cable by default, the sound will then be transmitted wirelessly (via Bluetooth) between your TV and your Bluetooth headset. - or you use a Bluetooth headset that you pair with your mini PC.
In this case, your mini PC must support Bluetooth and you will simply have to add your headset as a new Bluetooth device in Windows.
If you need help with this, here is how to do it with Windows 10: Windows 10 - Use a Bluetooth headset.
For other versions of Windows, search for the keyword "Bluethooth" on our site to find the tutorial corresponding to your version of Windows.
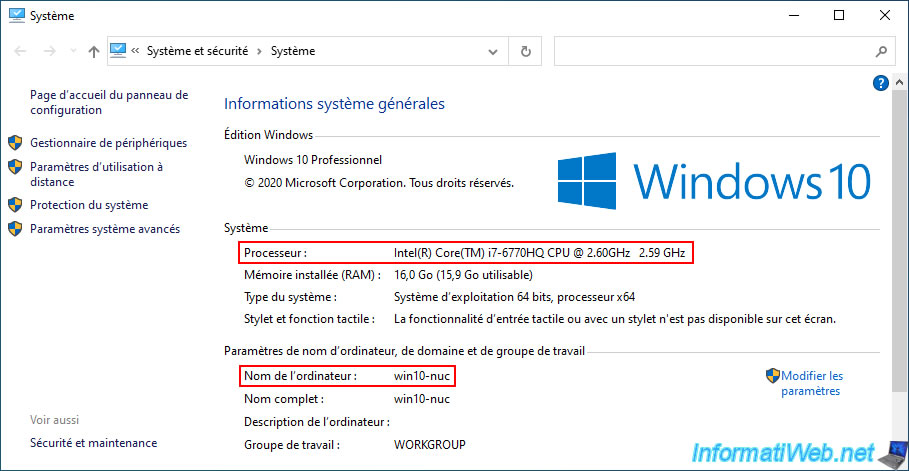
As you can see from the processor model "Intel(R) Core(TM) i7-6770HQ" displayed in the Windows 10 system information in our case, the PC used is the mini PC mentioned above.
To add a new Bluetooth device (including a Bluetooth headset), you usually just need to click on the "Bluetooth" icon in the taskbar, then click on: Show Bluetooth devices.
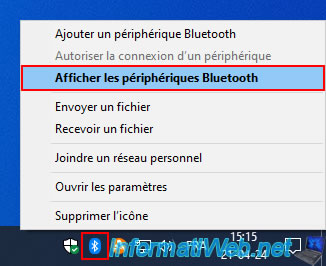
Then, click on the "Add a Bluetooth device..." option.
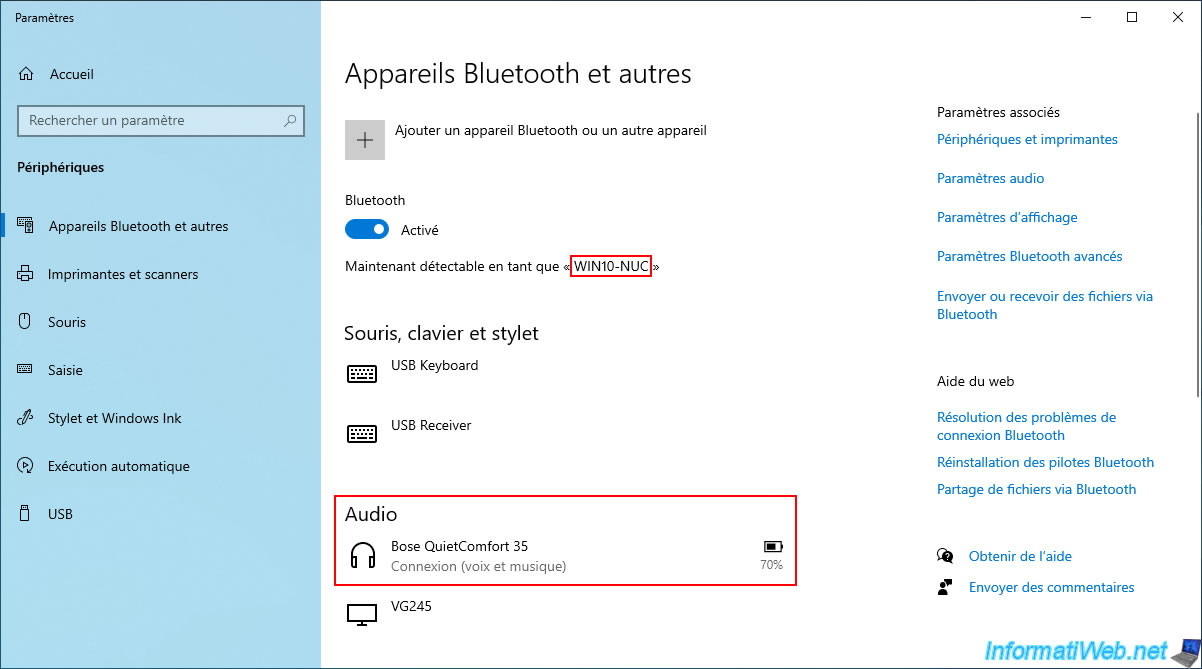
Note: in our case, you can see that our Bluetooth headset "Bose QuietComfort 35" is paired with our Intel NUC.
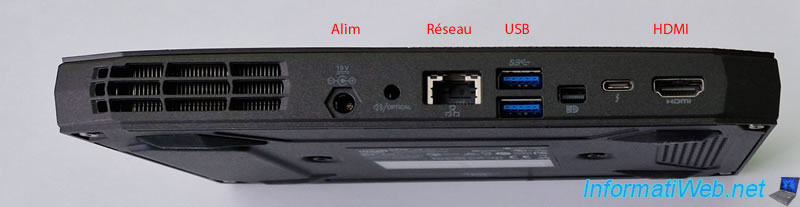
6. Hardware used to play on our Samsung TV
To be able to play a game on our Samsung TV that was on our gaming PC (in another room), we used our mini PC "Intel NUC Skull Canyon (NUC6I7KYK)" (as explained above).
On the front, we can see 2 USB ports (one orange for charging a device via USB and one blue for connecting any USB device).

On the back, we will need the connectors:
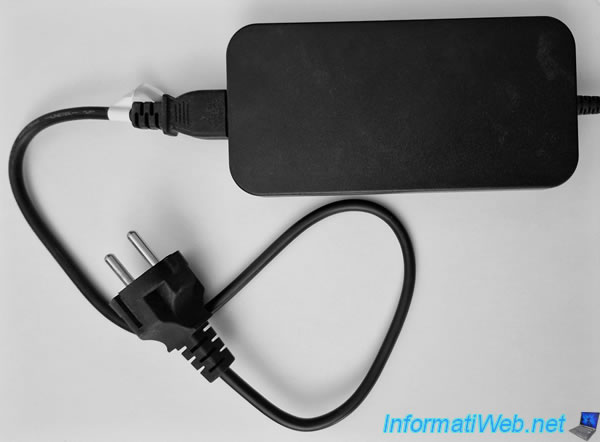
- Power supply: to power this mini PC.
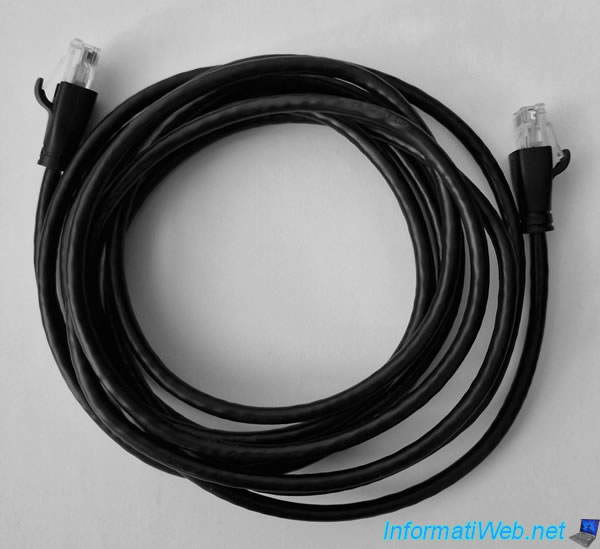
- Network: to connect it to the network and therefore be able to connect to the other PC via Moonlight (on this mini PC) and the "GameStream" feature on the remote PC.
- USB: to connect a keyboard and mouse.
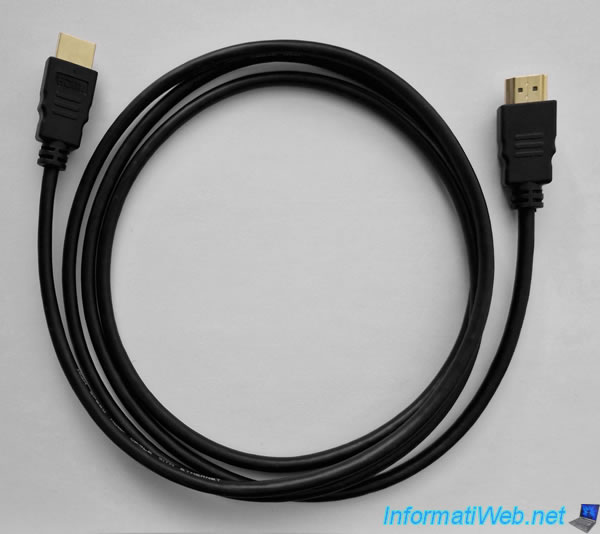
- HDMI: to display this mini PC on our Samsung TV.
To connect the mini PC to your TV, you will need a simple HDMI cable.
A network cable.
Note that the category of the network cable can be important since the maximum speed is higher and higher depending on the category of the cable.
However, the network card of the client PC, that of the remote PC and that your router supports the speed (Gigabit Ethernet, 10 Gigabit Ethernet, ...) must also be supported to obtain this higher speed.
In all cases, the speed used will be the lowest compatible with all these components.
If necessary, you can reduce the display quality in the Moonlight settings to reduce the amount of data transferred via the network. This will make the game smoother.
The power cable of the mini PC.
The Bluetooth headset (optional) used

7. Connect your mini PC to your TV
To start, you obviously need a keyboard and a mouse.
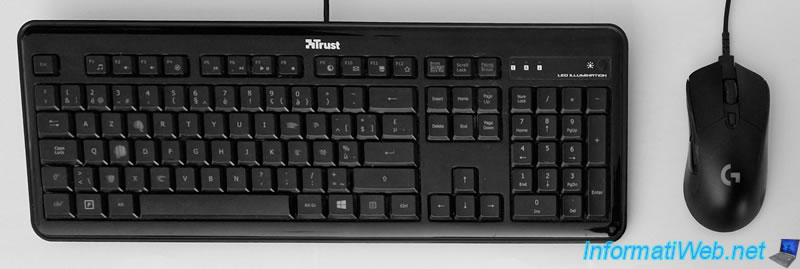
Plug these into your mini PC.
Also plug in the HDMI cable (for displaying via your TV) and the network cable (for accessing the remote PC from this mini PC).

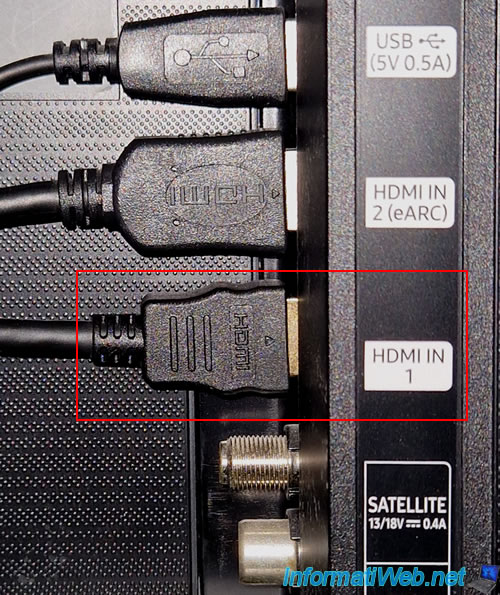
For the HDMI cable, check if an "HDMI IN" connector is free in your case.
In our case, the TV decoder provided by our ISP for digital TV is already connected to the "HDMI IN 2 (eARC)" port.
But, we also have an "HDMI IN 1" port that is not used in our case.
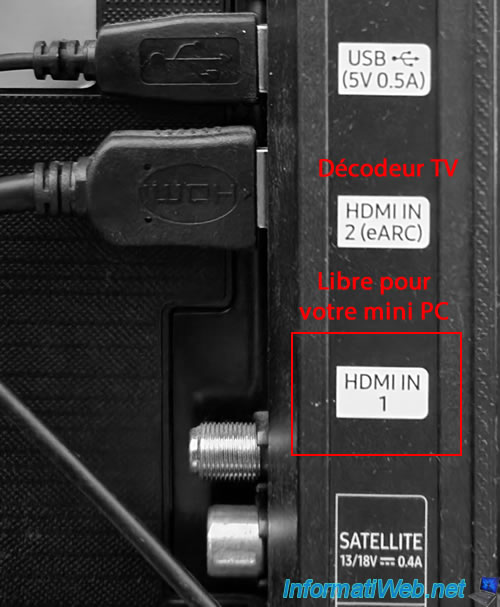
So, we just need to plug the HDMI cable from our mini PC into this "HDMI IN 1" port.
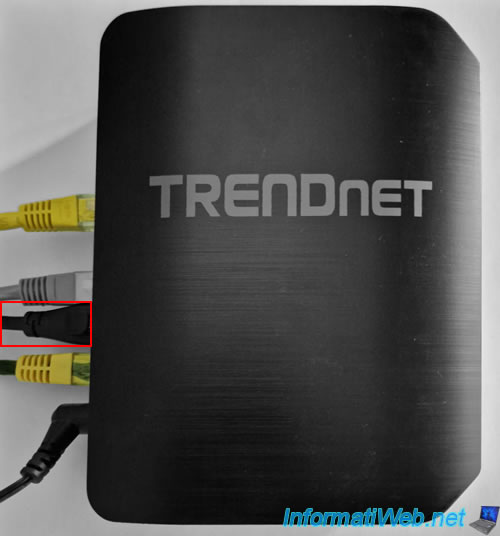
Connect the network cable of your mini PC to your Box (or a switch connected to your Box).
If your Box (or router) is located too far from your TV, you can buy PLC boxes (to pass the network through the power outlet) or connect your mini PC to Wi-Fi (using its wireless network card or via a Wi-Fi USB key to be purchased separately).
However, although the new version of Wi-Fi supports an increasingly high speed, you do not necessarily have this new version of Wi-Fi with the Box provided by your ISP.
It is therefore possible that the Wi-Fi speed in your case is more or less limited. This can slow down your game or require you to reduce the quality of your game in the Moonlight settings.
Finally, plug in the power cable of your mini PC and plug the plug into the power outlet.

Share this tutorial
To see also
-
Other 2/27/2025
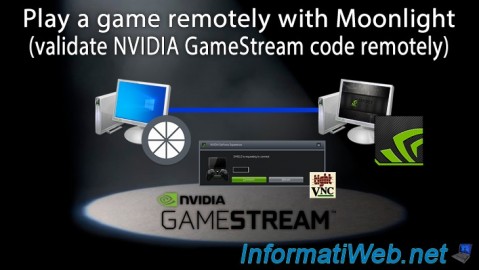
Moonlight - Play a game remotely (validate NVIDIA GameStream code remotely)
-
Other 2/20/2025
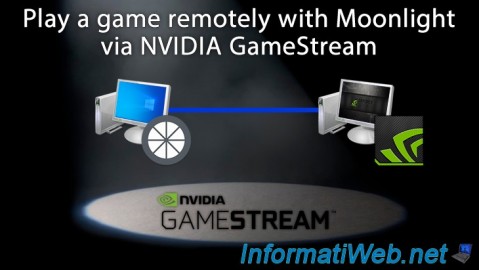
Moonlight - Play a game remotely (via NVIDIA GameStream)
-
Other 3/6/2025
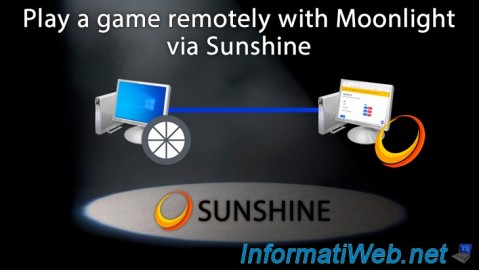
Moonlight - Play a game remotely (via Sunshine)
You must be logged in to post a comment