- Virtualization
- 18 August 2019 at 09:21 UTC
-

- 1/2
As we already explained before, Hyper-V is available in different ways :
- the free "Microsoft Hyper-V Server 2012 (standalone)" version, which will be discussed here.
- the "Hyper-V" role available in the "Server" edition of Windows
- the "Hyper-V" feature available in the client edition of recent versions of Windows (Windows 8, 8.1 and 10)
WARNING : installing Hyper-V requires a physical PC. By default, Hyper-V will not install if you try to install it in a virtual machine.
If you still want to install it in virtual mode (despite the big loss of performance that it will induce), then refer to our tutorial : VMware workstation - NESTED virtualization (coming soon)
- Download and install Microsoft Hyper-V Server 2012
- Server configuration for remote management
- Configuration of the client PC
- Installing remote management consoles
- Hyper-V Manager
- Server Manager requirements
1. Download and install Microsoft Hyper-V Server 2012
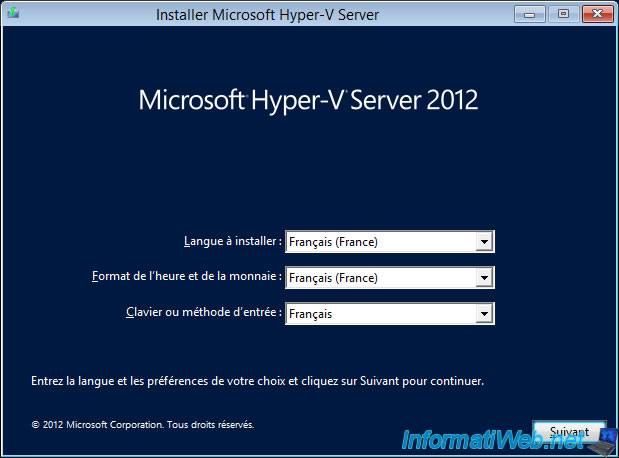
To get started, download the Microsoft Hyper-V Server 2012 iso file from the Microsoft site.

Then, boot on the downloaded iso file (DVD).
The Microsoft Hyper-V Server 2012 setup wizard appears.
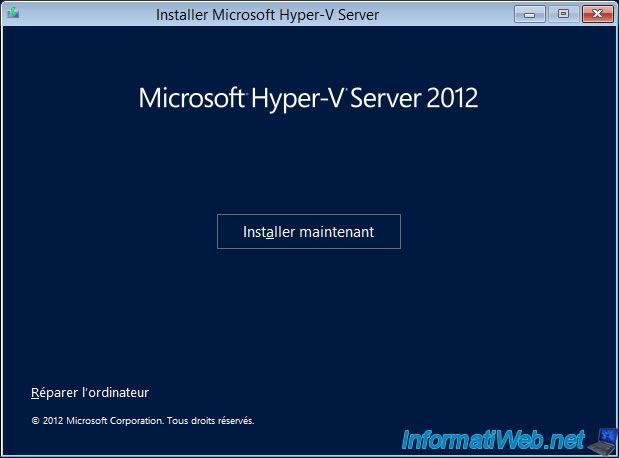
Click Install now.
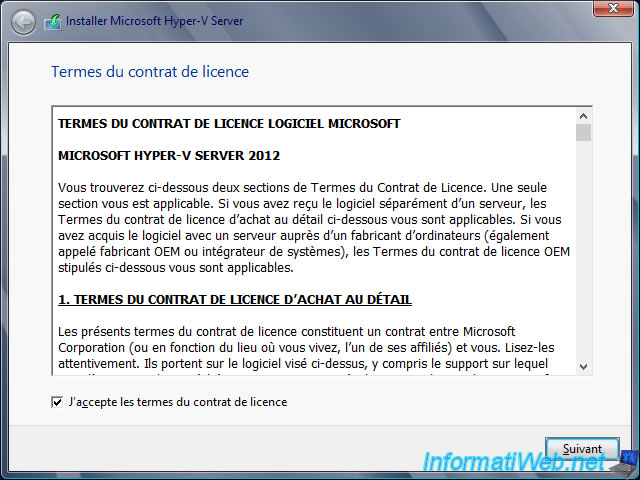
Check the "I agree..." box and click "Next".
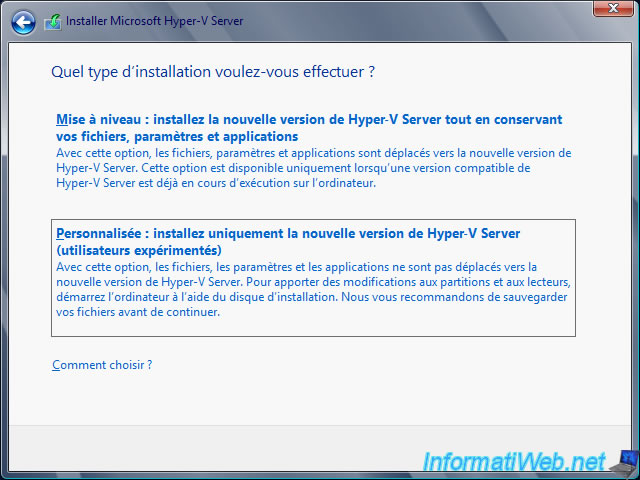
Choose the type of installation : Custom.
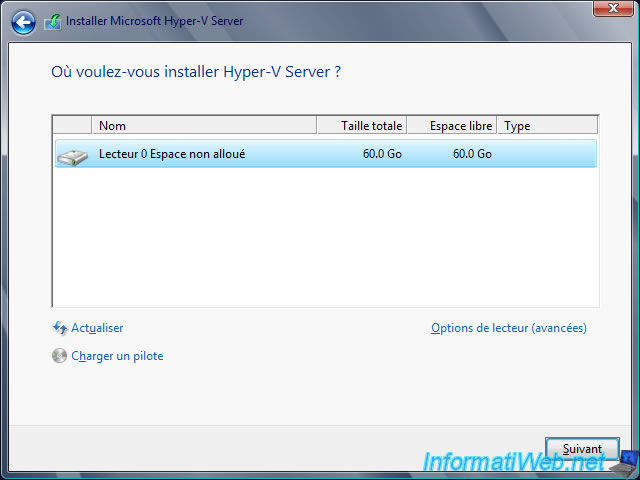
Partition the hard disk as desired, and then click Next.
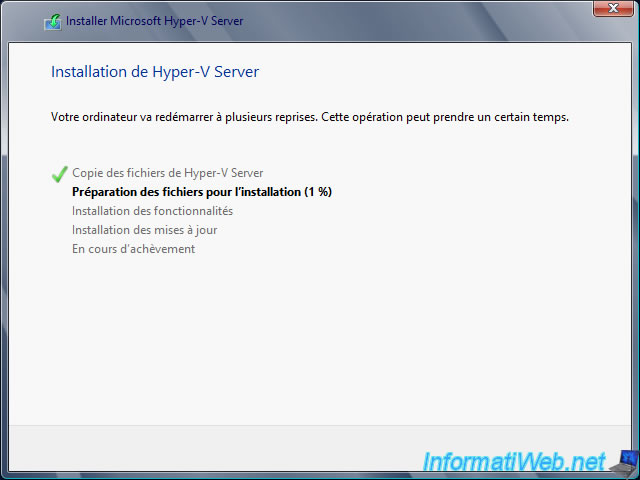
The installation starts.
Note : for those who have already installed Windows Server 2012 before, you should have noticed that the wizard did not ask you if you wanted to install the server with GUI or minimal mode (core mode).
You will quickly understand why.
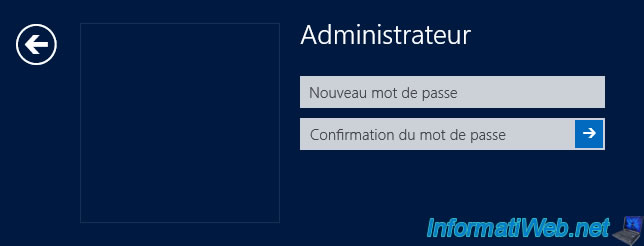
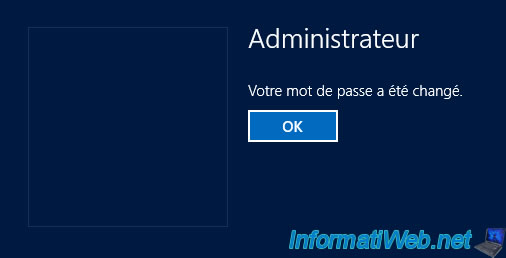
When the installation is complete, Windows will ask you to change the password for the Administrator account.

Enter a new password.
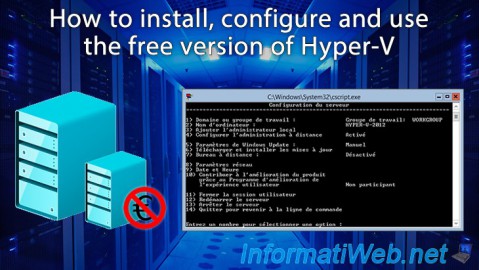
Once logged in with the Administrator account, you arrive in your session (in Core mode).
Since Microsoft Hyper-V Server 2012 is free, it obviously has limitations. Including that of not offering a graphical interface.
Nevertheless, thanks to this tutorial, you will be able to administer it remotely as if you were physically on this server.
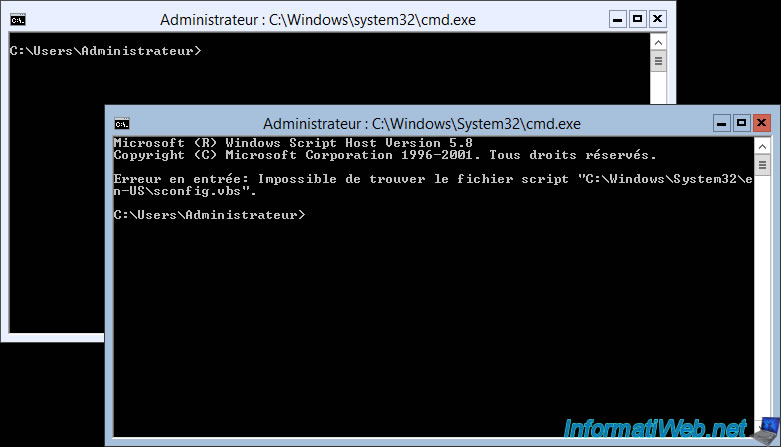
By default, the non-English versions of the Core mode has a small flaw. Produce an error when attempting to automatically launch sconfig when the server starts.
If you use a non-English version, just launch the "sconfig.vbs" present in this folder : C:\Windows\System32\xx-XX\sconfig.vbs
Note : replace "xx-XX" by the your locale code (ex : fr-FR).
For those who don't know Windows Server Core mode at all, refer to the "Windows Server 2012 - Install, configure, and use Windows Server 2012 in Core mode" tutorial available on our second website : InformatiWeb Pro.
This tutorial will allow you to know all the options present in Windows Server Core (minimal installation).
In short, all that interests us here is :
- the configuration of the network card of our server
- and the (NETBIOS) name change of it
For the configuration of the network card, use the "8) Network Settings" option as explained in step "2.8. Configure the server's network adapter" of the tutorial mentioned above.
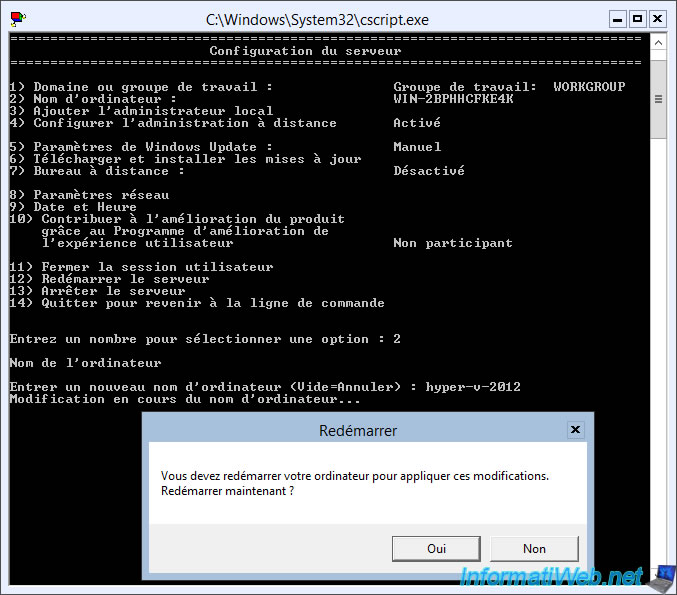
To change the name of your server :
- use the "2) Computer Name" option
- specify a name. For example : hyper-v-2012
- press Enter
- answer "Yes" to the question "You must restart your computer to apply these changes. Restart now?"
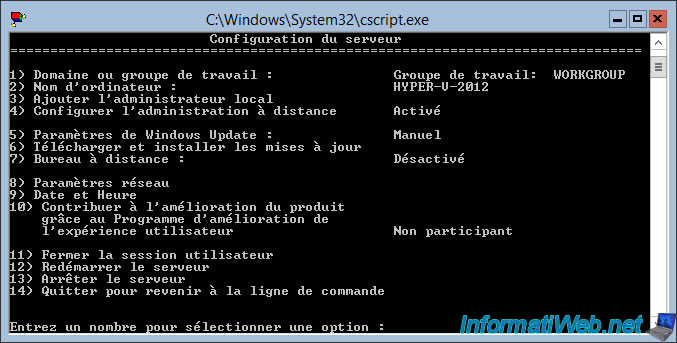
After the server restarts, the new name reappears in the sconfig tool.
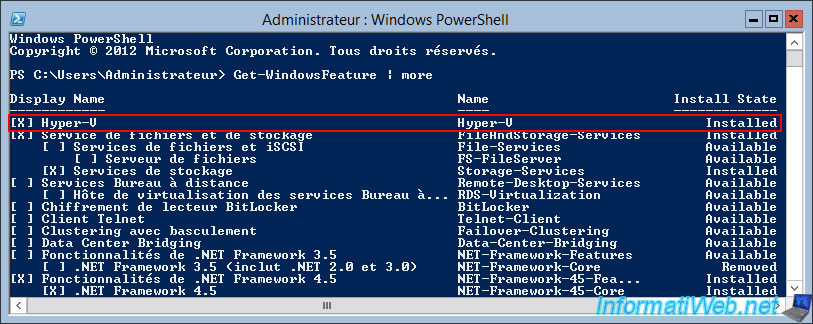
Since this is Microsoft Hyper-V Server 2012, you don't need to manually install the "Hyper-V" role since it was automatically installed during Windows installation.
But, you can check this with this powershell command :
PowerShell
Get-WindowsFeature | more
Note : to open a PowerShell console from the command prompt, use the command :
Batch
start powershell
2. Server configuration for remote management
By default, the remote management of this server is activated.
As you can see with the "4) Configure Remote Management : Enabled" option.
However, this will not be enough to manage Hyper-V remotely from the Hyper-V Manager.
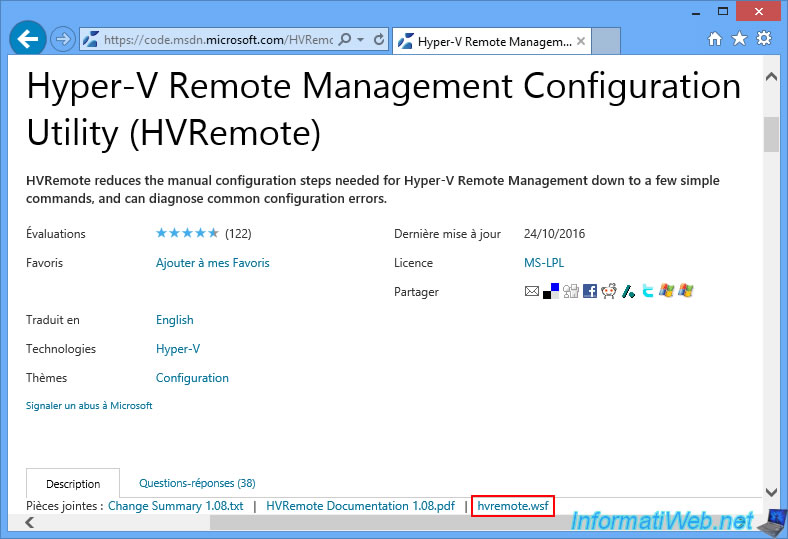
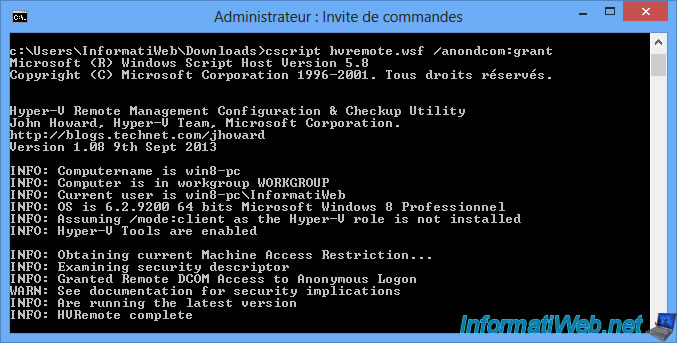
To simplify the configuration of your Microsoft Hyper-V Server 2012 for remote management, John Howard of Microsoft Hyper-V Team has created a script named : Hyper-V Remote Management Configuration Utility (HVRemote).
To download this script, locate the "hvremote.wsf" download link in the "Attachments" line.
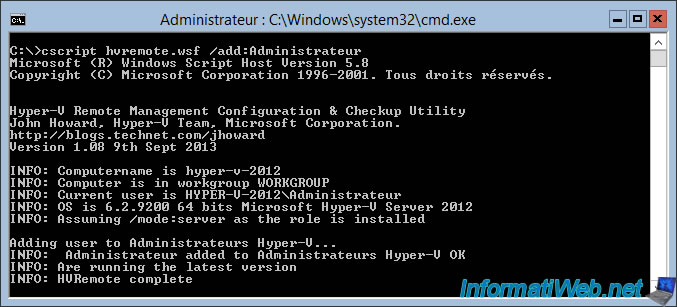
Transfer this file to your server (via a network share, a USB key, ...) and launch it like this :
Batch
cscript hvremote.wsf /add:Administrator
3. Configuration of the client PC
As a client, we will use a Windows 8 PC.
Since you will probably be using Hyper-V Server 2012 at home, you probably don't have a DNS server on your network.
In order for the Hyper-V Manager to find your server by name, you will need to use a little trick.
This trick consists in adding a correspondence "IP - name of the Hyper-V server" in the "hosts" file of Windows.
However, since you must be an administrator to edit it, you will need to start the notepad as an administrator first.
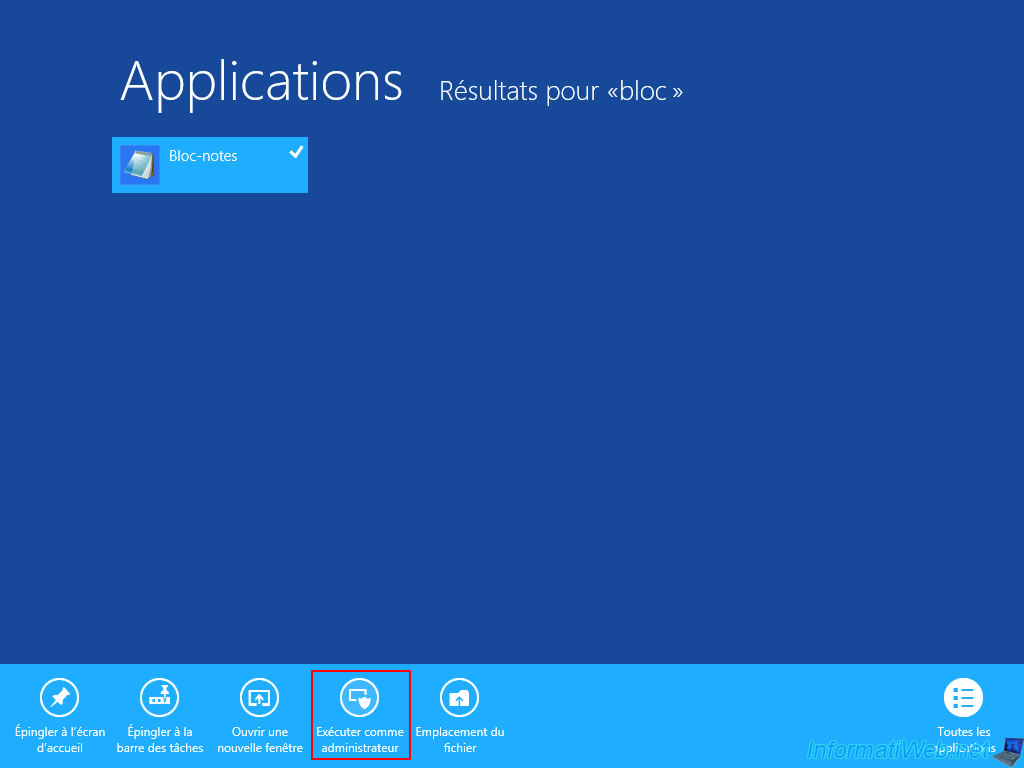
From the notepad, open this file : C:\Windows\System32\drivers\etc\hosts
Note : for the file to appear, you will first have to select the "All files" option (at bottom right).
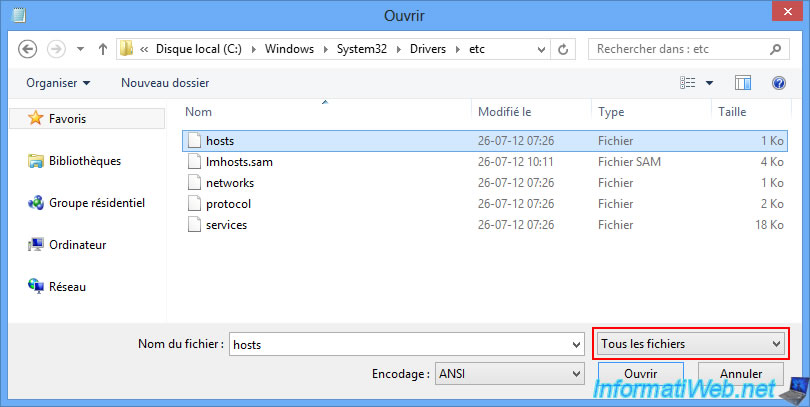
Add a line with the "IP of your Microsoft Hyper-V Server 2012" followed by the "name of your Hyper-V server".
Then, click : File -> Save.

Open a command prompt as an administrator and type this command :
Batch
cmdkey /add:hyper-v-2012 /User:Administrator /pass
Notes :
- hyper-v-2012 : is the name of your server
- Administrator : is the name of the user to use to connect to this server
- once the command has been executed, enter the password of the user indicated above and press Enter

Finally, run the "hvremote.wsf" script on this client PC.
Important : if you already installed Hyper-V on this client PC, don't forget to add the "/mode:client" param so that the script knows that this machine is used as a client and NOT as server.
Share this tutorial
To see also
-
Virtualization 8/1/2018
VirtualBox - Enable the aero of Windows 7
-
Virtualization 11/22/2022
VirtualBox - Import Windows XP Mode of Microsoft
-
Virtualization 10/20/2018
VirtualBox - Manage your VMs remotely with Hyperbox
-
Virtualization 12/12/2022
VirtualBox - Virtualize Windows 11 (supported hardware)
You must be logged in to post a comment