- Virtualization
- 30 August 2019 at 08:45 UTC
-


Since Windows 8, it's possible to install the Microsoft Hyper-V virtualization server with Windows features.
However, if you have enabled it, you may have noticed that VirtualBox or VMware Workstation stopped working since installing Hyper-V.
Indeed, these programs could no longer work once the Hyper-V hypervisor is loaded by Windows.
In 2019, VMware was working on a solution to use VMware Workstation at the same time as Hyper-V as you can see on the Microsoft site : VMware Workstation and Hyper-V - Working Together.
Important : currently, VirtualBox and VMware Workstation can now work properly even when Hyper-V is installed and enabled.
Although in the case of VirtualBox, Oracle indicates that the performance will be worse because of the use of the API of Hyper-V instead of its own virtualization system.
For more information about these solutions, refer to our tutorials :
- VirtualBox - Use VirtualBox and Hyper-V at the same time
- VMware Workstation 16 / 15.5.5 - Using Hyper-V and VMware Workstation simultaneously
- Known issues
- Solve the problem with a multi-boot
- Choose the default boot option
- Start Windows without Hyper-V
- Uninstall Hyper-V
1. Known issues
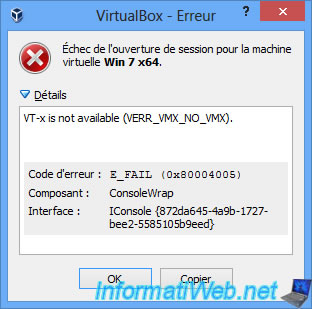
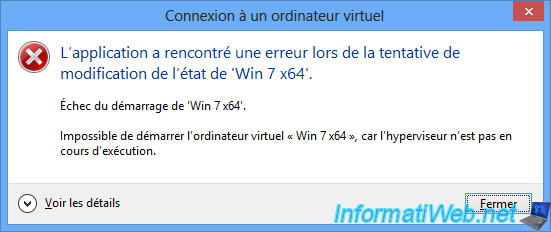
1.1. VirtualBox - VT-x is not available (VERR_VMX_NO_VMX)
In the case of VirtualBox, you will not be able to start virtual machines anymore, because you will always receive this error : VT-x is not available (VERR_VMX_NO_VMX).
Note : if you get this error, while Hyper-V is not installed, check that processor virtualization is enabled in the BIOS of your motherboard.
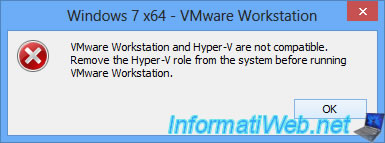
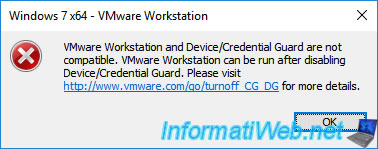
1.2. VMware Workstation - Device/Credential Guard are not compatible
In the case of VMware Workstation, the error will be very clear in Windows 8 : VMware Workstation and Hyper-V are not compatible. Remove the Hyper-V from the system before running VMware Workstation.
However, on Windows 10, you will see this error : VMware Workstation and Device/Credential Guard are not compatible. VMware Workstation can be run after disabling Device/Credential Guard.
On Windows 10, Microsoft sometimes activates or reactivates Hyper-V quite transparently through automatic Windows updates. This causes errors in VirtualBox and VMware Workstation (like the ones above).
In this case, simply uninstall this feature by following step 5 of the tutorial.
In all these cases, it doesn't matter if you are on Windows 8 or 10, the solution will be the same (see below).
2. Solve the problem with a multi-boot
To solve this problem, there are 2 solutions :
- uninstall Hyper-V through Windows features
- or create a multi-boot to be able to choose if you want to start Windows with the support of Hyper-V or not
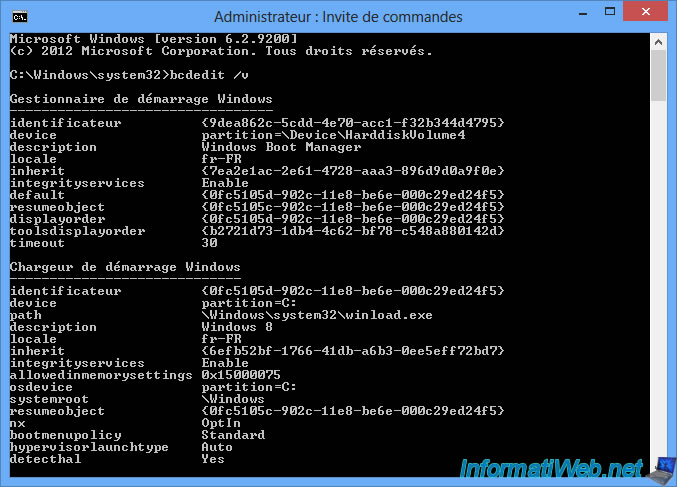
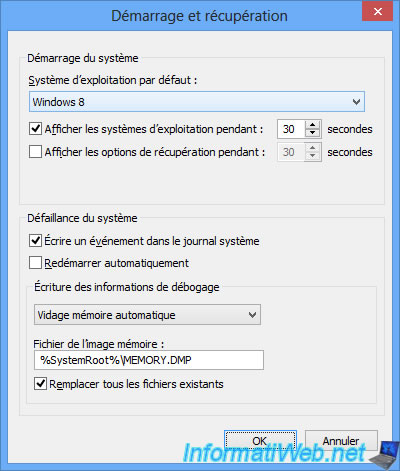
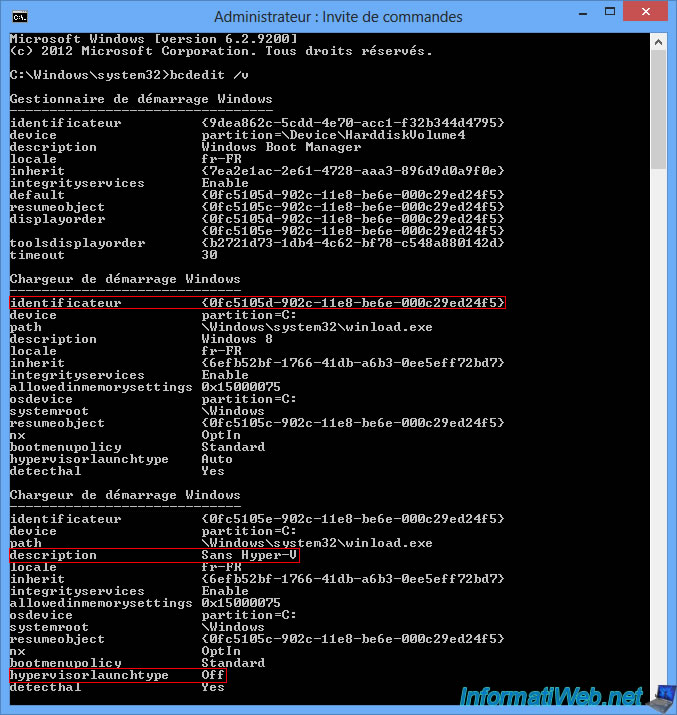
By default, this is what the boot configuration of Windows looks like.
To display it, start a command prompt as an administrator and type this command :
Batch
bcdedit /v
To begin, create a copy of the default boot entry using the command below.
Note : this will create a new boot option named "Without Hyper-V".
Batch
bcdedit /copy {current} /d "Without Hyper-V"
Running this command will show you a result similar to this.
Note : the identifier of the new startup option "Without Hyper-V" is between the braces.
Plain Text
The entry was successfully copied to {0fc5105e-902c-11e8-be6e-000c29ed24f5}.
Disable the launch of Hyper-V for this startup option by using the following command.
Note : replace "BOOT_OPTION_ID" by the identifier displayed by the previous command.
Batch
bcdedit /set {BOOT_OPTION_ID} hypervisorlaunchtype off
This message will be displayed :
Plain Text
The operation completed successfully.
To verify that the Windows boot configuration is good, use this command again :
Batch
bcdedit /v
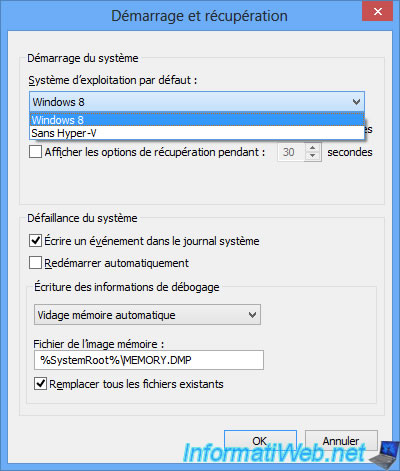
As you can see in the picture below, we now have 2 boot options :
- Windows 8 : the Hyper-V hypervisor will be set to start automatically
- Without Hyper-V : the Hyper-V hypervisor will be disabled
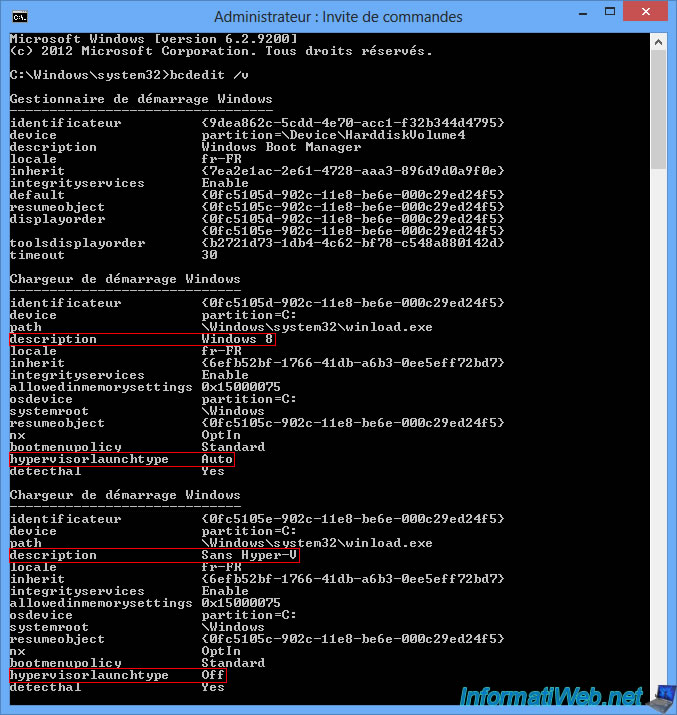
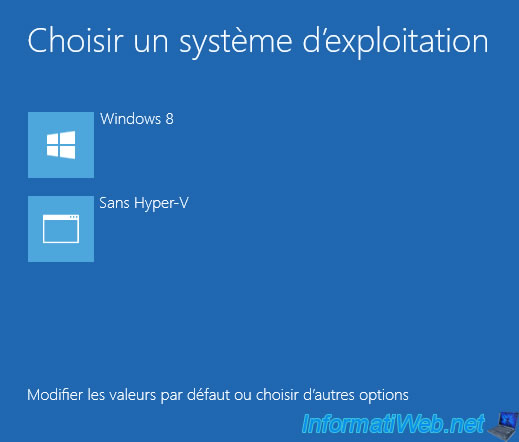
When you start your computer, you will have the choice between "Windows 8" and "Without Hyper-V".
3. Choose the default boot option
To easily choose which boot option to use by default, you can go through : Control Panel -> System and Security -> System -> Advanced system settings.
In the "Advanced" tab, click the "Settings" button in the "Startup and Recovery" section.
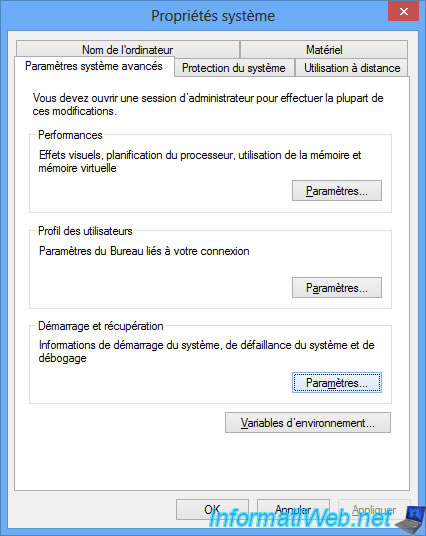
Here, you can choose how long the list of available startup options should be displayed. (Default: 30 seconds)
In the top list, you can choose which option to use by default (according to your needs).
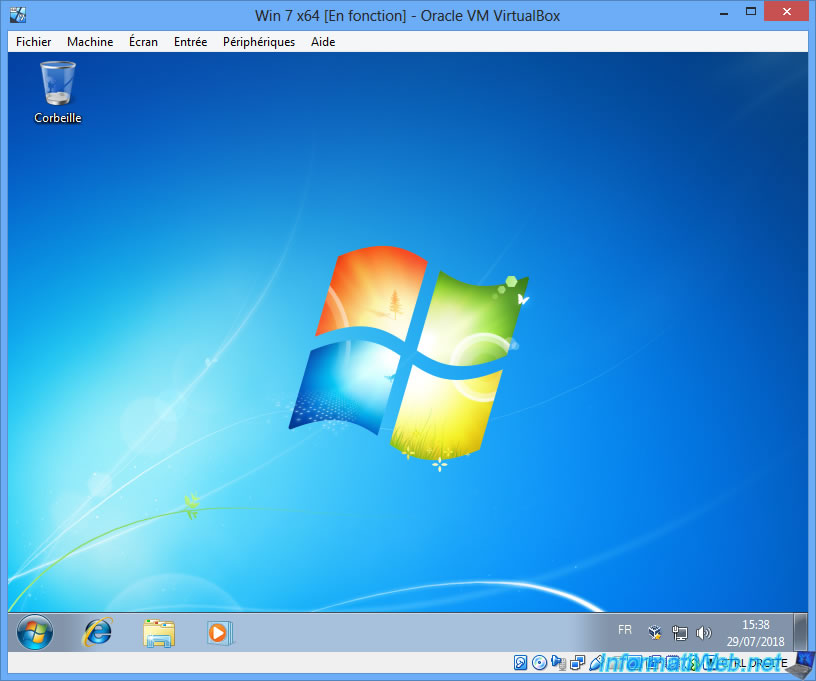
4. Start Windows without Hyper-V
When you start Windows with the "Without Hyper-V" startup option, you will still be able to access the Hyper-V Manager.
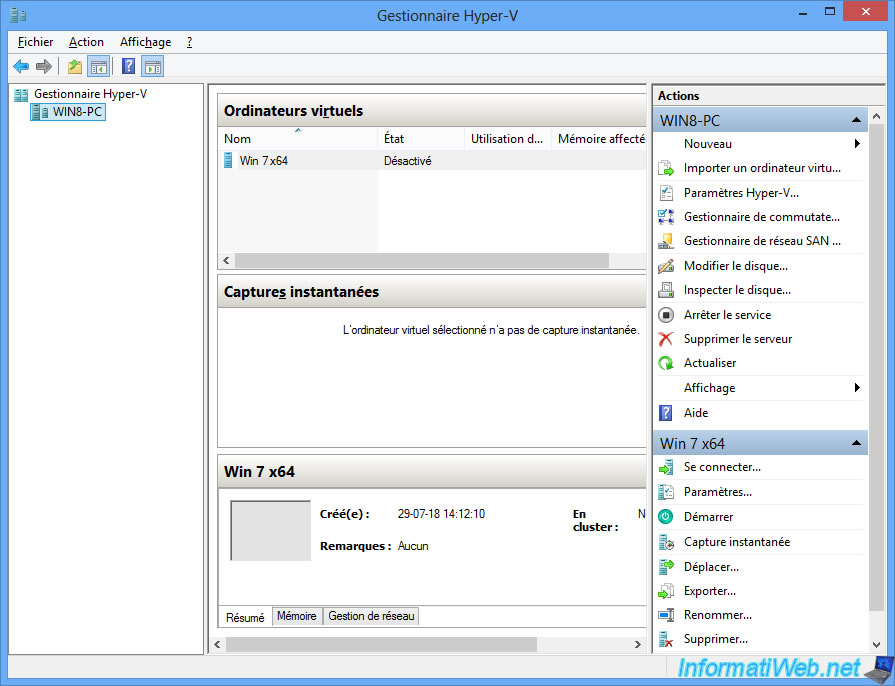
However, no virtual machine can start on this hypervisor because it's disabled.
Since Hyper-V hypervisor is disabled, other virtualization software will work properly.
As you can see, our VirtualBox virtual machine is working again.
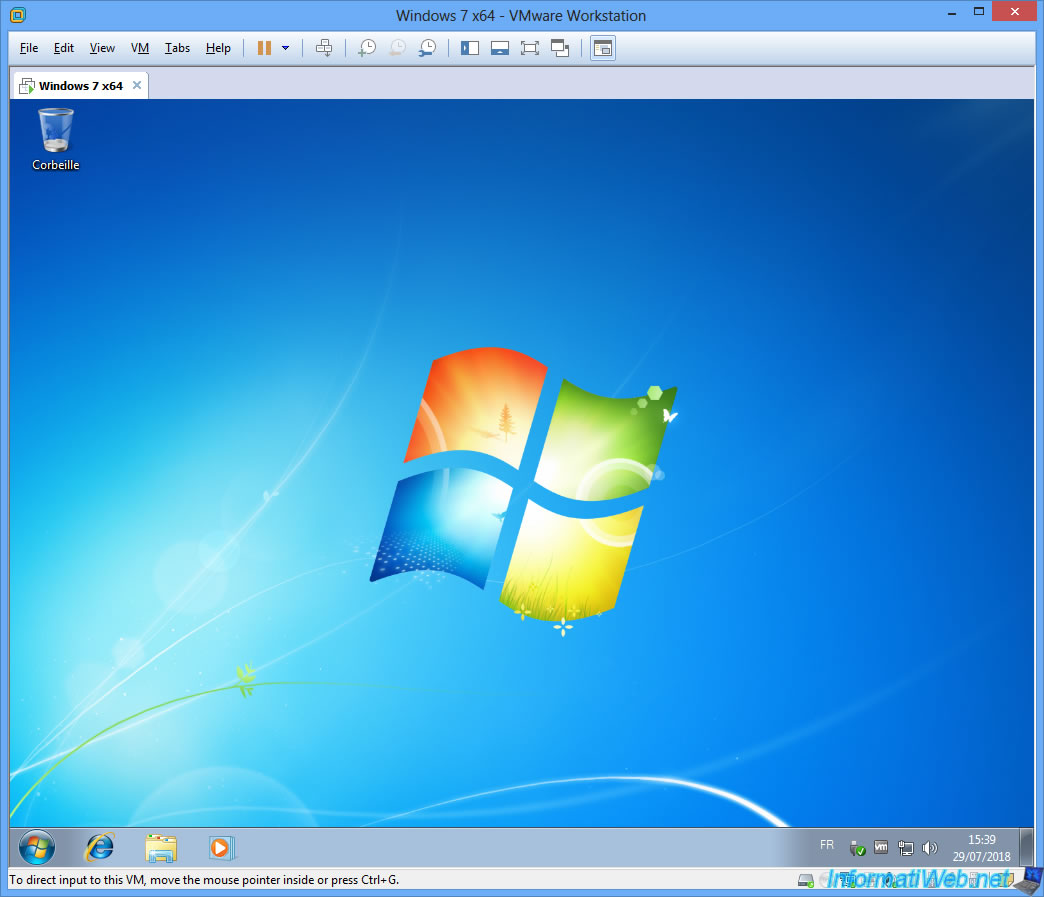
As well as the one under VMware Workstation.
5. Uninstall Hyper-V
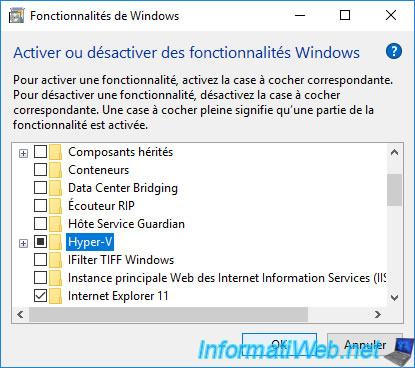
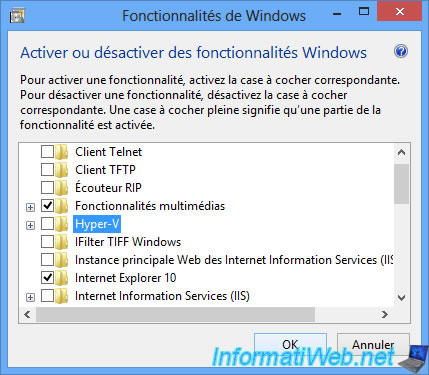
If you don't use Hyper-V, you can simply uninstall it from the Windows features.
To do this, go to the Control Panel -> Programs: Uninstall a program.
Then, click on "Turn Windows features on or off" and uncheck the "Hyper-V" box.
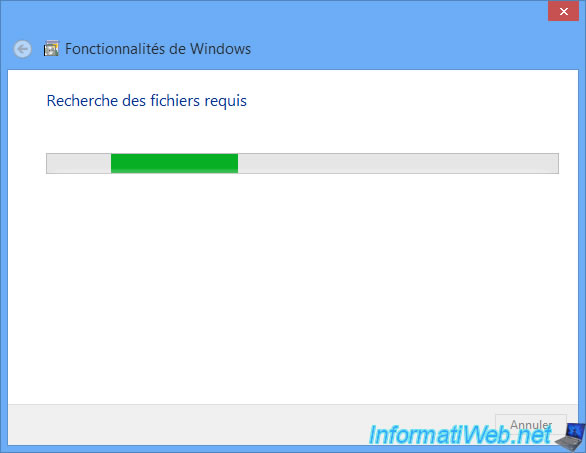
Windows will search for the required files.
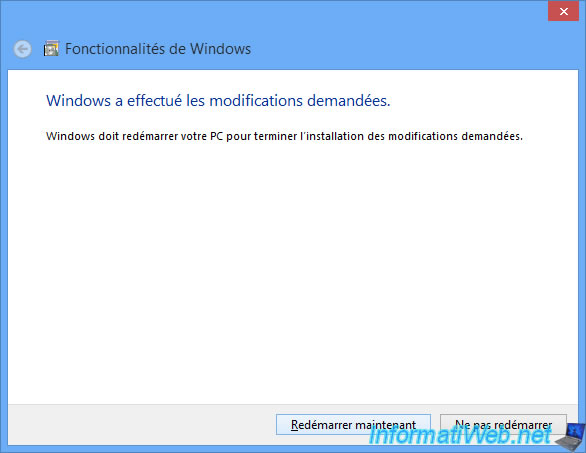
Then, will ask you to restart.

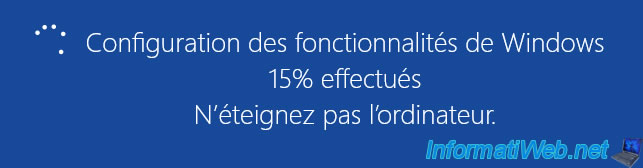
During the reboot, Windows will configure the required features.
Once back in Windows, you will see that the Hyper-V Manager will be gone and that your VirtualBox or VMware Workstation virtual machines will work again without problems.

Optional : if you had used our trick (the multi-boot) before uninstalling Hyper-V, don't forget to delete the "Without Hyper-V" startup option created previously since it has become useless.
To do this, run a command prompt as an administrator and use this command :
Batch
bcdedit /v
Thanks to this command, you will be able to recover the identifier of this startup option.
Then, simply delete it with the following command.
Note : replace "BOOT_OPTION_ID" by the identifier displayed by the previous command.
Batch
bcdedit /delete {BOOT_OPTION_ID}
Share this tutorial
To see also
-
Virtualization 8/25/2018
VirtualBox - Clone a virtual machine (VM)
-
Virtualization 7/22/2018
VirtualBox - Configure settings of your VMs
-

Virtualization 11/6/2020
VirtualBox - Connect an USB key to a VM
-
Virtualization 8/18/2018
VirtualBox - Create snapshots of a virtual machine
You must be logged in to post a comment