- Articles
- 18 November 2024 at 17:39 UTC
-

- 1/3
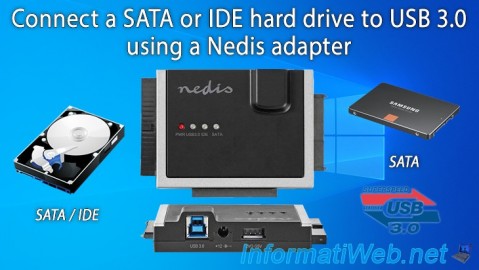
If you have old computers or old hard drives that you no longer use, you can easily reuse your old IDE hard drives, SATA hard drives and SATA SSDs by simply connecting them to your computer via USB. To do this, simply purchase the "Nedis USB 3.0 to IDE/SATA Adapter for 2.5"/3.5" HDD/SSD" HDD/SSD" for around €40.
- Unboxing the Nedis Hard Disk Adapter (USB 3.0 to IDE / SATA)
- Available connectors
- Connections
- Using a SATA hard drive via USB 3.0
- Using a SATA SSD via USB 3.0
- Using an IDE hard drive via USB 3.0
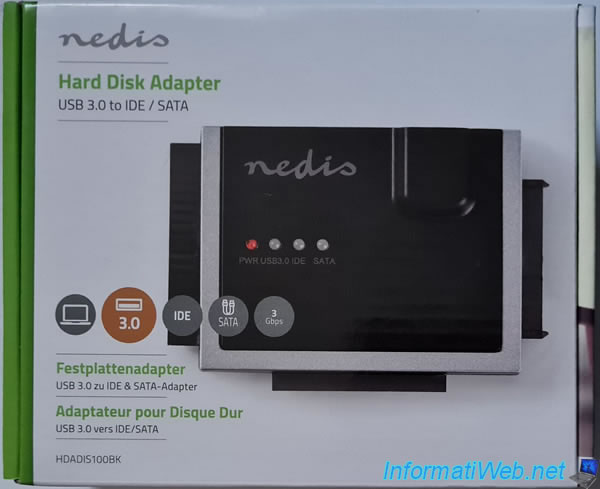
1. Unboxing the Nedis Hard Disk Adapter (USB 3.0 to IDE / SATA)
This is what the box of the "Nedis Hard Disk Adapter (USB 3.0 to IDE / SATA)" (HDADIS100BK) looks like.
Note: a new reference replaces this one.
If you can't find it on the Internet anymore, then buy the new reference "HDADIS110BK".
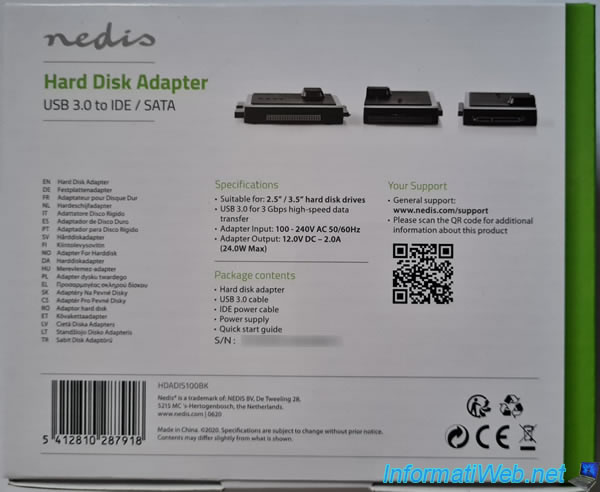
On the back of the box, you will see that this adapter:
- supports 2.5" and 3.5" hard drives (whether hard drives or SSDs).
- uses USB 3.0 to benefit from a bandwidth of 3 Gbps.
- has a transformer suitable for 100 V and 240 V voltages (which allows it to be used in France (230 V) as well as in the United States (110 V).
- the output is 12 V DC to power this box and therefore the hard drive or SSD that you will connect to it.
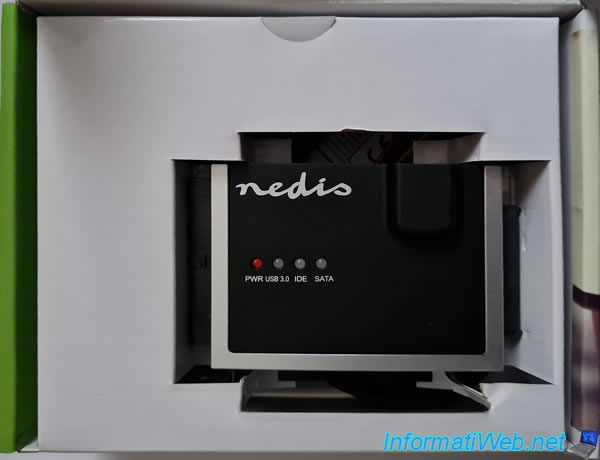
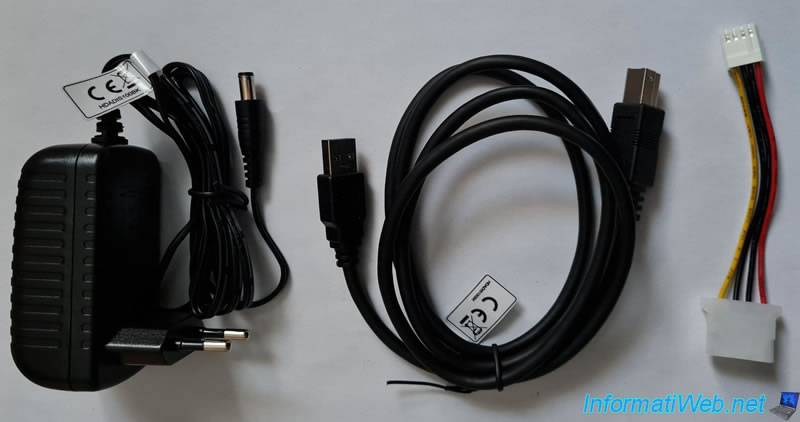
You will also see that this box contains several components that you will see a little further down in this article.
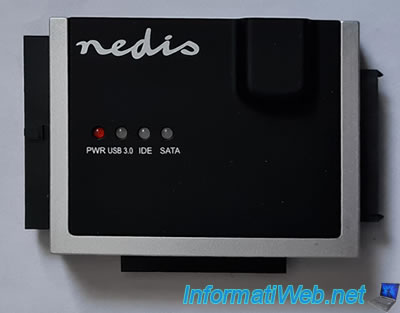
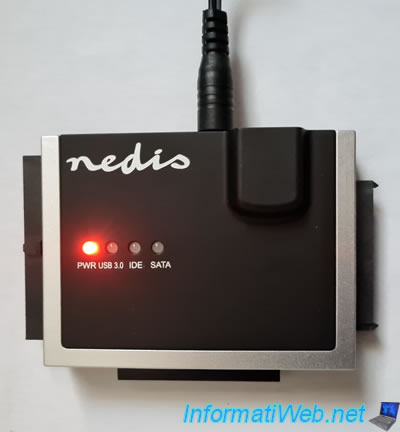
To begin with, when you open the box you will see the "nedis" adapter itself.
Below, you will find:
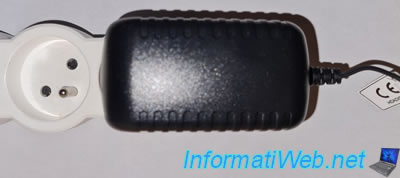
- the transformer to power the device.
- the USB 3.0 cable to transfer data between your computer and the desired hard drive or SSD via the "nedis" box.
- a power cable for IDE hard drives.
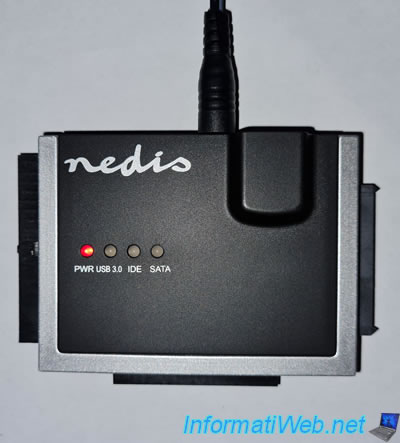
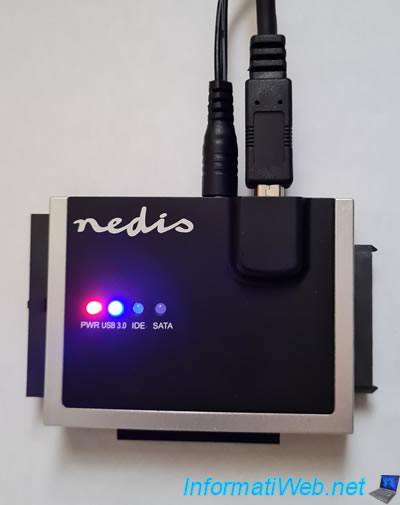
As you can see, the "nedis" box has 4 LEDs:
- PWR: indicates whether this enclosure is powered (through the transformer) or not.
- USB 3.0: indicates whether the USB 3.0 cable is connected between this enclosure and your computer.
- IDE: indicates whether an IDE hard drive is connected or not.
- SATA: indicates whether a SATA hard drive / SSD is connected or not.
Important : always connect the transformer last to avoid driver issues and to avoid electrical arcs between the enclosure and the hard drive you want to connect to it.
On the back, you will find the reference "HDADIS100BK" of this product, as well as the electrical voltages it supports. You will also find its serial number. Useful if you need to contact support or if you want to benefit from the warranty.

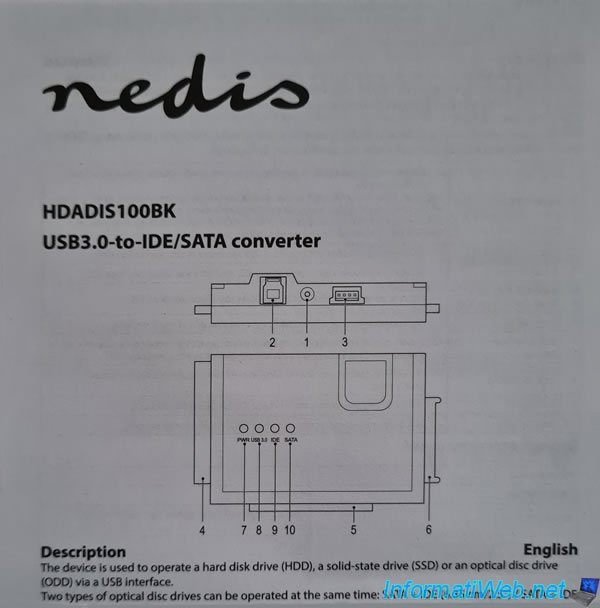
Inside, you will find a small paper manual in several languages.
This user manual can also be downloaded from the nedis website : HDADIS100BK_MAN_COMP_1018_web.PDF.

2. Available connectors
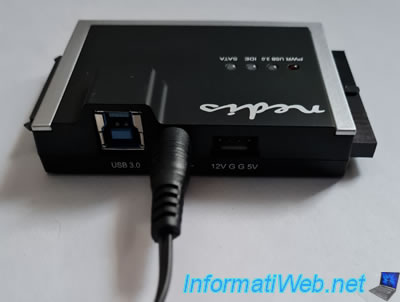
To start, you will find the connectors:
- USB 3.0: for data transfer between your computer and the desired hard drive/SSD.
- the 12V power connector: to power the box using the transformer provided in the box.
- the white 12 V + 5V power connector: to power the desired IDE hard drive.

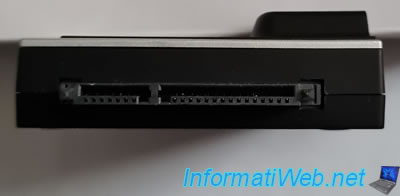
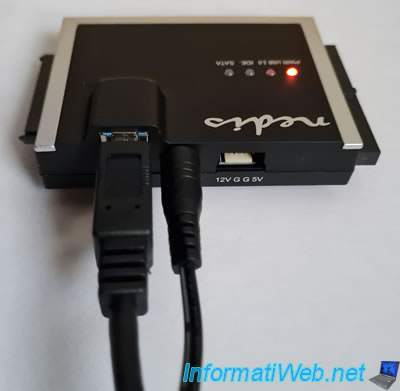
On one side, you will find the SATA connectors:
- the small SATA connector on the left for data transfer.
- the large SATA connector on the right for its power supply.
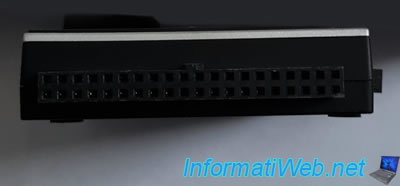
On the other side, you will find an IDE connector with 40 pins for data transfer.
Warning : connecting an IDE hard drive requires that the small additional power cable be connected between the "12 V G G 5V" connector and your IDE hard drive.
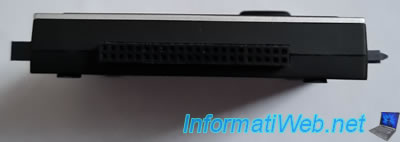
On the large side you will find an IDE connector for data transfer, but with 44 pins.
Warning : as said previously, don't forget to also plug in the small IDE power cable in this case.
3. Connections
3.1. Connecting the power cable
Plug the power cable into the connector in the center of the case.
At the moment, all LEDs are off.
Plug the transformer into the power outlet.
The red "PWR" LED lights up.
3.2. Connecting the USB 3.0 cable (for data transfer)
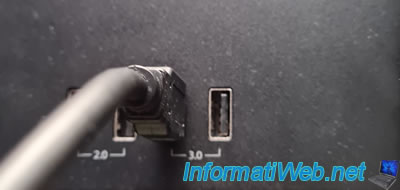
Plug the supplied USB 3.0 cable into the blue connector (left) on the case.
Plug this USB 3.0 cable into your computer.
Important : preferably plug the USB 3.0 cable into a USB port on the back of your computer.
In fact, they provide more current than those at the front of the tower.
Additionally, if you plug the USB cable into a USB port on the front of your tower, there is a good chance that your hard drive will never be recognized by your computer.
In any case, with this box.
The blue "USB 3.0" LED also lights up.
Warning : these steps are there only to make it clearer for you.
However, in practice, always plug everything in, including the desired hard drive/SSD BEFORE plugging the transformer into the power outlet.
Share this tutorial
To see also
-
Articles 1/9/2023
Create a high-performance USB 3.0/3.1 key
-
Articles 9/23/2024
Intel NUC Skull Canyon - Install Windows 11
-

Articles 1/23/2013
Need IT hardware ?
-

Articles 7/1/2018
What is the virtualization ?
You must be logged in to post a comment