Unboxing and assembly of the Razer Core X eGPU
- Articles
- 27 July 2026 at 13:47 UTC
-

- 3/3
Now, press the small white plastic lever (outlined in red in one of the previous images), then insert your graphics card all the way in.
The small lever will automatically move to lock that PCIe slot again.
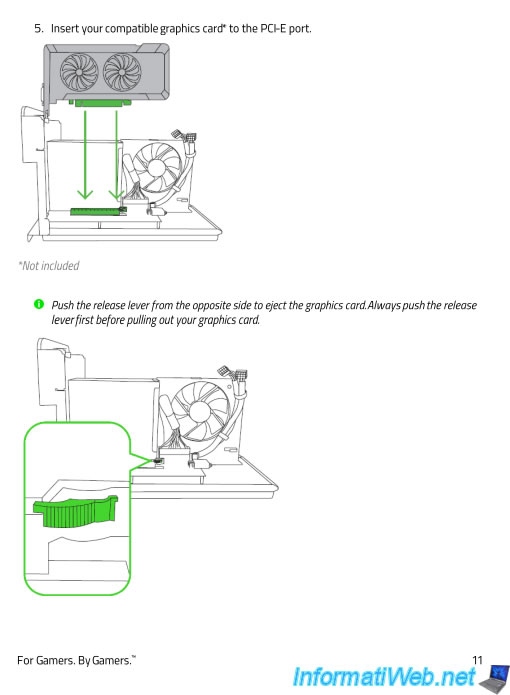
Our graphics card is plugged into this case.
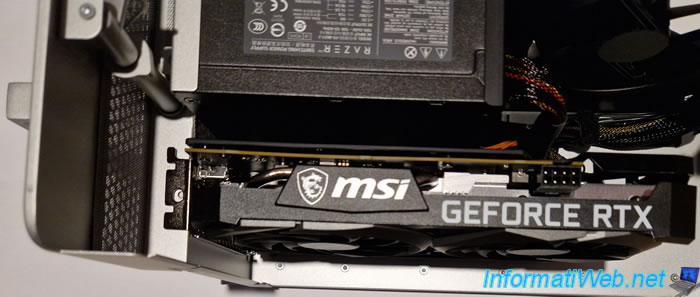
As stated in the manual, you need to screw in the screw you unscrewed earlier to secure your graphics card in this case, then connect the PCIe connector(s) required by your graphics card.
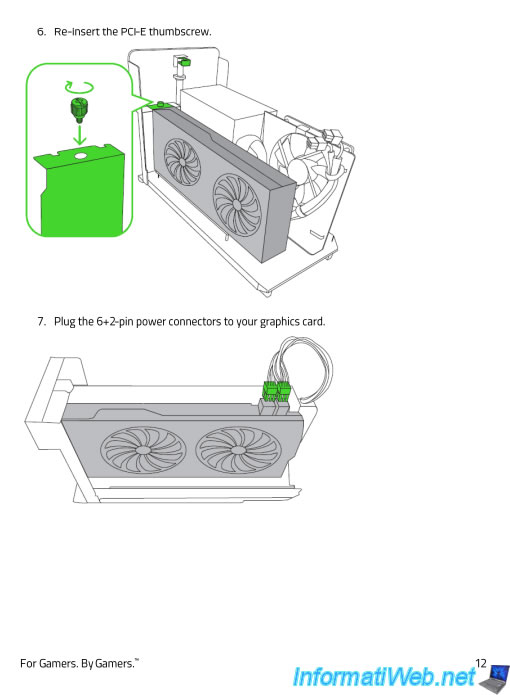
Tighten the screw to prevent the graphics card from moving in the case.
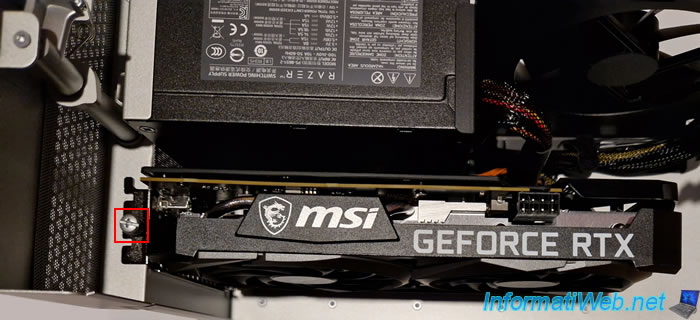
Connect the PCIe connector(s) required for your graphics card.
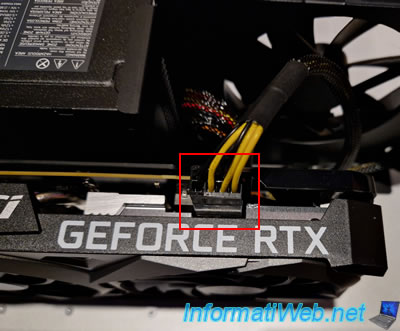
Make sure the connector is properly seated and that its clip is correctly positioned.
Failure to properly connect this connector can cause arcing and cause a flame if it gets too hot.
This is what has happened to some people in a standard computer with an RTX 40XX graphics card.
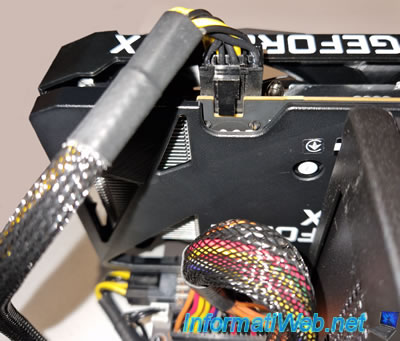
Now that your graphics card is correctly placed in the compartment, all you have to do is slide the compartment into the case and then lock the case by replacing the handle to the left.
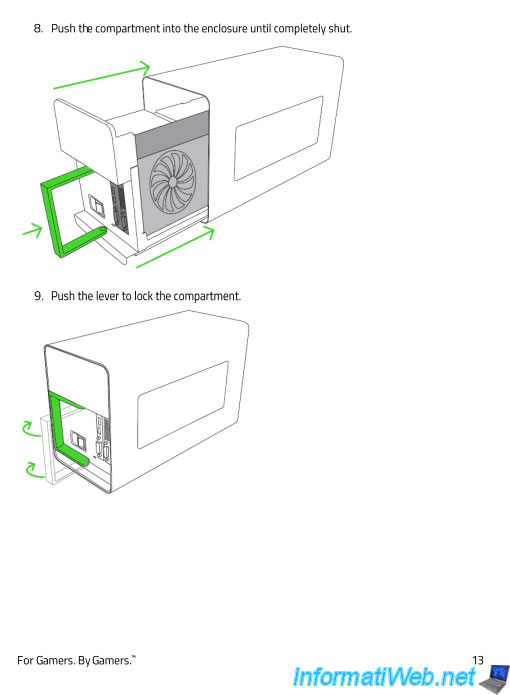
Carefully place the compartment in the case, then slide it all the way in.
Warning : do not force it, the compartment should fit without any problem. If not, it may be that something is wrong in your case or that the graphics card is too big for this case.
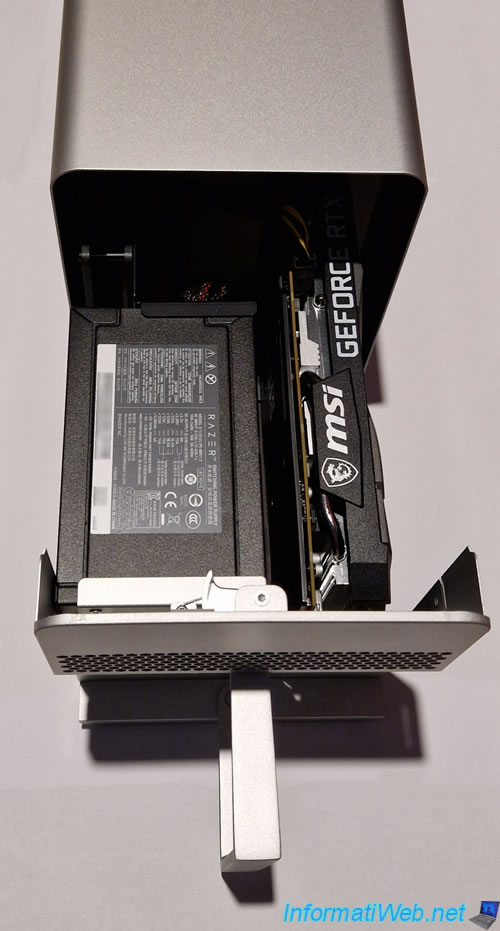
Lock the case by replacing the handle on the left.
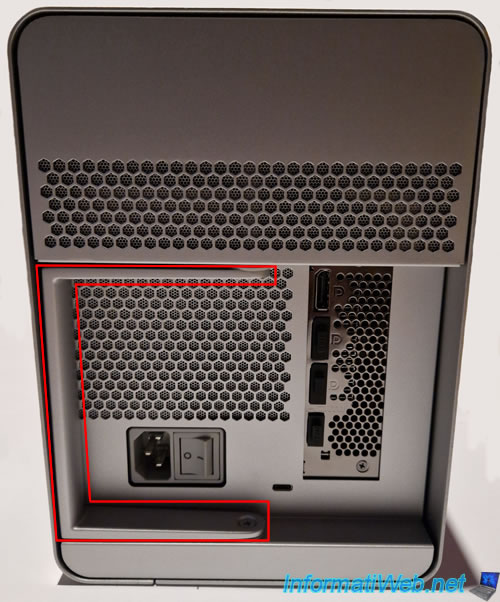
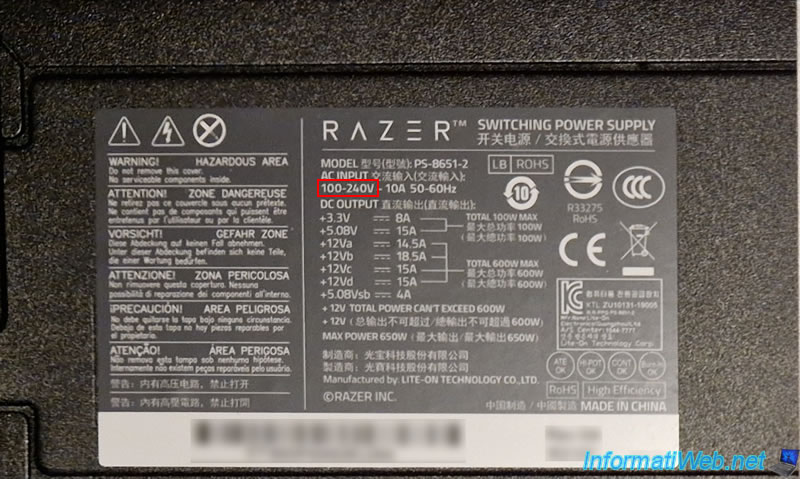
Note that the "Razer Core X" case works in both Europe and the United States despite the voltage difference.
Indeed, if you look at the power supply of this case, you will see that the voltages indicated are "110-240V".
Which means that the power supply will automatically adapt to the input voltage (INPUT).
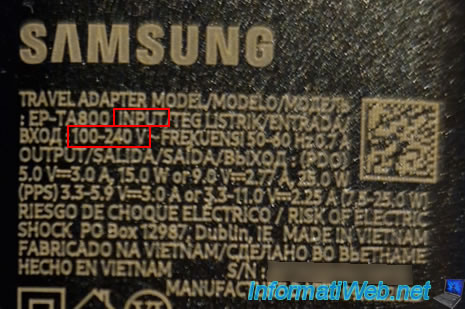
By the way, if you look at your smartphone charger, it is very likely that you will see the same thing (100-240 V).
On the other hand, there are some electrical devices that only support one of the 2 voltages. In this case, it will be specified 100V or 240V depending on the device and the country where you bought it.
In our case, as we bought it on "amazon.com" (because we could no longer find it on French sites when we wanted to buy it), we received this eGPU with a cable for the United States (instead of France as would have been the case with "amazon.fr").
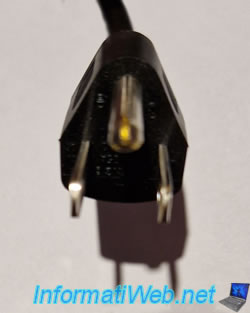
That said, if you look at the plug on the other side of this cable, you quickly realize that it's a standard power cable to power any computer.
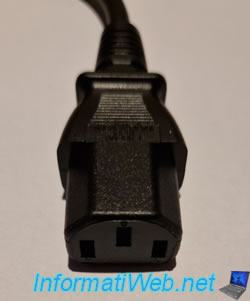
So we salvaged an old cable from an old computer that we had saved just in case.
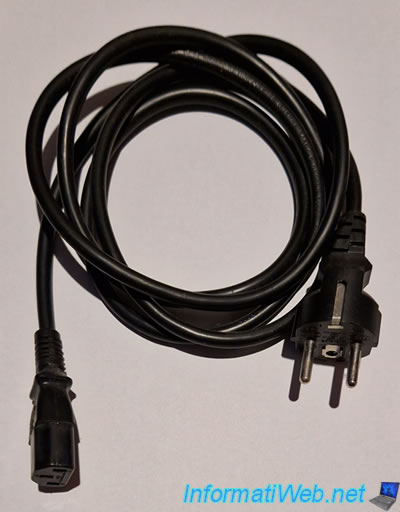
As stated in the manual, you first need to connect the power cable (although the switch is off by default anyway).
Then connect the Thunderbolt cable between this enclosure and your computer.
Warning : despite the high price of an eGPU and this one (around €300), the Thunderbolt cable is very short.
The cable is so short that we had to put the eGPU on the cardboard box it was in to be able to connect our eGPU to our computer.
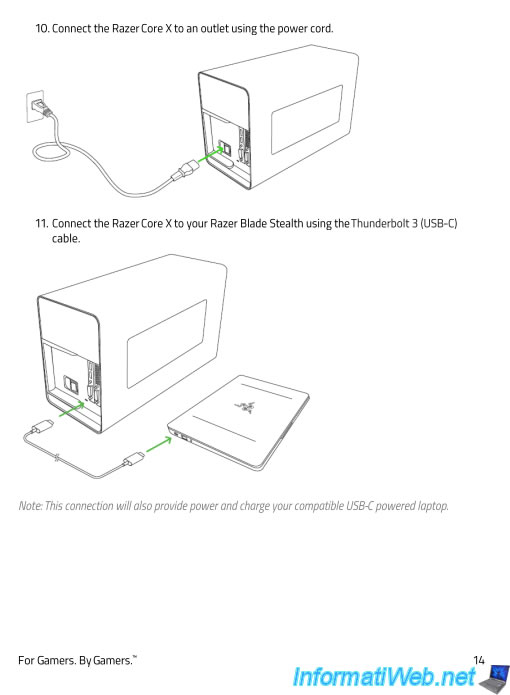
Connect the power cable to your "Razer Core X" eGPU enclosure.
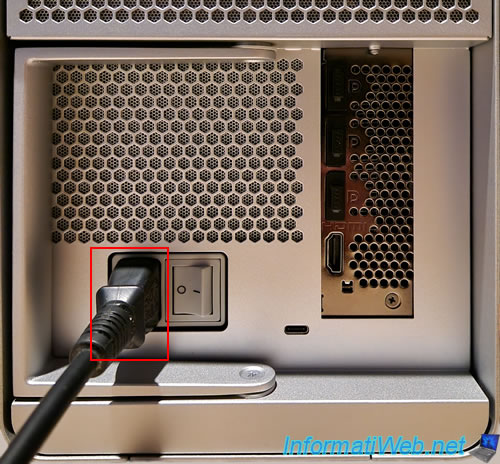
Plug the other end of the power cord into the power outlet (or a power strip, if desired).
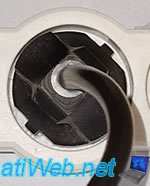
Connect your screen to a graphics port on your graphics card.
In our case, an HDMI cable.
Note: if you are a little observant, you will see that there is a small one that runs along the HDMI cable.
Indeed, in our case, we are using a KVM box that allows you to control several PCs with the same keyboard, the same mouse and the same screen.
This small wire allows you to connect the USB cable corresponding to this HDMI cable.
But in your case, it will be a simple HDMI cable to connect between your screen and your eGPU box.
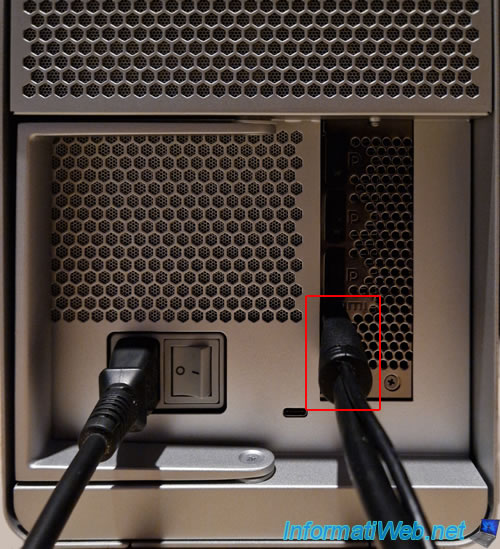
At the bottom, still on the back of the case, you will find a small oval-shaped connector.
This is the Thunderbolt connector of the case.
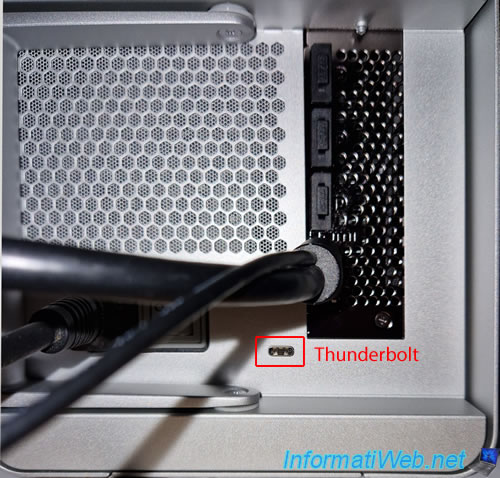
Use the small Thunderbolt cable provided by Razer and plug it in here.
Note: This cable is non-directional. The 2 Thunderbolt connectors are identical, so you can't get it wrong.
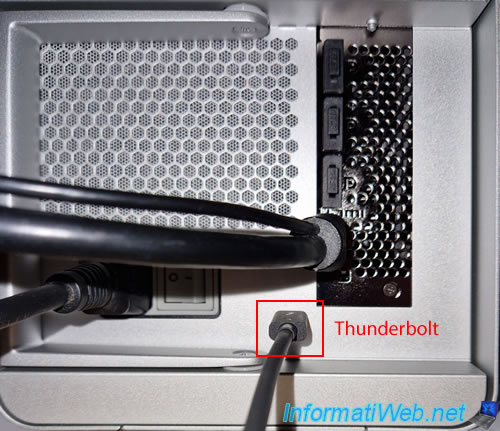
On your computer, locate a Thunderbolt port on your motherboard.
In our case, we have 2. In our case, there is a small lightning bolt just above the connector.
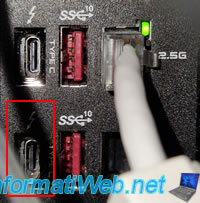
Plug the other end of the supplied Thunderbolt cable into it.
Warning : don't get confused with a USB-C connector that has the same shape but doesn't use the same communication protocol at all.
USB ports have an icon like the red ports in the image above.
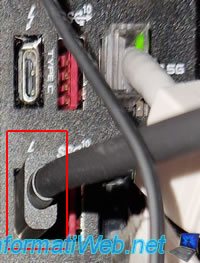
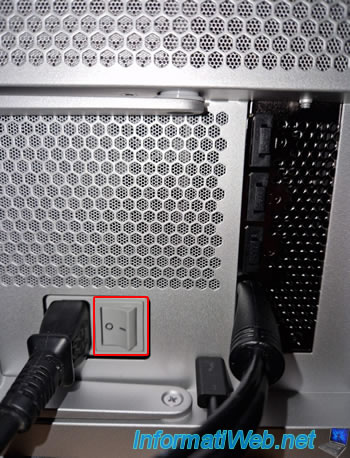
Finally, you will need to plug in your screen (if it isn't already), then turn on the switch on the back of the case.
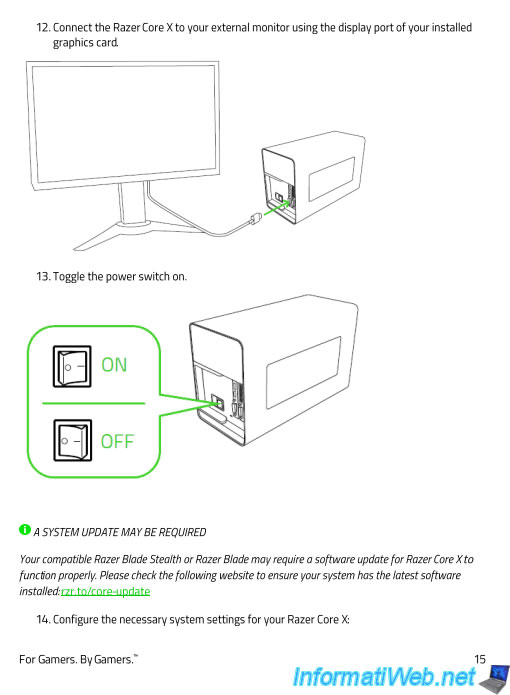
The switch you need to turn on (letter "I" pressed) is located right next to the power connector.
Share this tutorial
To see also
-
Articles 12/16/2024
Easily unplug Molex connectors
-
Articles 3/26/2014
Kingston MobileLite Wireless - Network sharing on batery
-
Articles 8/3/2026
Razer Core X - Installing the eGPU on Windows 10
-
Articles 11/25/2024
WD My Passport - Encrypted external (USB) hard drive
No comment