- Backup
- Acronis True Image
- 20 October 2025 at 13:41 UTC
-

With Acronis Cyber Protect Home Office (True Image), you can easily archive your old and large files.
- Archive your files and store the Acronis archive on an external hard drive
- Open an Acronis archive stored on an external hard drive
- Delete an Acronis archive stored on an external hard drive
1. Archive your files and store the Acronis archive on an external hard drive
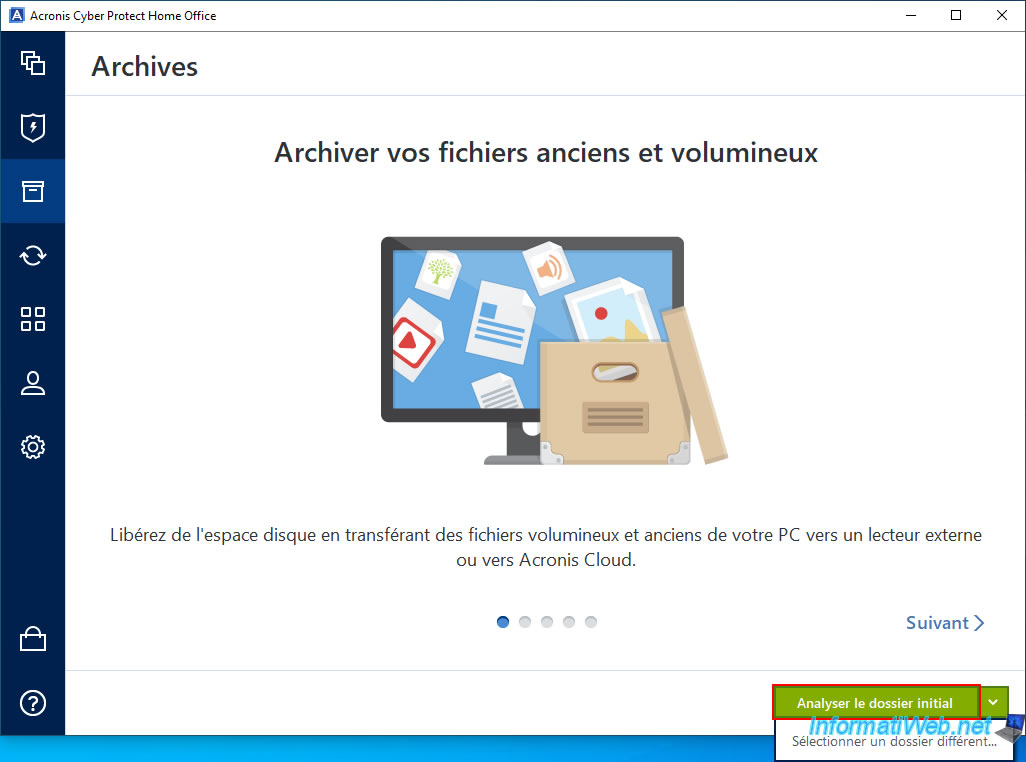
To archive your old and/or large files, go to the "Archive" section of Acronis Cyber Protect Home Office (True Image).
Then, click the "Scan original folder" button to scan only your home folder (= "C:\Users\[Windows user name]").
Note: to scan a specific folder or an entire partition, click the arrow on the right, then click "Select a different folder".
Please wait while the selected folder (default: your home folder) is analyzed.
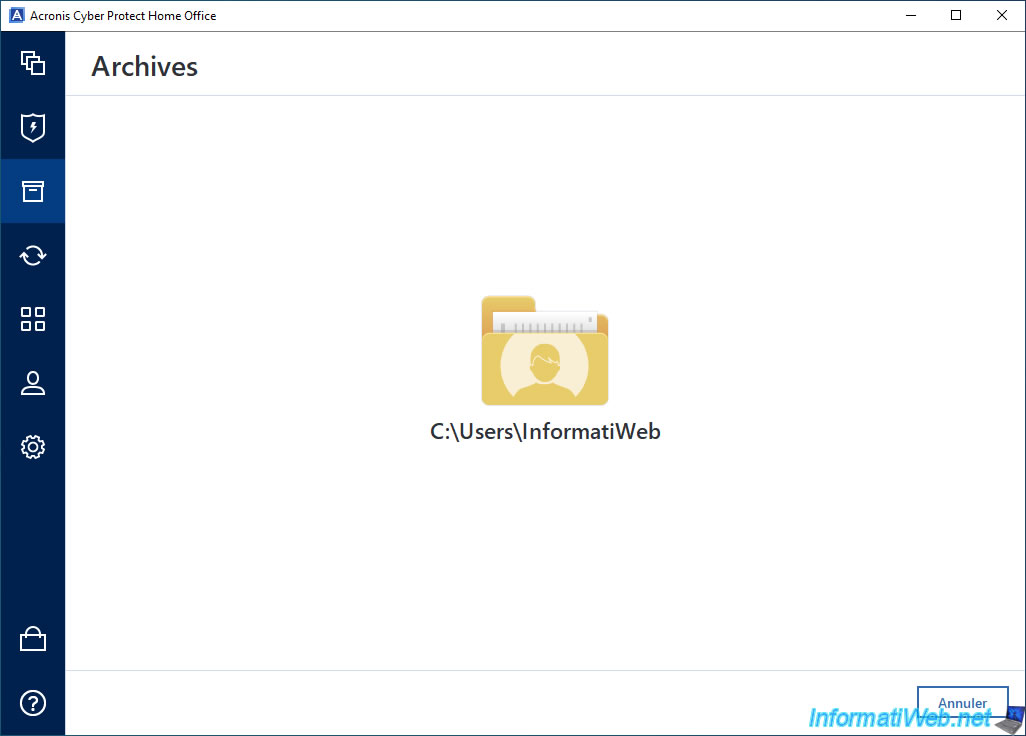
Once the scan is complete, the list of old and/or large files will appear.
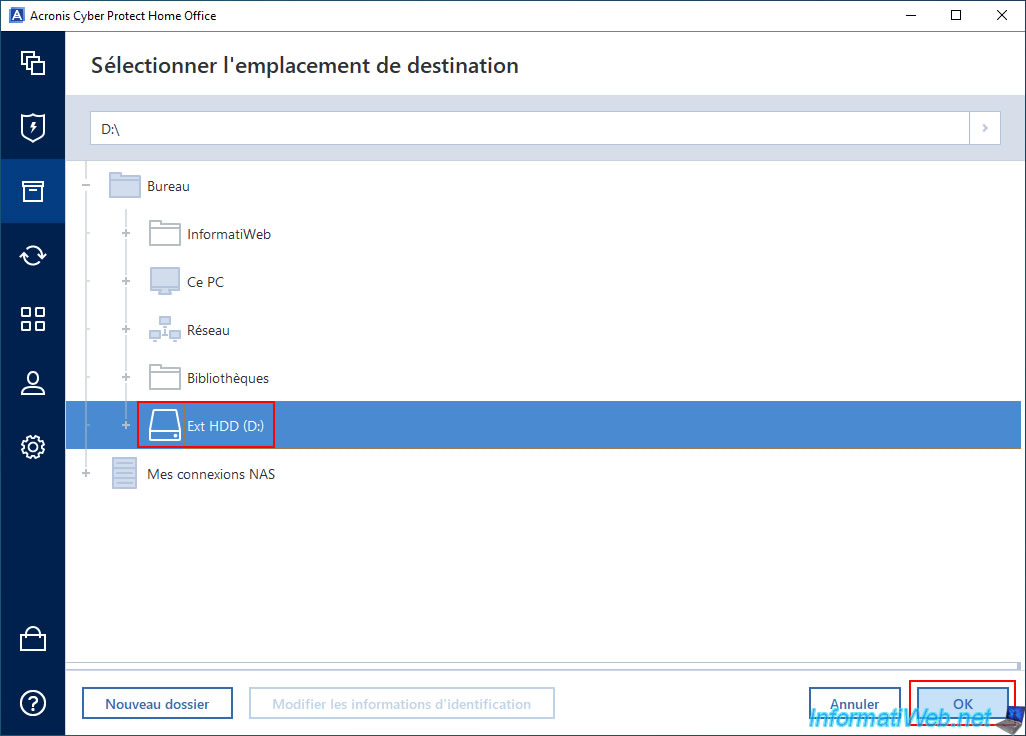
At the bottom left, in the "Destination location" list, select "Browse".
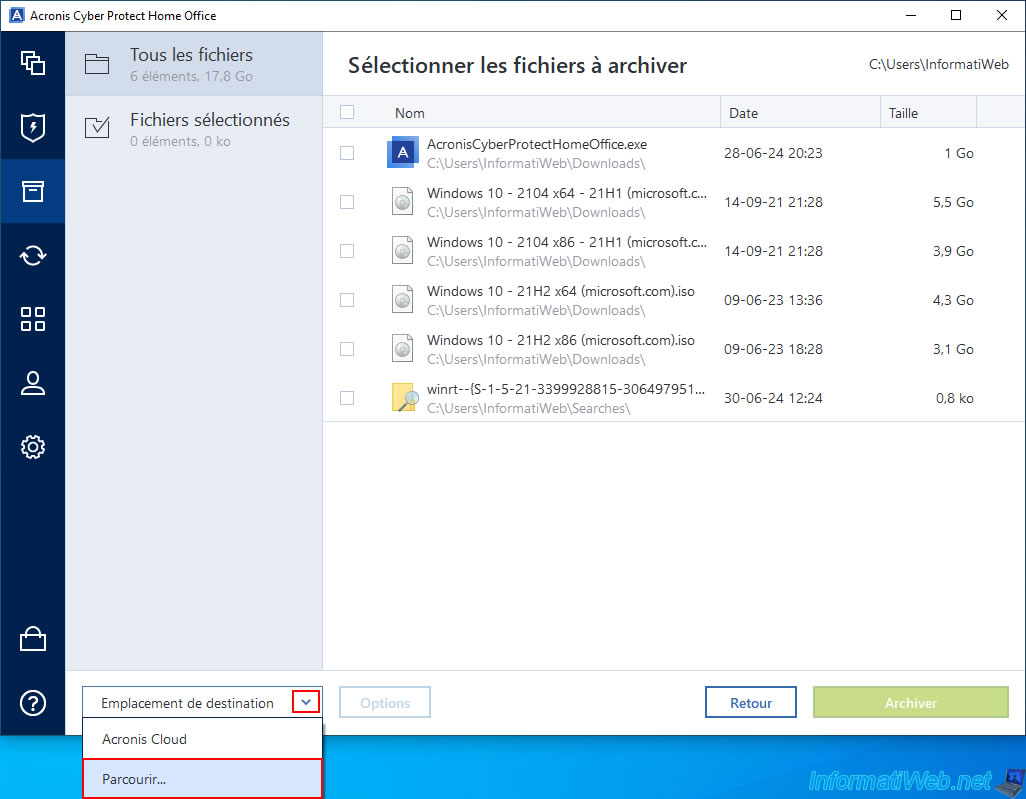
Select the folder or partition where you want to store the archive (containing the files to be archived) that will be created, then click OK.
In our case, our external hard drive "Ext HDD (D:)".
Select the files to archive, then click the "Archive xx.x GB" button.
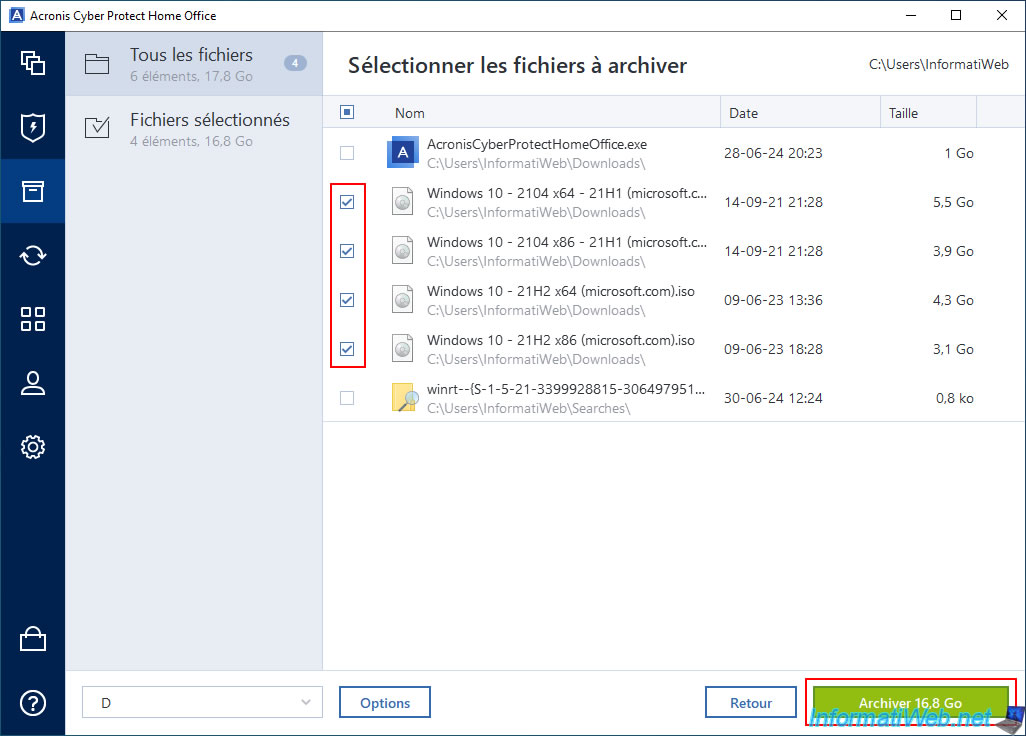
Attention: as indicated by "Acronis Cyber Protect Home Office (True Image)", the archived files will be moved to the archive that will be created at the location selected above and then deleted from their original location.
To access them, you can use Windows File Explorer via the link that will be displayed by Acronis Cyber Protect Home Office (True Image) or open the network location "Acronis Drive" that you will see in the "My PC" section of File Explorer.
Important : the network location "Acronis Drive" that you will see later is read-only.
So, if you try to delete a file from it, the desired file will magically reappear if you refresh the contents of the folder in that network location where it was located.
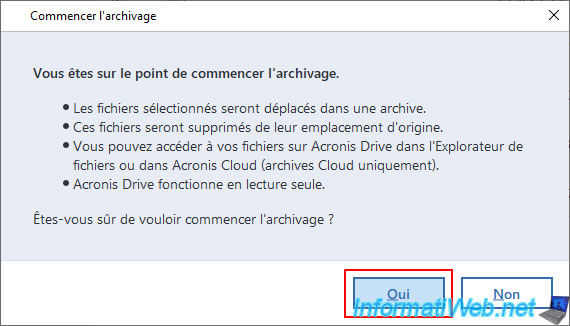
Click Yes.
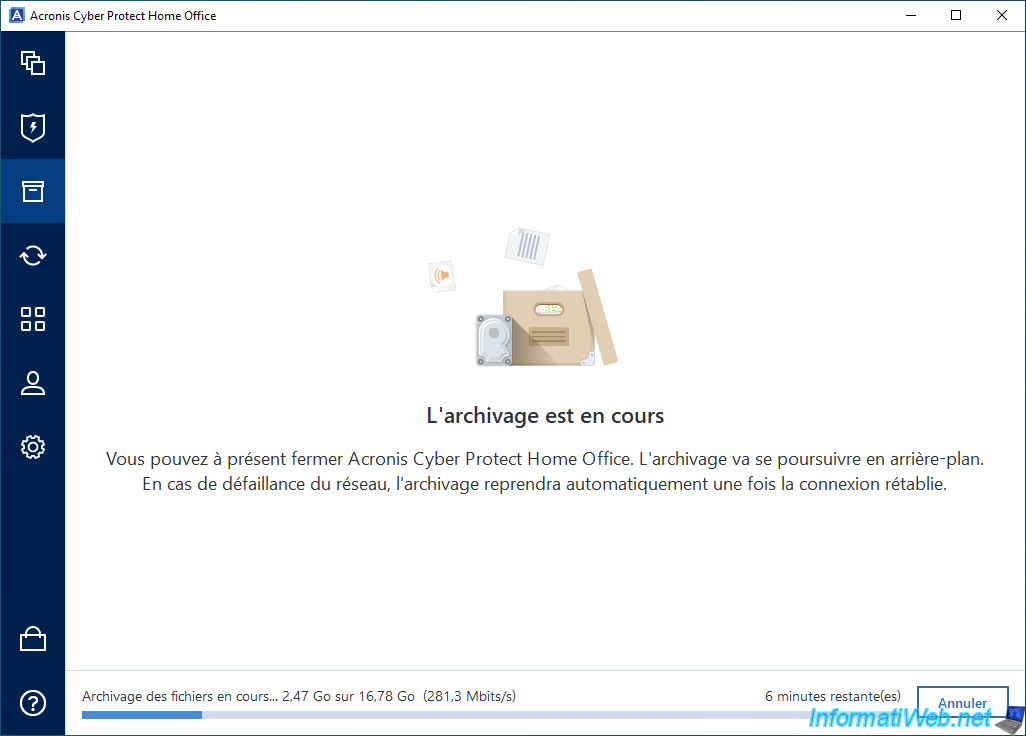
Please wait while the desired files are archived.
Archiving files...
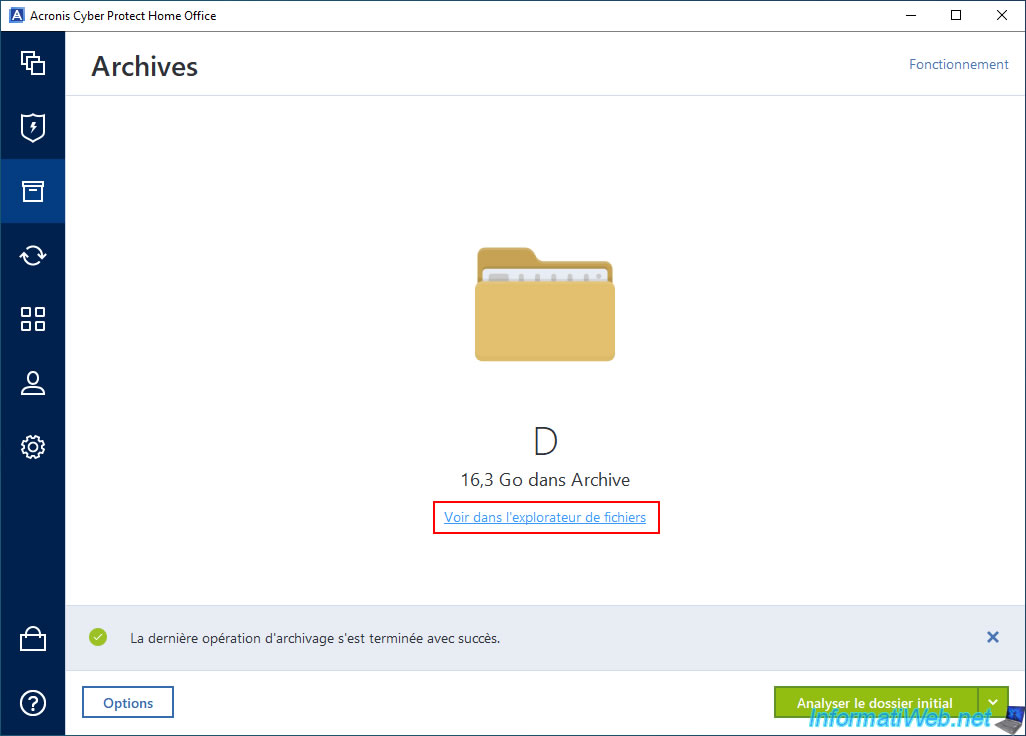
Once your files have finished archiving, you will see the "The last archive operation completed successfully" message.
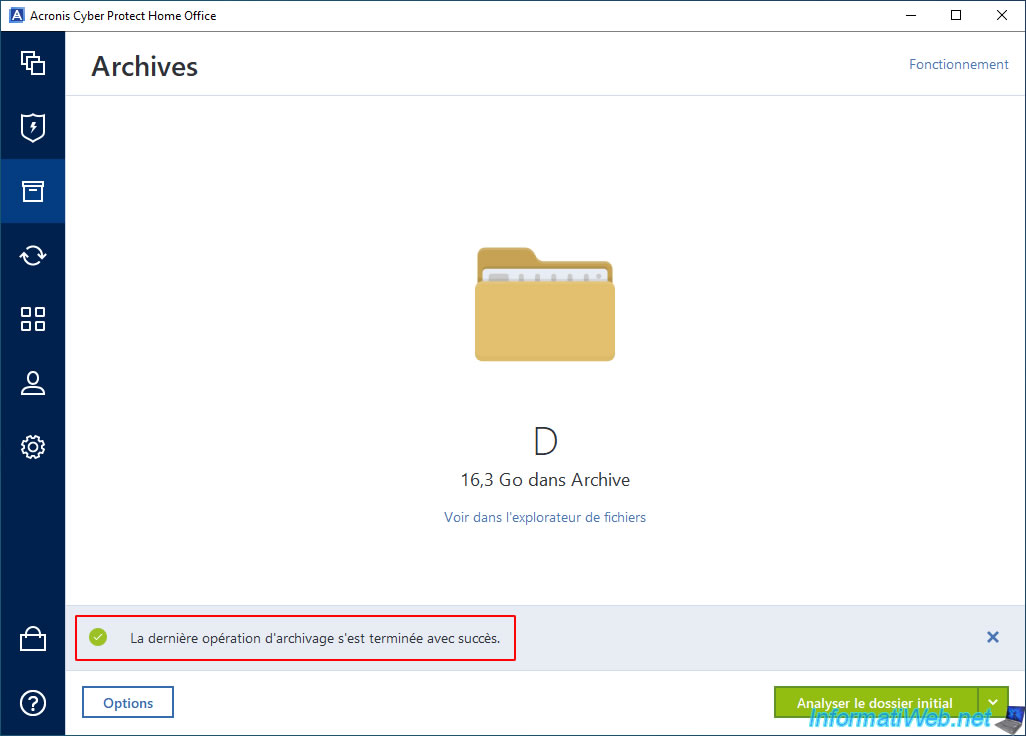
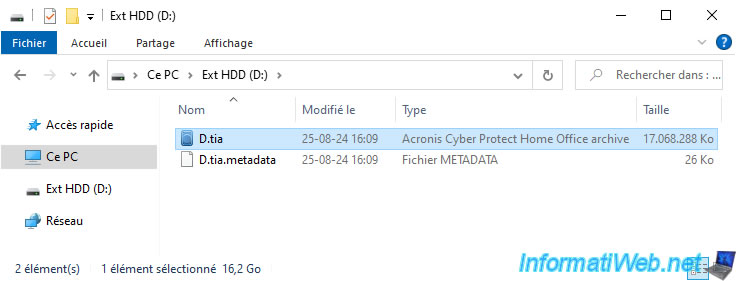
In the previously selected destination folder (in our case, our external hard drive "Ext HDD (D:)"), you will see 2 files appear:
- a ".tia" file (which stands for "True Image Archive"): the archive containing the archived files.
- a ".tia.metadata" file: metadata that Acronis Cyber Protect Home Office (True Image) needs to use this archive.
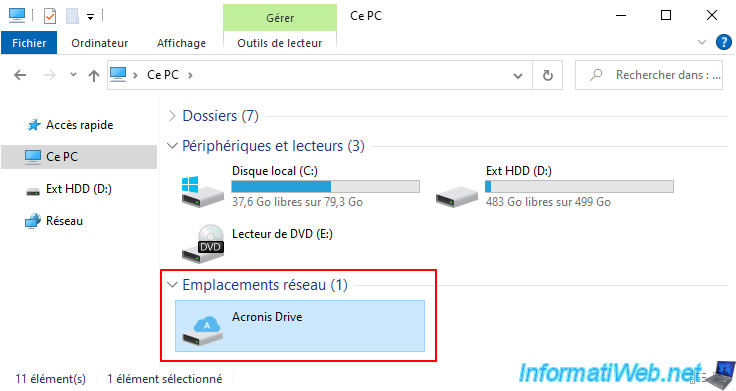
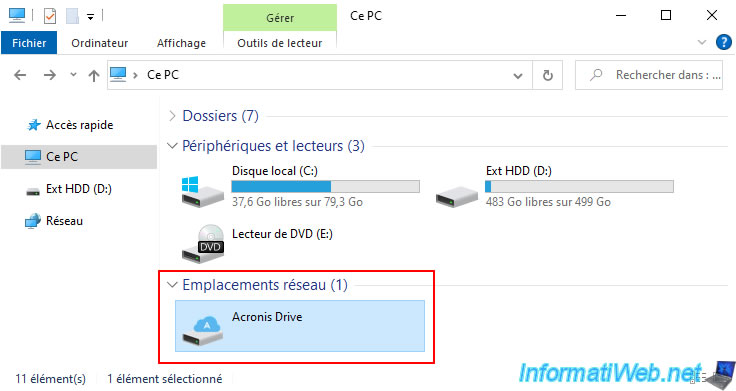
In the "This PC" section of Windows file explorer, you will see that a network location "Acronis Drive" has appeared.
As expected, the ISO files that were archived in our case disappeared from the source folder (Downloads) where they were previously.
2. Open an Acronis archive stored on an external hard drive
To access files archived with Acronis Cyber Protect Home Office (True Image), you have several options.
The first option is to go to the "Archive" section of Acronis Cyber Protect Home Office (True Image), then click the "View in file explorer" link displayed under the name of your archive.
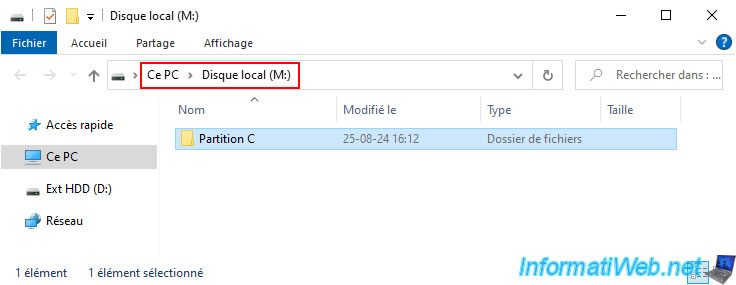
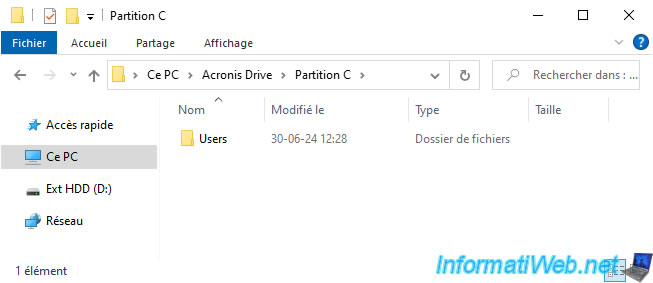
You will notice that a "Local Disk (M:)" will appear via file explorer (although this partition does not actually exist and it is also not visible in the "This PC" section of file explorer).
In this virtual partition, you will find a folder "Partition C" (where "C" corresponds to the source partition where the archived files were located).
The 2nd option to access your archived files is to navigate to the network location "Acronis Drive" which appeared in the "This PC" section of your file explorer.
As you can see, the content of this network location "Acronis Drive" is exactly the same as the "Local Disk (M:)" accessible only via the special link displayed by Acronis Cyber Protect Home Office (True Image).
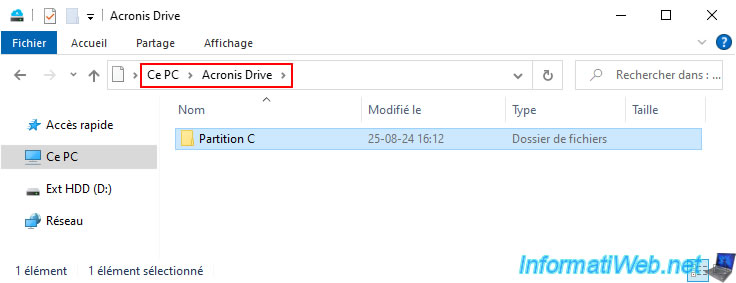
In the "Partition C" folder of this network location "Acronis Drive" or "Local Disk (M:)" you will find the source folder structure where the archived files were located.
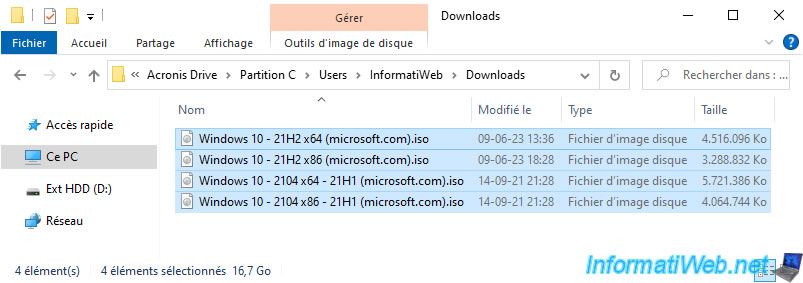
In our case, the archived ISO files were located in the "Downloads" folder (which is actually named "Downloads" in the Windows file system, no matter your language) of our home folder (e.g. "C:\Users\InformatiWeb\Downloads").
In "Acronis Drive (or 'Local Disk (M:)')\Partition C\Users\InformatiWeb\Downloads", we find our ISO files archived with Acronis Cyber Protect Home Office (True Image).
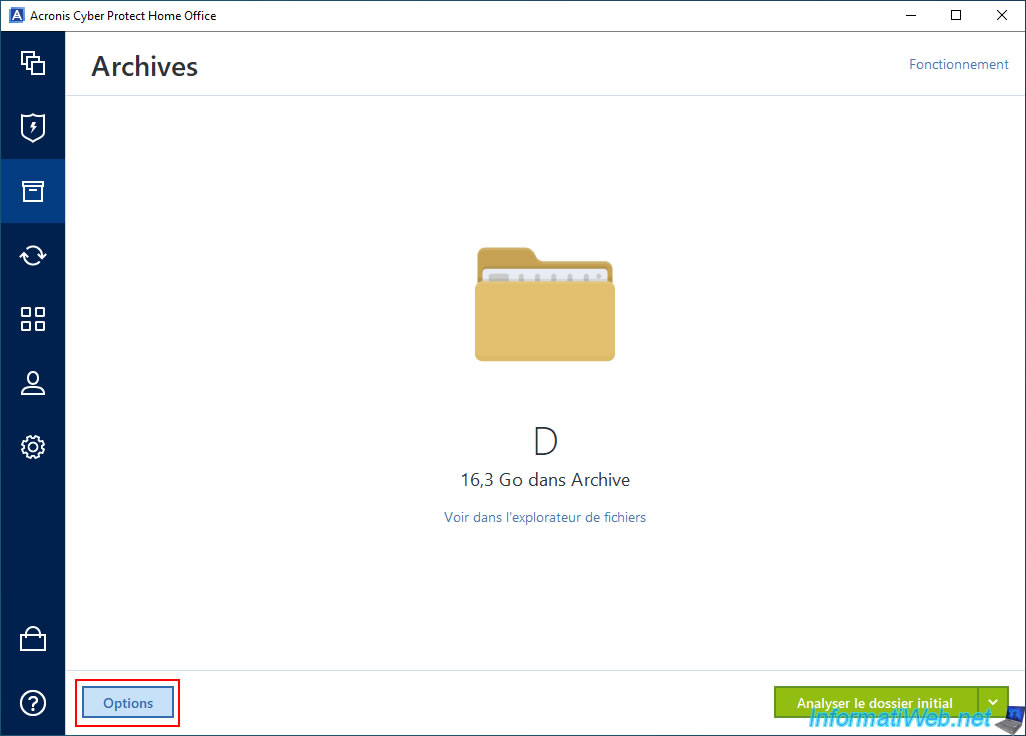
3. Delete an Acronis archive stored on an external hard drive
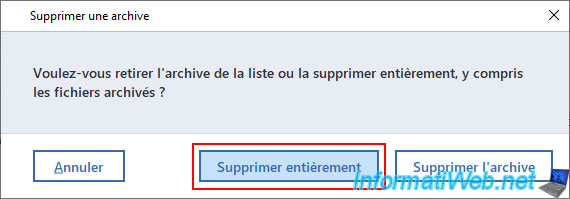
To delete an archive (including the files inside it) stored locally on your external hard drive (or any local folder), go to the "Archive" section, then click the "Options" button.
Then, simply click on the "Delete archive" link.
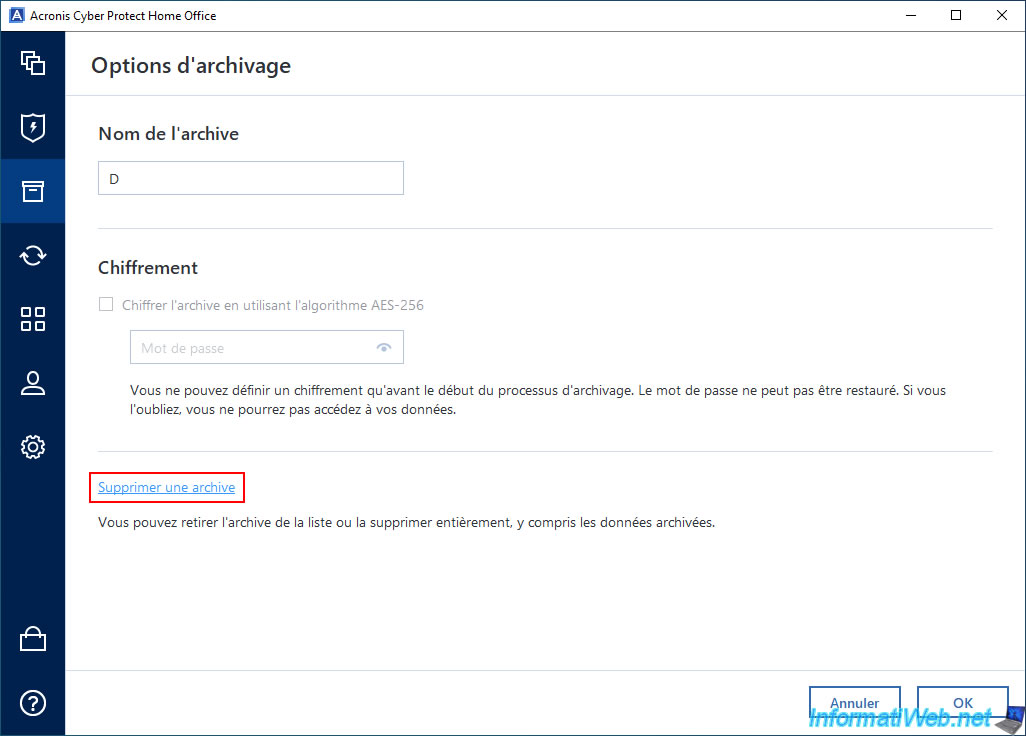
To remove the archive from the Acronis Cyber Protect Home Office (True Image) interface and also delete the associated ".tia" and ".tia.metadata" files present on your external hard drive, click the "Remove completely" button.
Alternatively, if you want to keep the archive on your external hard drive, but hide only this archive from the Acronis Cyber Protect Home Office (True Image) interface, then click "Remove archive".
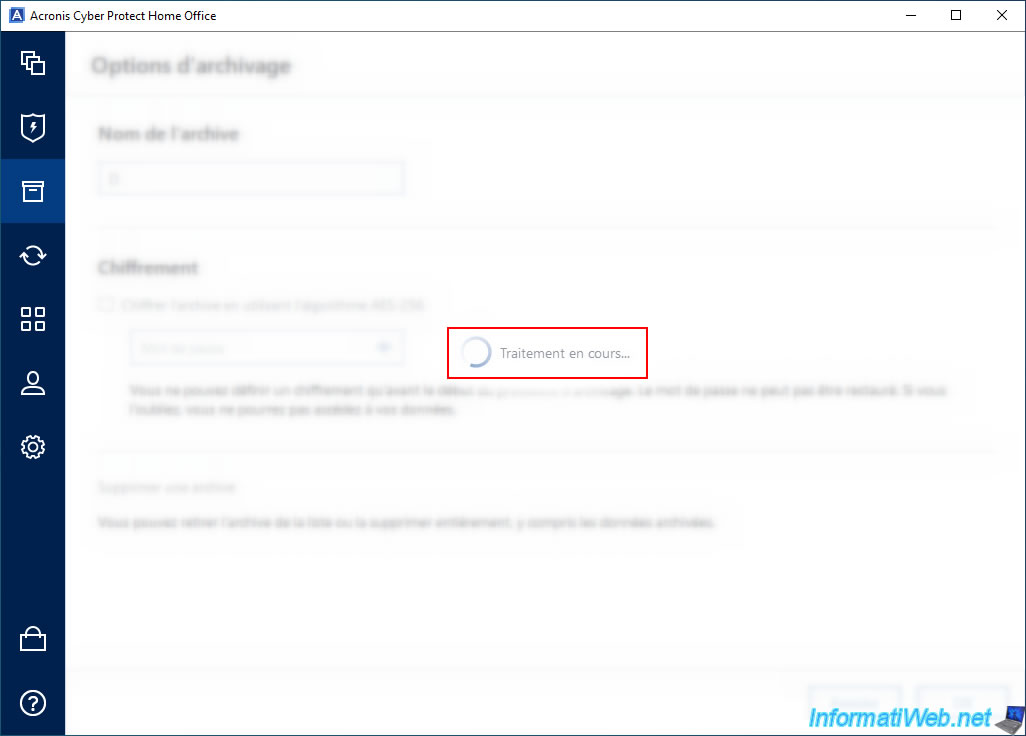
Please wait while this archive (and associated ".tia" and ".tia.medata" files) is deleted.
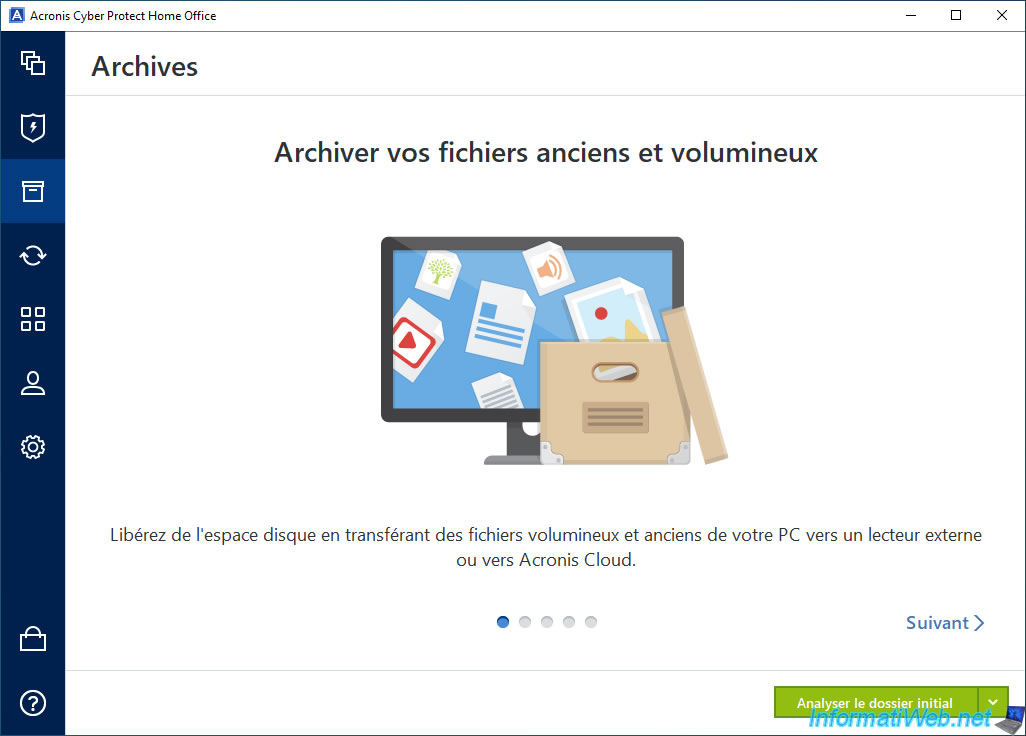
Once the archive is deleted and removed from the Acronis Cyber Protect Home Office (True Image) interface, you will see information about the operation of this archiving system again.
In Windows file explorer, you will notice that the network location "Acronis Drive" has disappeared.
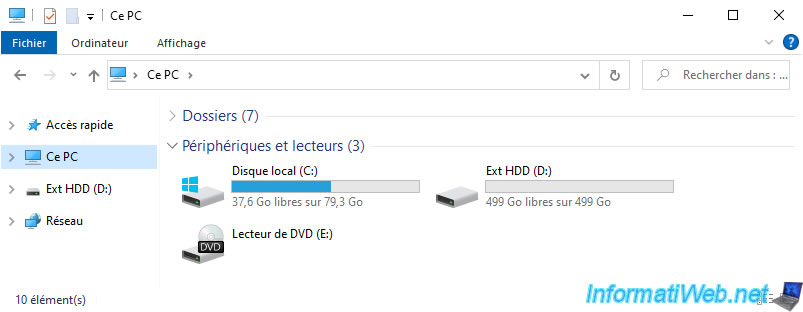
On your external hard drive, you will notice that the associated files (".tia" and ".tia.metadata") have also been deleted.
Share this tutorial
To see also
-
Backup 10/27/2025
Acronis True Image - Archive your files locally (encrypted archive)
-
Backup 11/10/2025
Acronis True Image - Archive your files on Acronis Cloud (encrypted archive)
-
Backup 8/4/2025
Acronis True Image - Search for files in a backup
-
Backup 5/18/2026
Acronis True Image - Universal Restore Media - Create media (Win PE version based on Win ADK)
You must be logged in to post a comment