- Backup
- Acronis True Image
- 02 June 2025 at 13:11 UTC
-

- 1/2
When you install Acronis Cyber Protect Home Office (True Image) on your computer, you have the option to create a backup of it on an external hard drive (for example) and to schedule the following backups.
Thus, in case of a problem with your computer, you will be able to restore your computer to the desired date thanks to the created backups.
In this tutorial, you will see how to back up your computer for the first time on your external hard drive.
Then, you will see how to restore your computer to its previous state thanks to this same backup.
- Back up your computer to an external hard drive with Acronis
- Changes after saving
- Restore your computer from a backup stored on an external hard drive with Acronis
1. Back up your computer to an external hard drive with Acronis
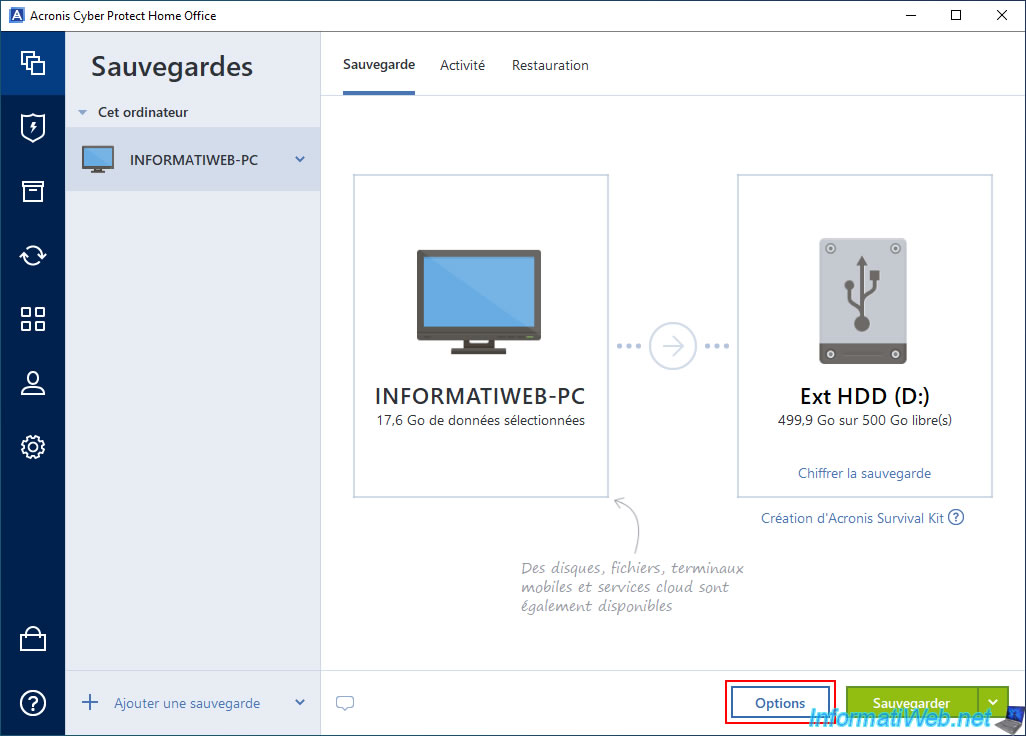
To back up your computer to an external hard drive using Acronis Cyber Protect Home Office (True Image), go to the 1st section of the program (Backup).
By default, you will see that a backup for "This computer" already appears.
The name displayed is the one defined in Windows system properties. But, you can change it from this backup in Acronis Cyber Protect Home Office (True Image) if you want.
If you select this backup configuration, you will see that Acronis Cyber Protect Home Office (True Image) automatically selects your computer on the left (as the source).
For the destination, click on the "Select destination location" message displayed in the right rectangle.

If an external hard drive is connected to your computer, it will automatically appear as the 2nd option.
If so, just click on it. The backup file created by Acronis Cyber Protect Home Office (True Image) will be stored automatically at the root of this external hard drive.
If your external hard drive does not automatically appear here or you want to store the backup file (the copy of the desired disks) in a specific folder, then click on the 3rd option (Browse).

Once your external hard drive is selected, it will appear on the right (as a destination).
Before starting the backup, be aware that it is possible to configure options for it.
To do this, click on the "Options" button.
As you can see, by default, your computer will be backed up every week (weekly).
Of course, Acronis Cyber Protect Home Office (True Image) does not copy the data every time, but only the changes that have been made since the last backup.
This is called: incremental backups.
This will allow you to later return to a specific date without consuming too much disk space on your external hard drive.
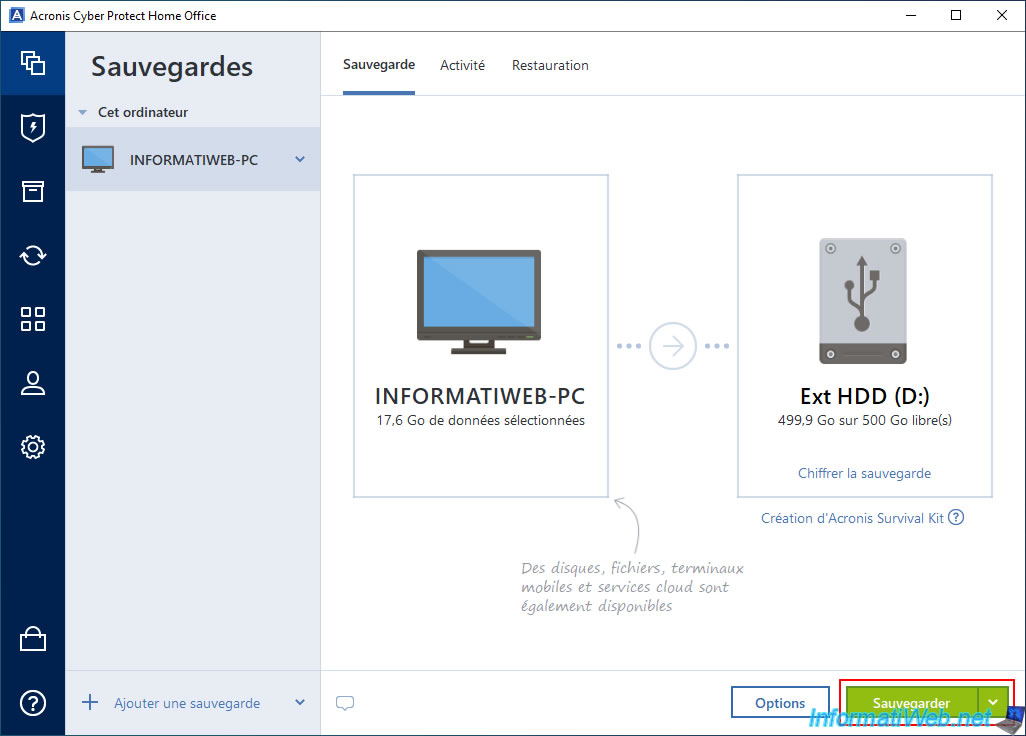
Once the backup options are configured (if any), click on the "OK" button (bottom right) to save the changes.

Once the backup options are configured, start the backup by clicking on the green "Backup" button.
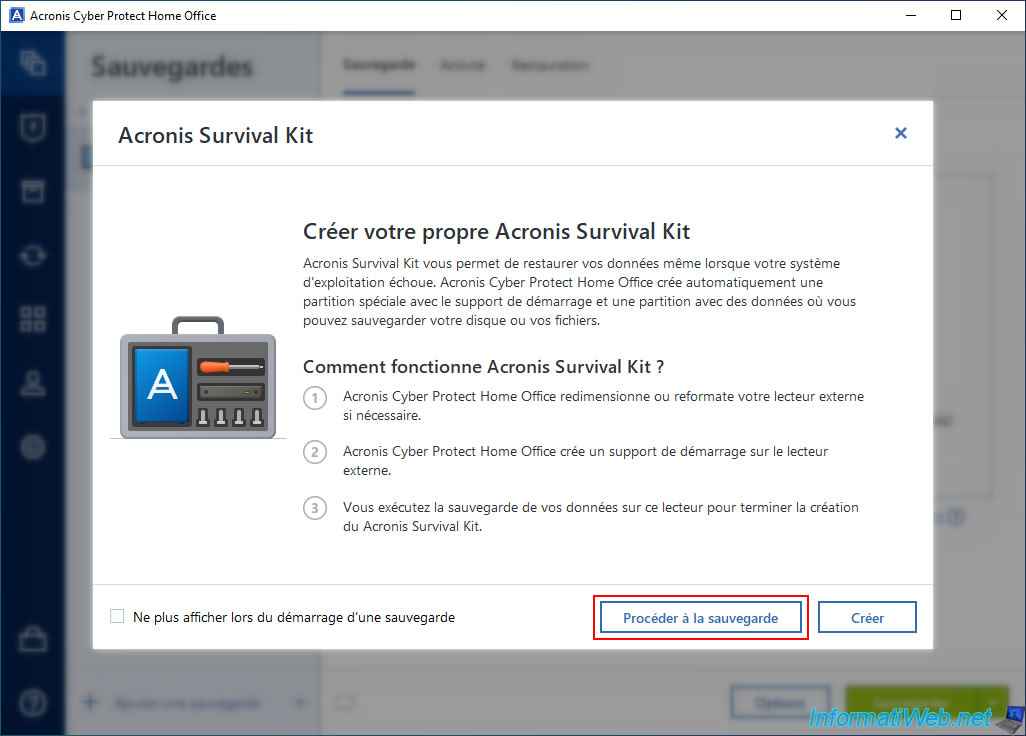
When you try to start your first backup, Acronis Cyber Protect Home Office (True Image) will show you a message about Acronis Survival Kit.
As explained, to restore a backup created by Acronis Cyber Protect Home Office (True Image), you need Acronis Cyber Protect Home Office (True Image) program or a rescue media (which can be created via the "Tools" section of the program you are using).
However, Acronis Cyber Protect Home Office (True Image) can also create an Acronis Survival Kit environment on your external hard drive (by resizing it) so that you can restore your backup later via this Acronis Survival Kit environment (even if your computer fails to boot).
Ignore creating this Acronis Survival Kit environment by clicking "Proceed to backup", as we will not use it in this tutorial.
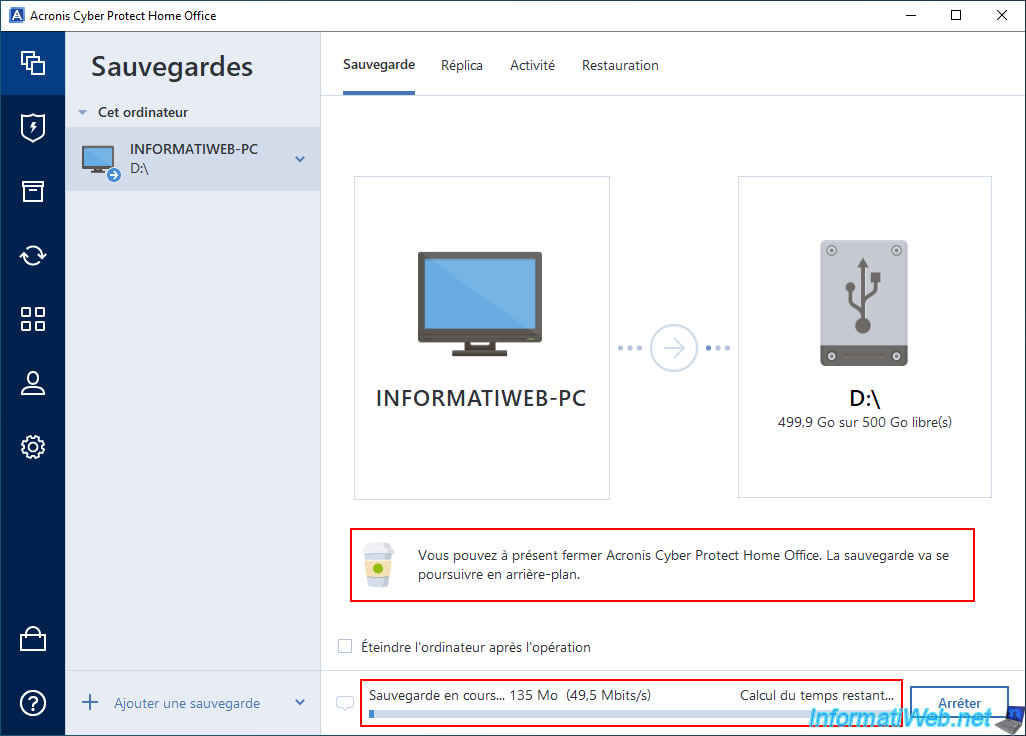
Please wait while your computer is being backed up.
As indicated by Acronis Cyber Protect Home Office (True Image), the process is running in the background, so you can close this window.
Plain Text
You can now close Acronis Cyber Protect Home Office (True Image). The backup will continue in the background.

Backup in progress...
However, leave your computer on and make sure that Windows automatic sleep is disabled.
To do this, refer to our tutorial: Disable automatic sleep on Windows 11, 10, 8.1, 8 and 7.
In the Windows taskbar, you will see that an additional icon has appeared.
If you hover over it, you will see that the backup progress will appear.
Plain Text
Acronis Cyber Protect Home Office (True Image) : xx % complete.

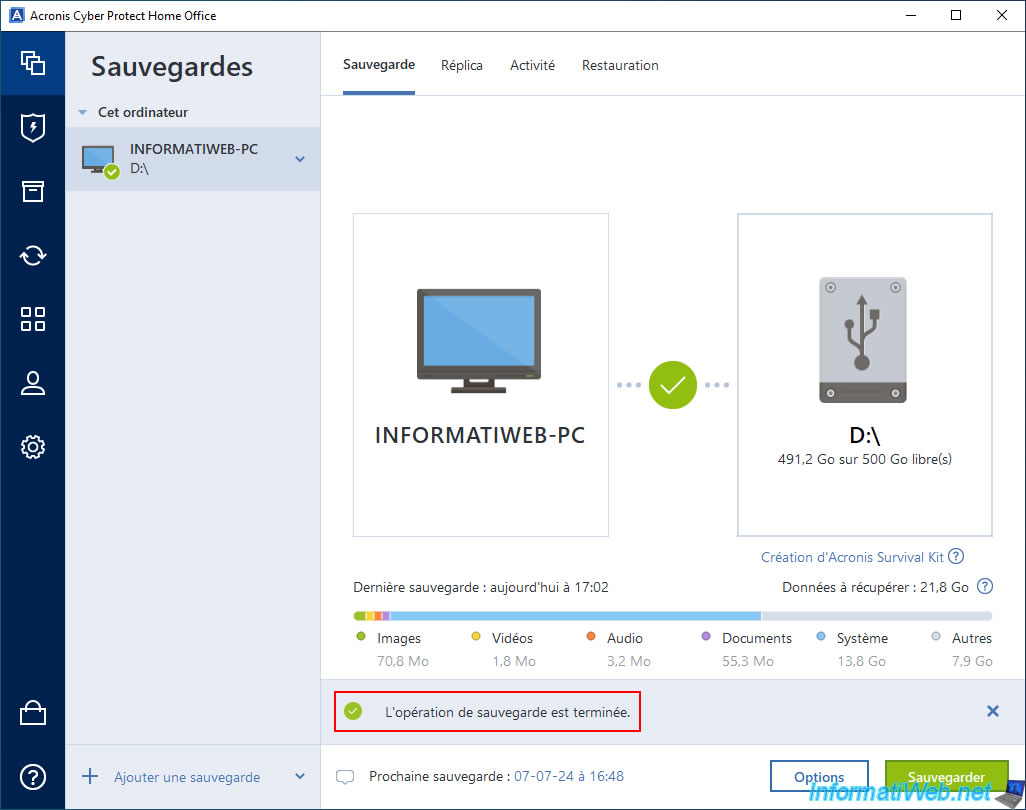
Once the backup is complete, you will see the message "Backup operation is complete".
If you are observant, you will also see just below that the next backup is scheduled in a week (since the backup is scheduled weekly, by default).
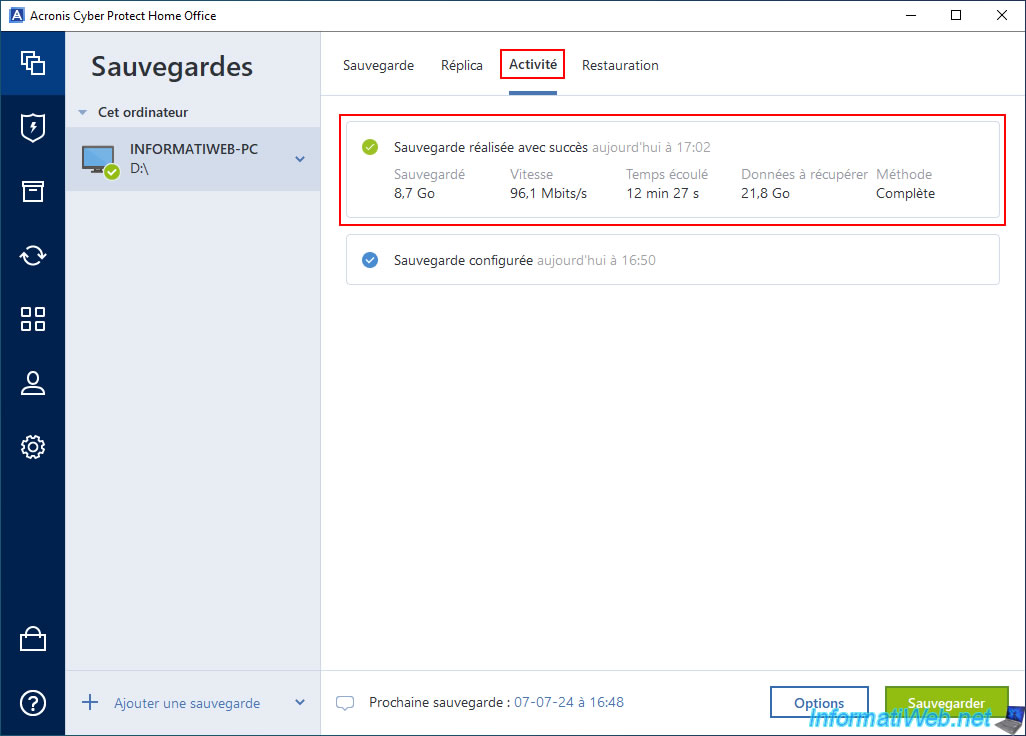
In the "Activity" tab, you will see the status "Backup completed successfully", as well as information about the elapsed time and average write speed.
This can be useful for comparing the performance of several external hard drives and choosing the best one for your backups.
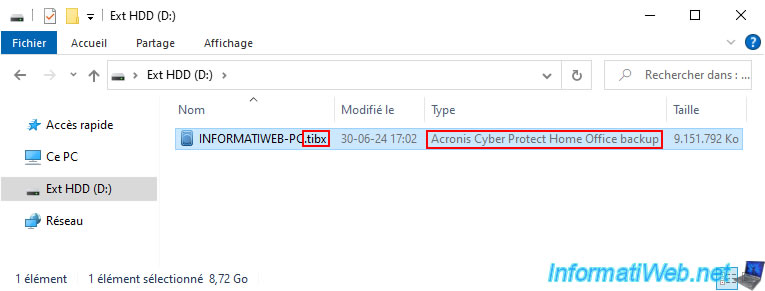
If you look at the contents of your external hard drive, you will see that a large file named "[your computer name].tibx" has been created at the root of it.
Notes :
- at the time, Acronis True Image used ".tib" files.
- since Acronis True Image 2020, the format used is ".tibx".
That said, this does not change anything for you. - Acronis Cyber Protect Home Office (True Image) is the new name for Acronis True Image.
Share this tutorial
To see also
-

Backup 6/16/2025
Acronis True Image - Backing up your PC to a Synology NAS
-

Backup 9/15/2025
Acronis True Image - Backing up your smartphone to Acronis Cloud (encrypted backup)
-

Backup 6/15/2026
Acronis True Image - Create an Acronis Secure Zone
-
Backup 1/12/2026
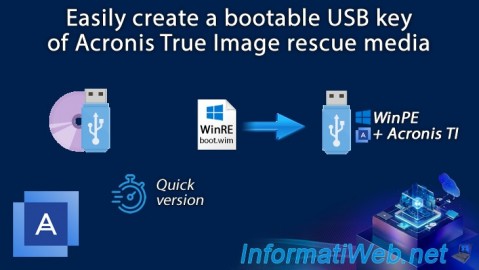
Acronis True Image - Rescue Media - Create media easily (bootable USB key)
You must be logged in to post a comment