- Windows
- Windows 8 / 8.1, Windows 7, Windows 10, Windows 11
- 24 May 2022 at 14:32 UTC
-

When you install or reinstall Windows, the sleep mode is enabled by default.
Which is problematic, because your computer will tend to go to sleep when you go to eat (for example). The problem is that if a download, a file synchronization, ... is in progress, it's possible that this process is stopped prematurely because of this automatic sleep.
This is also problematic with virtual machines, as these will tend to go to sleep or pause (depending on the virtualization solution used) since you are using your physical PC and not the virtual machine for a while.
1. Disable automatic sleep on Windows 7, 8 and 8.1
To disable automatic sleep on Windows 7, 8 or 8.1, the procedure is exactly the same.
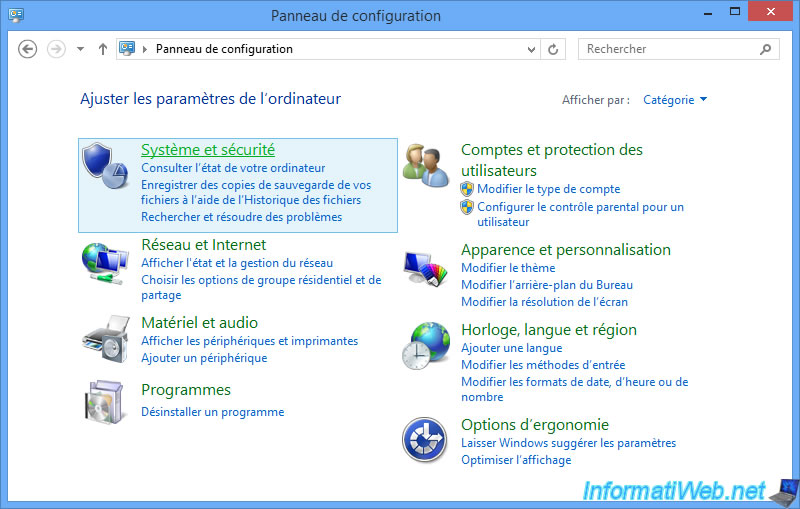
To get started, open the control panel and go to : System and Security.
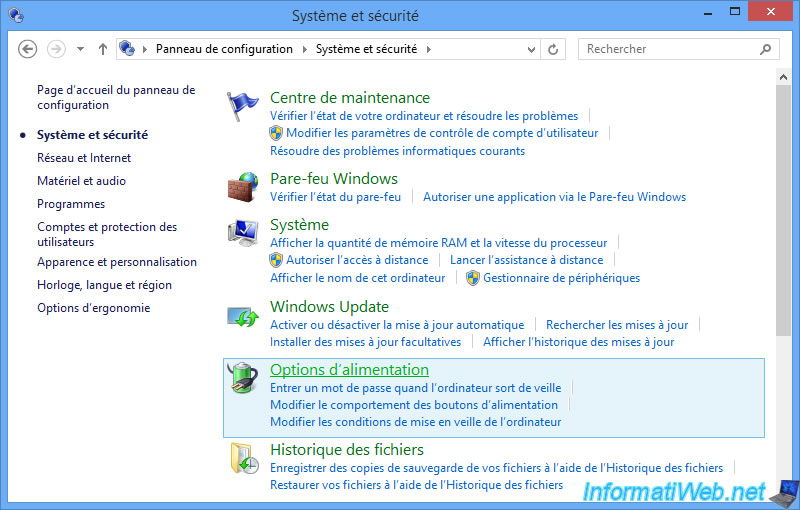
Then, in : Power options.
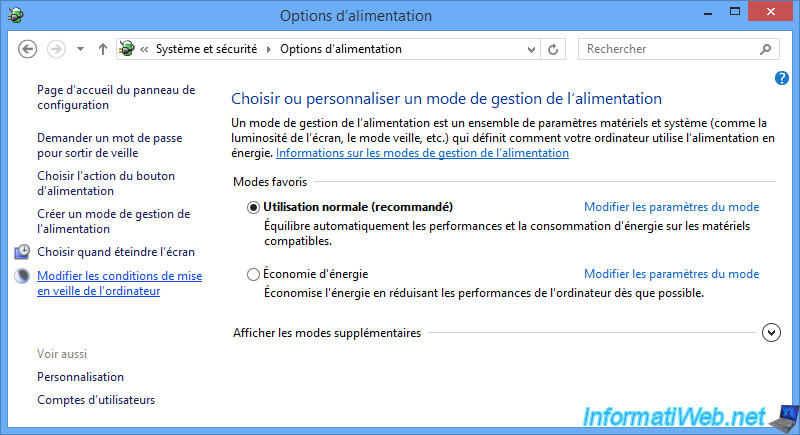
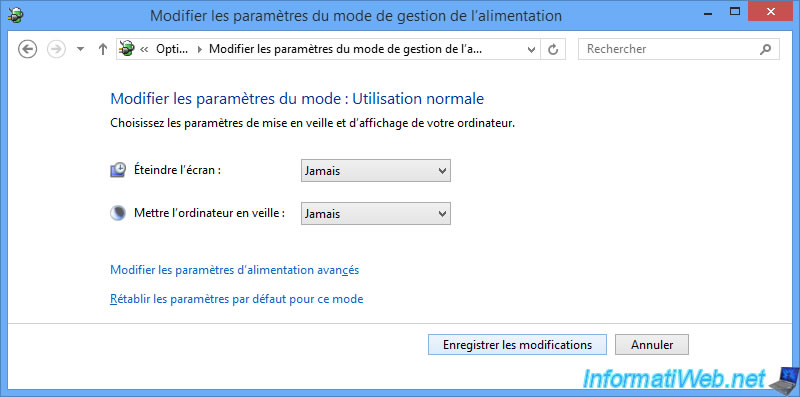
Then, click on "Change when the computer sleeps" in the left menu.
Here, you will find 2 settings :
- Turn off the display
- Put the computer to sleep
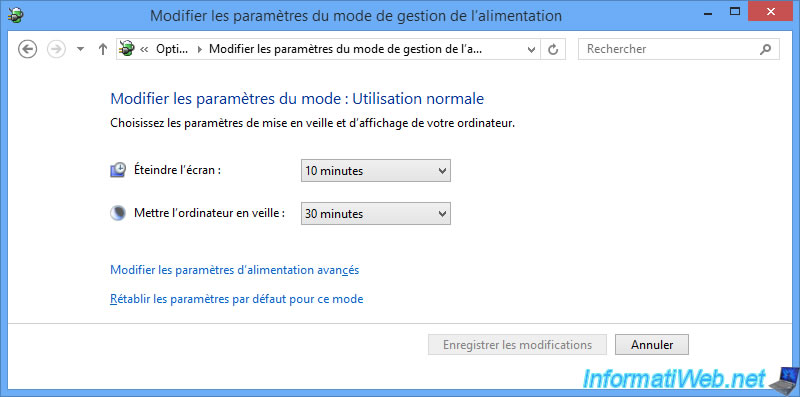
As usual, we always select "Never" for these 2 settings.
But, above all, you must configure the "Put the computer to sleep" setting to "Never".
Then, click on : Save changes.
2. Disable automatic sleep on Windows 10 and 11
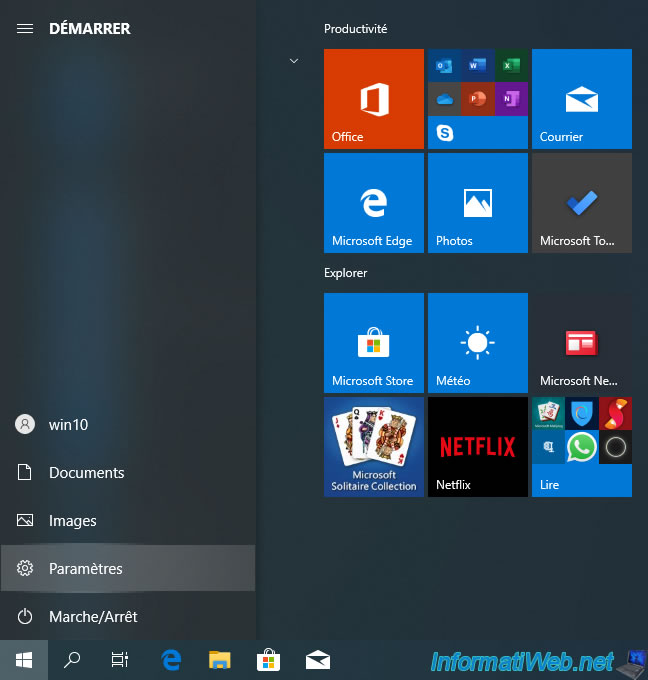
On Windows 10 and 11, you need to go to the start menu, then click on : Settings.
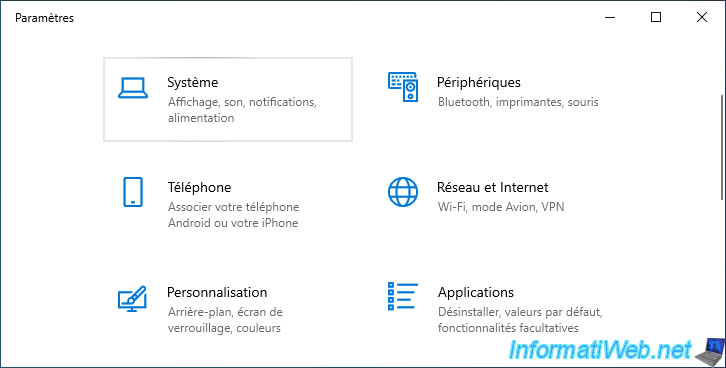
In the "Settings" window that appears, go to the "System" section.
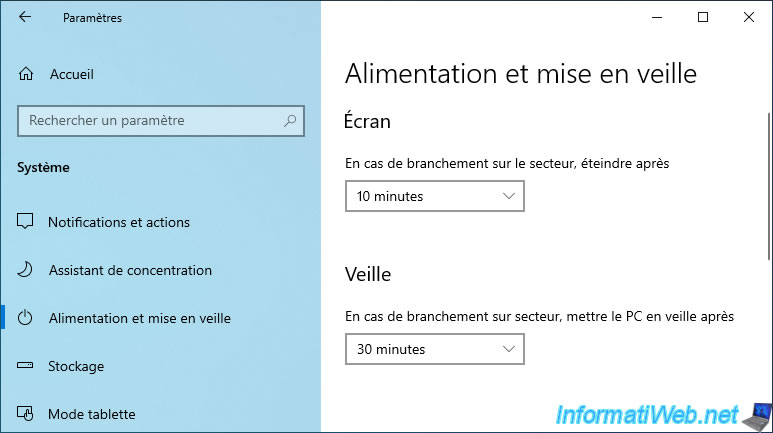
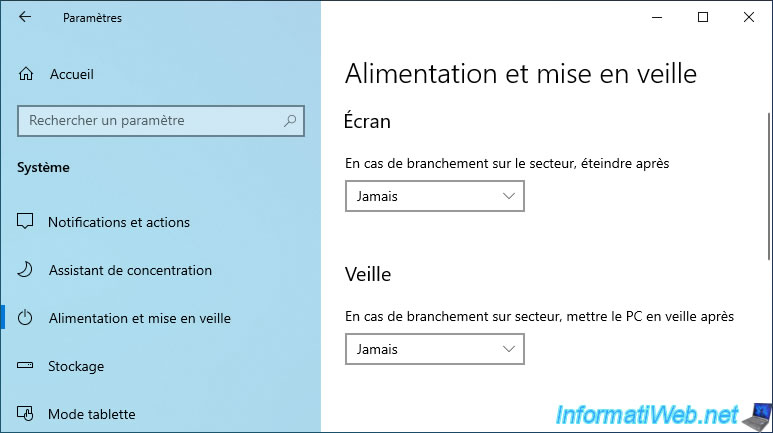
Then, on Windows 10, click on "Power & Sleep" on the left.
On Windows 11, click on "Power", then on : Screen and sleep.

And finally, on Windows 10, select "Never" for the 2 settings available :
- Screen : when plugged in, turn off after : Never
- Sleep : when plugged in, PC goes to sleep after : Never
On Windows 11, you will find the same 2 settings under slightly different names :
- When plugged in, turn off my screen after : Never
- When plugged in, put my device to sleep after : Never
If you have a laptop PC, also select "Never" for the equivalents "On battery power, ...".
Share this tutorial
To see also
-

Windows 2/12/2021
Windows - Test your RAM easily
-

Windows 6/12/2023
Windows 10 - Configure default programs
-

Windows 10/12/2021
Windows 7 / 8 / 8.1 - Disable Windows tracking systems (telemetry)
-

Virtualization 1/29/2024
Windows 8 / 8.1 / 10 / 11 - Install Hyper-V on Windows Home Edition

You must be logged in to post a comment