- Backup
- Acronis True Image
- 29 December 2025 at 14:22 UTC
-

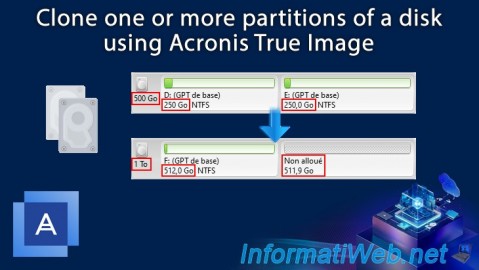
With Acronis Cyber Protect Home Office (True Image), you can copy one or more partitions from one disk to a new hard drive without having to copy the entire drive.
What's more, you can even resize the automatically copied partitions if you want.
1. Source hard drive to clone
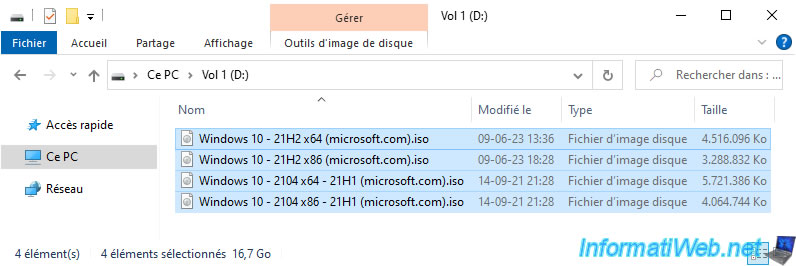
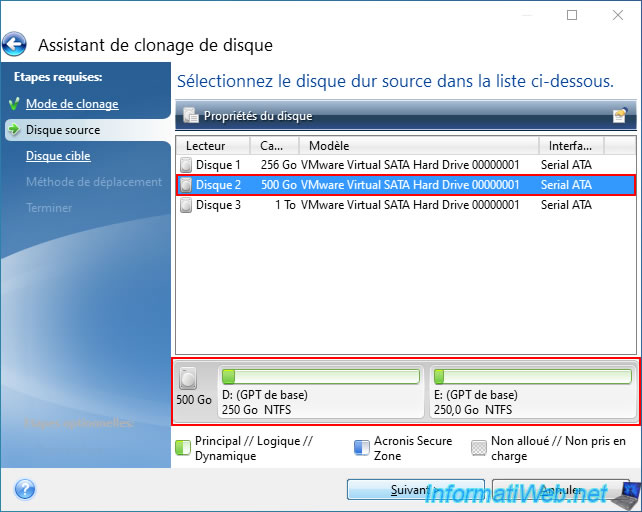
For this tutorial, we used a 500GB hard drive with 2 partitions and we will only copy the 1st partition (named "Vol 1") from it.
In the 1st partition, we stored 4 files of several gigabytes each.
In the 2nd partition, we stored 4 more files of several gigabytes each.

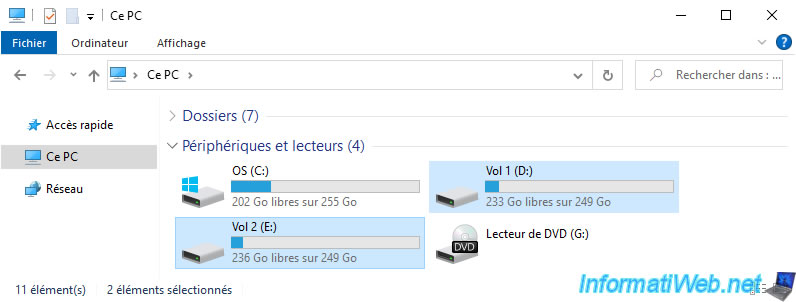
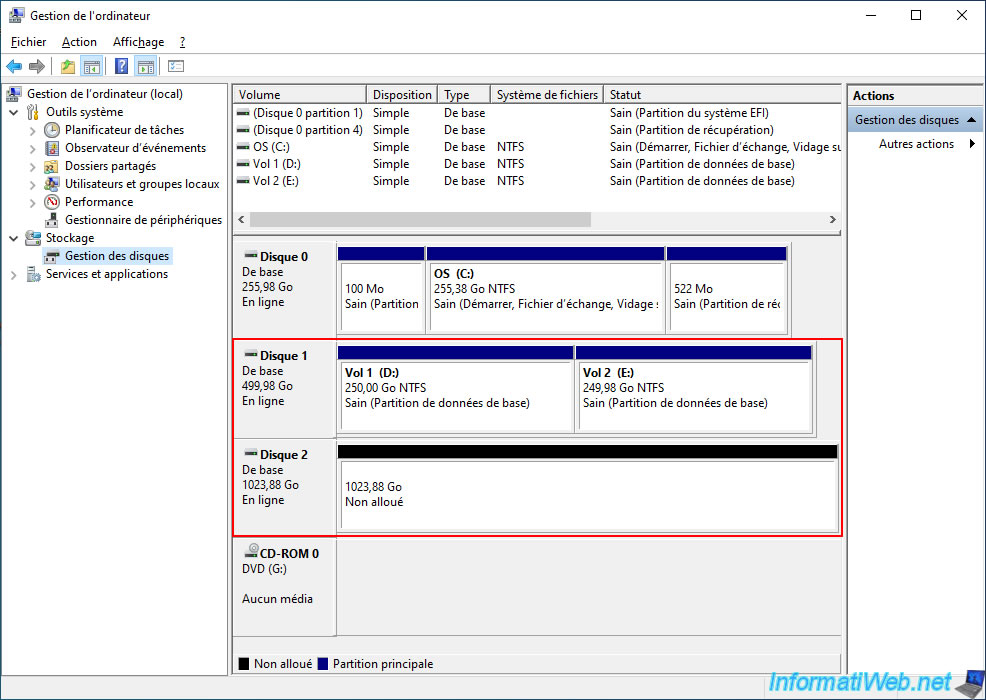
As you can see from Windows Disk Management:
- the source disk has a capacity of 500 GB and 2 partitions of 250 GB each.
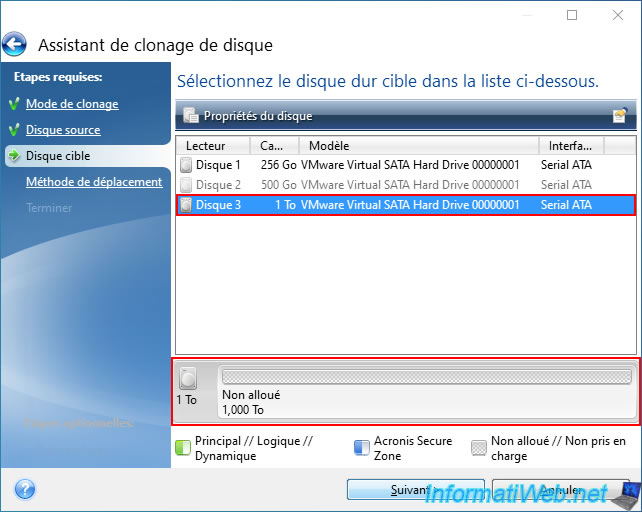
- the destination (target) disk has a capacity of 1 TB and it is empty at the moment.
Hence the unallocated space visible on it.
2. Clone only specific partitions of a hard drive
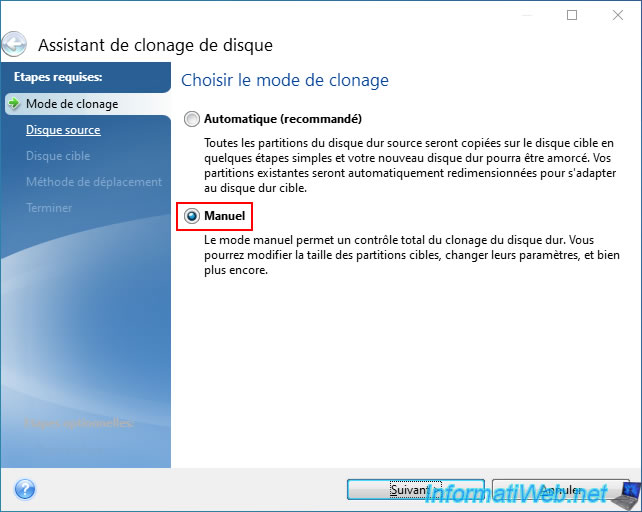
To clone only one or several partitions of a disk without copying the entire partitions of the source disk, you will need to use the "Clone Disk" tool (available in the "Tools" section of Acronis Cyber Protect Home Office (True Image)).

In the "Disk Clone Wizard" window that appears, select the "Manual" cloning mode, then click "Next".
Select your source disk (in our case: the 500 GB disk with the 2 partitions of 250 GB each), then click "Next".
Select your target disk (in our case: the 1TB disk which is empty (unallocated space) at the moment), then click "Next".
Select the "Manual" moving method (which will allow you to resize and rename the copied partitions).
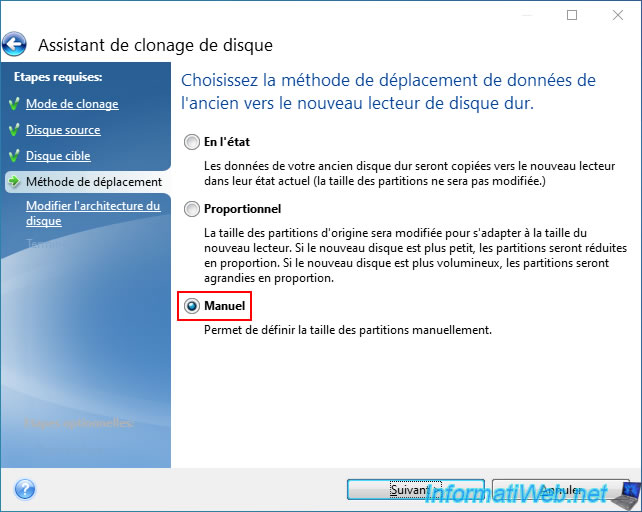
As you can see, by default, the wizard wants to clone all partitions from the source disk to the desired target disk by proportionally adapting their size for the target disk.
To exclude a partition, click on the optional "What to exclude" option (present at the bottom left).

In the "Exclude by files and folders" tab that appears, check the box of the partition to exclude.
In our case, we want to ignore the copy of the "Vol 2" partition, so we check the box of this partition "Vol 2 (E:)".
Then, click on the "Modify disk architecture" step (visible on the left) to continue the wizard.
Warning : you must check what you want to exclude.

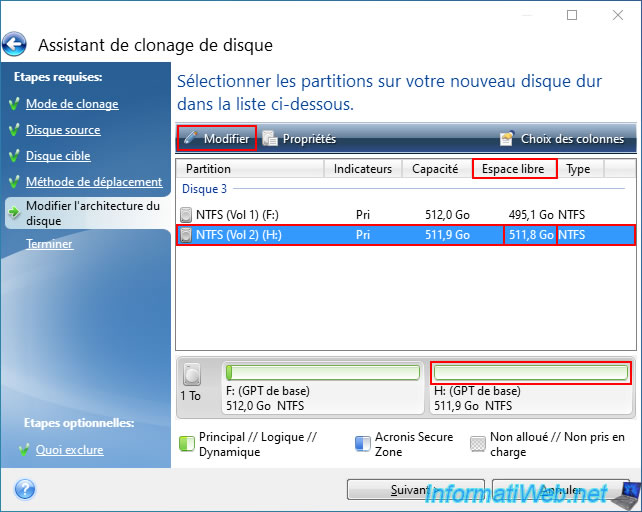
Now, you can see that the excluded partition will be completely empty.
You can see this with the light green bar that does not contain any dark green (so no data) and also by checking the free space that will be available on this partition (displayed in the list).
Select this partition that you just excluded from copying your disk partitions and click "Modify".
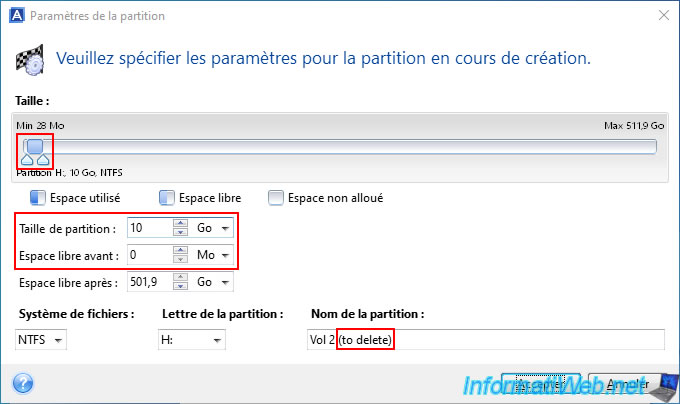
Reduce the size of this partition to 10 GB, because it will be empty (or almost, because it is very possible that some invisible system files in File Explorer are automatically created by Windows).
Rename this partition by adding for example "(to delete)" at the end of its name to find it more easily in Disk Management (where you will go a little later in this tutorial).
And above all, make sure that the blue bar is on the left.
This way, you can delete it very easily from Disk Management and recover a single unallocated space at the end of your target hard drive.
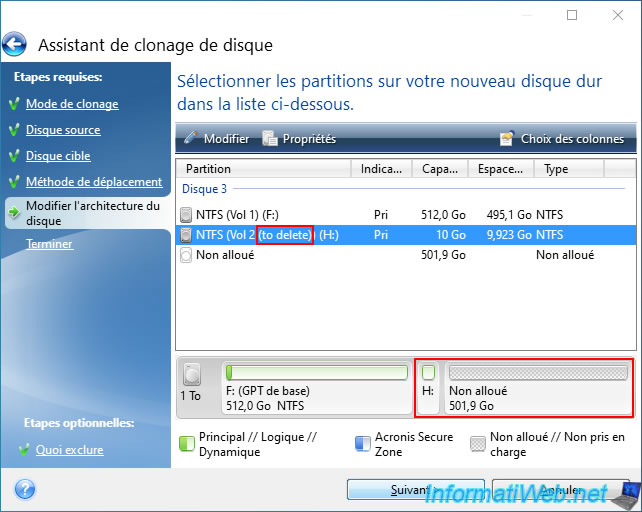
As expected, the partition "Vol 2" whose contents we excluded for copying partitions from our source disk will be named "Vol 2 (to delete)" on the target hard disk, it will be empty and its size will be only 10 GB.
Click "Next".
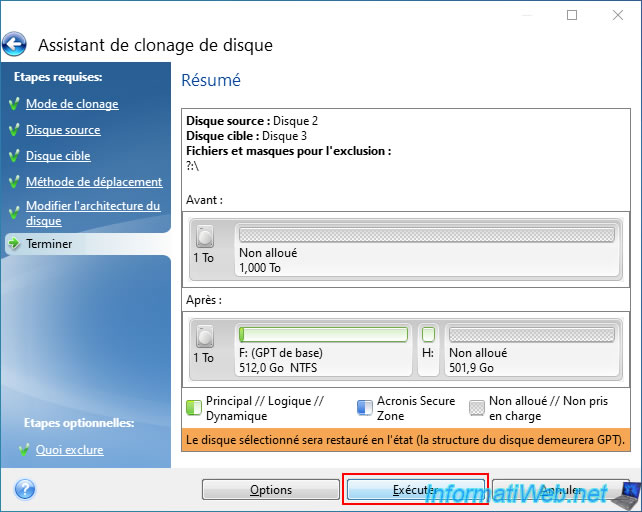
A summary of your partition copy appears.
Click "Run".
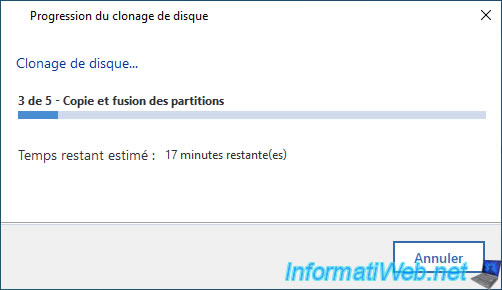
Please wait while the desired partition(s) are copied.
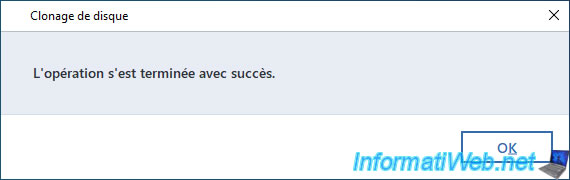
Once the copy is complete, the message "The operation has completed..." will appear.
If you go to the file explorer, you will see that Acronis Cyber Protect Home Office (True Image) has created as many partitions as the number of partitions that were present on the source disk.
On the other hand, you will notice that the partition "Vol 2 (to delete)" has a size of 10 GB and that it is almost empty.
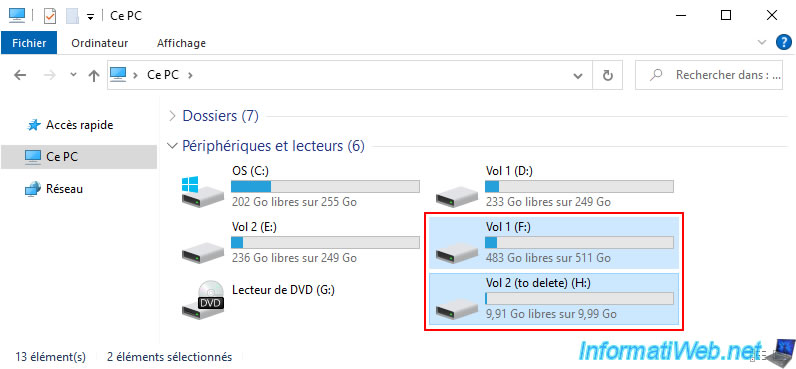
By the way, if you enter this partition (whose content you ignored in the disk cloning wizard), you will notice that Windows tells you that this partition is empty.
So, the little space used on it (barely visible with the blue bar on the image above) is simply due to hidden system data created automatically by Windows.
However, these are only useful for the partition where they are located. So, you can delete this partition without risk.

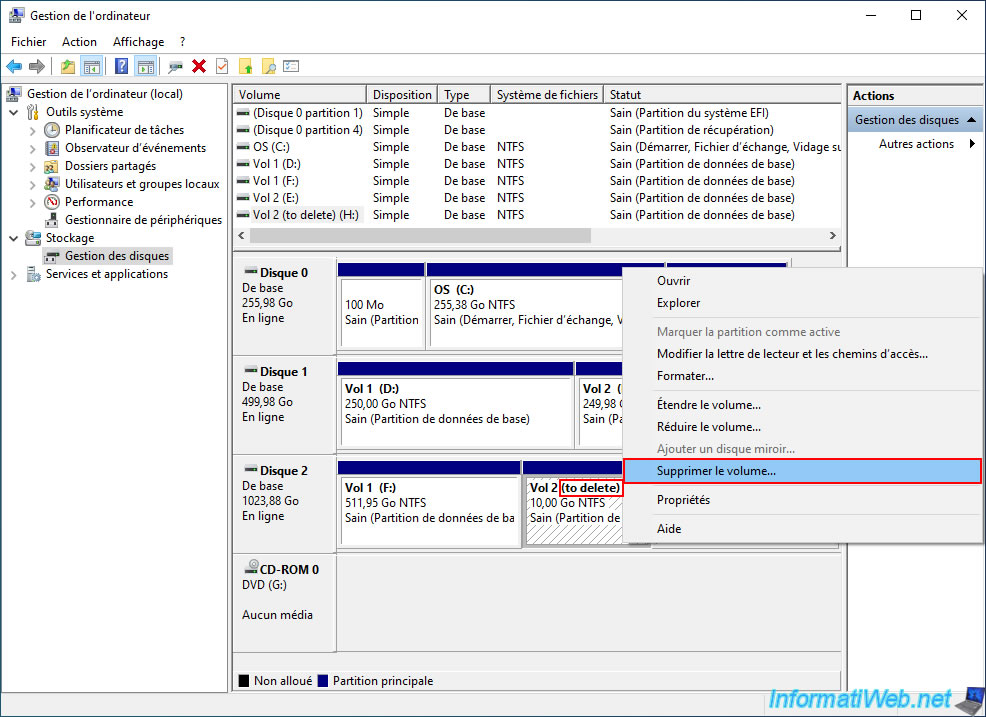
To delete this partition that you had excluded in the Acronis Disk Cloning Wizard, right-click "Manage" on "This PC" (in file explorer).
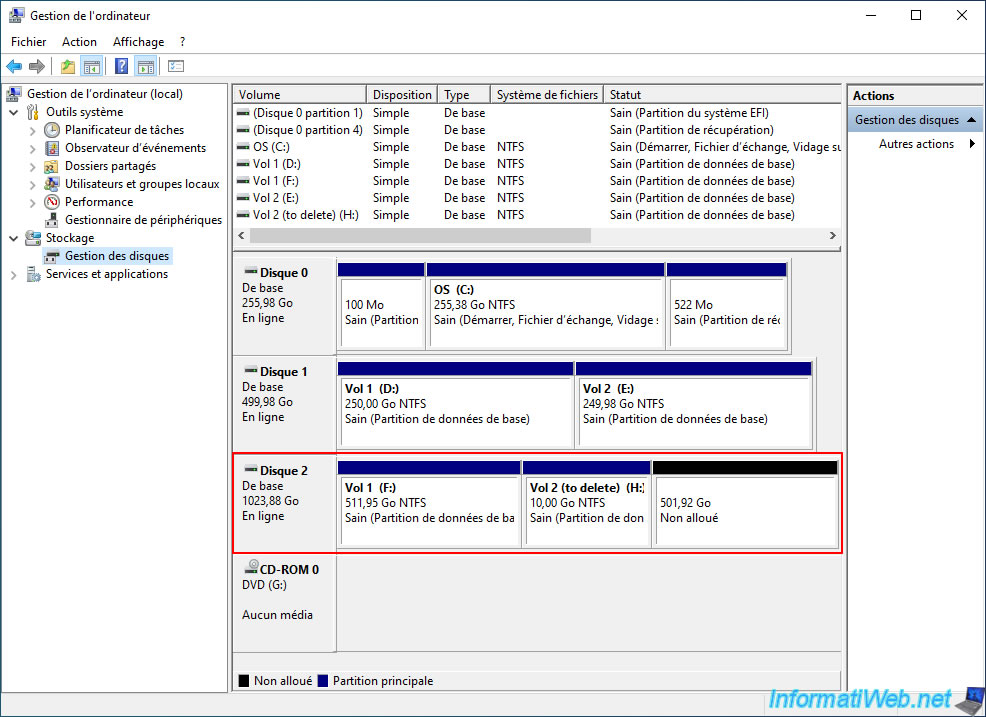
Then, in the "Computer Management" window that appears, go to Disk Management.
As you can see, the desired partition has been copied and the other one that you had excluded has a size of 10 GB (as it was modified in the Acronis wizard).
The rest of the disk contains only unallocated space.
Right click "Delete volume" on this 10GB partition that you renamed by adding "(to delete)" at the end of its name.
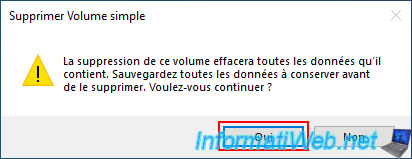
Confirm the deletion of this volume (partition) by clicking "Yes".
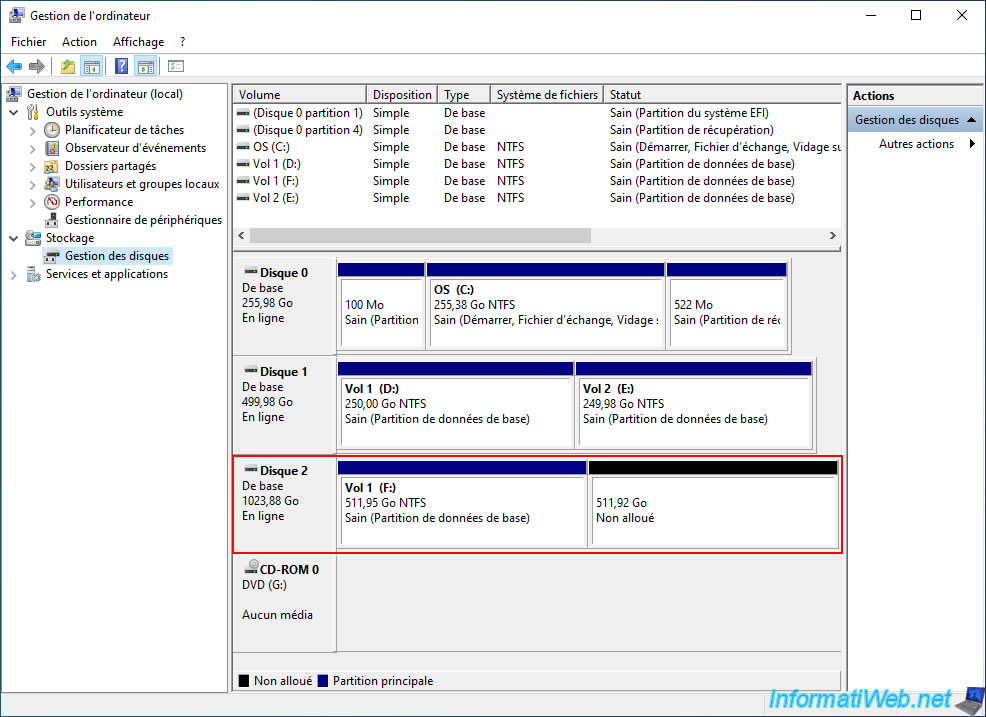
As expected, we end up with only the "Vol 1" partition on the target disk (as we wanted) and unallocated space on the rest of that target disk.
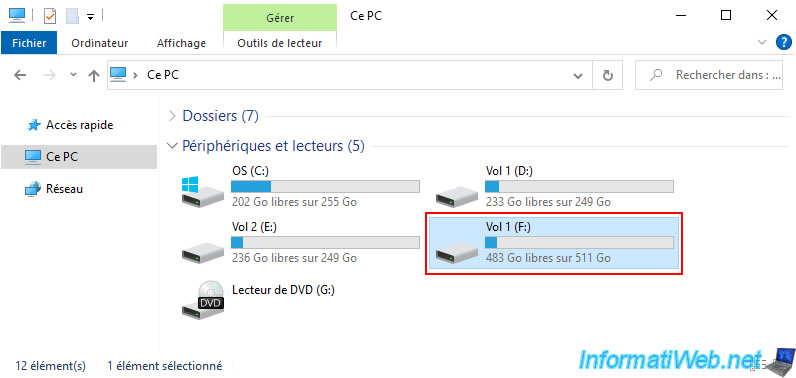
If you go back to file explorer, you will actually only find the partition whose contents you copied via Acronis.
Share this tutorial
To see also
-
Backup 6/9/2025
Acronis True Image - Backing up your PC to a FTP server
-
Backup 3/30/2026
Acronis True Image - Rescue Media - Check network configuration
-
Backup 2/9/2026
Acronis True Image - Rescue Media - Create media (Win PE version) on Win 8
-
Backup 5/18/2026
Acronis True Image - Universal Restore Media - Create media (Win PE version based on Win ADK)
You must be logged in to post a comment