- Backup
- Acronis True Image
- 26 January 2026 at 14:22 UTC
-

With the Acronis Media Builder tool provided with Acronis Cyber Protect Home Office (True Image), you can create Acronis rescue media in a customized way.
This allows you to choose the architecture (x86 / x64) that will be used by this Acronis rescue media, but also to add drivers (by providing the sys, inf, ... files of the desired device).
This is very useful for adding support for a network card or RAID controller that would not be natively supported by this Acronis rescue media, for example.
Tutorial made on Windows 10 v2104 and also tested on Windows 11 v21H2.
Warning : this feature of Acronis Cyber Protect Home Office (True Image) is not available on Windows 8 and is therefore available on Windows 7, 8.1, 10 and 11.
Also, note that this does not seem to work on Windows 8.1 (whether Windows is fully up to date or not).
If you are on Windows 8.1, then you will need to use the 2nd option (which involves installing Windows ADK).
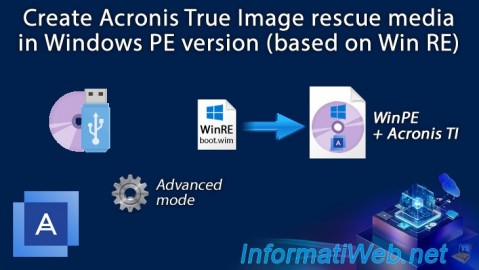
Important : when you create an Acronis rescue media based on WinRE (Windows Recovery Environment), it can only be used on the computer where it was created.
On the other hand, the advantage is that it does not require installing Windows AIK (on Windows 7) or Windows ADK and Windows PE (from Windows 8).
Source : Acronis Media Builder - Acronis Cyber Protect Home Office - User Guide.
Warning : creating Windows PE-based Acronis rescue media with a trial version of Acronis Cyber Protect Home Office (True Image) will not allow you to back up your computer from it.
This option requires an active Acronis Cyber Protect Home Office (True Image) license to be available.
- Create custom Acronis rescue media based on Windows PE (by adding driver)
- Boot to your custom Acronis rescue media
1. Create custom Acronis rescue media based on Windows PE (by adding driver)
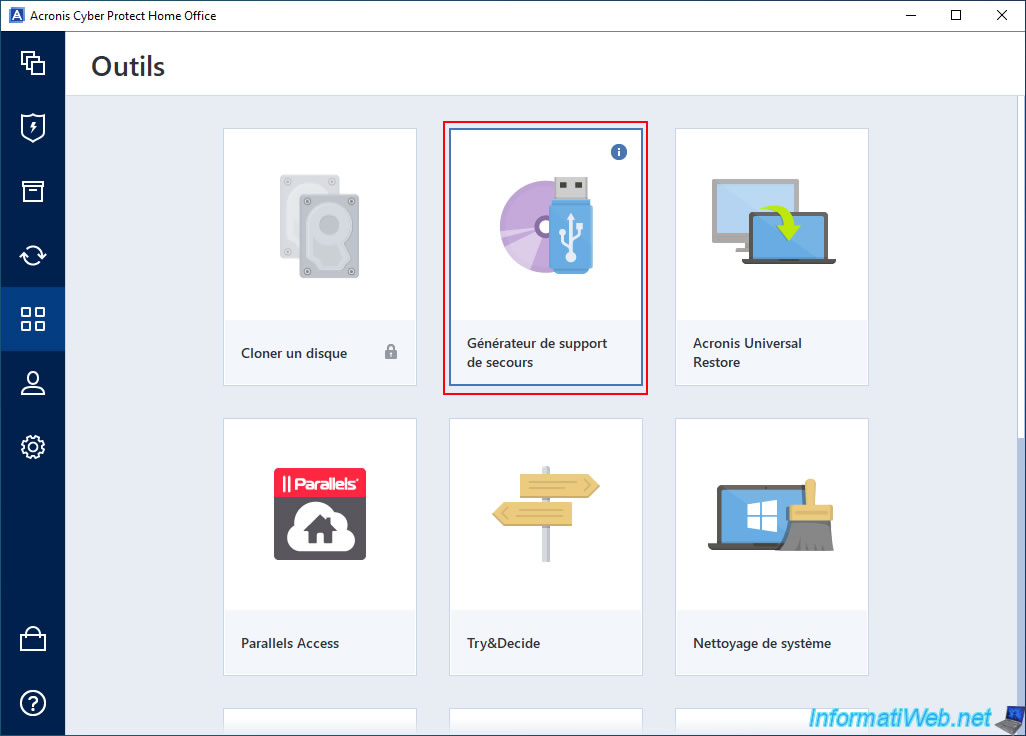
To create your custom Acronis rescue media, go to the "Tools" section and click "Rescue Media Generator".
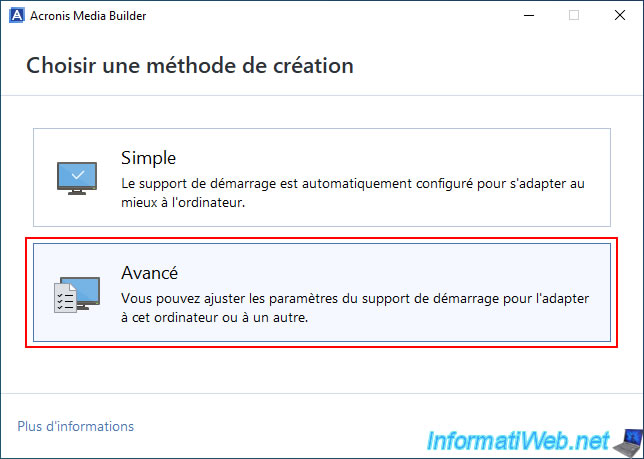
In the "Acronis Media Builder" tool that appears, choose the "Advanced" creation method.
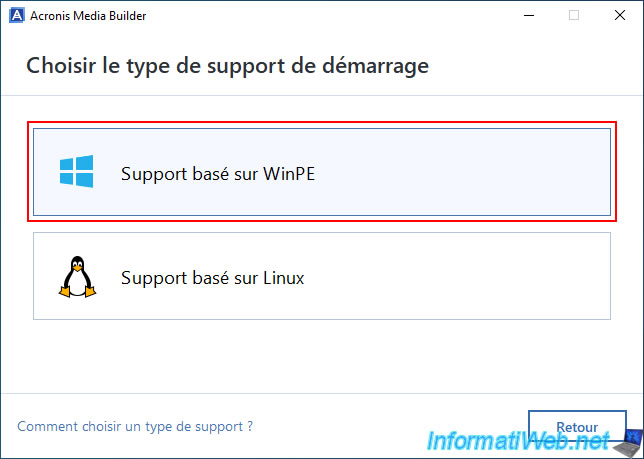
As you can see, you have the choice between "WinPE" and "Linux".
Choose the boot type "WinPE-based media", so that the rescue media is based on a Windows PE (WinPE) environment.
Next, select the desired architecture:
- 32-bit (x86): compatible with PCs with a processor (CPU) using 32-bit (x86) or 64-bit (x64) architecture.
So, very good compatibility, even with older PCs. - 64-bit (x64): compatible only with PCs with a 64-bit (x64) processor (CPU).
So, compatible only with recent computers (although x64 architecture has become more and more common in recent years, and Windows 11 is only available in 64-bit).
But, Windows can use more RAM (more than 4 GB of RAM) with a 64-bit (x64) architecture.
Which is not the case with 32-bit (x86) architecture.
In our case, we have therefore used the 64-bit architecture.
This architecture only concerns the architecture of the Windows PE environment that will be used by your Acronis rescue media.
You could therefore also restore a PC with a Windows x64 (64-bit) with a rescue media using the x86 architecture (32-bit).

To avoid having to install Microsoft tools (either Windows ADK or Windows AIK depending on the version of Windows you want), choose the "Windows Recovery Environment" option.
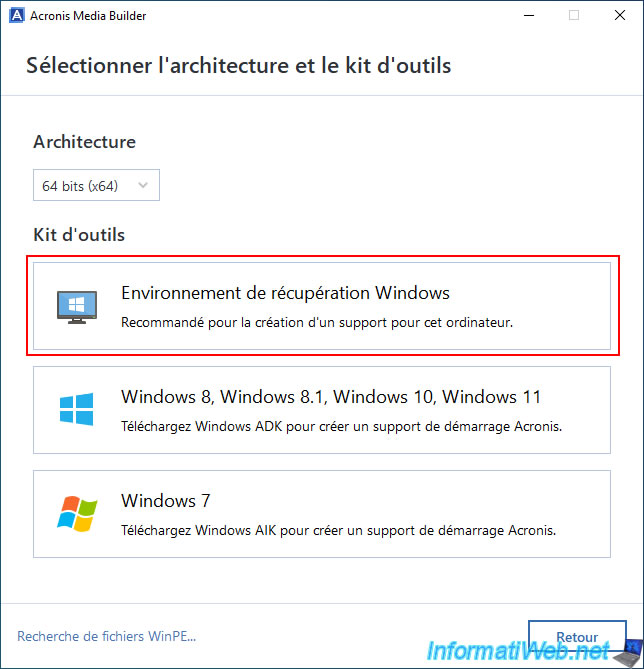
With the "Advanced" mode of Acronis Media Builder, you will be able to add drivers to the Acronis rescue media you want to create.
This can be very useful to add the driver of a network card or RAID controller used on the PC you want to backup or restore via this Acronis Rescue Media.
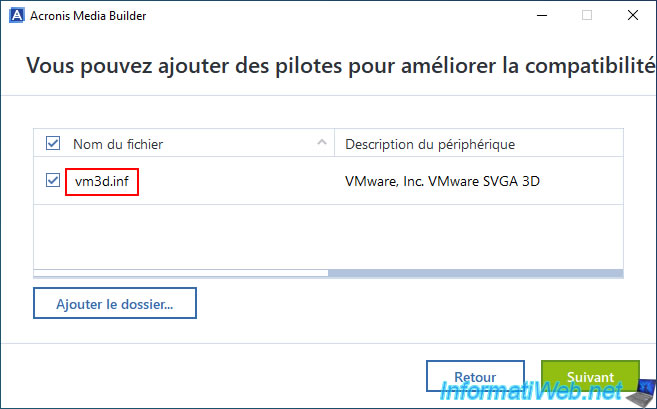
Note that you will need to download the desired drivers from the website of your network card or RAID controller manufacturer (for example), and then click the "Add folder" button to select the driver folder where the .sys file (the driver for the desired device), the .inf file (the configuration file that allows Windows to install this driver) and other system files are located in the same folder.
For more information about these drivers, refer to our tutorial: Install the drivers on Windows from the device manager.
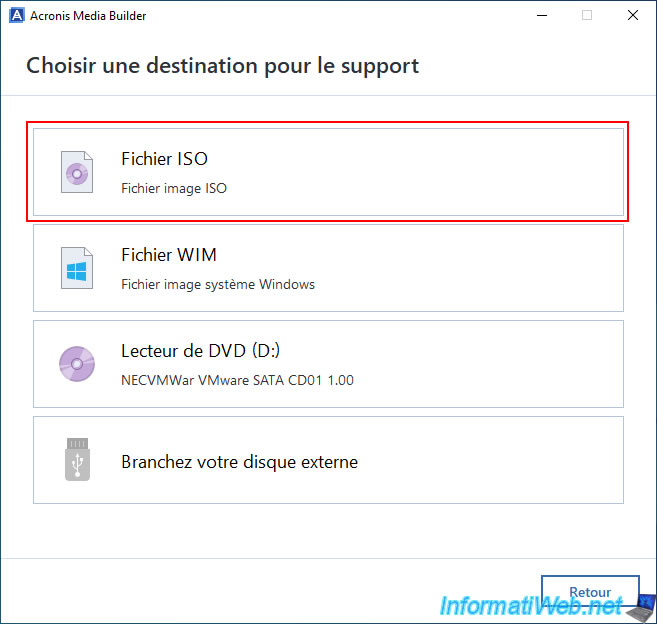
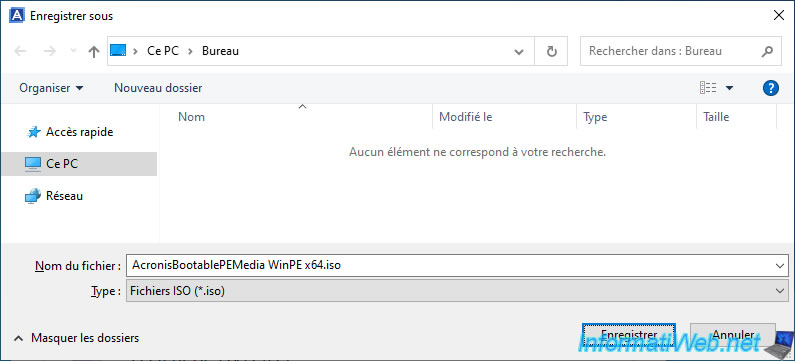
Select a destination for this media.
In our case: ISO file.
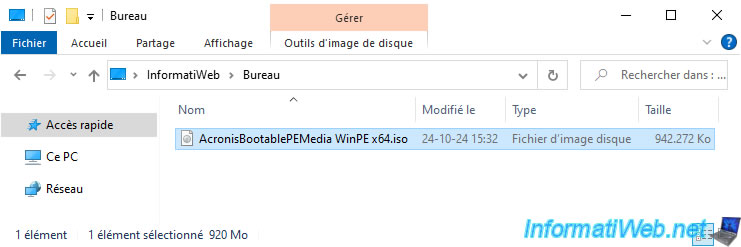
By default, this tool will name the destination file: AcronisBootablePEMedia.iso.
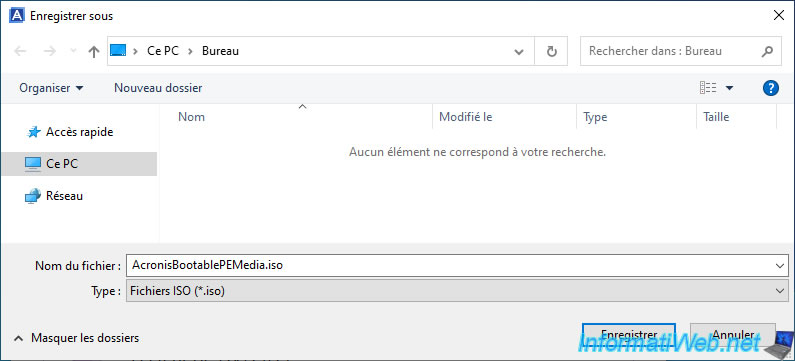
In our case, we named it: AcronisBootablePEMedia WinPE x64.iso.
Then, click "Save".
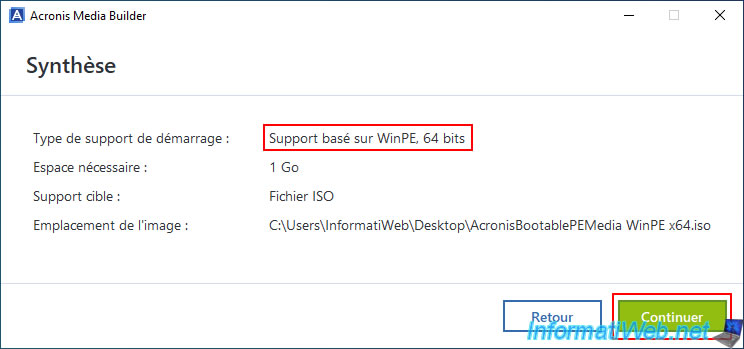
As expected, the "Acronis Media Builder" tool tells you that it will create a bootable media of type: WinPE 64-bit.
Click "Continue".
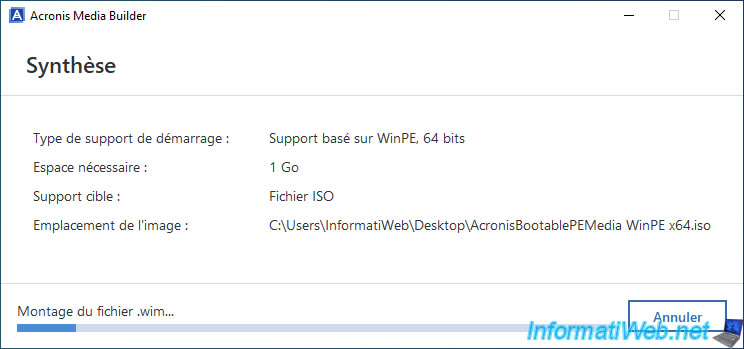
The "Acronis Media Builder" tool mounts the WinPE .wim file (to be able to configure it in the background).
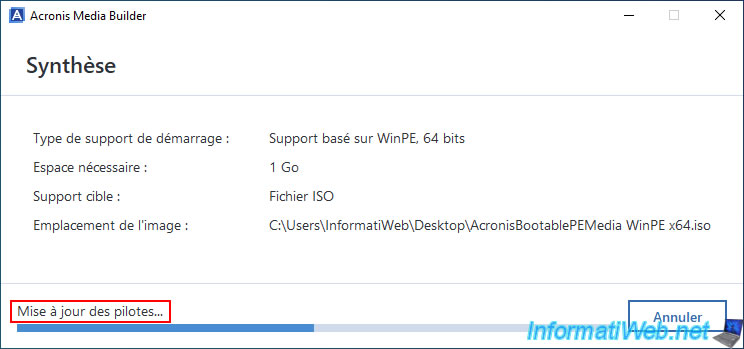
It updates Windows PE drivers by installing the drivers you provided (via .sys, .inf, ... files).
Once the Acronis bootable media creation is complete, click "Close".
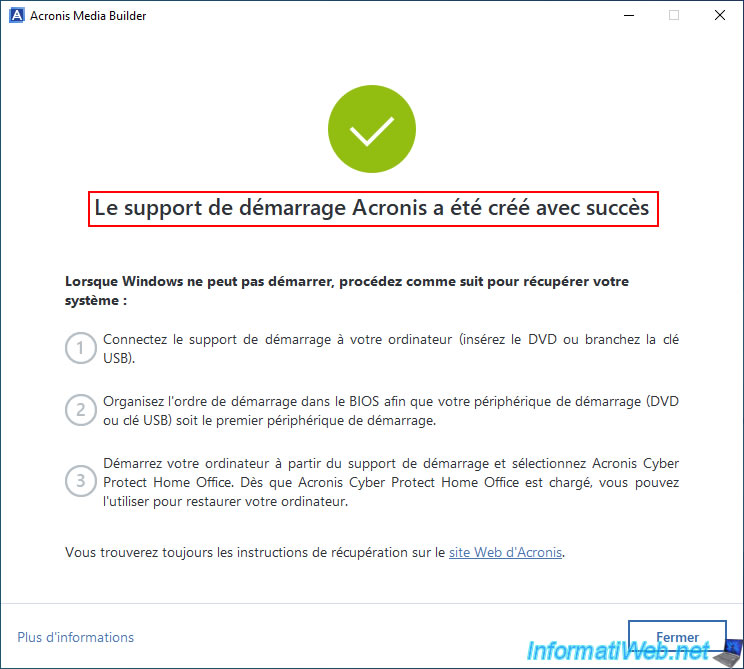
As expected, your ISO file has been created.
All you have to do now is burn it to a CD with your favorite burning software.
To do this, if necessary, refer to our tutorial "Burn a CD/DVD" to burn this ISO image to a CD.
2. Boot to your custom Acronis rescue media
To use your custom Acronis rescue media, configure your motherboard BIOS/UEFI firmware to boot from your CD/DVD drive.
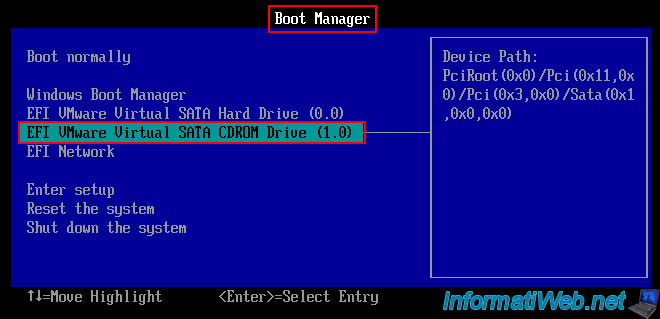
If this message appears during startup, press Enter to boot to your Acronis rescue media.

As expected, the Windows logo appears at startup since your Acronis rescue media is based on a Windows PE environment.
![]()
A command prompt (where you clearly see the keyword "windows") appears.
Click on "Restore: My Disks".
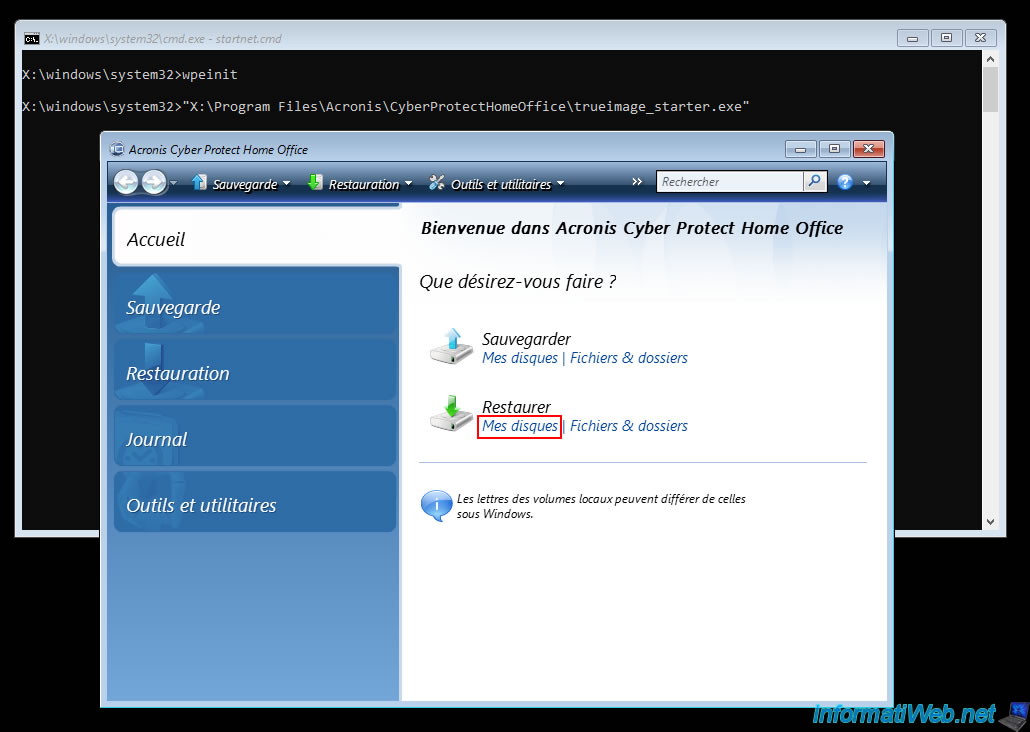
As you can see, the Restore Wizard displays common paths on Windows.
Such as "D:\INFORMATIWEB-PC.tibx".
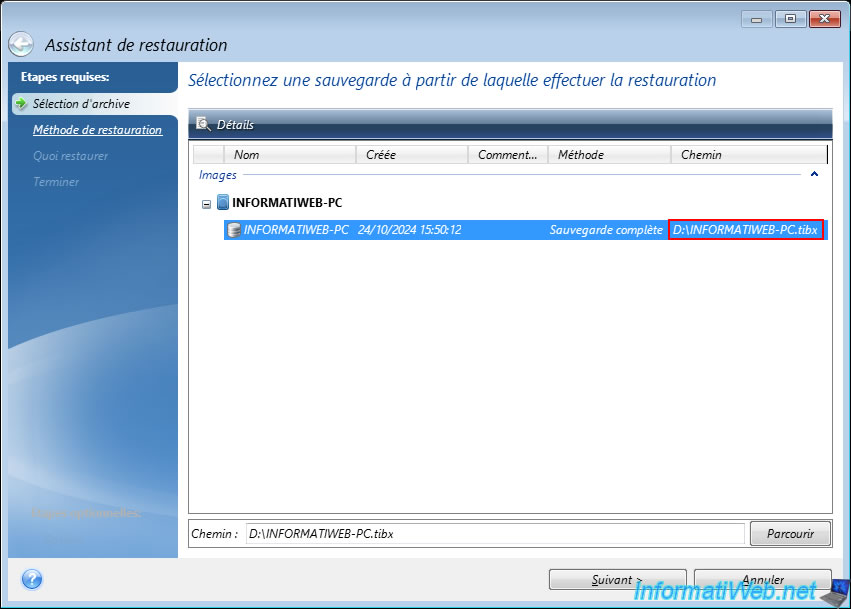
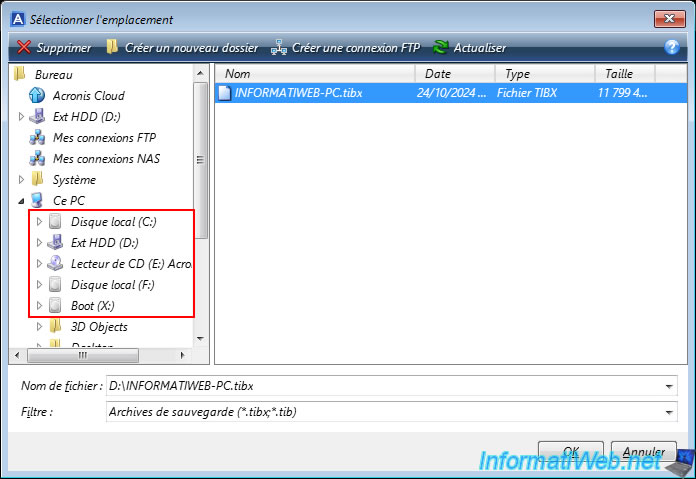
If you click "Browse" you will be able to see the partitions (which is Windows specific) appear on the left of the window.
Share this tutorial
To see also
-
Backup 10/27/2025
Acronis True Image - Archive your files locally (encrypted archive)
-
Backup 8/11/2025
Acronis True Image - Create Acronis Survival Kit media
-
Backup 2/2/2026
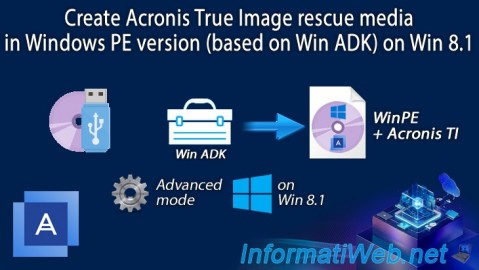
Acronis True Image - Rescue Media - Create media (Win PE version) on Win 8.1
-
Backup 5/18/2026
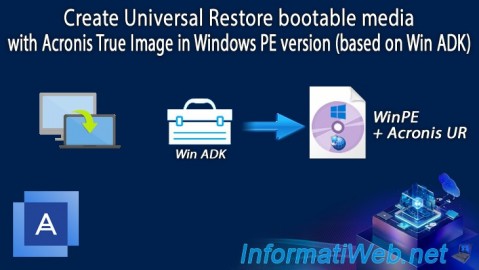
Acronis True Image - Universal Restore Media - Create media (Win PE version based on Win ADK)
You must be logged in to post a comment