- Backup
- Acronis True Image
- 09 June 2025 at 08:27 UTC
-

- 1/3
Typically, you will use Acronis Cyber Protect Home Office (True Image) to back up your computer to an external hard drive and/or to the Cloud.
However, you can also back up and restore your computer via Acronis Cyber Protect Home Office (True Image) by storing the backup on an FTP server.
- Configure FTP server
- Backup your entire PC to an FTP server
- Restore your entire PC from the backup stored on an FTP server
- Quick backup after restoring your Acronis backup via FTP
- View the backup stored on your FTP server from your PC
1. Configure FTP server
For this tutorial, we used the FTP server "FileZilla Server" which is free and open-source.
However, you could also use any other FTP server since they all use the same protocol (FTP).
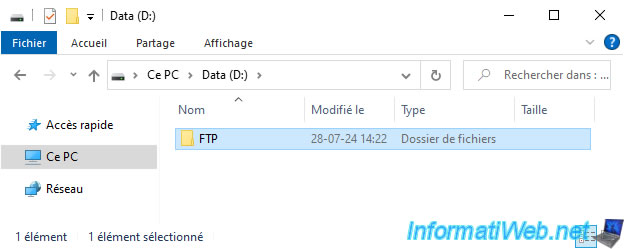
On this FTP server, we created a folder "FTP" on our "Data (D:)" partition.
This is the folder that will correspond to the root when we connect to our FTP server via the network.
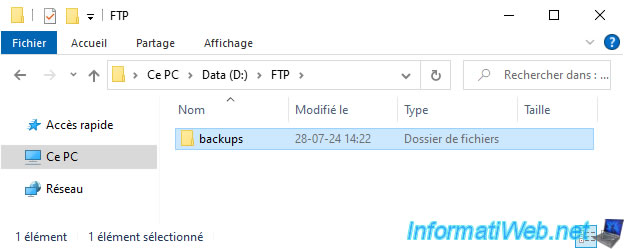
In this "FTP" folder, we have created a subfolder named "backups" to show you how to store your Acronis backup in a specific subfolder of your FTP server.
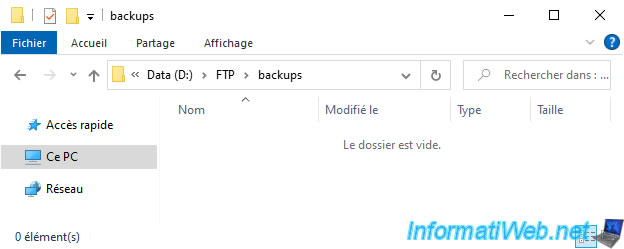
At the moment, the "D:\FTP\backups" folder on our FTP server is empty.
For this tutorial, we used "FileZilla Server 1.8.2".
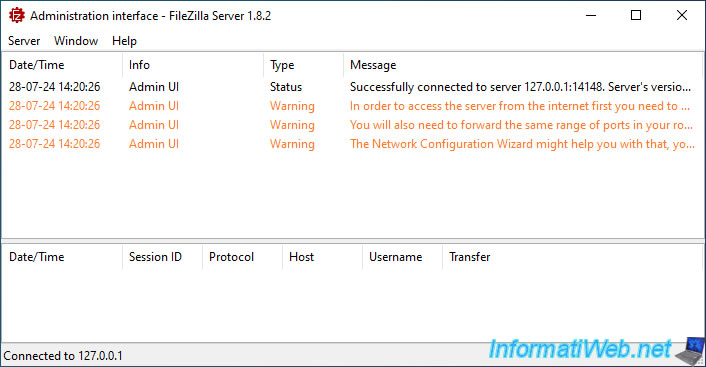
Note: when you first launch FileZilla Server, you will need to click "Server -> Connect" to connect to the FileZilla Server administration console.
The password is the one you typed during the FileZilla Server installation.
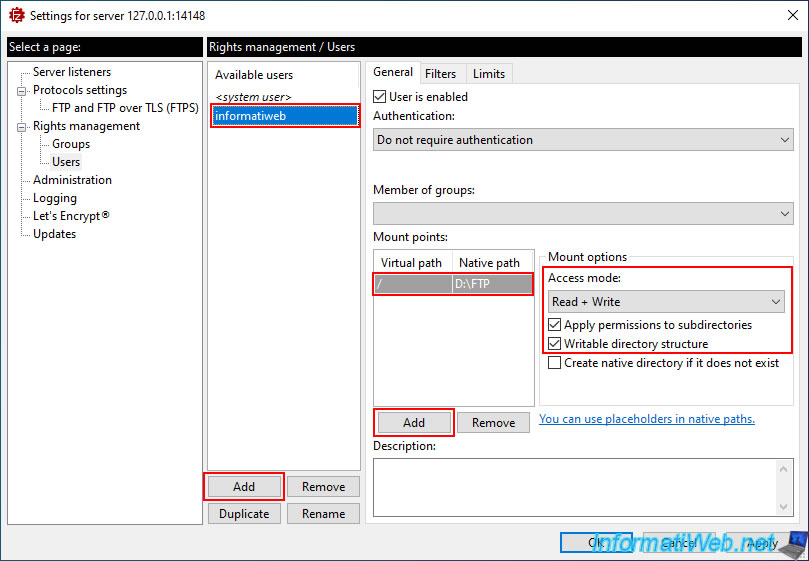
Go to the "Server -> Configure" menu to open the "Settings for server 127.0.0.1:14148" window.
In the "Rights management -> Users" section, click "Add" to add a new user and add a mount point.
In our case, the root "/" of the FTP server will point to the "D:\FTP" folder of our FTP server.
Make sure that the folder is readable and writable and that the permissions also apply to subfolders (if applicable).
Here is our FileZilla Server configuration for this tutorial.
Once this configuration is done, click OK.
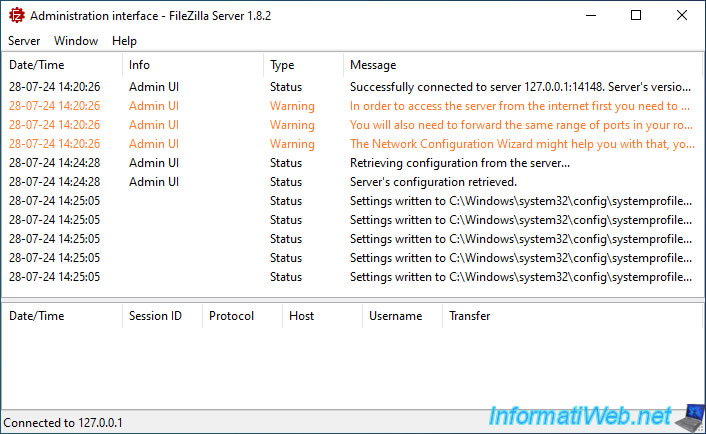
FileZilla Server configuration has been successfully modified.
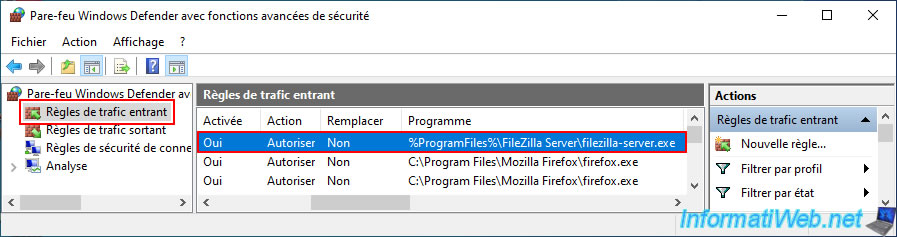
Make sure that FileZilla Server is allowed in your firewall settings.
In case of Windows firewall, just allow the program "%ProgramFiles%\FileZilla Server\filezilla-server.exe".
2. Backup your entire PC to an FTP server
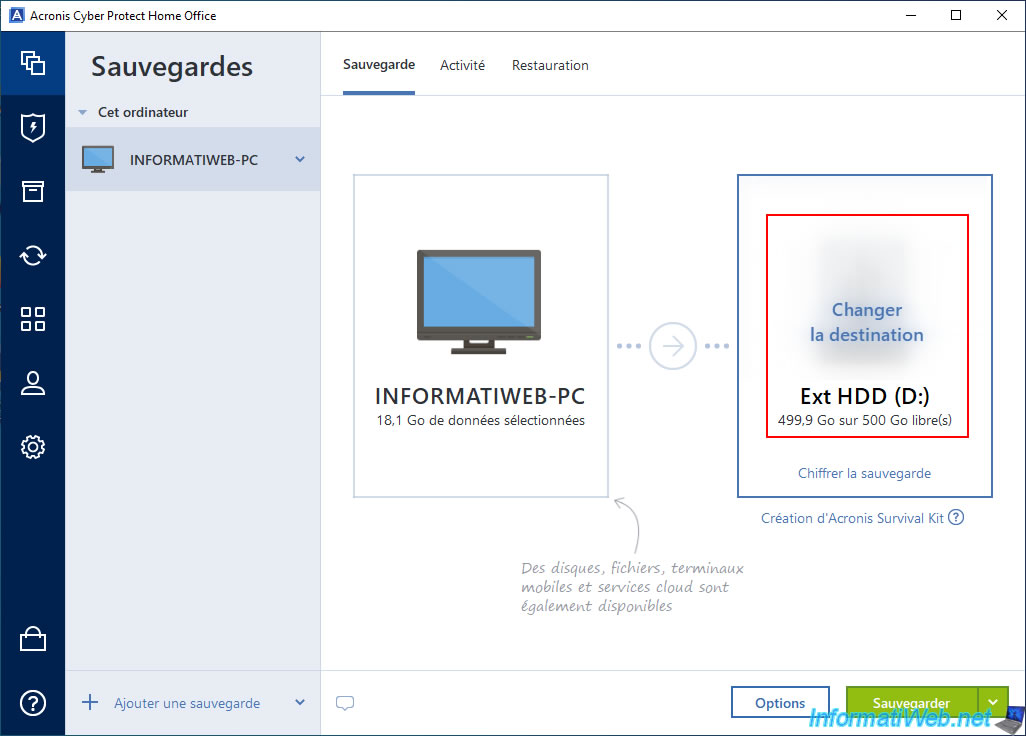
In Acronis Cyber Protect Home Office (True Image), go to the "Backup" section and click on the image on the right to change the destination of your backup.
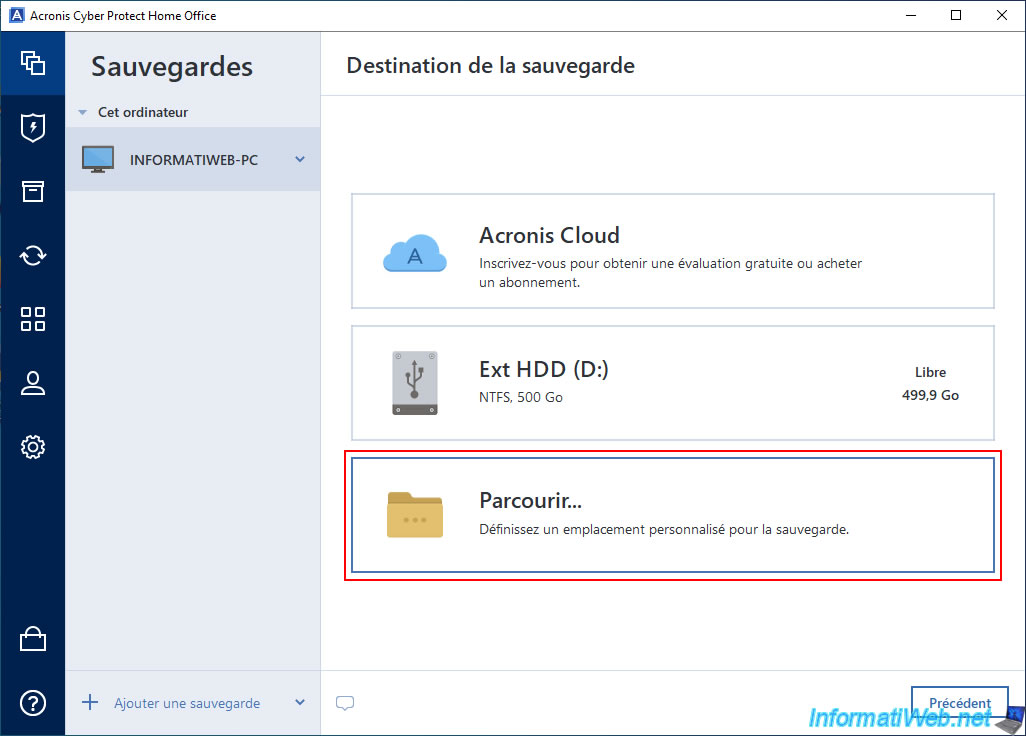
Choose the "Browse" option.
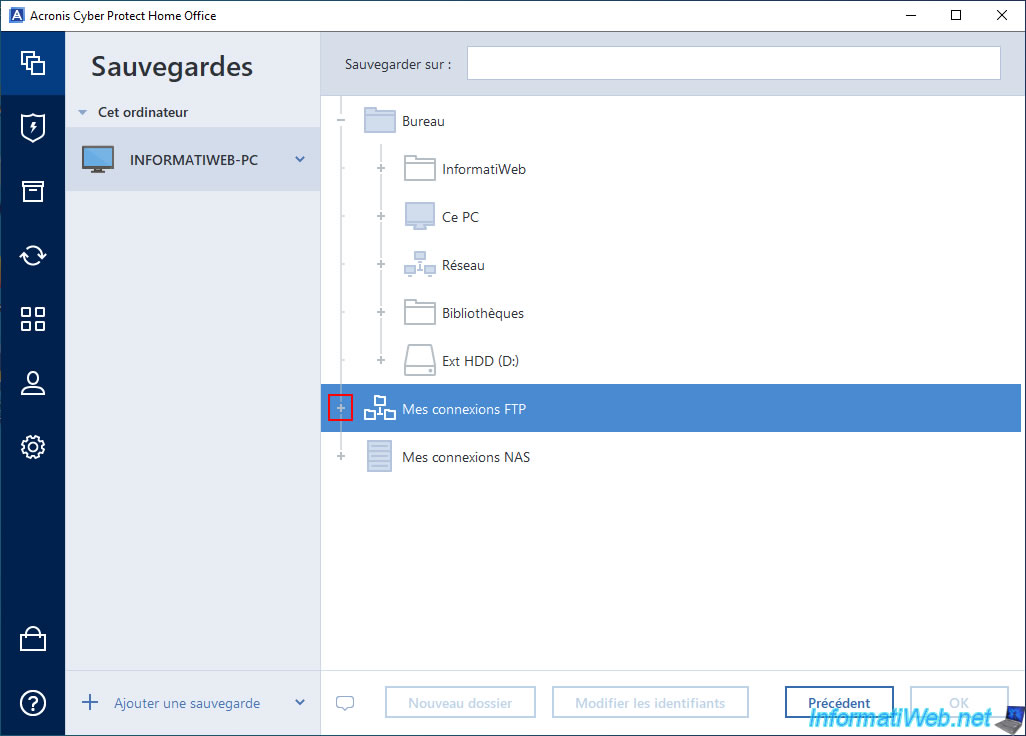
Click on the "+" icon (to the left of "My FTP Connections").
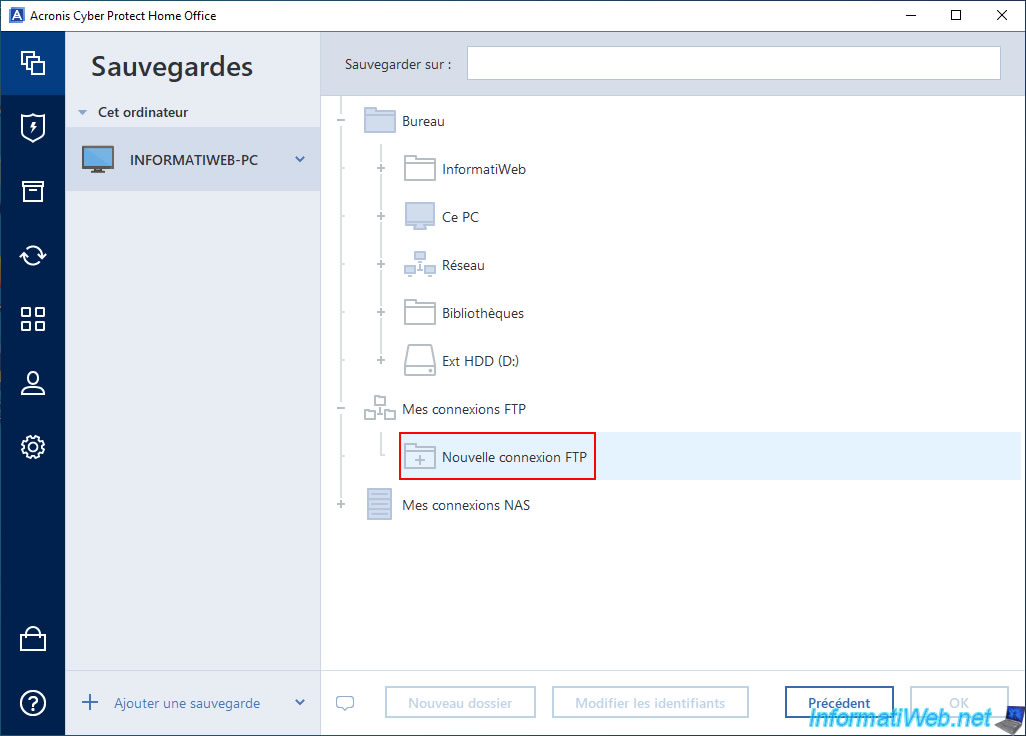
Then, click on "New FTP Connection".
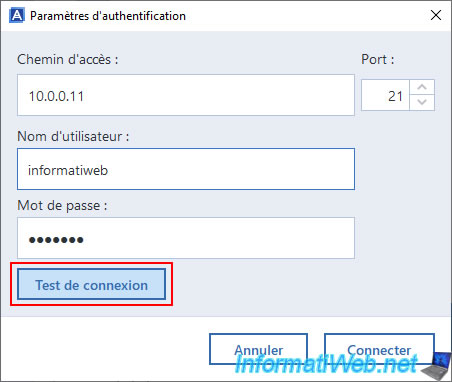
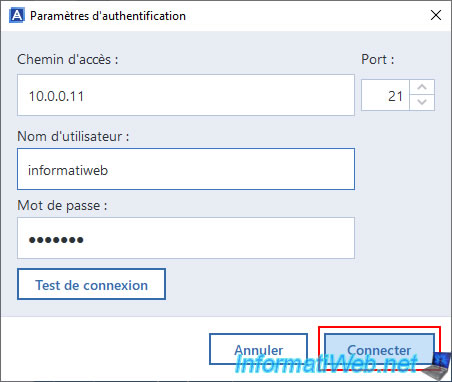
In the small "Authentication Settings" window that appears, specify:
- Path: the IP address of your FTP server.
- Port: 21 (default port for the "FTP" protocol).
- Username: the name of the user previously created on your FTP server.
- Password: the password for this FTP account.
Then, click the "Test Connection" button to check if these authentication settings are correct.
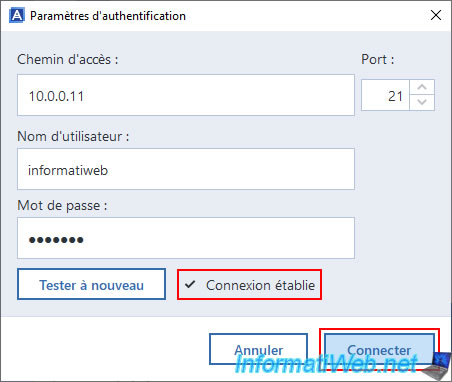
Note: if you want your backups in a subfolder on your FTP server, you can specify the desired folder a little later.
If the FTP authentication settings you specified are correct, you will see the message "Connection established".
In this case, click the "Connect" button.
In the "My FTP Connections" node, a new option with the IP address of your FTP server will appear.
Click on the "+" icon located to the left of this option to expand this node.
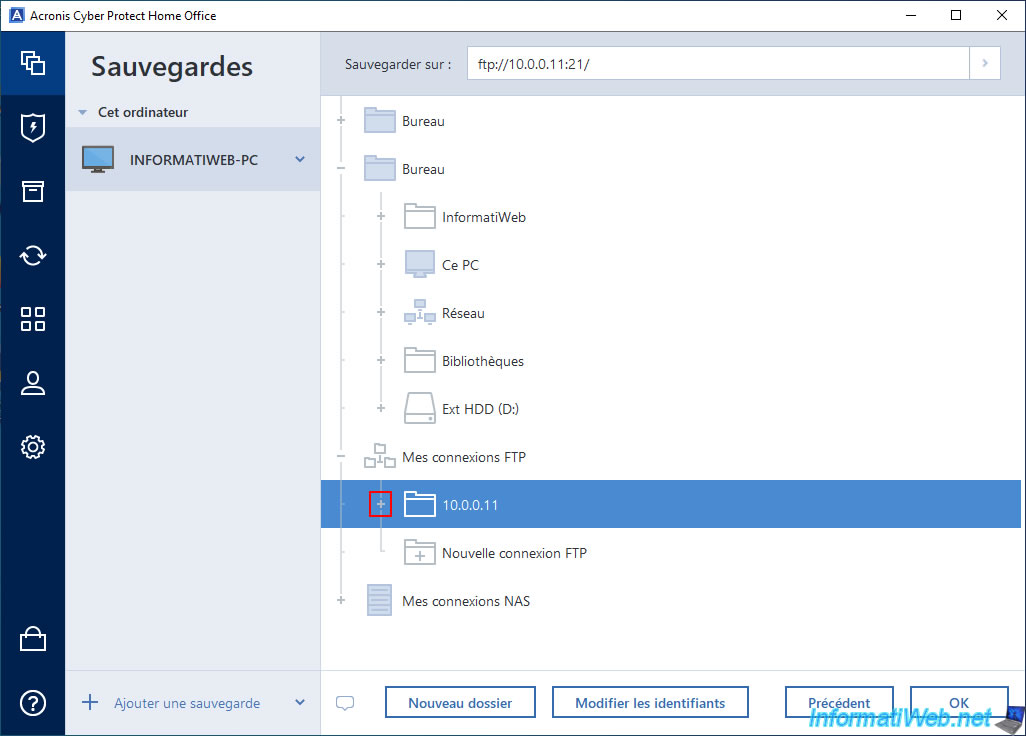
As you can see, Acronis Cyber Protect Home Office (True Image) detects our "backups" folder present at the root of our FTP server (for the FTP account used).
Select the desired folder of your FTP server, then click OK.
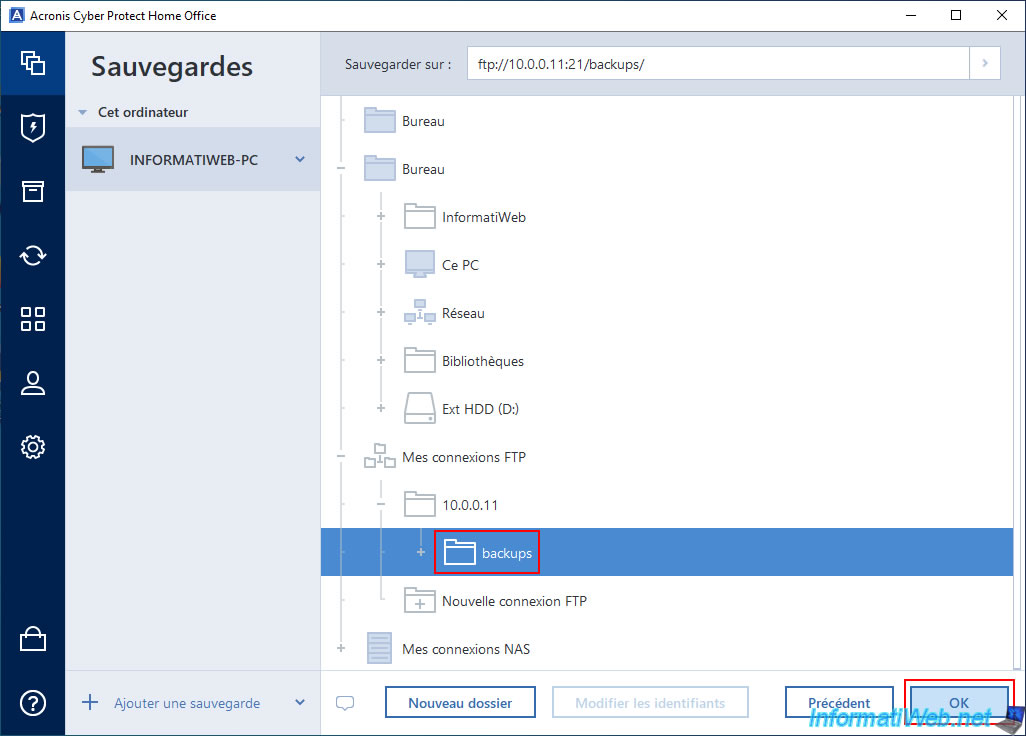
The "Authentication Settings" window will reappear and you just have to click "Connect".
Note: if this window reappears a 2nd time, click "Connect" again.
For some unknown reason, this window appeared 2 times in a row in our case, while the settings were correct and the backup then worked without any problem.
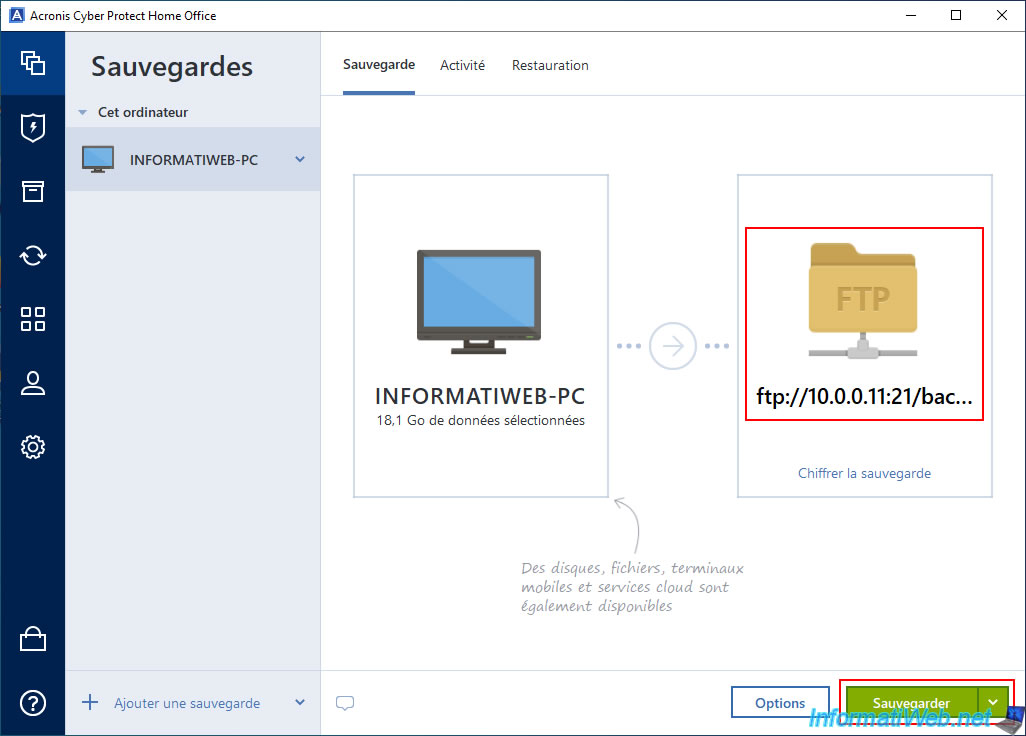
As you can see, the destination of our backup is now "ftp://10.0.0.21/backups" in our case.
Click on the "Backup" button to start the backup of your computer to your FTP server.
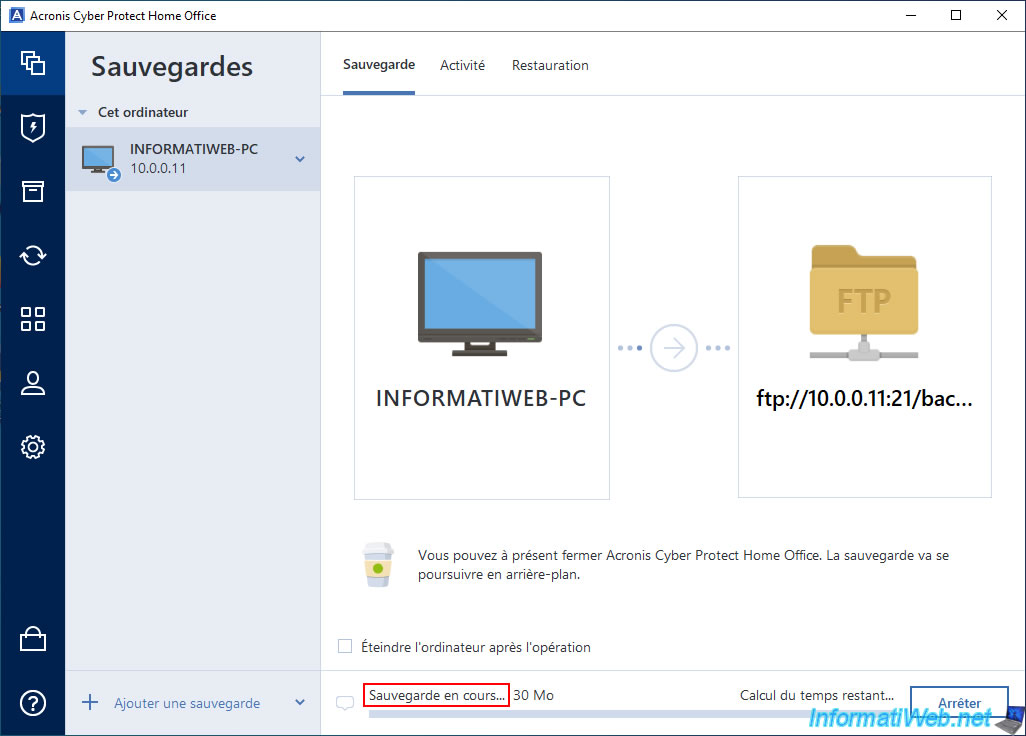
To begin with, the message "Backup in progress" appears.
Acronis Cyber Protect Home Office (True Image) will certainly make sure that the file it wants to store your backup under on your FTP server does not exist.
Hence the "MLST" (gets information about the specified file) and "DELE" (delete the specified file, if it exists) commands.
Note: you can therefore ignore the fact that the "DELE" command returns an error. Because it simply means that Acronis has tried to delete a file that does not exist just to make sure it does not exist before creating your backup file.
Source : List of FTP commands - Wikipedia.
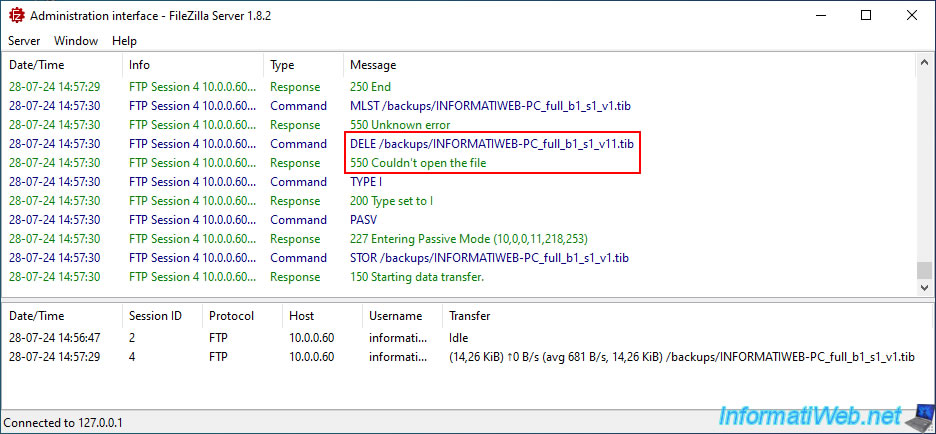
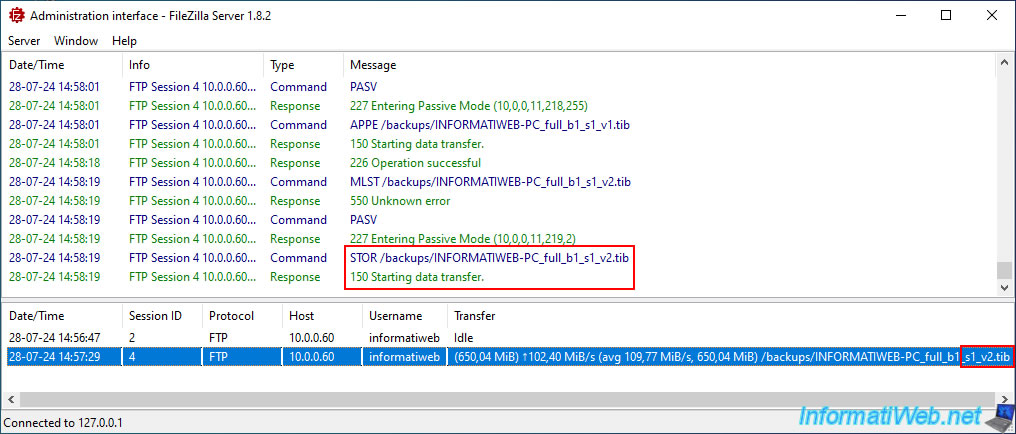
Then Acronis will start filling the file created on your FTP server (with the FTP command "APPE").
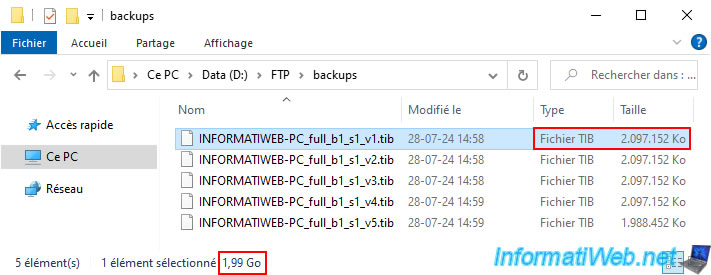
As you can see, at the moment the name of the file created on your FTP server ends with "s1_v1.tib".
That means: 1st version of this backup (s1) and 1st file (v1) of this backup version.
![]()
In Acronis Cyber Protect Home Office (True Image), the backup of your computer to your FTP server continues.
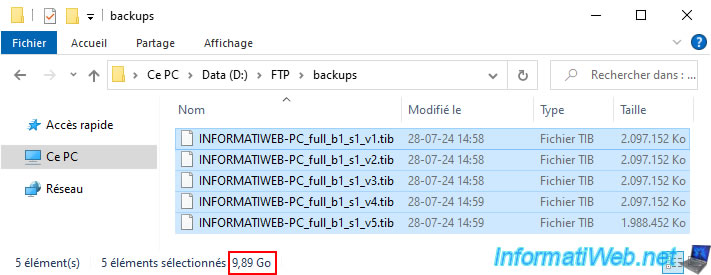
As you can see, we are currently at 4.55 GB backed up.
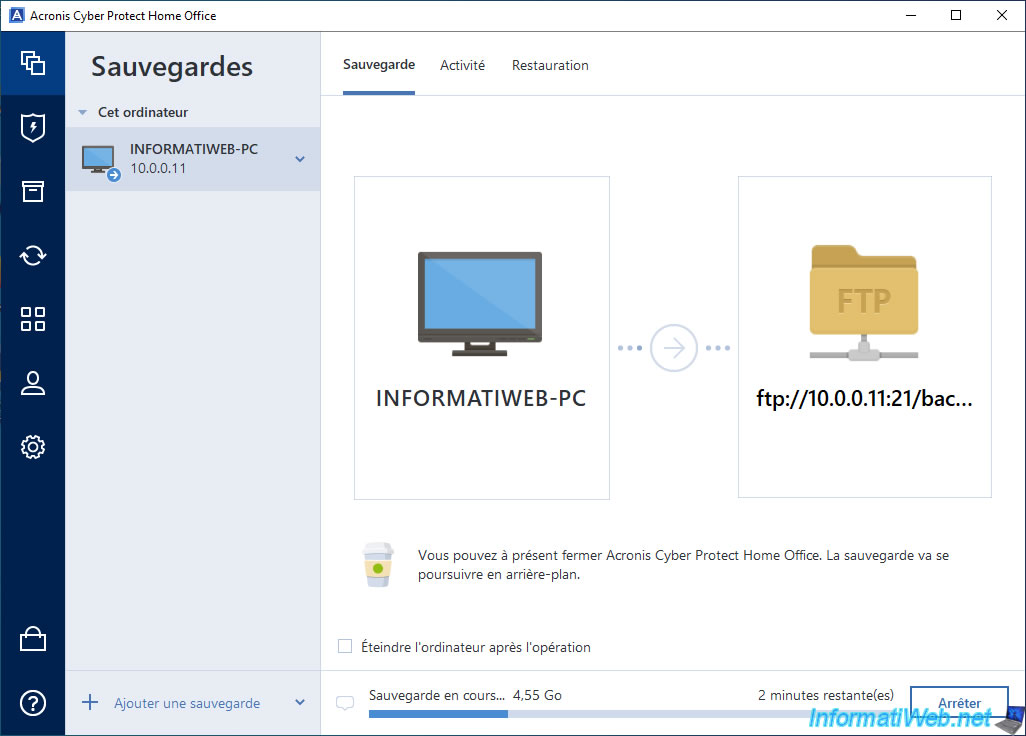
On the FTP server, you will see that a second file (whose name ends with "s1_v2.tib" will be created).
Which means: 1st version of this backup (s1) and 2nd file (v2) of this backup version.
Indeed, when you back up your computer or other via Acronis Cyber Protect Home Office (True Image) to an FTP server, the backup is automatically split into files of 2 GB maximum.
Source : FTP connection - Acronis Cyber Protect Home Office (True Image) - User Guide.
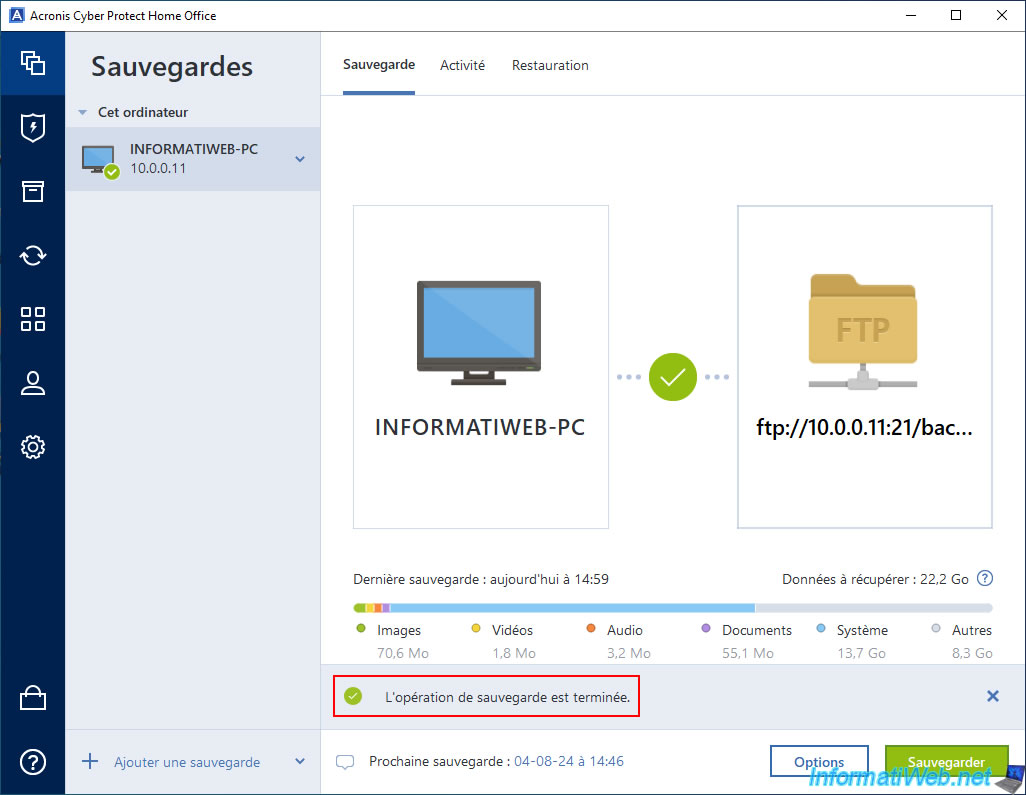
Once the backup from your computer to your FTP server is complete, the message "Backup operation completed" will appear.
Once the backup to your FTP server is complete, you will notice that the FTP sessions used will be automatically closed.
Plain Text
Session X ended gracefully.
![]()
In the "Activity" tab, you will see the message "Backup completed successfully" appear.
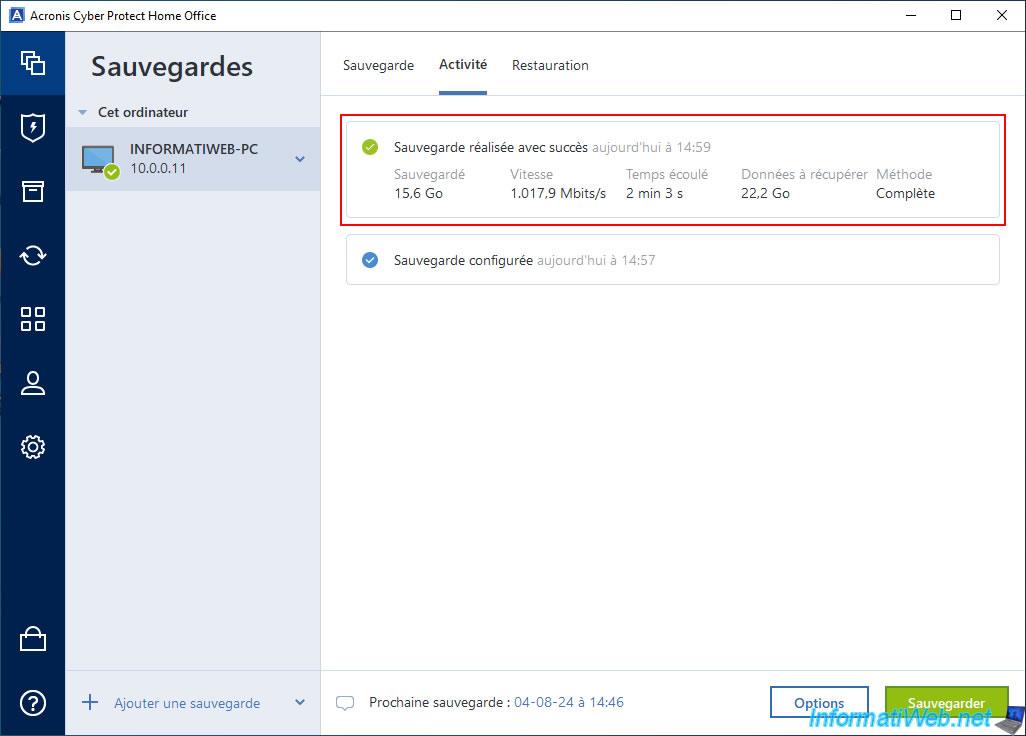
As you can see on your FTP server, your Acronis backup has been automatically split into 2GB files.
Share this tutorial
To see also
-
Backup 10/6/2025
Acronis True Image - Clean up backup versions of a PC (local and Cloud)
-
Backup 3/30/2026
Acronis True Image - Rescue Media - Check network configuration
-
Backup 12/1/2025
Acronis True Image - Synchronize a folder between 2 PCs (Cloud instead of local)
-

Backup 11/17/2025
Acronis True Image - Synchronize a folder to Acronis Cloud
You must be logged in to post a comment