- Backup
- Acronis True Image
- 24 August 2026 at 13:57 UTC
-

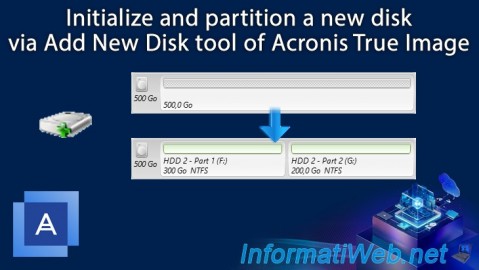
From the "Tools" section of Acronis Cyber Protect Home Office (True Image), you have the option to initialize and partition your new disks.
Indeed, when you buy a new internal hard drive or SSD, they are not initialized or partitioned by default.
- Initialize and partition a new disk via Acronis Cyber Protect Home Office (True Image)
- New disk initialized and partitioned
1. Initialize and partition a new disk via Acronis Cyber Protect Home Office (True Image)
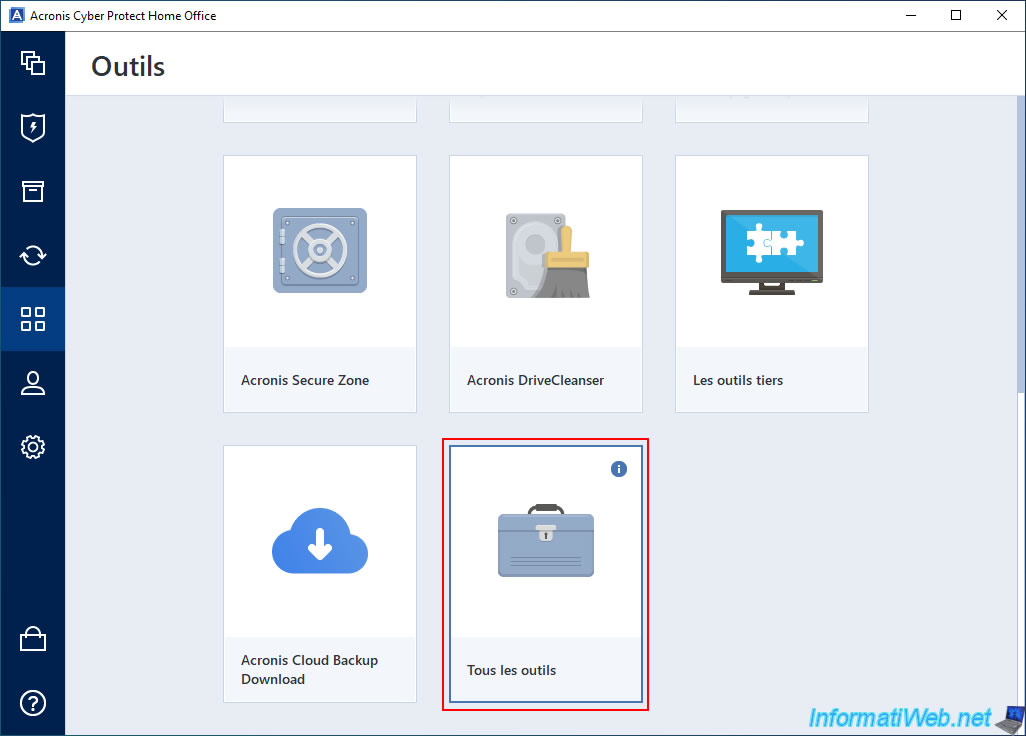
To initialize and partition a new disk, go to the "Tools" section of Acronis Cyber Protect Home Office (True Image) and click "All tools".
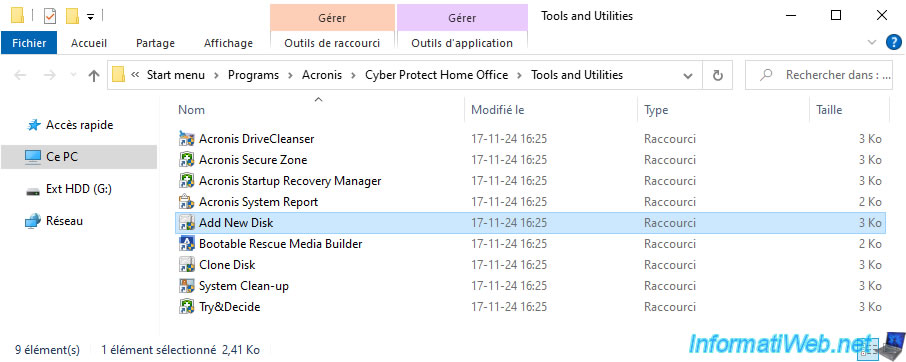
Then, double-click the "Add New Disk" shortcut.
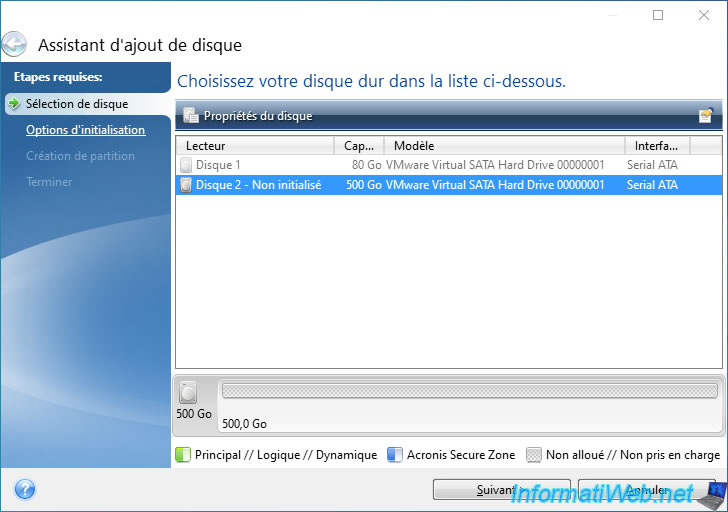
An "Add Disk Wizard" window will appear.
Select your new disk and click "Next".
In our case, we will initialize and partition our new 500GB SATA hard drive.
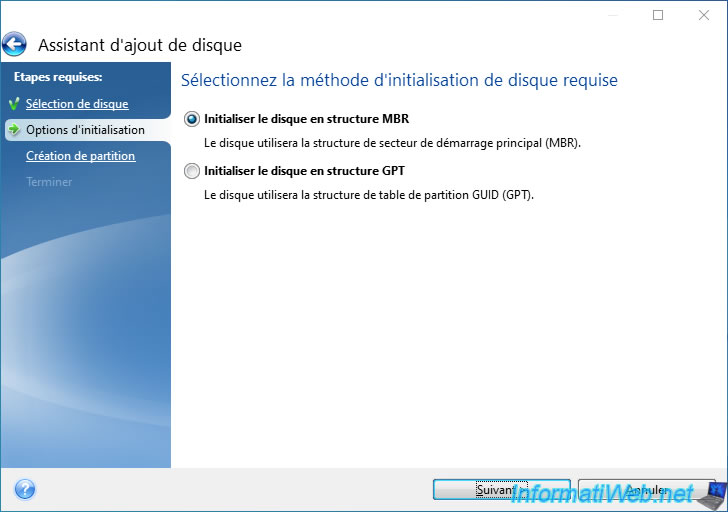
To initialize a new disk, you have the choice between:To initialize a new disk, you have the choice between:
- Initialize the disk in MBR structure: this allows to use a master boot record (MBR) for the partition table of this disk.
This allows to maximize compatibility, even with older OS.
However, MBR cannot be used on a disk with a capacity of more than 2 TB. - Initialize the disk in GPT structure: this allows to support disks with a capacity of more than 2 TB.
Note: in the case of a disk that would later be used to boot an OS, the MBR allows you to boot an OS (including older OSes) in Legacy BIOS mode and the GPT allows you to boot a recent OS (notably Windows 7 and later) in UEFI mode.
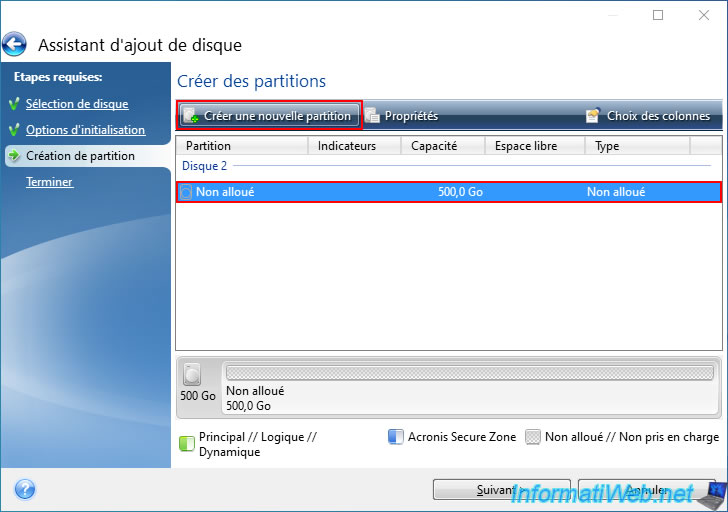
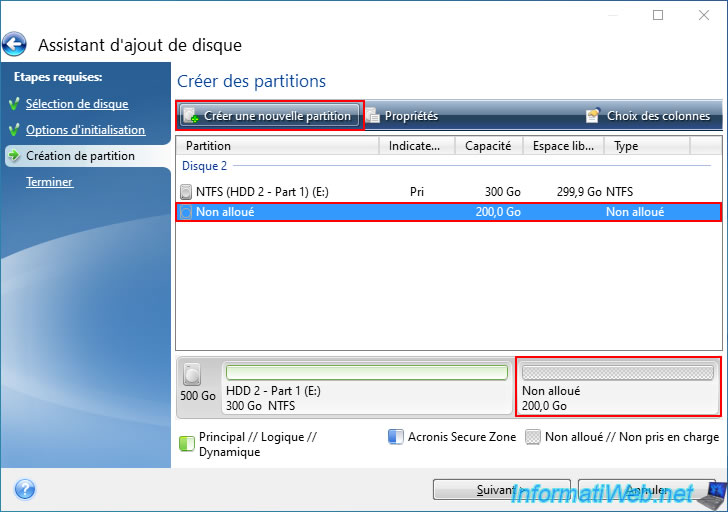
Select the unallocated space on your disk and click "Create new partition".
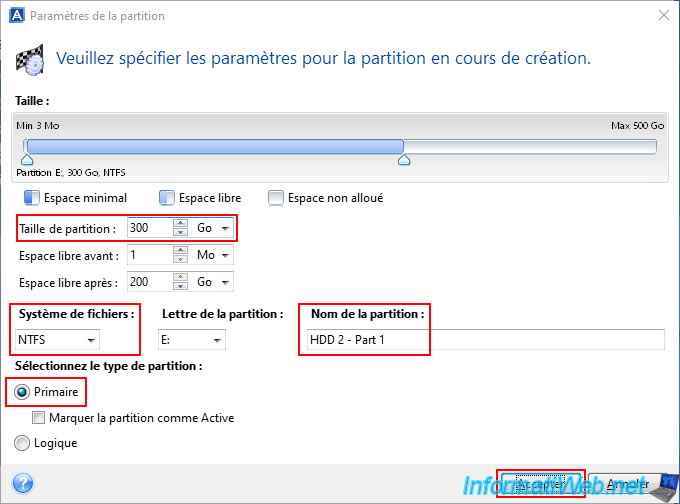
For the example, we will create 2 partitions on our 500 GB hard drive.
For our 1st partition, we have indicated:
- Partition size: 300 GB.
- File system: NTFS (because it is the file system you will use the most under Windows and which allows you to manage file rights, if you wish).
- Partition name: HDD 2 - Part 1.
- Partition type: Primary.
Note that with an MBR, you are limited to 4 partitions per hard drive (except if the 4th partition is an extended partition, because it allows you to create logical disks in it that will be seen as partitions by Windows).
Then, click "Accept" to validate these partition settings.
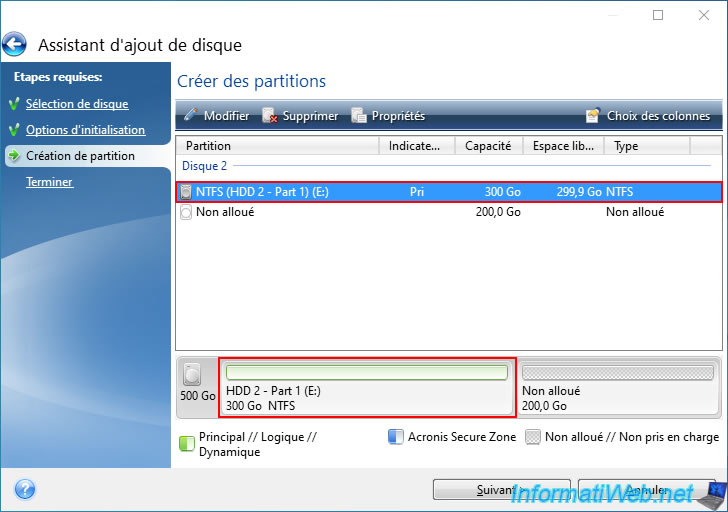
The configured partition appears in the partition list, as well as in the diagram at the bottom.
However, this is only a preview of the changes that will be made to your disk.
So for now, your physical disk has not been modified.
Select the remaining unallocated space displayed in the list and click "Create new partition".
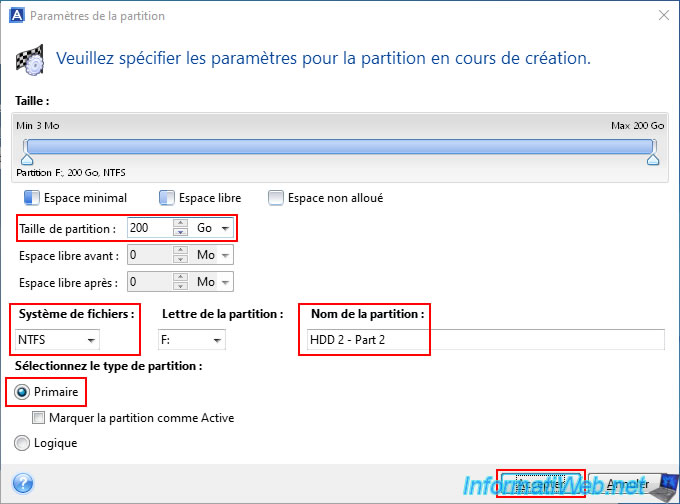
Configure this 2nd partition as you wish.
In our case, it will again be a primary partition with an "NTFS" file system.
However, this one will have a size of 200 GB (so the rest of the space available on our new 500 GB disk) and it will be named "HDD 2 - Part 2".
Then, click on "Accept".
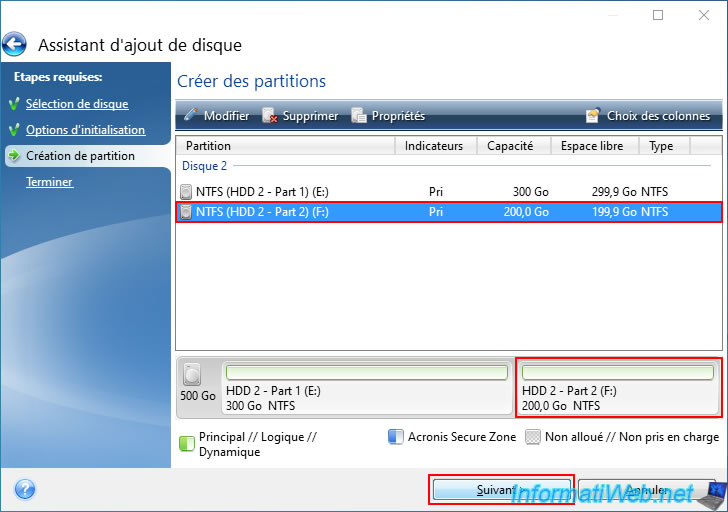
The 2nd configured partition also appears in the list of partitions that will be created on your new disk.
You will also see it appear in the partitioning scheme at the bottom of this add disk wizard.
Click "Next".
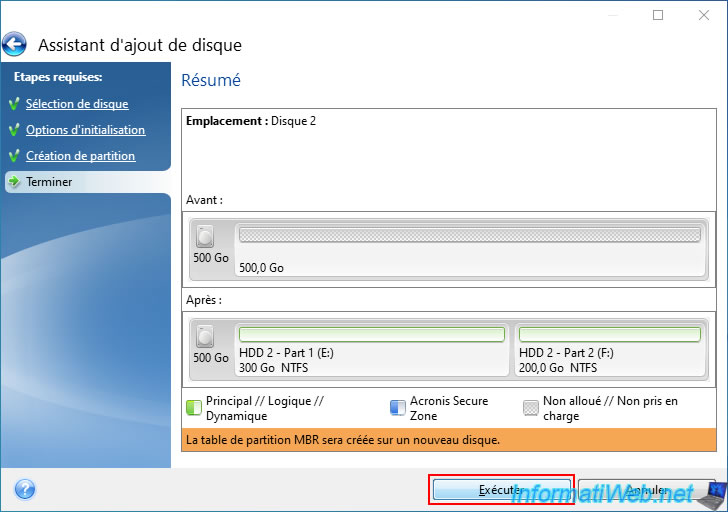
The "add disk" wizard shows you the partitioning status of your new disk before and after the partitioning you just set up.
Click "Run" to create these partitions on your disk.
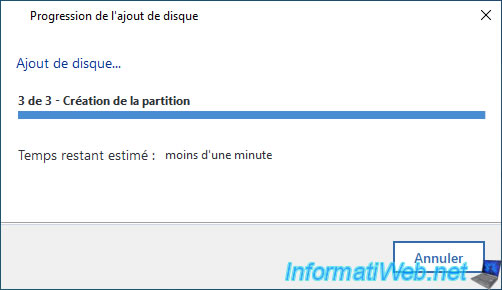
Acronis will quickly create your partitions.
Plain Text
Ajout de disque.
3 de 3 - Création de la partition.
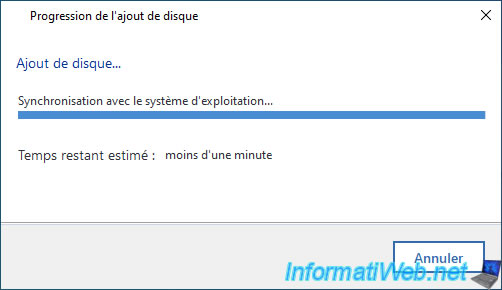
Then, the message "Synchronizing with operating system" will appear for a few seconds.
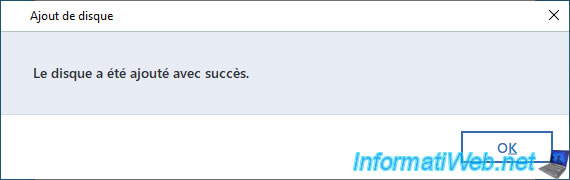
Once your new disk is initialized and partitions are created on it, the message "The disk was added successfully" will appear.
2. New disk initialized and partitioned
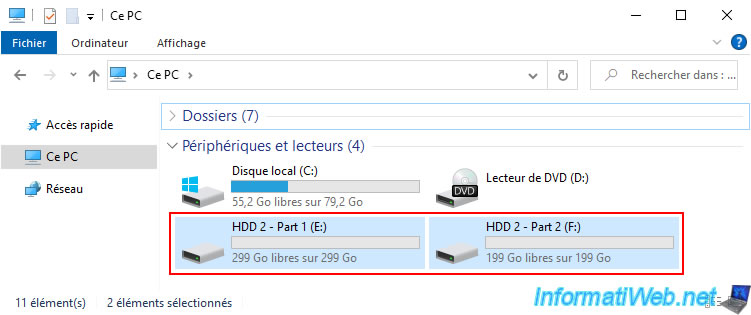
In the file explorer, you will be able to see your new partitions appear in the "This PC" section.
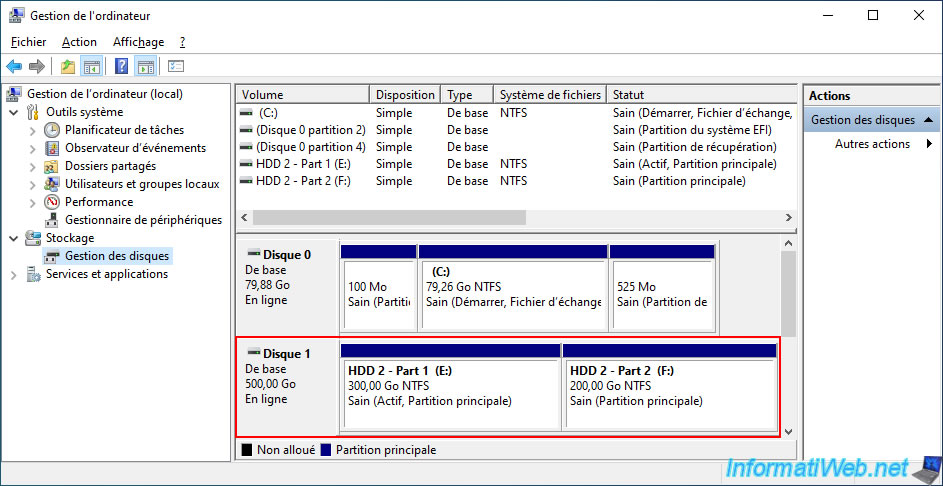
In our case, our partitions "HDD 2 - Part 1" and "HDD 2 - Part 2" which have a size of 300 GB and 200 GB respectively.
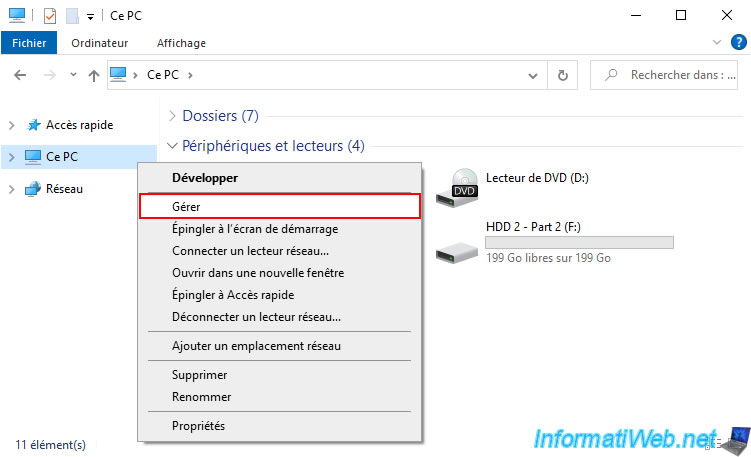
To see these partitions better, right-click "Manage" on "This PC".
As expected, our 2 new partitions are on our 500 GB hard drive.
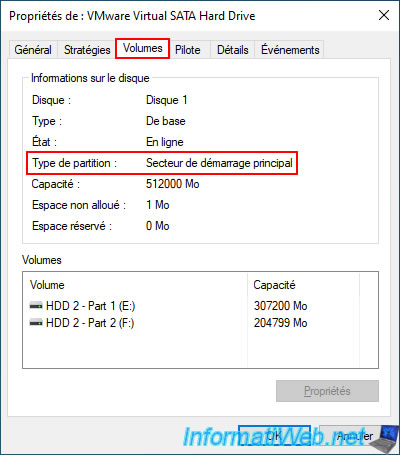
If you right click "Properties" on it and go to its "Volumes" tab, you can check the type of partition used:
- Master Boot Sector: In case of MBR.
- GUID Partition Table (GPT): In case of GPT.
Share this tutorial
To see also
-
Backup 6/5/2025
Acronis True Image - Backing up your PC to Acronis Cloud
-
Backup 9/11/2025
Acronis True Image - Backing up your smartphone to Acronis Cloud
-
Backup 3/23/2026
Acronis True Image - Rescue Media - Clone a disk
-
Backup 3/9/2026
Acronis True Image - Rescue Media - Enable recovery option
You must be logged in to post a comment