- Backup
- Acronis True Image
- 13 April 2026 at 07:32 UTC
-


With the Acronis Rescue Media previously created with Acronis Cyber Protect Home Office (True Image), you can create an incremental backup by simply adding it to an already existing file.
- Create an incremental backup from Acronis rescue media
- Restore your computer from an incremental backup via Acronis rescue media
1. Create an incremental backup from Acronis rescue media
In our tutorial "Acronis True Image - Rescue Media - Backing up your PC to an external hard drive", we backed up our PC from this emergency media.
Now, we will back up this same PC again (a few days later) by adding this new backup to an existing backup file.
This will create an incremental backup in the ".tibx" file that you will select. The goal is for this new backup to be lighter by only saving the changes made since the last backup (whether it was complete or not).
In short, to back up your computer again, click on the "My disks" link under the "Backup" option.
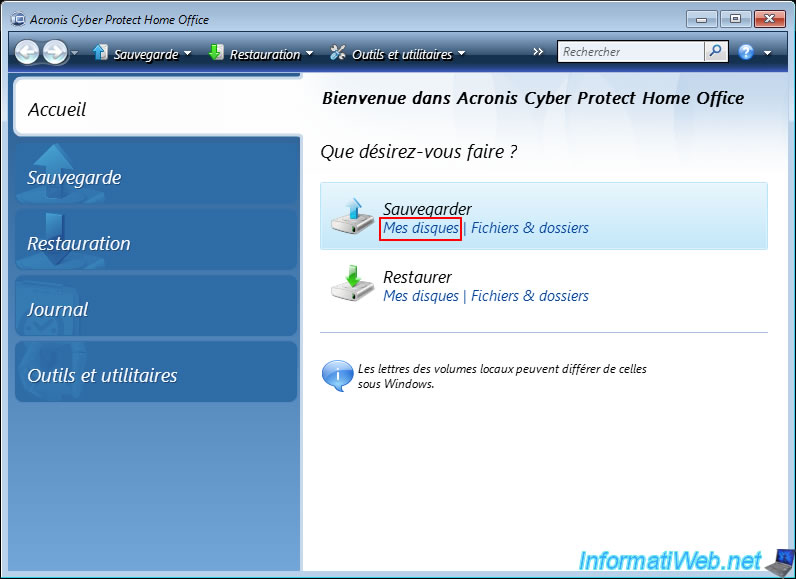
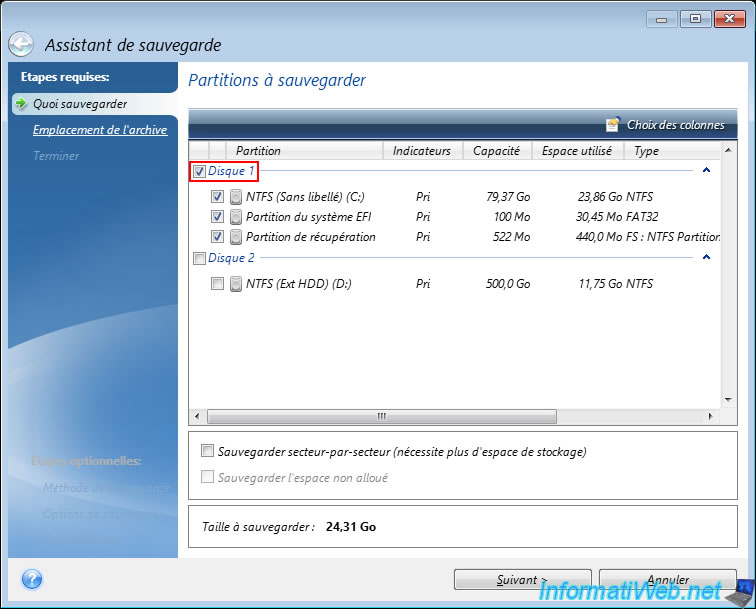
Select the disk to backup.
In our case, we will backup again our disk 1 (where Windows is installed) that we had already backed up previously in our previous tutorial.
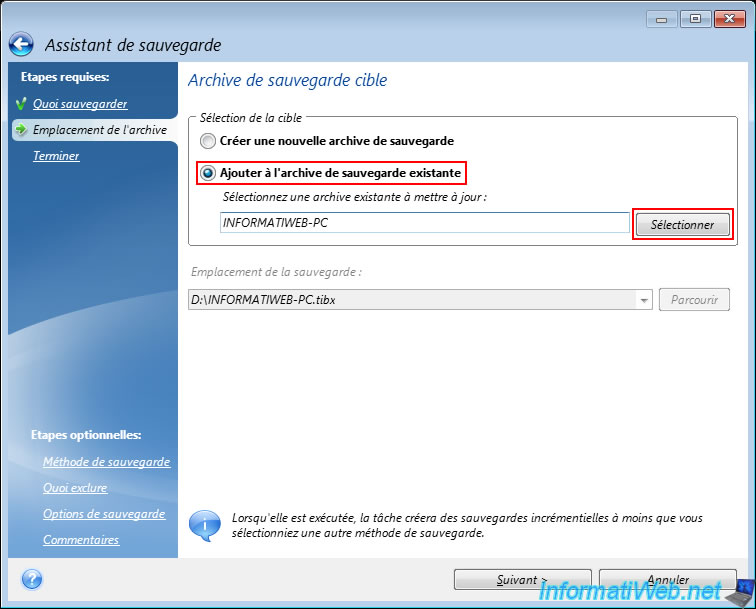
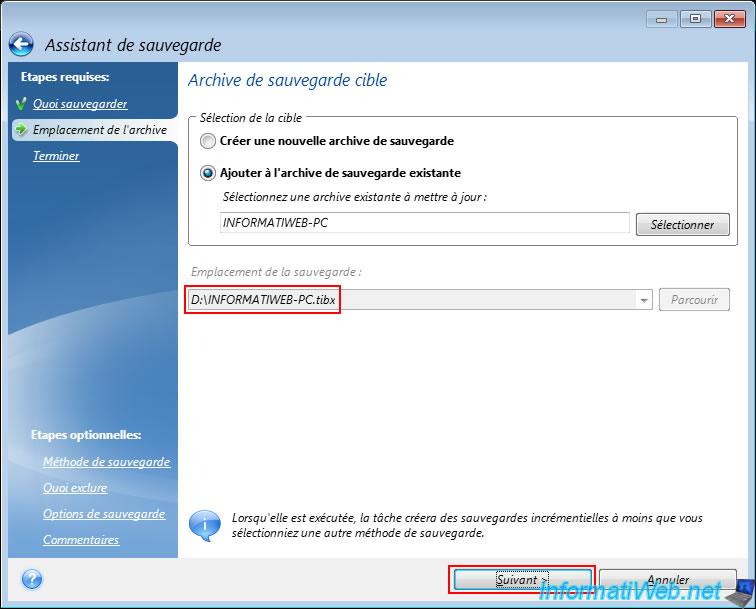
To create an incremental backup, select "Add to existing backup archive" as the target.
Acronis Cyber Protect Home Office (True Image) will automatically detect the backup archive on your computer to be updated.
In our case, the archive "INFORMATIWEB-PC.tibx".
However, if needed, you can select another backup file (.tibx) by clicking "Browse".
Again, Acronis Cyber Protect Home Office (True Image) offers you the backup files it detected automatically and you can see that in our case, the detected archive simply contains a full backup of our computer.
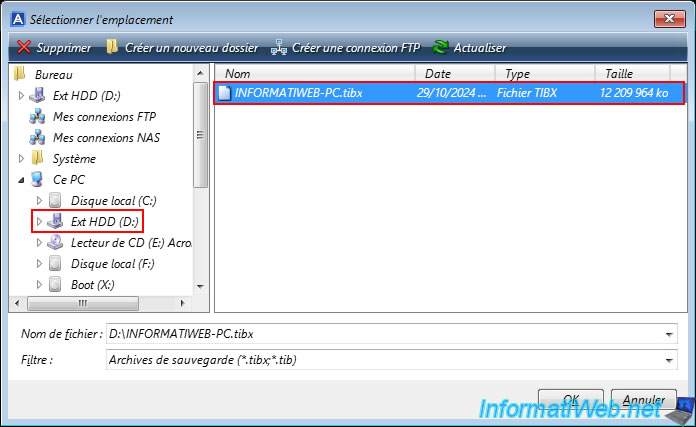
If you want to select another backup file that would not be displayed here, then click the "Browse" button.
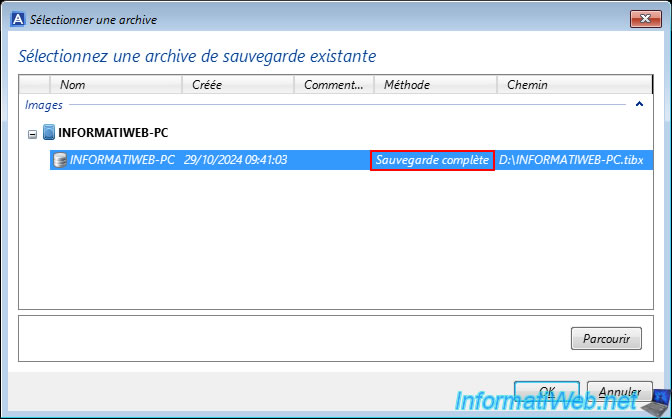
In the "Select Location" window, select the location and then the backup file to use.
In our case, the backup file "INFORMATIWE-PC.tibx" present on our external hard drive "Ext HDD (D:)".
Once the desired existing backup is selected, click "Next".
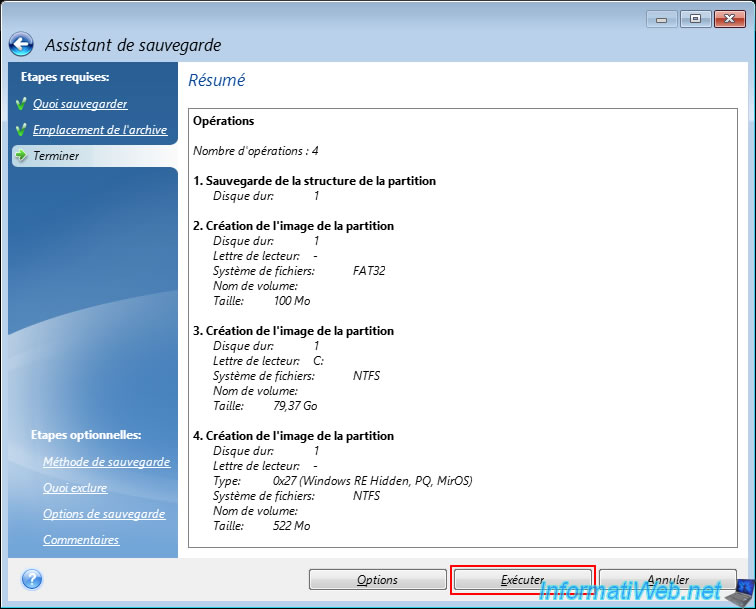
Then, a summary of the backup operations appears.
Click "Run".
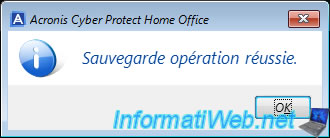
Please wait while your computer is backed up (and therefore an incremental backup is created which will be added to the previously selected ".tibx" backup file).

Once the backup is complete, the message "Backup operation successful" will appear.
2. Restore your computer from an incremental backup via Acronis rescue media
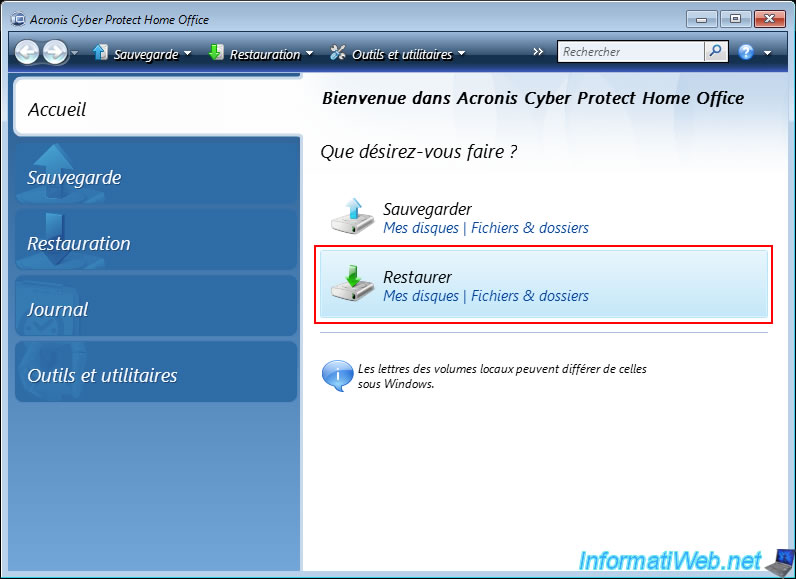
To restore your computer from an incremental backup using your Acronis rescue media, simply click the "Restore" option.
In the "Disk Backups" tab (displayed by default), you will be able to automatically see the backups detected by Acronis Cyber Protect Home Office (True Image) on your computer.
In our case, it detects our image (backup) "INFORMATIWEB-PC" which corresponds to the file "D:\INFORMATIWEB-PC.tibx" present on our external hard drive.
As you can see:
- the 1st backup is of type "Full backup" (given that the 1st backup is always of type "full").
- the 2nd backup is of type "Incremental backup" (because we had chosen to add this backup to the already existing ".tibx" file as explained in the previous step of this tutorial).
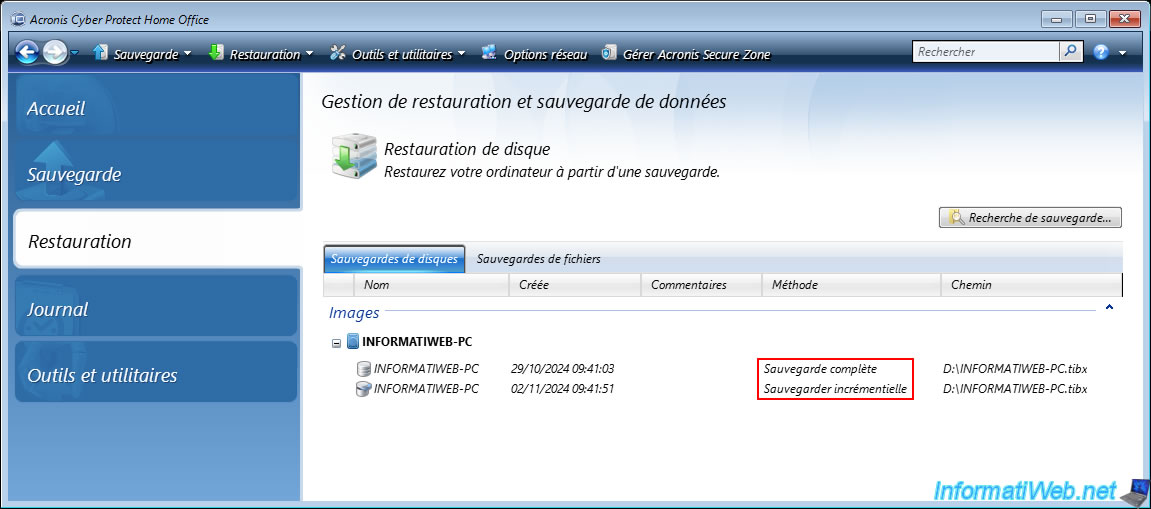
To restore your computer using the backups detected by Acronis Cyber Protect Home Office (True Image), right-click on one of the backups present in this image.
In our case, we will restore our computer to the date "02/11/2024 09:41:51" whose backup is of the "Incremental backup" type.
Warning : Acronis Cyber Protect Home Office (True Image) does not take into account the specific backup selected, but only the name of the image concerned by the backup you select.

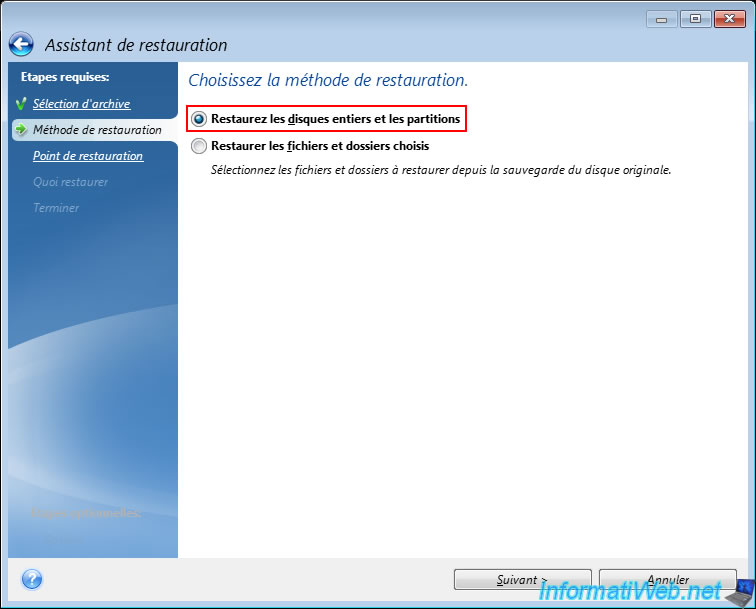
In the "Restore Wizard" window that appears, select "Restore entire disks and partitions".
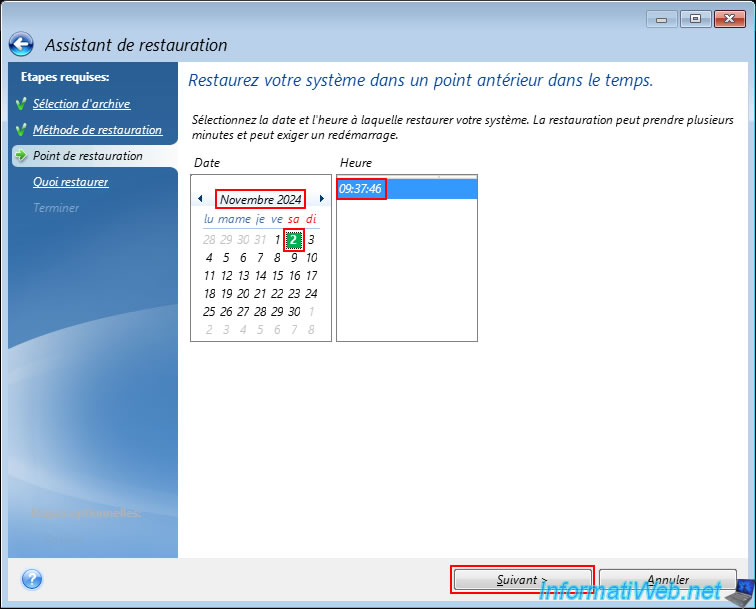
Warning : by default, the date selected for the restoration will be that of the last backup (full or incremental) present in the image (archive) selected to open this restoration wizard.
It does not matter which backup and therefore which date/time was selected in the previous list where you right-clicked "Restore".
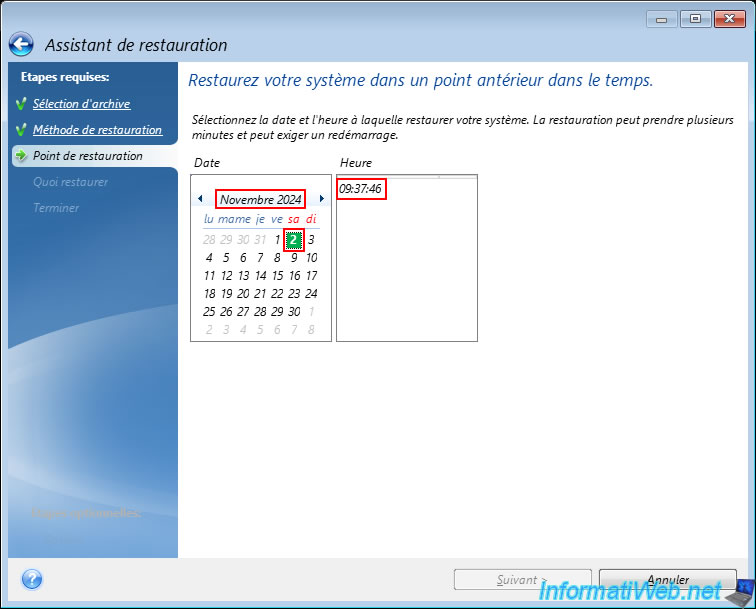
If you use the arrows to the left and right of the month indicated at the top of the calendar, Acronis Cyber Protect Home Office (True Image) will suggest other available dates/times (depending on the full or incremental backups present in the ".tibx" file concerned by the backup you are trying to restore on your computer).

In our case, we want to restore our computer to the date/time "November 2, 2024 at 9:37 AM" (which corresponds to our incremental backup).
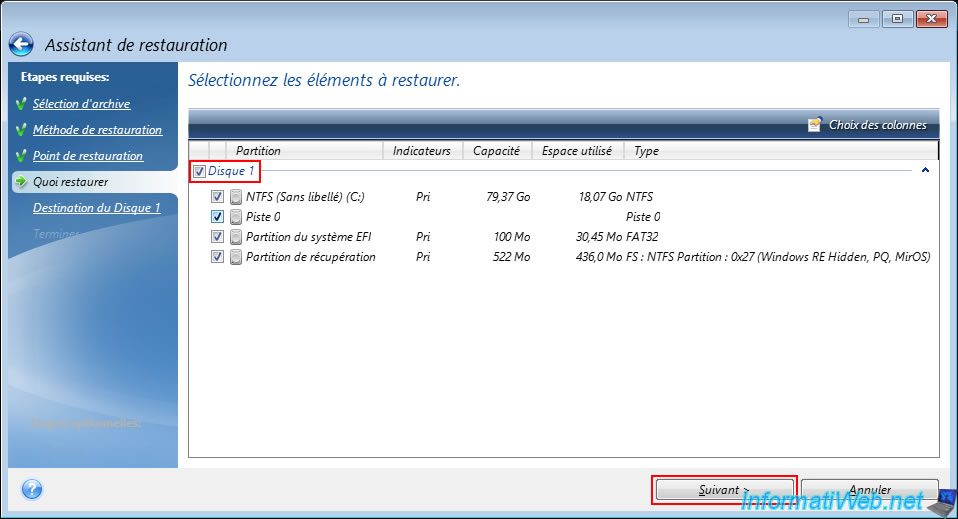
Select the disk (present in this backup) whose data you want to restore from your backup.
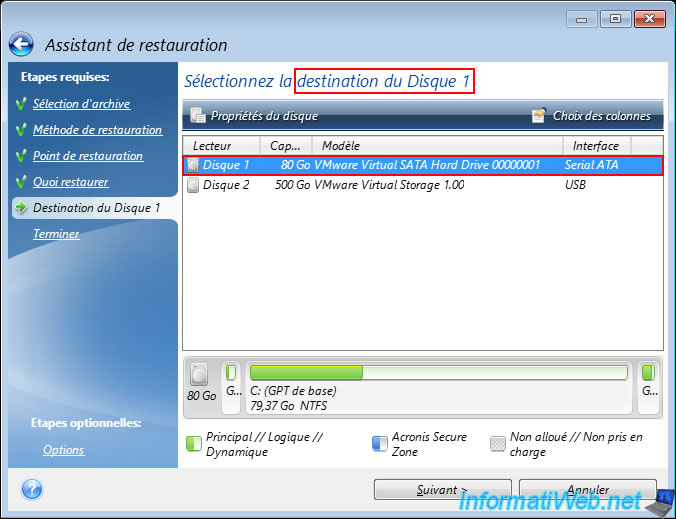
Next, select the local disk on your computer that will be the destination for Disk 1 of the backup.
In our case, our 80 GB hard drive.
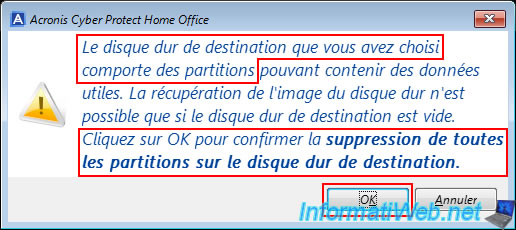
Acronis Cyber Protect Home Office (True Image) warns you that this disk already contains data and that it will be erased in order to restore your backup data to it.
This is normal since you want to restore this disk to a previous state.
So, click OK.
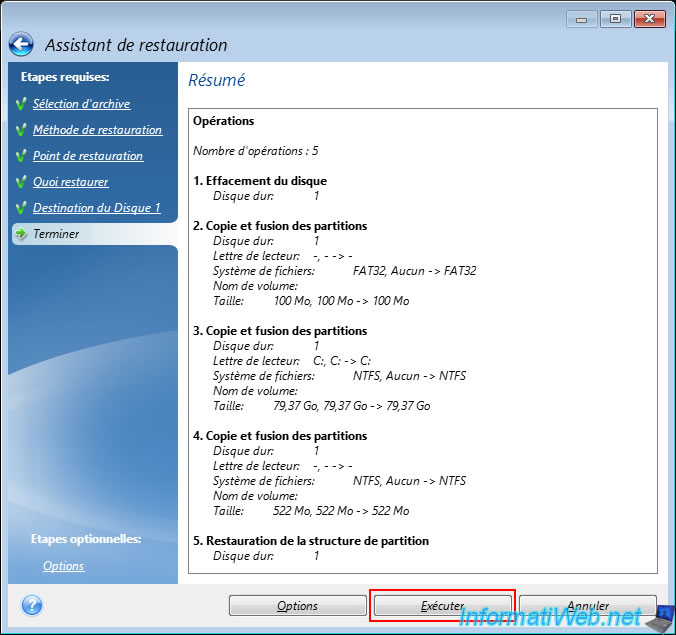
A summary of the restoration operations appears.
Click "Run".
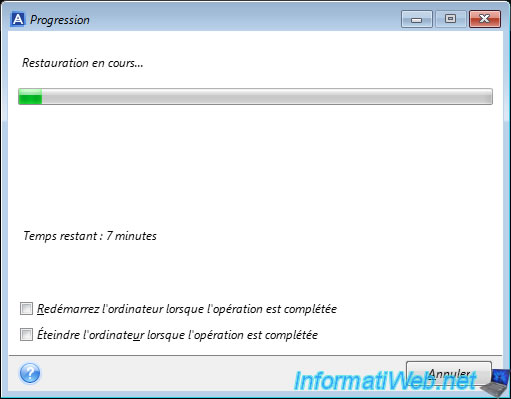
Please wait while the data is restored to the desired local disk.
Restoring your backup to your local drive is complete.
Now all you have to do is close the "Acronis Cyber Protect Home Office (True Image)" program and close the command prompt (the black window) to restart your computer.

Share this tutorial
To see also
-

Backup 6/9/2025
Acronis True Image - Backing up your PC to a FTP server
-
Backup 8/21/2025
Acronis True Image - Replicate encrypted backups to Acronis Cloud
-

Backup 8/7/2025
Acronis True Image - Search for files in a Cloud backup
-
Backup 5/4/2026
Acronis True Image - Universal Restore Media - Create and use media
You must be logged in to post a comment