- Backup
- Acronis True Image
- 16 March 2026 at 13:47 UTC
-

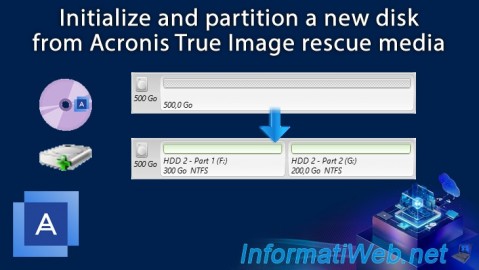
From your Acronis rescue media created via Acronis Cyber Protect Home Office (True Image), you have the possibility to initialize and partition your new disks added physically to your computer (and which are therefore not initialized or partitioned by default when they leave the factory).
- Initialize and partition a new disk from its Acronis rescue media
- View partitions created from your Acronis rescue media
- View partitions created from Windows disk management
1. Initialize and partition a new disk from its Acronis rescue media
Although it is possible to do this very easily from Windows Disk Management (regardless of the version used), you can also do it from your Acronis rescue media.
This can be interesting if your operating system (e.g. Windows) is not yet installed or if it no longer starts.
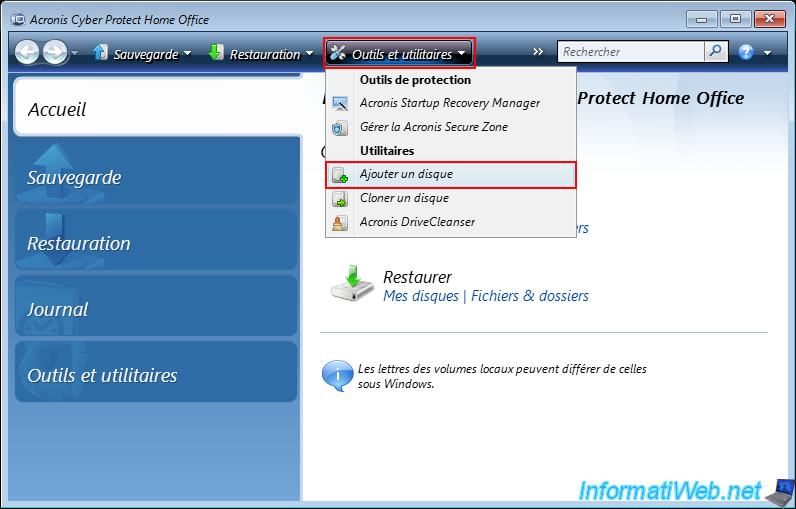
To do this, click on "Tools and Utilities" in the Acronis Cyber Protect Home Office (True Image) toolbar, then click on "Add a disk".
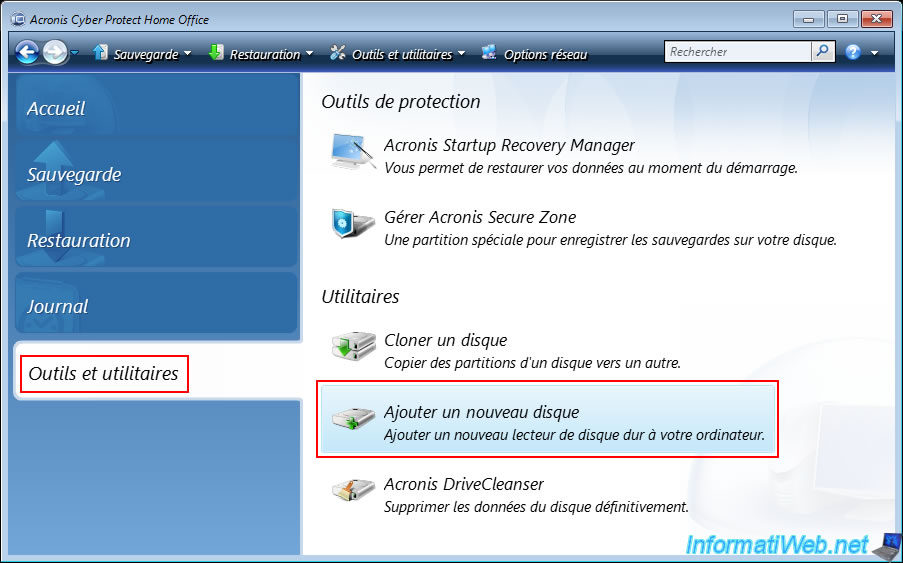
Or, go to the "Tools and Utilities" section, then launch the "Add New Disk" utility.
In the "Add Disk Wizard" window that appears, select your new disk (previously physically added to your computer).
Note: as explained above, a new internal hard drive coming out of the factory is never initialized or partitioned.
As you can see below, our 500 GB hard drive is "Uninitialized" and therefore contains only unallocated (unpartitioned) space.

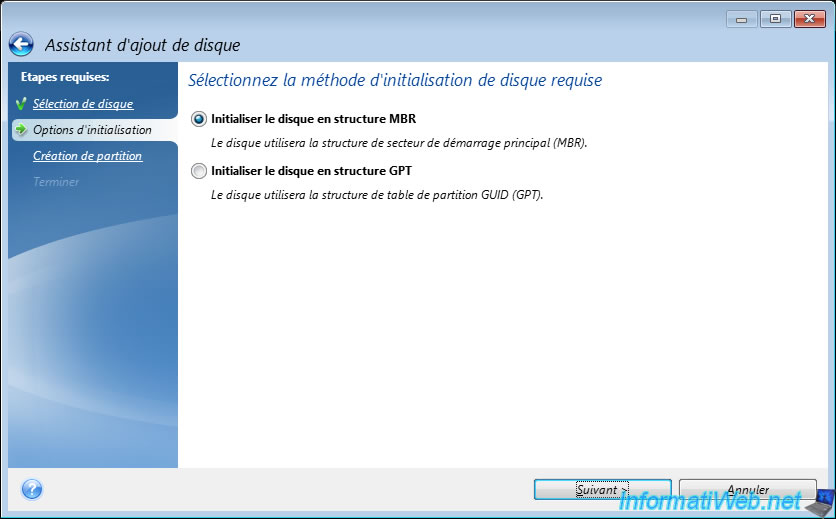
Select the initialization method you want in your case:
- Initialize disk in MBR structure: old method maximizing compatibility (including with older operating systems).
With an MBR, you can create a maximum of 4 primary partitions or 3 primary partitions and an extended partition (where you can create additional logical disks).
However, MBR cannot be used for disks with a capacity greater than 2 TB (due to the technical limitations of this MBR). - Initialize disk in GPT structure: new method required for disks with a capacity greater than 2 TB, as well as for booting in UEFI mode on an operating system that you would like to install on this disk.
A GUID partition table (GPT) allows you to create many partitions (without the limit of 4 primary partitions that MBR imposed).
However, the GUID partition table (GPT) is not supported or poorly supported by very old operating systems.
Preferably, only use GPT from Windows 7 onwards which also supports this type of partition table since it also supports UEFI booting (although secure boot via UEFI is only supported from Windows 8 onwards).
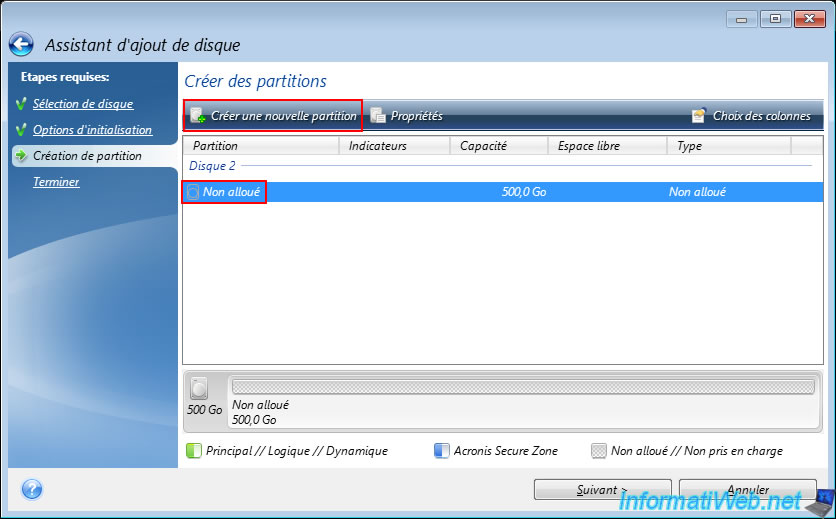
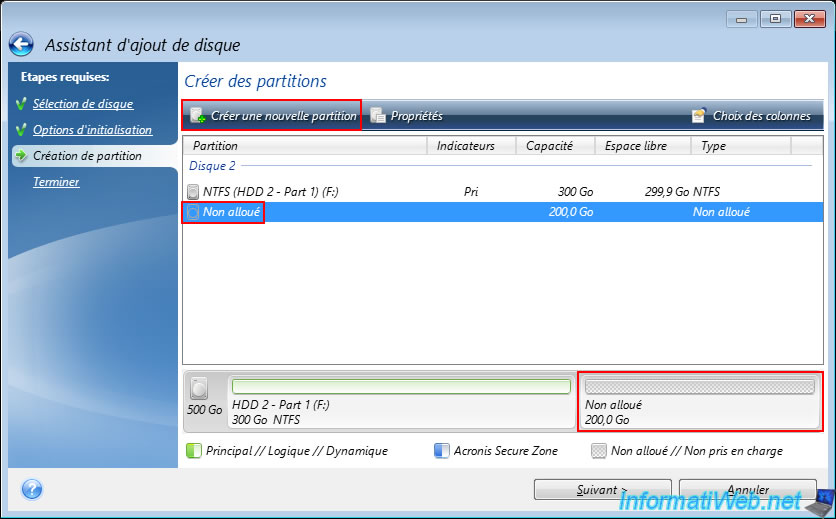
In the "Create Partitions" step, select the available unallocated space and click "Create New Partition".
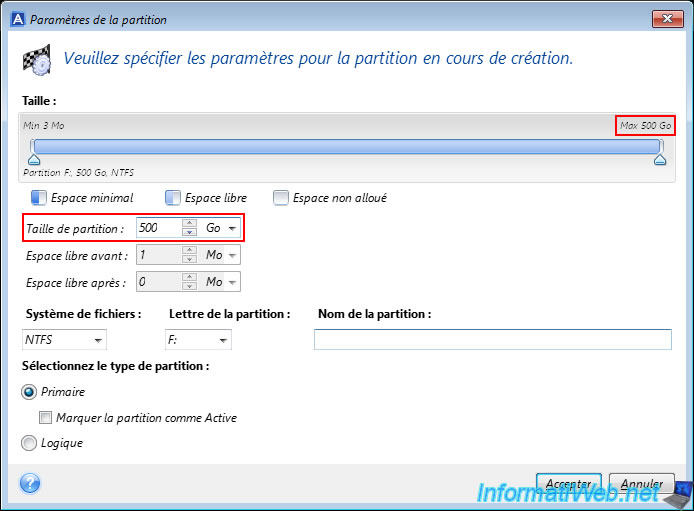
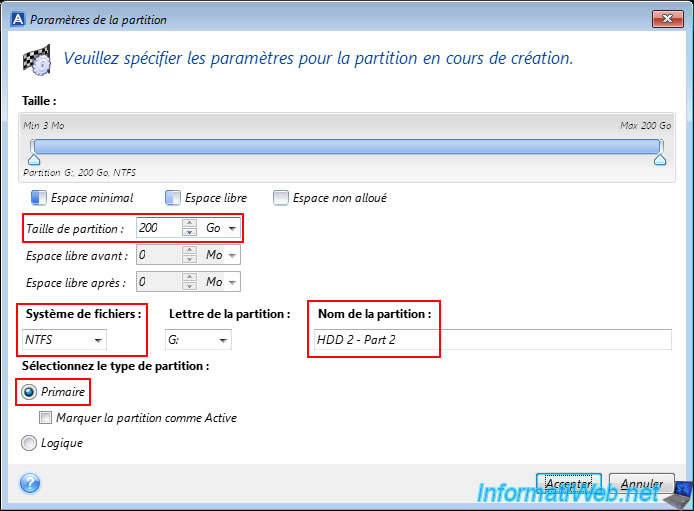
In the "Partition Settings" window that appears, you can configure the size, letter, file system (e.g. NTFS, FAT32, Ext4, ...), name and partition type (Primary or Logical) to use.
By default, the size of the partition indicated corresponds to the capacity of your physical disk.
Note: the "Mark partition as Active" option is only available if the partition table used is an MBR and allows you to indicate on which partition the operating system is located (if applicable).
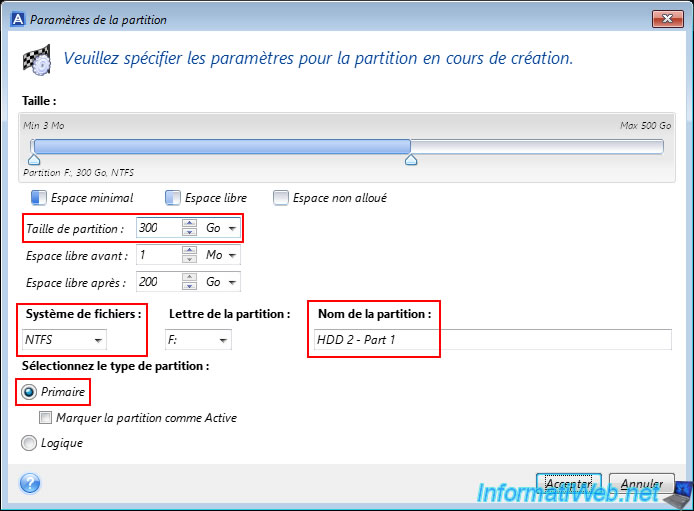
In our case, we created a 1st primary (main) partition of 300 GB with the NTFS file system (which is the one most often used on Windows).
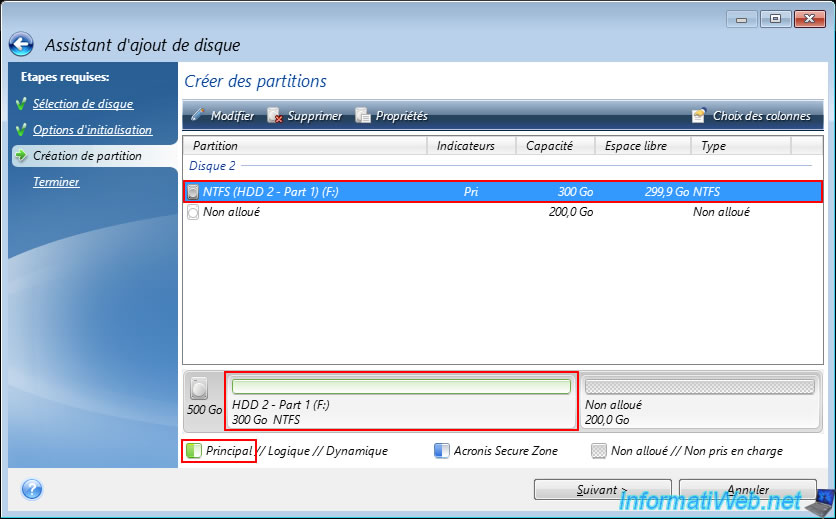
The first partition of 300 GB in NTFS configured appears.
Note that the changes will be actually made only at the end of the wizard.
This is therefore only a preview of what will be done next on your physical disk.
To create an additional partition on this disk, select the unallocated space again (which has obviously decreased in capacity) and click "Create New Partition" again.
For the 2nd partition, we left the default size of 200 GB to take the remaining space on our physical disk.
Again, we selected the partition type "Primary".
Warning : from the 2nd partition, Acronis Cyber Protect Home Office (True Image) tries to make you create logical partitions instead of primary partitions.
For data storage, this changes absolutely nothing. However, if you later want to install multiple operating systems on the same computer on the same physical disk, it is necessary that these operating systems are installed in primary partitions.
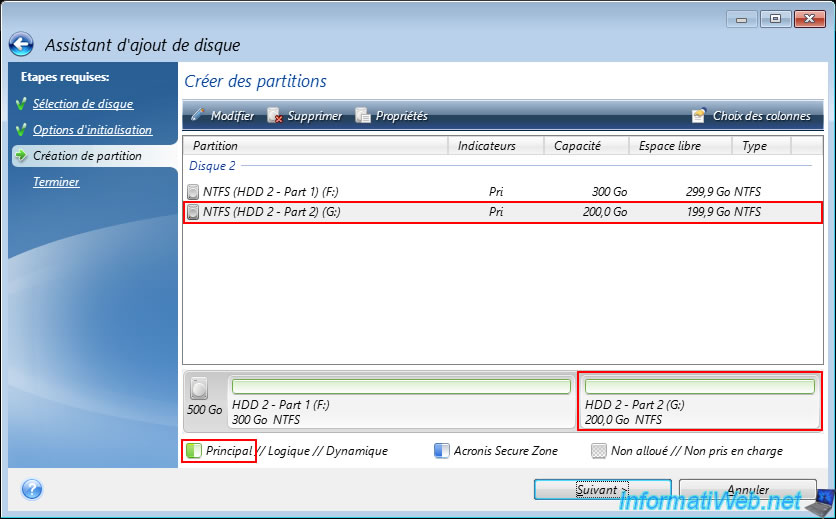
The 2nd configured partition appears in the list and you can see that 2 partitions will be created in our case on our physical disk.
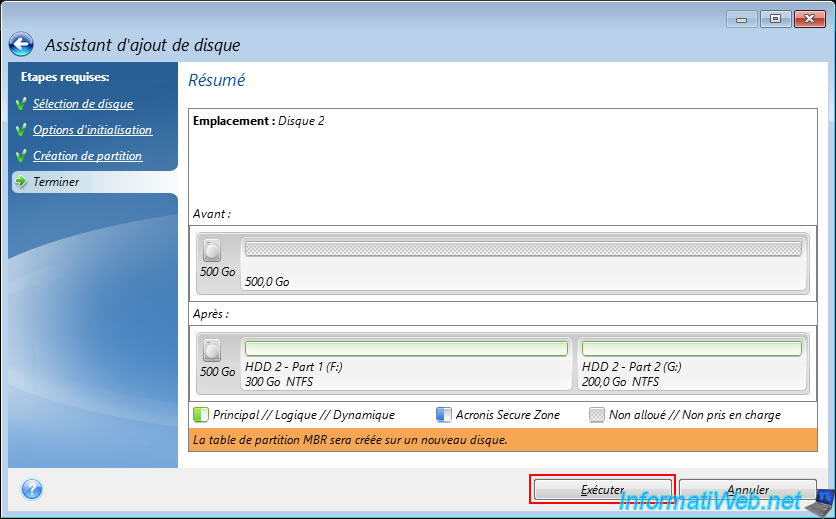
At the end of the wizard, a summary will show you the partitioning status of your disk before and after Acronis creates the desired partitions on it.
In the orange rectangle, you will be able to see the type of partition table that will be created.
In our case, an MBR partition table.
Plain Text
The MBR partition table will be created on a new disk.
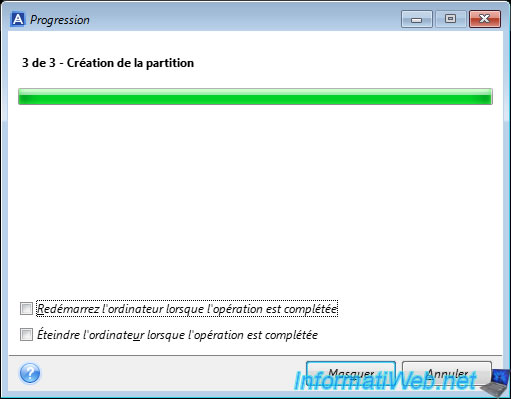
Please wait while the partitions on your new disk are quickly created.
Plain Text
3 of 3 - Creating the partition.
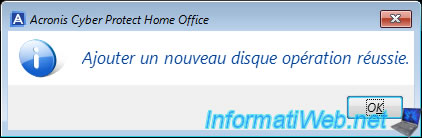
Once your physical disk is initialized and partitions are created, the message "Add new disk operation successful" will appear.
2. View partitions created from your Acronis rescue media
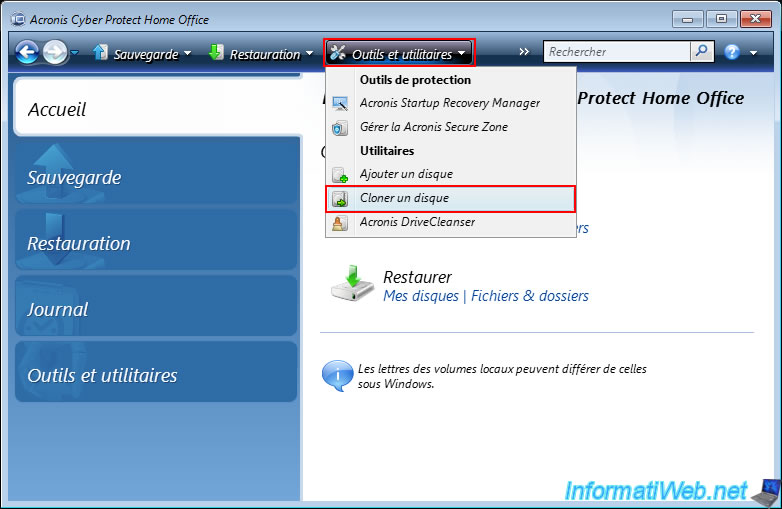
If you want to verify that the partitions have been created without restarting your computer, you can click "Tools and Utilities -> Clone Disk".
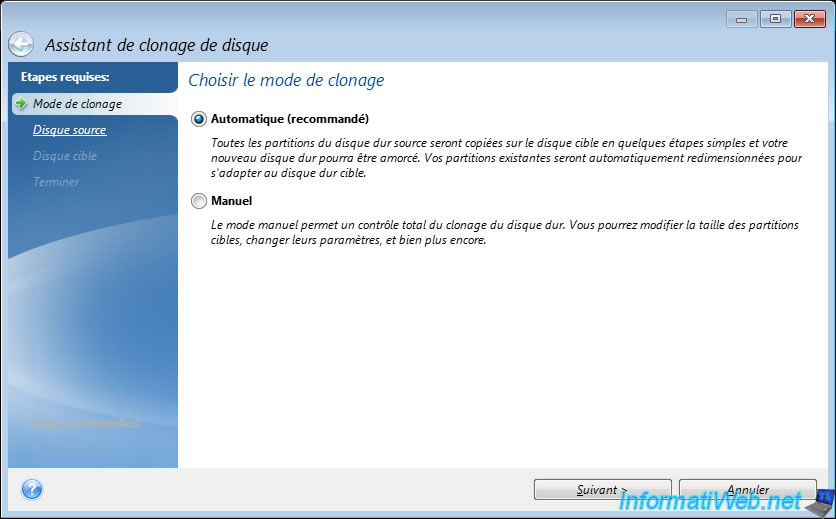
Leave the cloning word "Automatic" selected by default (because you will not validate this disk cloning anyway).
Select the physical disk where you just created your partitions and you will see them appear at the bottom of the window.
As you can see, in our case, Acronis Cyber Protect Home Office (True Image) has successfully created 2 partitions (one of 300 GB and the other of 200 GB) on our 500 GB physical disk.

3. View partitions created from Windows disk management
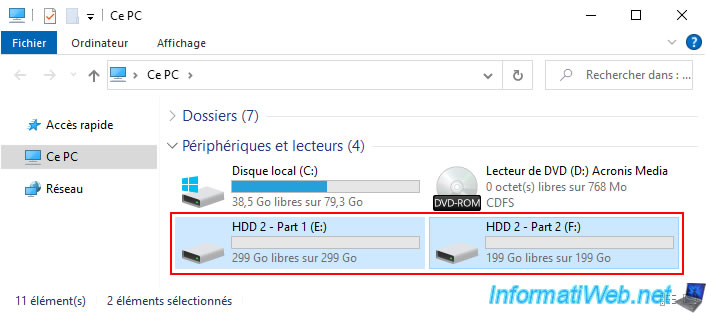
Restart your computer and open file explorer.
You should see your partitions appear in the "This PC" section of file explorer.
Right click "Manage" on "This PC".
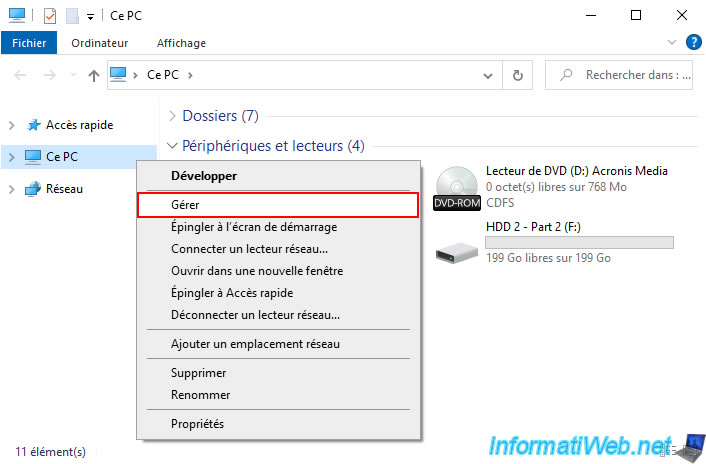
Then, go to disk management.
As you can see, there are indeed 2 partitions on our new 500GB hard drive.

Share this tutorial
To see also
-
Backup 10/27/2025
Acronis True Image - Archive your files locally (encrypted archive)
-
Backup 11/10/2025
Acronis True Image - Archive your files on Acronis Cloud (encrypted archive)
-
Backup 3/30/2026
Acronis True Image - Rescue Media - Check network configuration
-

Backup 4/13/2026
Acronis True Image - Rescue Media - Create an incremental backup
You must be logged in to post a comment