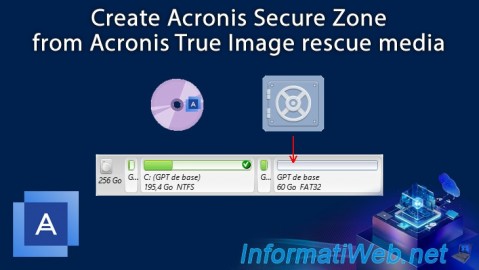
- Backup
- Acronis True Image
- 02 March 2026 at 09:28 UTC
-

- 1/3
To protect access to your backups created via Acronis Cyber Protect Home Office (True Image), you have the option to create an Acronis Secure Zone.
This also protects your backups from malware that would try to make your backup files unusable.
Warning : Creating and managing an Acronis Secure Zone requires that you have created your rescue media from a full version of Acronis Cyber Protect Home Office (True Image).
- Create an Acronis Secure Zone on your hard drive
- Back up your PC to the Acronis Secure Zone via your Acronis rescue media
- Restore your PC from the Acronis Secure Zone via your Acronis rescue media
- Backup stored in the Acronis Secure Zone visible in Acronis Cyber Protect Home Office (True Image)
- Backup stored in Acronis Secure Zone visible in Windows file explorer
- Unknown device visible in Windows file explorer if Acronis is not installed
1. Create an Acronis Secure Zone on your hard drive
To create an Acronis Secure Zone on your hard drive, first create an Acronis rescue media by referring to one of our tutorials that allows you to create it in different ways.
The easiest way is to follow this one: Acronis True Image - Rescue Media - Create media easily (in ISO format).
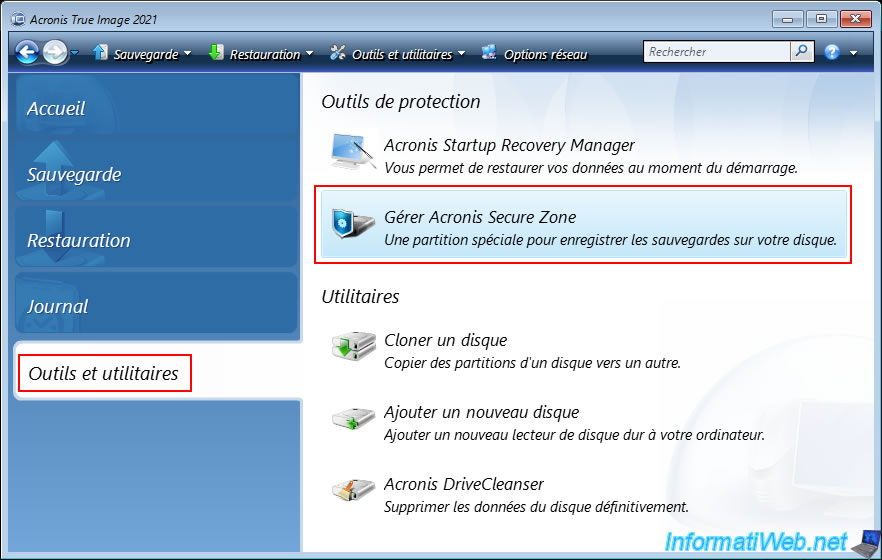
Then, boot your computer from this Acronis rescue media and click on the "Tools and Utilities" option (in the toolbar displayed at the top of the Acronis program), then on "Manage Acronis Secure Zone".

Or, go to the "Tools and Utilities" section of this Acronis program and click on the "Manage Acronis Secure Zone" protection tool.
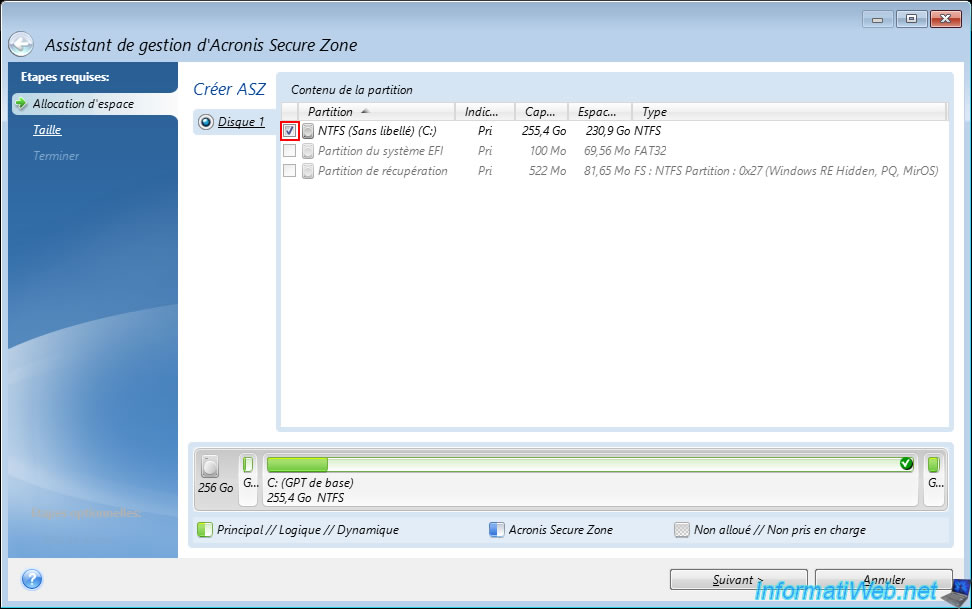
In the "Acronis Secure Zone Management Wizard" window that appears, select the disk where you want to create your Acronis Secure Zone.
In our case, on disk 1.
Then, check the box of the partition that you will need to reduce the size of to create a new partition (Acronis Secure Zone) at the end of the desired disk using the freed disk space.
In our case, there is only one large partition on this 256 GB disk. The other partitions are only Windows 10 system partitions, including the recovery partition where Acronis tells you that it is "Windows RE Hidden" (= Windows Recovery Environment).
By default, the wizard will use half of the size of the selected partition for the size of the future "Acronis Secure Zone" partition.
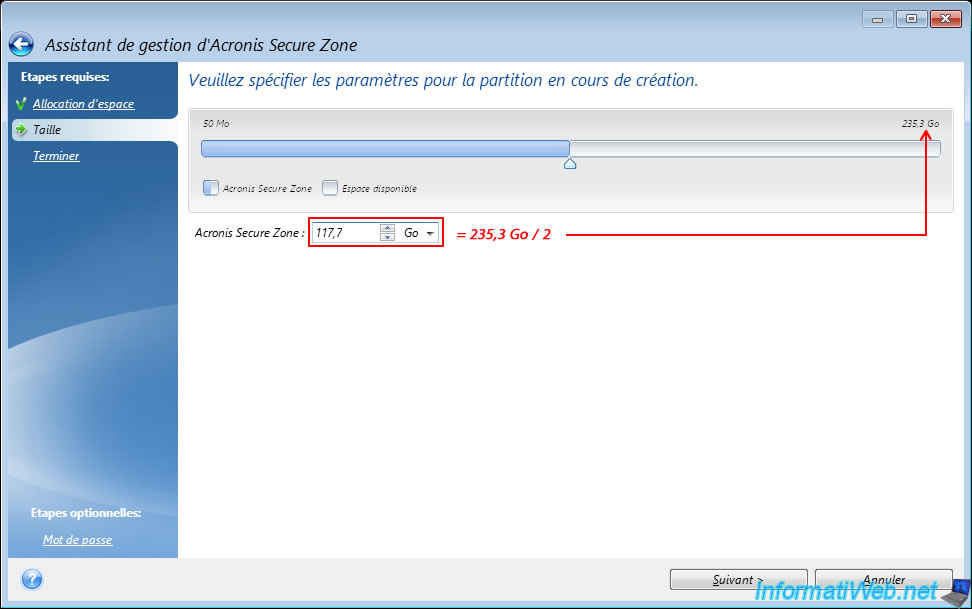
In our case, for the example, we created a 60 GB partition.
Note: you can easily see the free space and calculate the used space on this partition by going back to the 1st step (Space Allocation) of this wizard.
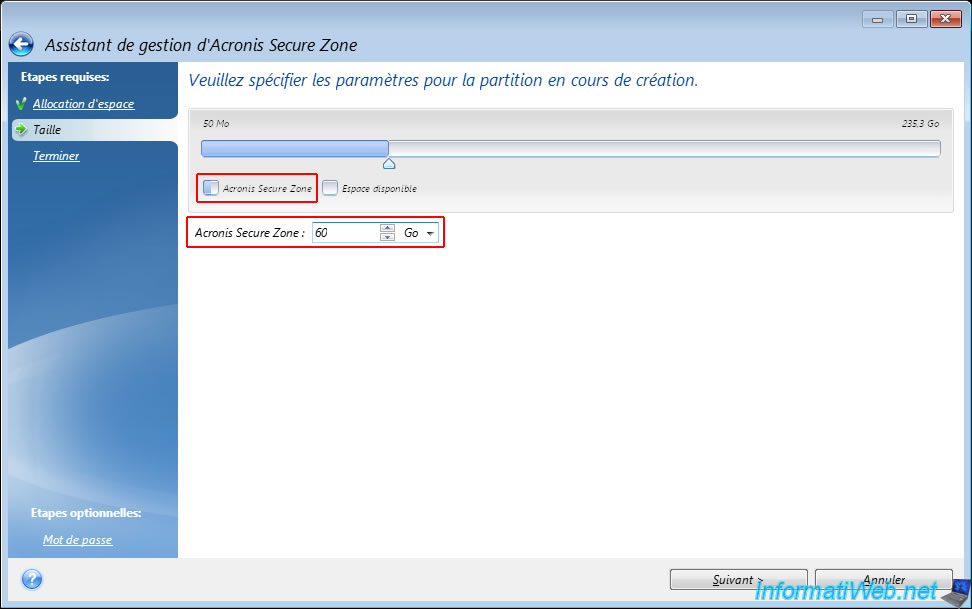
As expected, the size of our "C:" partition will be reduced by 60 GB and an additional 60 GB partition will be created at the end of this disk.

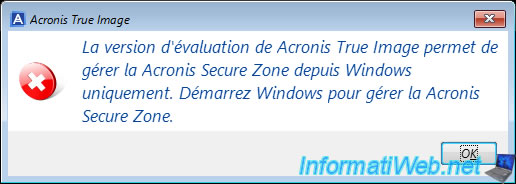
If you created your Acronis Rescue Media from a trial version of Acronis Cyber Protect Home Office (True Image), you will see the error below.
If you created it from a full version of Acronis Cyber Protect Home Office (True Image), then you will not have this problem.
Plain Text
The trial version of Acronis Cyber Protect Home Office (True Image) allows you to manage the Acronis Secure Zone from Windows only. Start Windows to manage the Acronis Secure Zone.
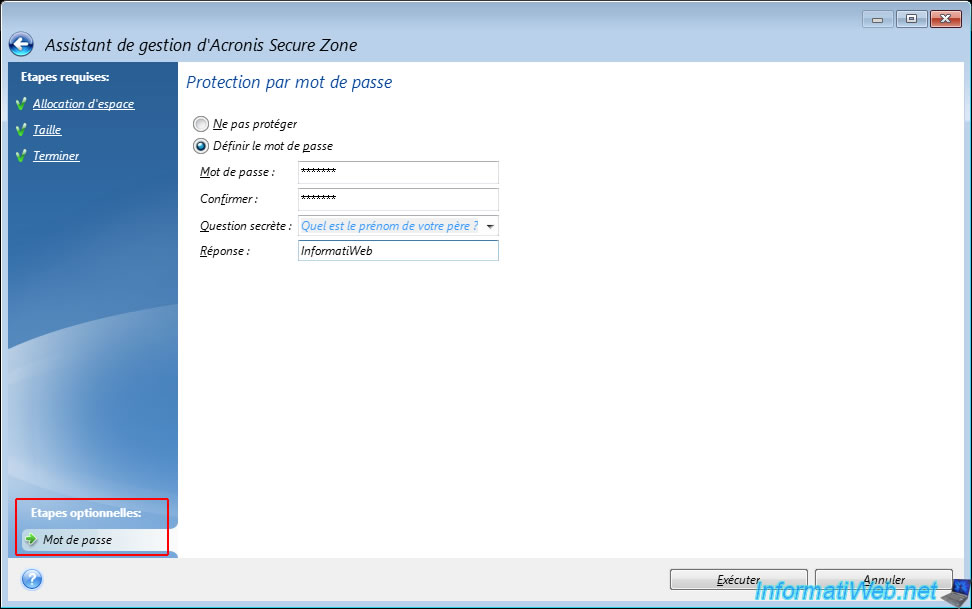
If you want to protect access to this special partition "Acronis Secure Zone", click on the optional step "Password" (located at the bottom left) of this wizard.
Then, select "Set password" and set a password, as well as a secret question and answer for it.
Then, click "Run".
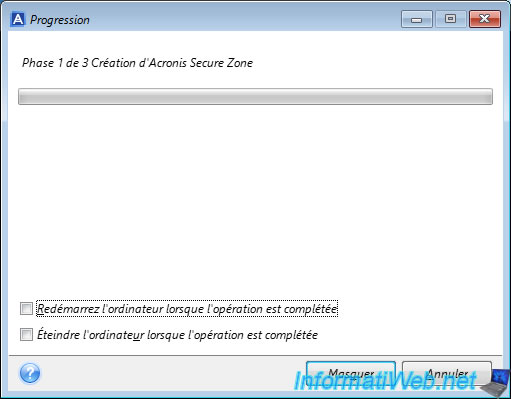
Please wait a little while the process initializes.

Please wait while the Acronis Secure Zone is created.
Plain Text
Phase 1 of 3 Creating Acronis Secure Zone
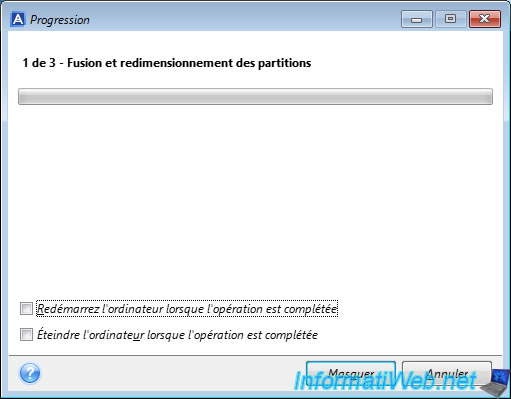
Then, Acronis Cyber Protect Home Office (True Image) will resize the previously selected partition to be able to place the "Acronis Secure Zone" partition at the end of the disk concerned by the previously selected partition.
Plain Text
1 of 3 - Merging and resizing partitions.
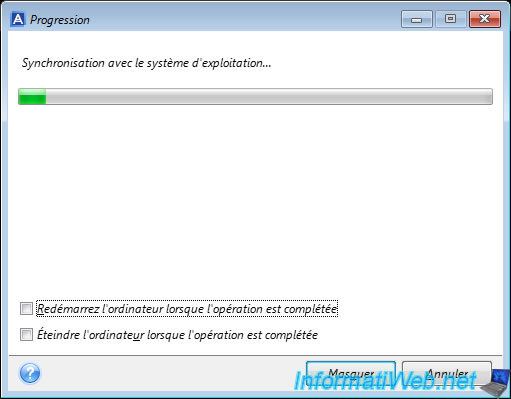
Finally, you will see this appear a little bit more.
Plain Text
Synchronization with the operating system...
Once the creation of this "Acronis Secure Zone" is completed, the message "The Acronis Secure Zone has been created successfully" will appear.

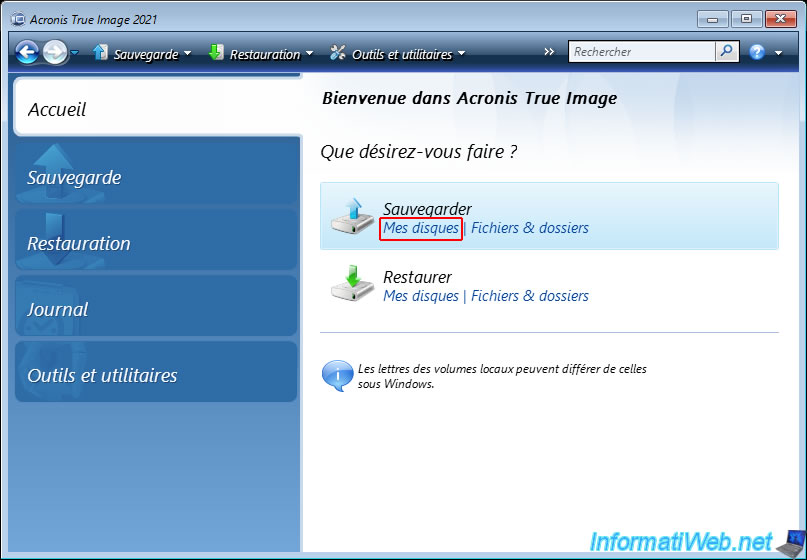
2. Back up your PC to the Acronis Secure Zone via your Acronis rescue media
Once the Acronis Secure Zone is created, you can back up your computer and store your backup on it if you wish.
To do this, click on the "My Disks" link in the "Backup" option.
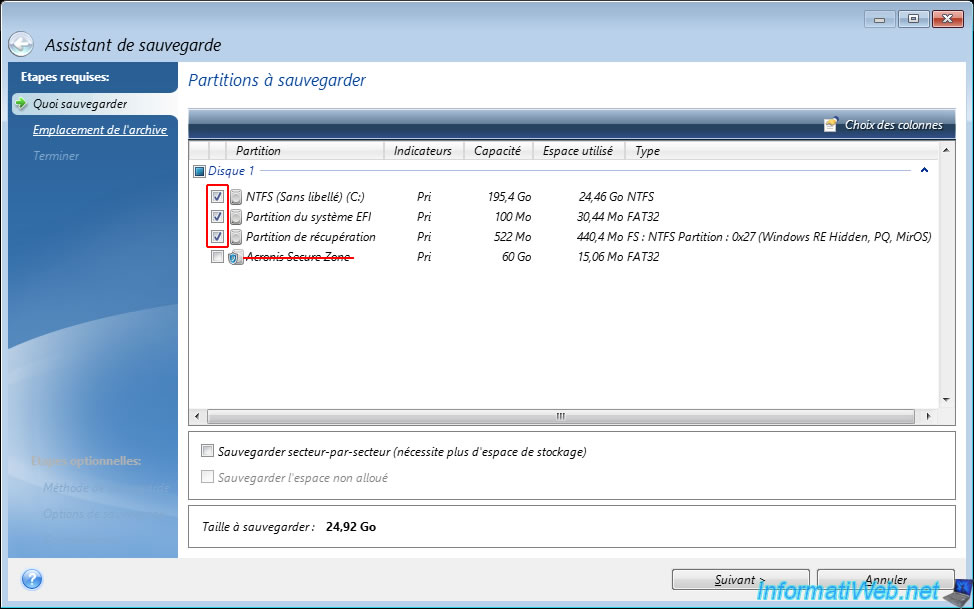
At the "Partitions to backup" step, select the partitions you want to backup, ignoring the one named "Acronis Secure Zone" (if you want to backup the disk where this "Acronis Secure Zone" partition is located).
Warning : it is important to ignore the "Acronis Secure Zone" partition so as not to lose your backups when restoring the partitions to backup later.
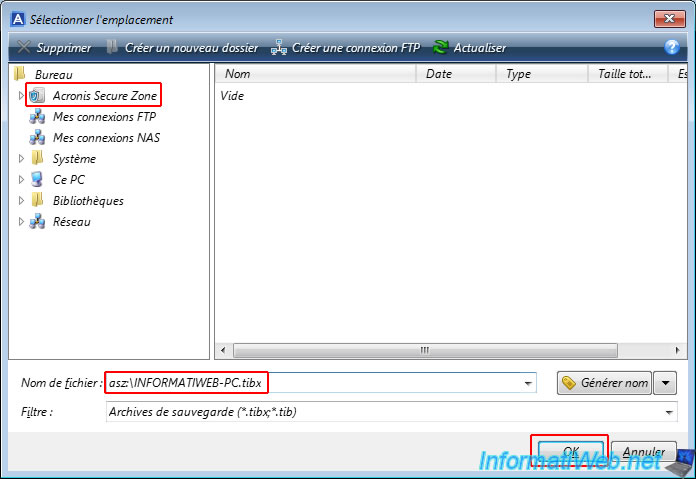
Select "Create a new backup archive" and click "Browse".
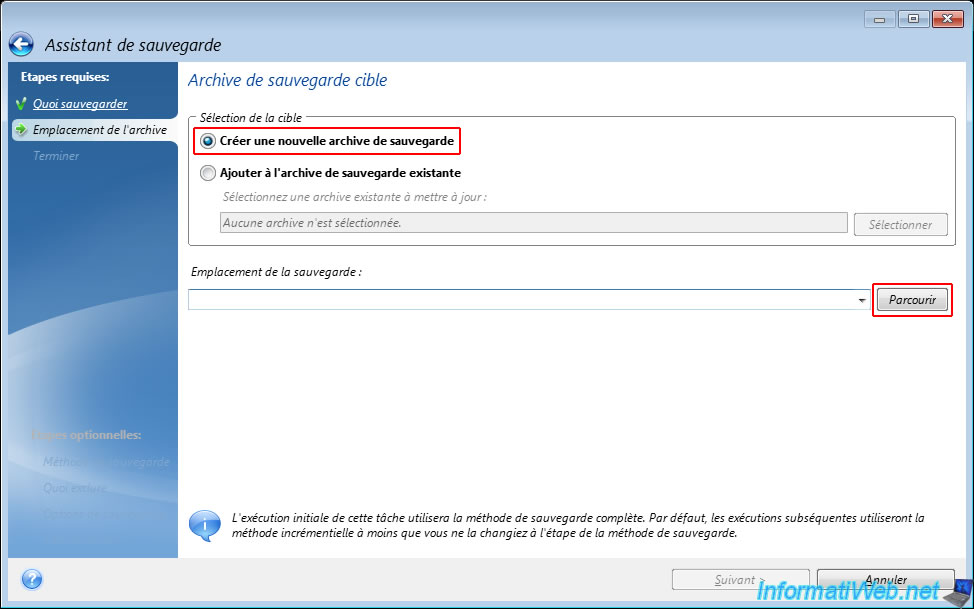
Go to the "Acronis Secure Zone" location located at the top left of the "Select Location" window, and then specify a file name with the ".tibx" extension for the backup that will be created on this Acronis Secure Zone.
Then, click OK.
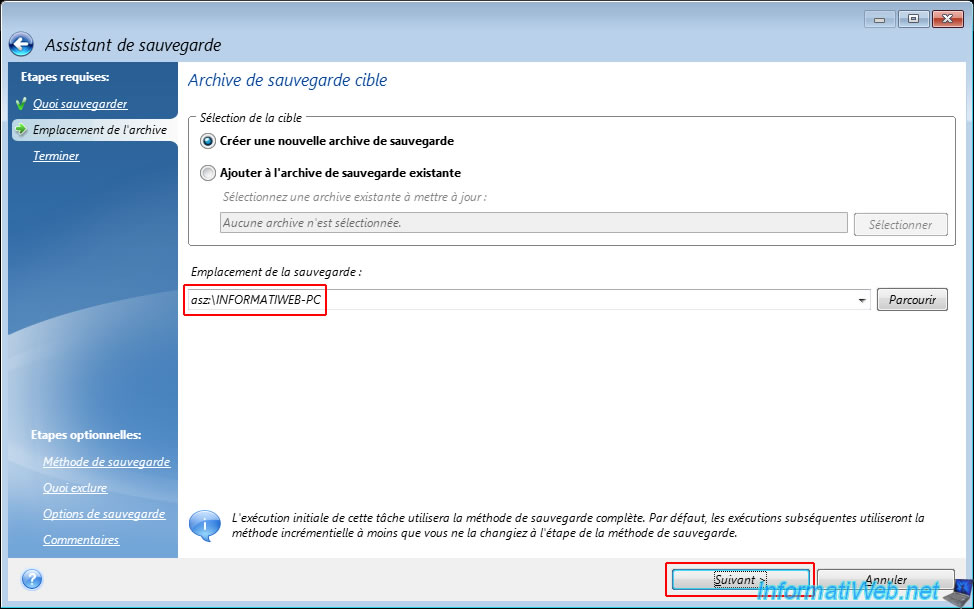
Note that the path displayed will start with "asz:\" (which means "Acronis Secure Zone").
The path of the backup that will be created appears.
Click "Next".
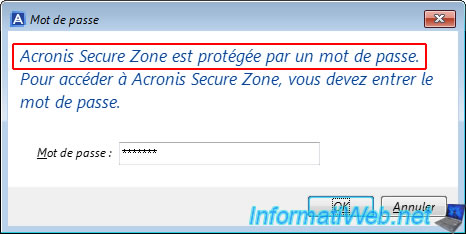
If you have protected your Acronis Secure Zone with a password (when creating it), a popup will appear asking for it.
Otherwise, this popup will not appear.
Plain Text
Acronis Secure Zone is password protected.
To access Acronis Secure Zone, you must enter the password.
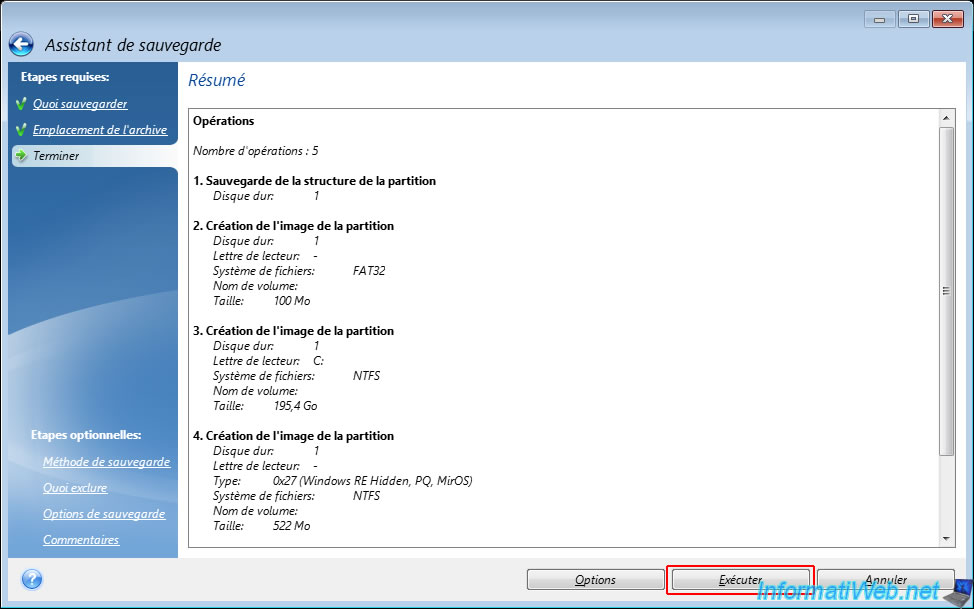
A summary of the operations that will be performed appears.
Click on "Run".
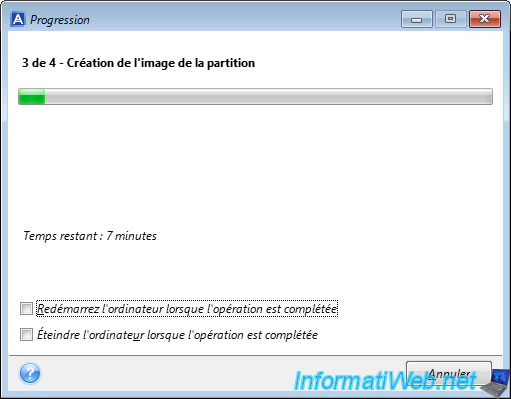
Please wait while the desired partitions are saved.
Plain Text
3 of 4 - Creating the partition image.
Once the backup of your partitions is complete, you will see the message "Backup operation successful".

Share this tutorial
To see also
-

Backup 9/1/2025
Acronis True Image - Backing up your smartphone to your PC
-
Backup 7/7/2025
Acronis True Image - Backup files or folders
-
Backup 10/6/2025
Acronis True Image - Clean up backup versions of a PC (local and Cloud)
-
Backup 8/18/2025
Acronis True Image - Replicate backups to Acronis Cloud
You must be logged in to post a comment