Enable the internal graphics card (iGPU / Intel UHD Graphics 630) of the ASUS ROG MAXIMUS XIII HERO motherboard
- BIOS
- 18 December 2023 at 14:49 UTC
-

- 2/2
2.3. Initialize the graphics part (Intel UHD Graphics) first in the BIOS of the ASUS ROG MAXIMUS XIII HERO motherboard
Restart your computer and return to the BIOS of your ASUS ROG MAXIMUS XIII HERO motherboard.
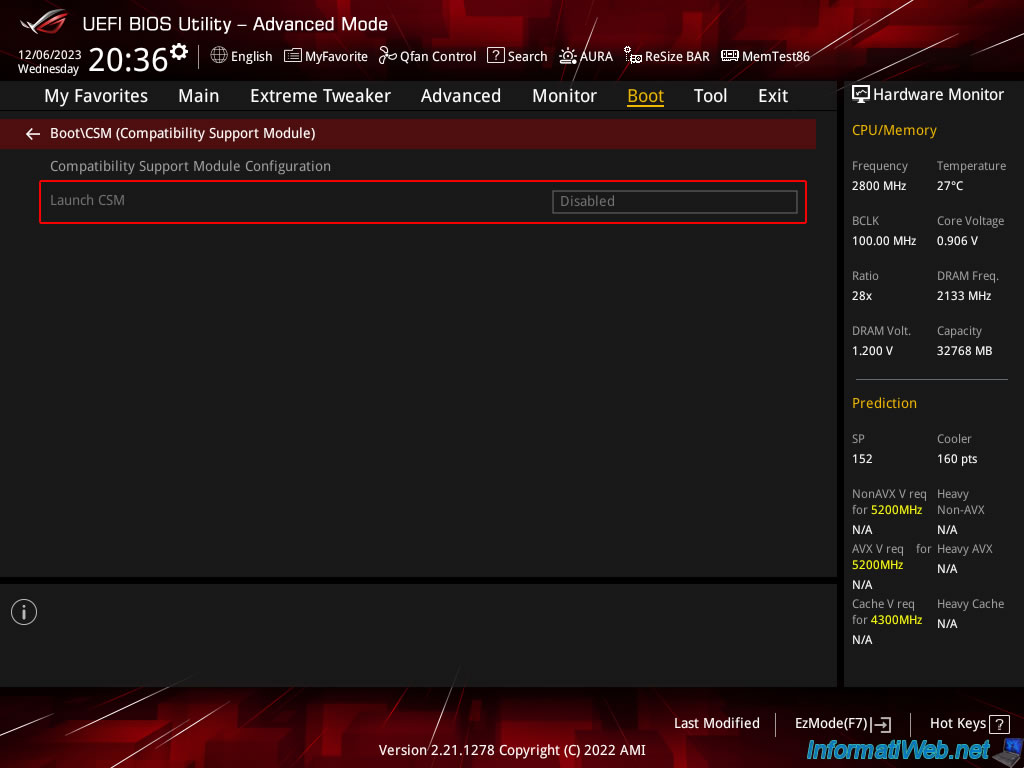
If you go to the "Boot" tab, then to "CSM (Compatibility Support Module)", you will see that the "Launch CSM" option is disabled (Disabled) and grayed out.
This is because re-enabling this setting would disable the graphics portion of your CPU again on this motherboard (although UEFI was not required for the iGPU on other Asus motherboards).
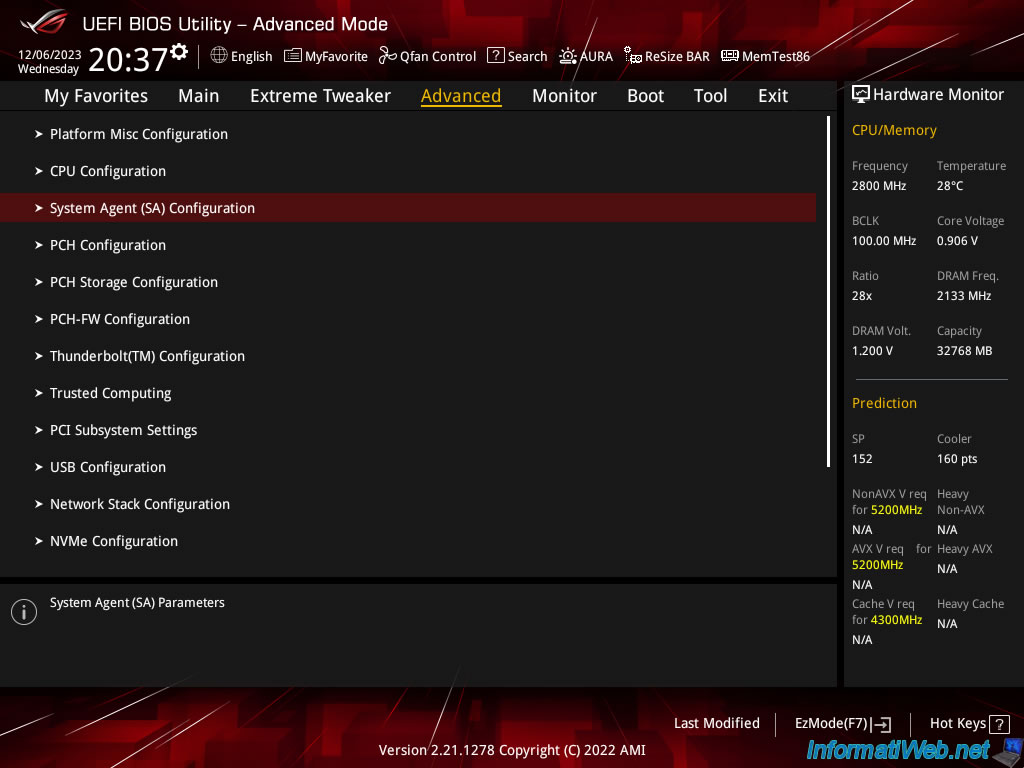
Go to the "Advanced" tab and click on "System Agent (SA) Configuration".
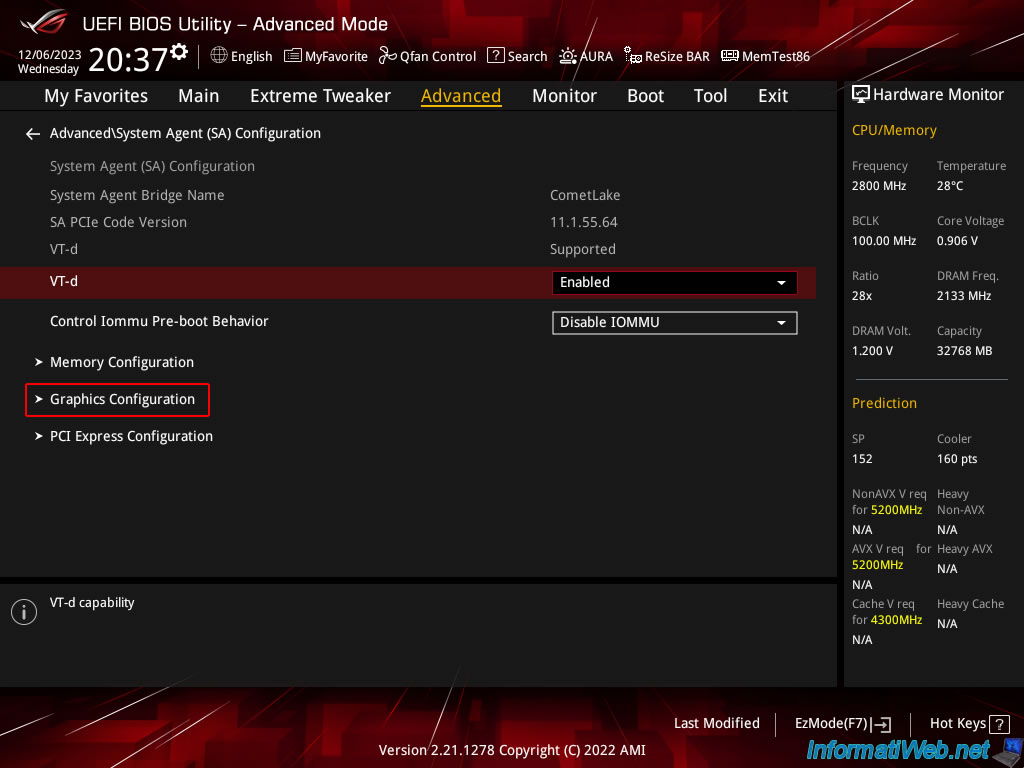
Again, if you want to use GPU passthrough, you will need to enable the "VT-d" setting.
Otherwise, don't change the value.
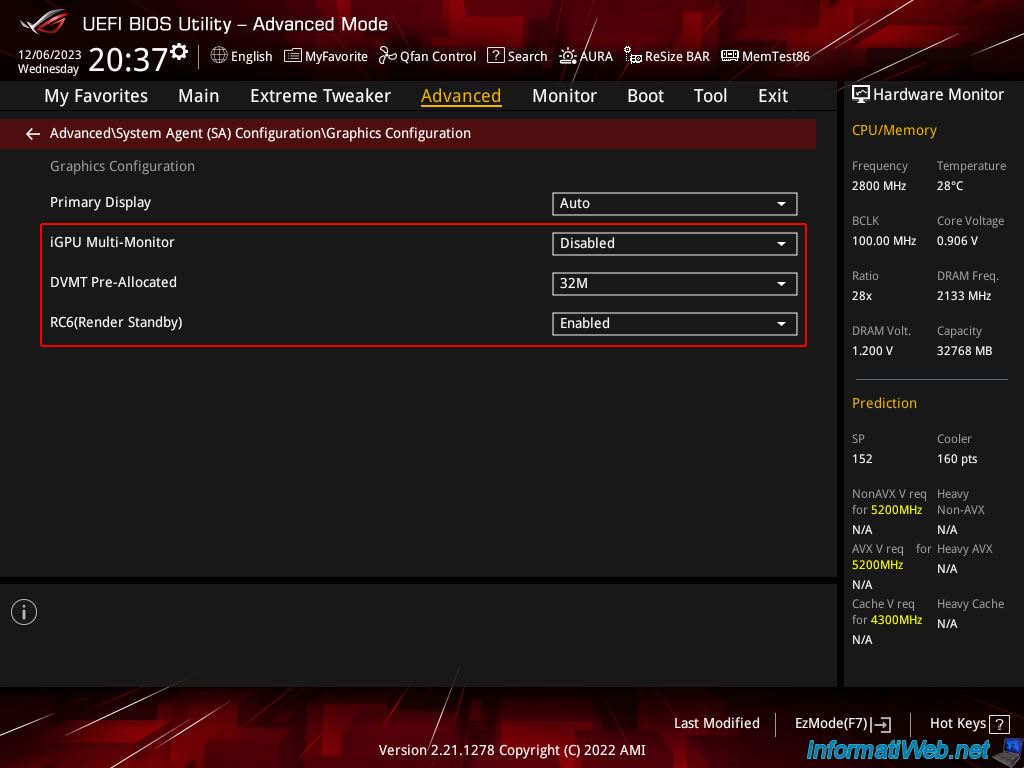
Then click on: Graphics Configuration.
As you can see, 3 new settings have appeared in this "Graphics Configuration" section since the graphics part of your processor is enabled.
- Primary Display: allows you to choose the graphics card to initialize when the computer starts.
So, you can choose between the graphics part of your Intel processor or your physical graphics card. - iGPU Multi-Monitor: allows you to power the 2 graphics cards (internal (Intel UHD Graphics) and external (Nvidia, ATI, ...) or only the one selected above.
Enabling this option will set the pre-allocated memory (via the setting below) to 64 MB. - DVMT Pre-Allocated: allows you to adjust the video memory used by the graphics part of the Intel processor.
- RC6 (Render Standby): enables checking for render standby support.
Source : ROG MAXIMUS XIII HERO BIOS Manual (page 52).
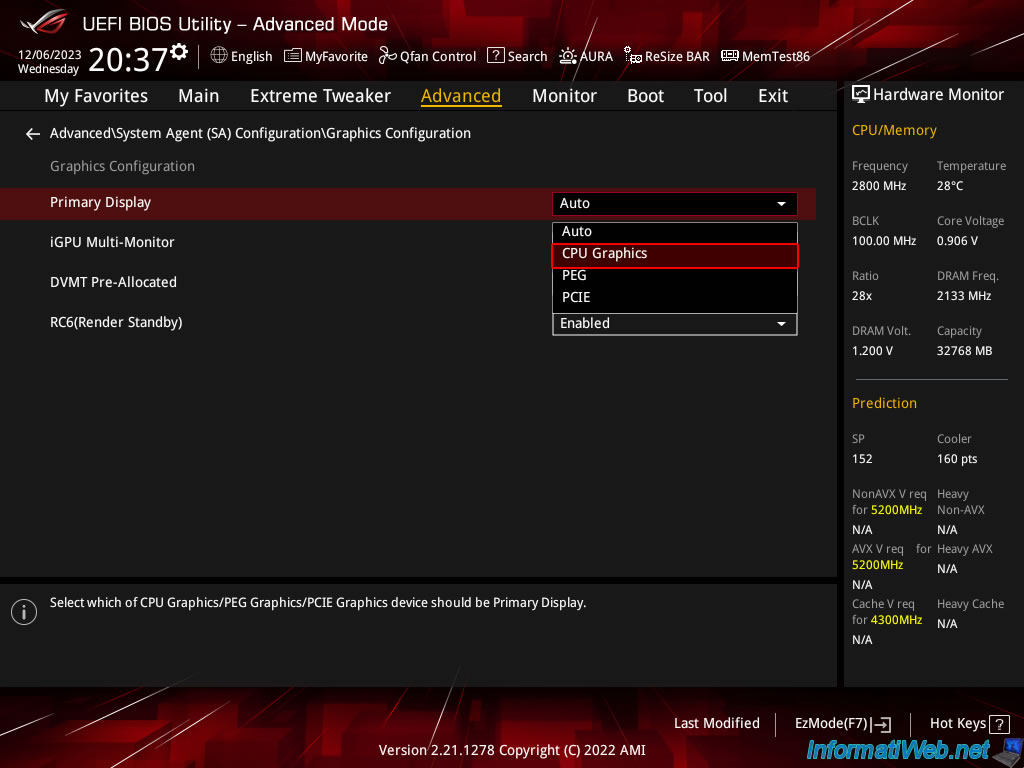
Now, if you look at the list of available values for the "Primary Display" setting, you will see that the "CPU Graphics" option is available.
Select this "CPU Graphics" option to have your computer continue to initialize the graphics part of the processor first.
Note: in case you want to use GPU passthrough, this allows you to leave the physical graphics card free to be able to pass it to a virtual machine.
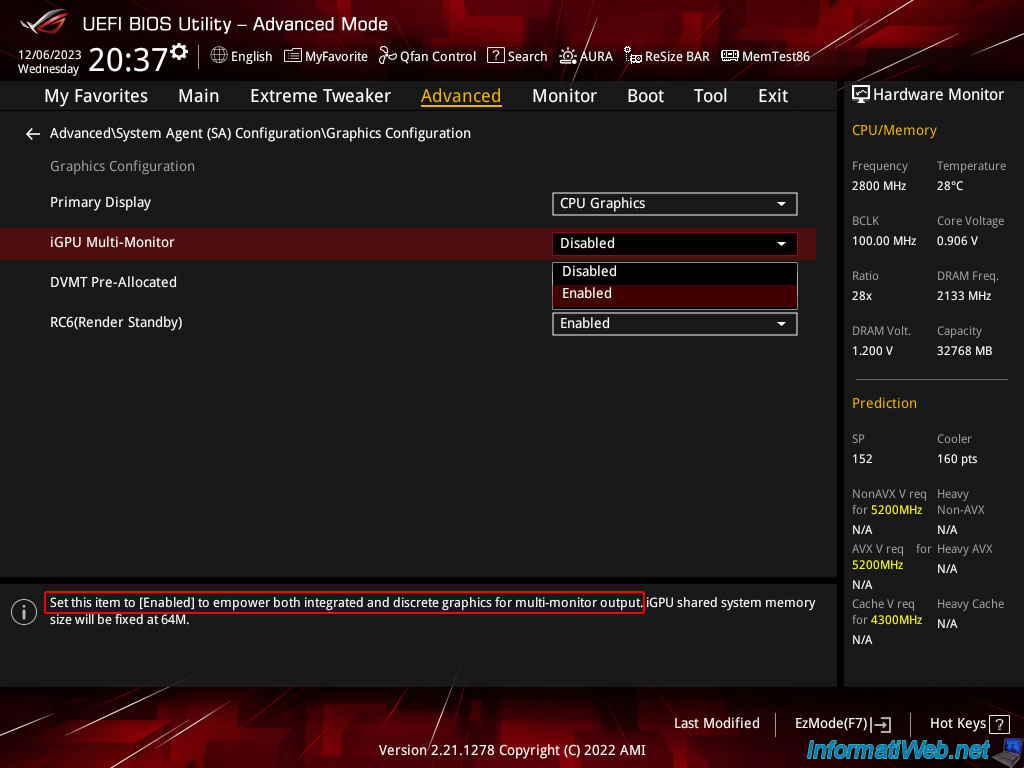
Enable the "iGPU Multi-Monitor" setting by selecting the "Enabled" value.
As indicated at the bottom of the screen, this allows you to power the integrated graphics card (= the graphics part of your Intel processor = Intel UHD Graphics), as well as the physical graphics card connected via PCIe to your motherboard.
So, in the case of a server, you use the graphics part of the processor for your server console and you will pass the physical graphics card (connected via PCIe) to your virtual machine.
Notes :
- when you enable this setting, the memory allocated to the graphics part of the processor (iGU) will be set to 64 MB instead of the default 32 MB.
- to use only the graphics part of the processor, leave this setting disabled. Which means that if you later plug in a PCIe graphics card, it will not work and you will therefore not have a display via this physical graphics card.
Plain Text
iGPU Multi-Monitor.
Set this item to [Enabled] to empower both integrated and discrete graphics for multi-monitor output. iGPU shared system memory size will be fixed at 64M.
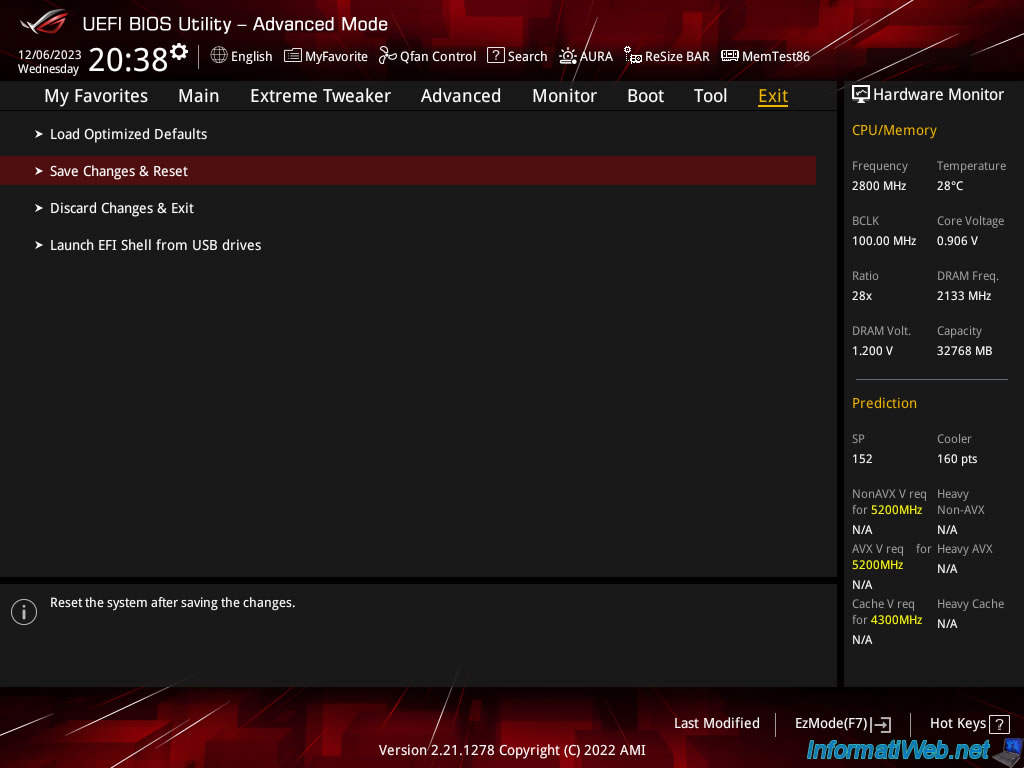
Finally, go to the "Exit" tab and click "Save Changes & Reset".
Click OK.

2.4. Boot the computer using the graphics part of the CPU first
As expected, you still have a display via the HDMI port of your motherboard given that the iGPU (graphics part of the CPU) is always enabled (Primary Display: CPU Graphics) and that your motherboard powers your 2 graphics cards (internal and external) thanks to the activation of the "iGPU Multi-Monitor" setting.

Your computer continues to boot in UEFI mode.

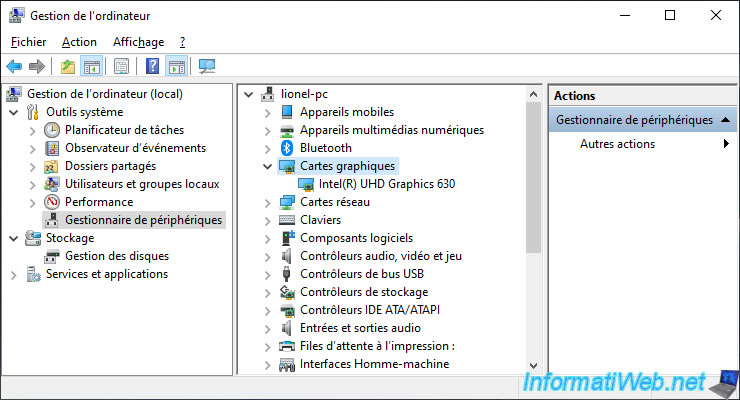
If you open the device manager again, you will see that the graphics card used still corresponds to the graphics part of your processor (Intel(R) UHD Graphics 630).
3. Reconnect your physical graphics card
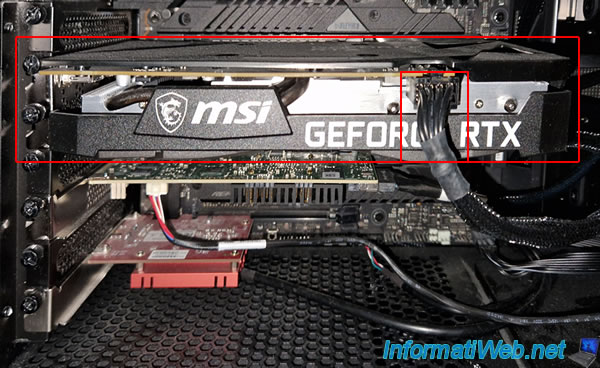
Now that the internal graphics card (iGPU) is activated and your computer's BIOS is configured to power both graphics cards (internal and external), you can reconnect your physical graphics card.
Important : if you have a large graphics card, don't forget to reconnect the PCIe power connector(s) to it.
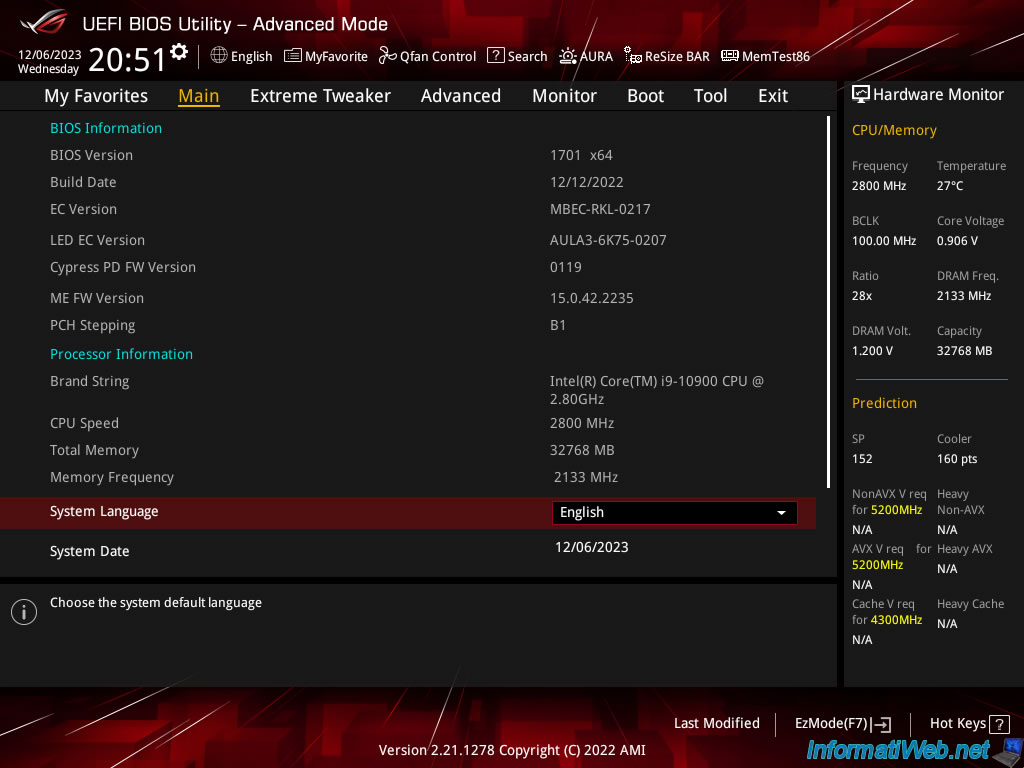
Return to the BIOS of your Asus ROG motherboard.
Go to the "Advanced" tab again, then to the "System Agent (SA) Configuration" section.
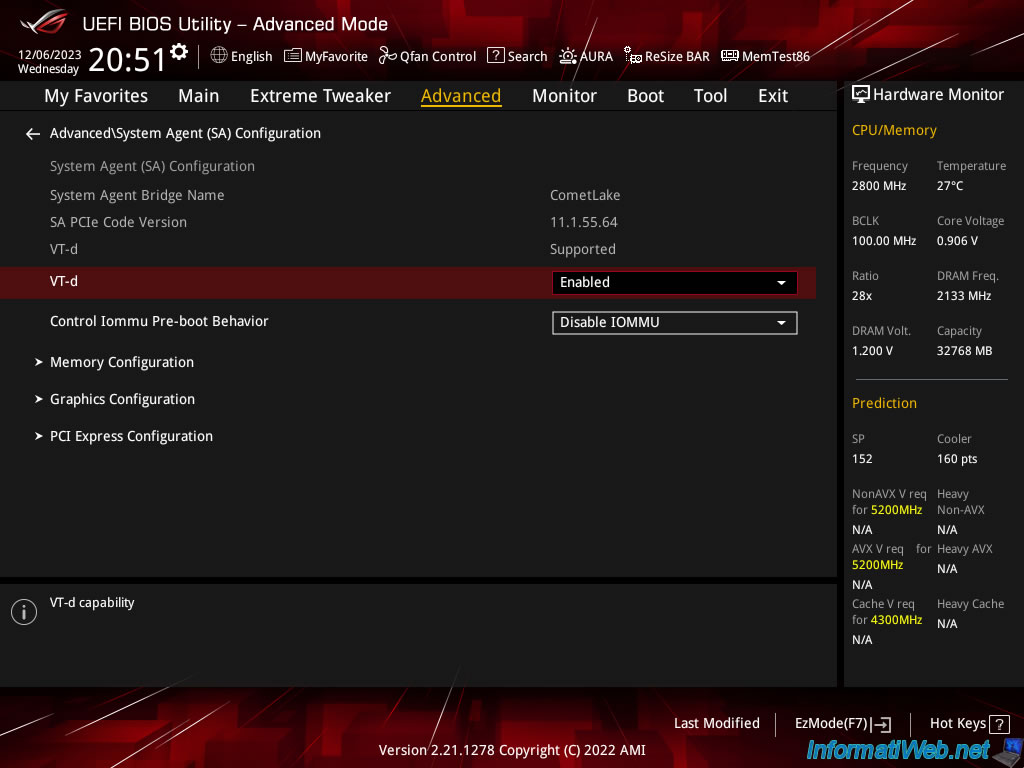
As you can see, the 2 main settings are still configured for:
- Primary Display - CPU Graphics: first initialize the graphics part of your Intel processor.
- iGPU Multi-Monitor - Enabled: power your 2 graphics cards (internal (CPU) and external (GPU)).
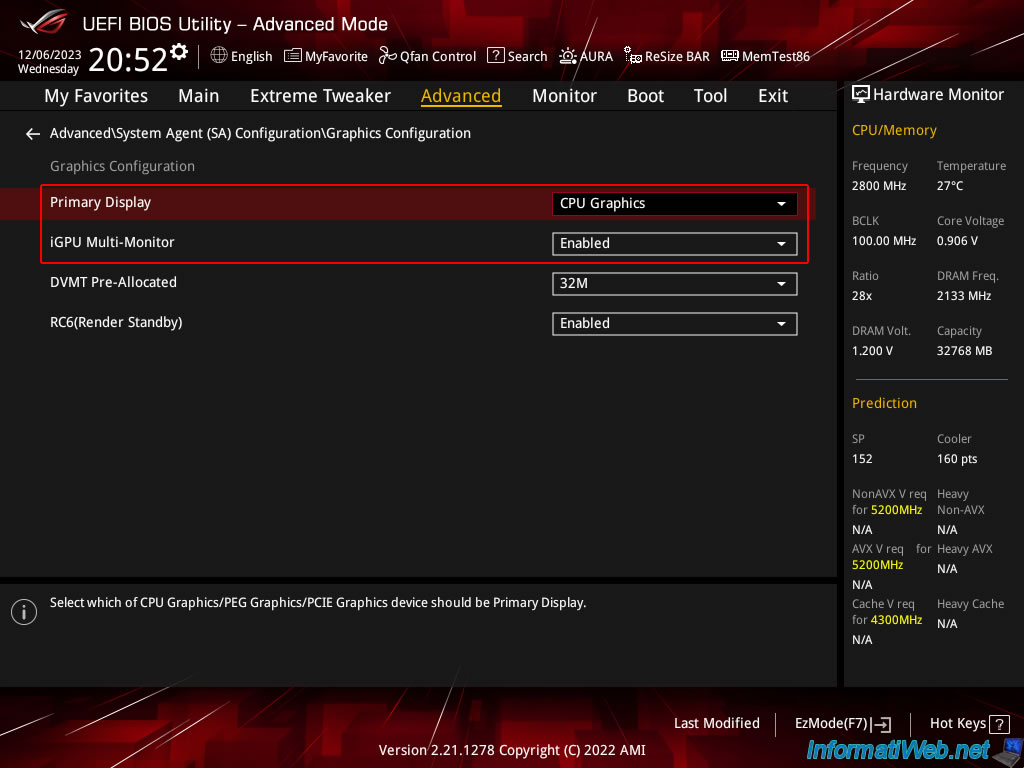
Go to the "Boot" tab and click on "CSM (Compatibility Support Module)".
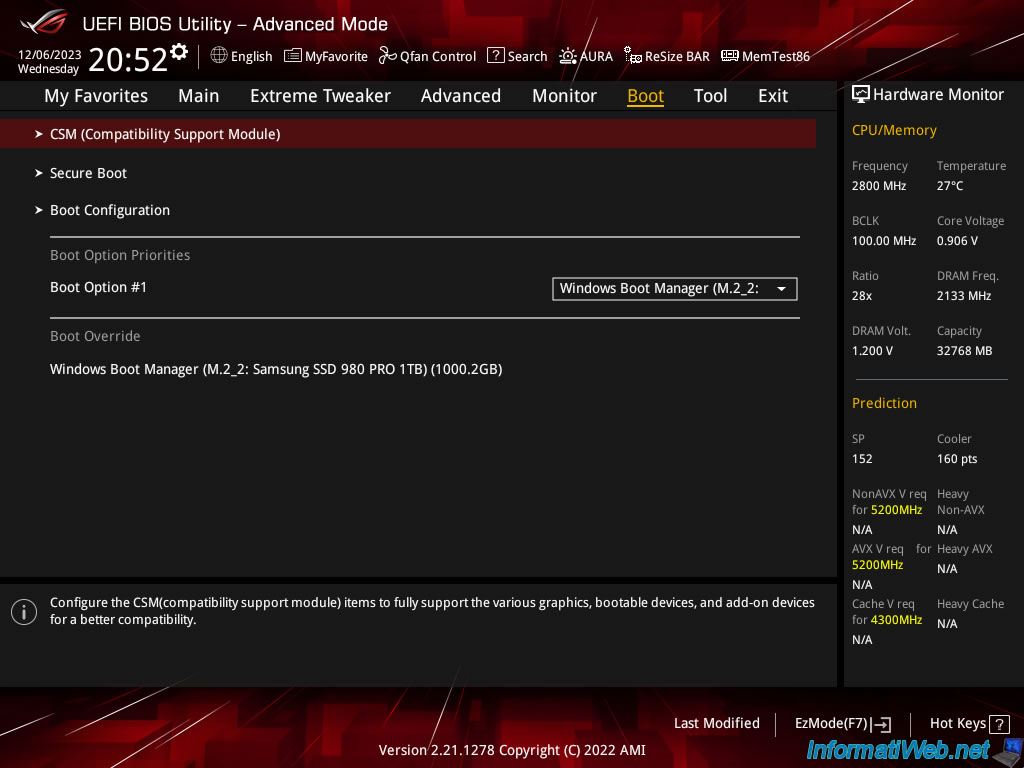
As you can see, the "Launch CSM" option is still Disabled, but it is no longer grayed out.
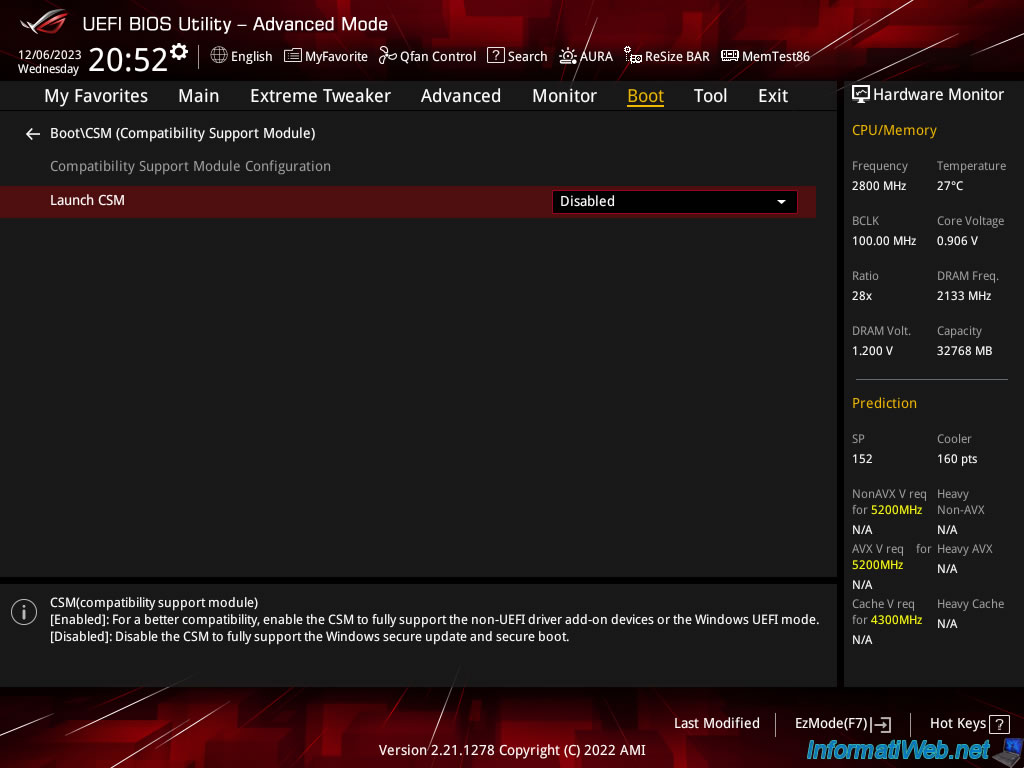
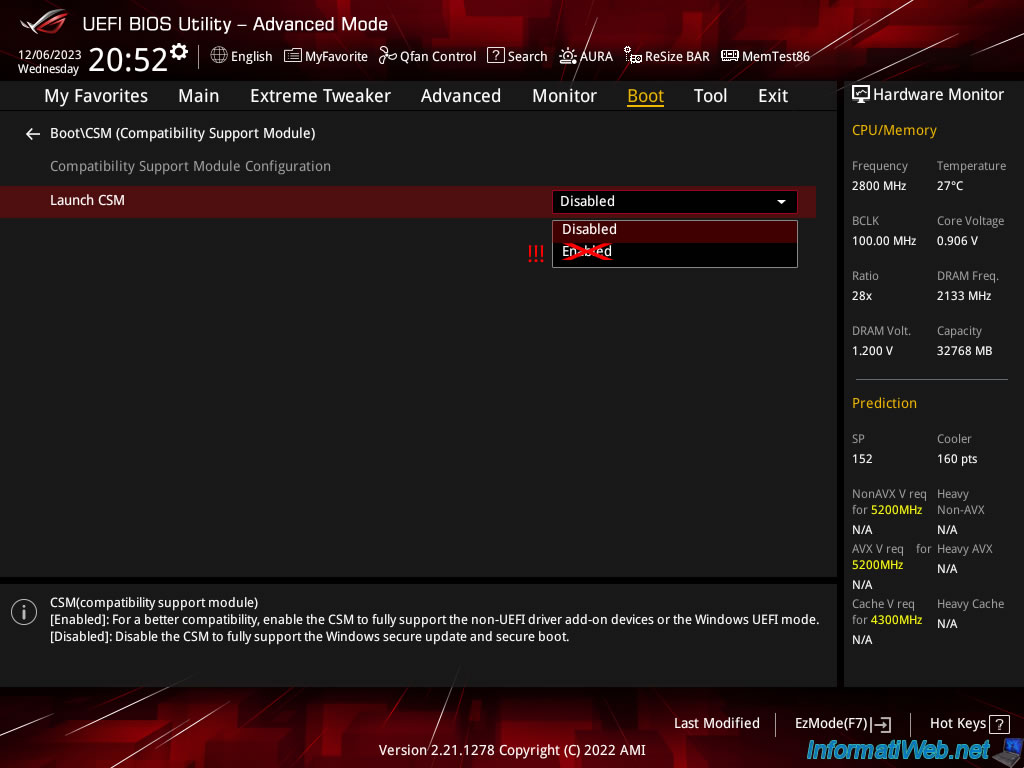
Warning : don't reactivate the "Launch CSM" option if you wish to continue using the graphics part of your Intel processor (or the 2 graphics cards: Intel UHD Graphics + physical graphics card).
If you reactivate the "Launch CSM" option, the "CPU Graphics" option of the "Primary Display" setting will disappear again, as well as the 3 other settings: iGPU Multi-Monitor, DVMT Pre-Allocated and RC6 (Render Standby) .
To resolve the problem, simply deactivate this "Launch CSM" setting again (no need to unplug the physical graphics card again).
Go to the "Exit" tab and click "Save Changes & Reset".
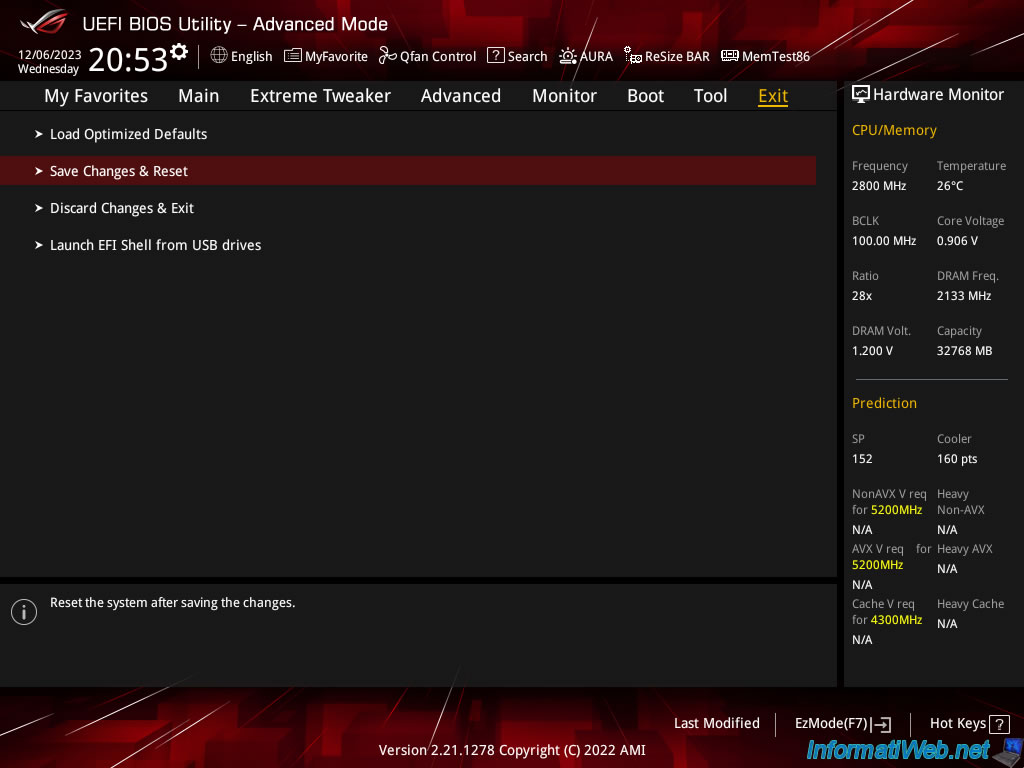
Click OK.

Now, if you open the device manager again in Windows 10, you will see 2 graphics cards appear in the "Graphics cards" section:
- Intel(R) UHD Graphics 630: the graphics part of your Intel processor.
- NVIDIA GeForce RTX 3050: your physical graphics card connected via PCIe to your motherboard.
Note: connecting a screen to the motherboard + another to the physical graphics card may be necessary for the 2 graphics cards to appear.
However, both will be powered and therefore functional.
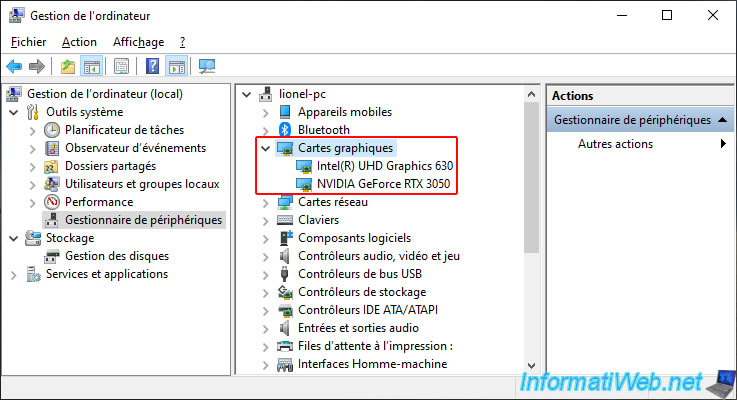
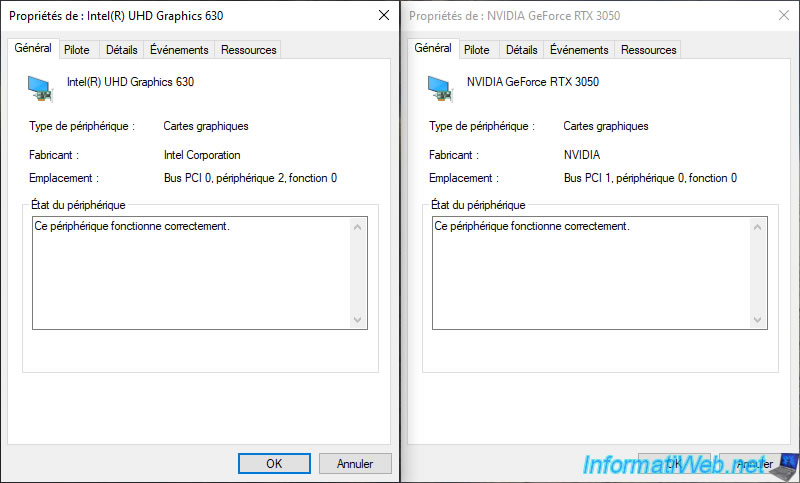
As expected, both work correctly simultaneously.
4. Manage multi-monitor setting on Windows 10
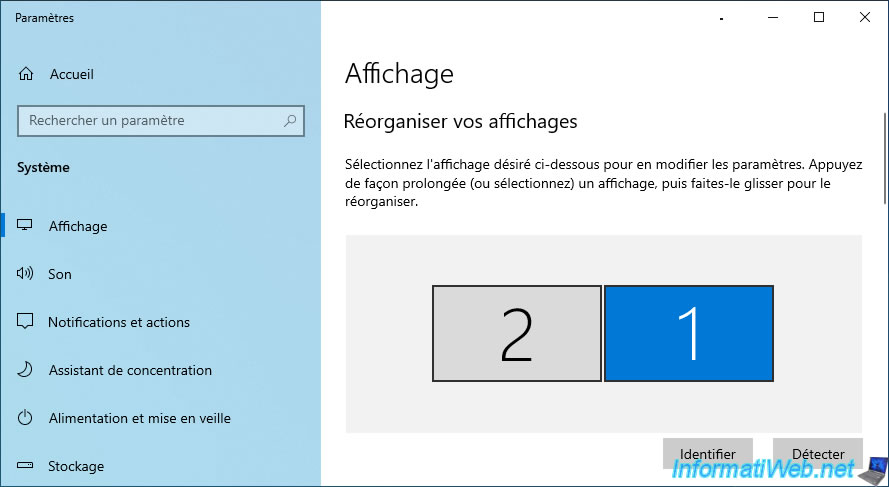
If you have plugged a screen into the HDMI port of your motherboard, as well as another into your physical graphics card (Nvidia, ATI, ...), Windows 10 will detect 2 screens.
Which means that if you move your mouse beyond the right edge of your screen, it will disappear, because it will be on the other screen.
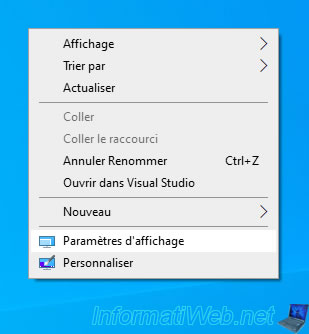
To fix this problem (if it's the same screen with 2 HDMI inputs) under Windows 10, right-click "Display Settings".
The "Display" section of the Windows 10 "Settings" application appears with 2 screens.
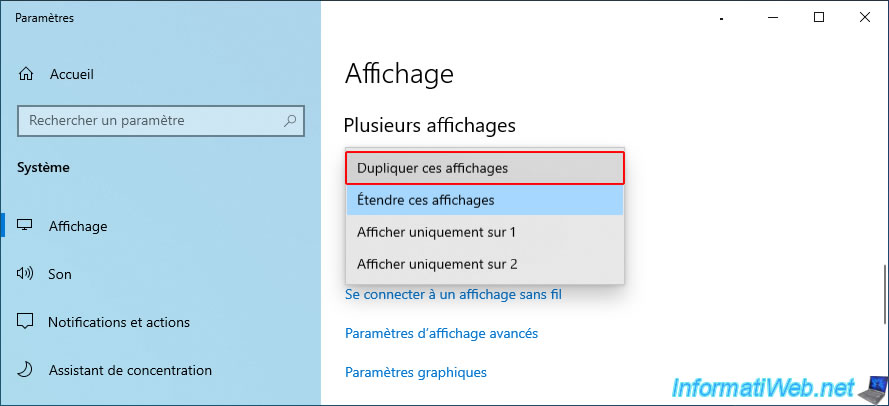
Click the "Multiple displays" list and select "Duplicate these displays".
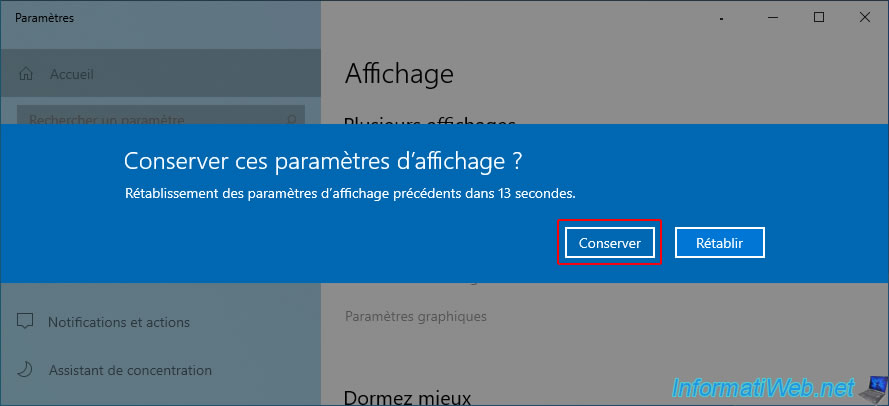
Click: Keep.
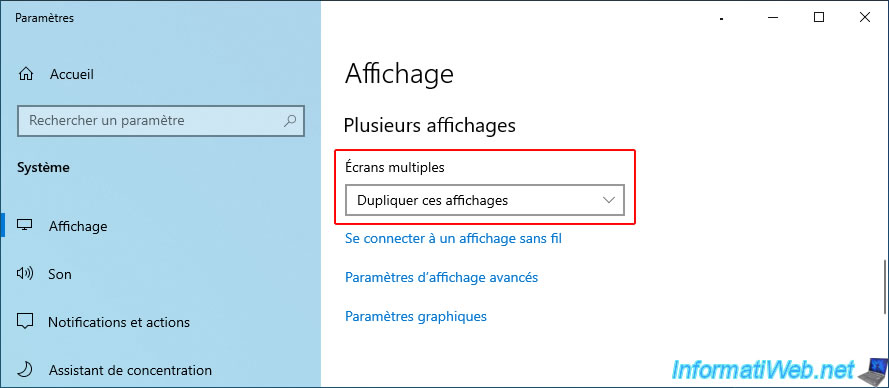
Now, Windows 10 will duplicate the display on your 2 screens.
Share this tutorial
To see also
-
BIOS 1/26/2013
Change the BIOS boot priority
-

BIOS 11/25/2015
Enable IOMMU or VT-d in your BIOS
-
BIOS 12/28/2021
Limit a server's exposure to attacks with the Intel XD / AMD NX
-
BIOS 11/9/2021
Take a printscreen in a recent Asus BIOS
No comment