- Others
- 07 November 2022 at 17:33 UTC
-

Thanks to the Recovery DVDs that you could create via the Burn Recovery program preinstalled on your MSI laptop, you can restore the Windows 8 installation to its factory state without erasing your personal data.
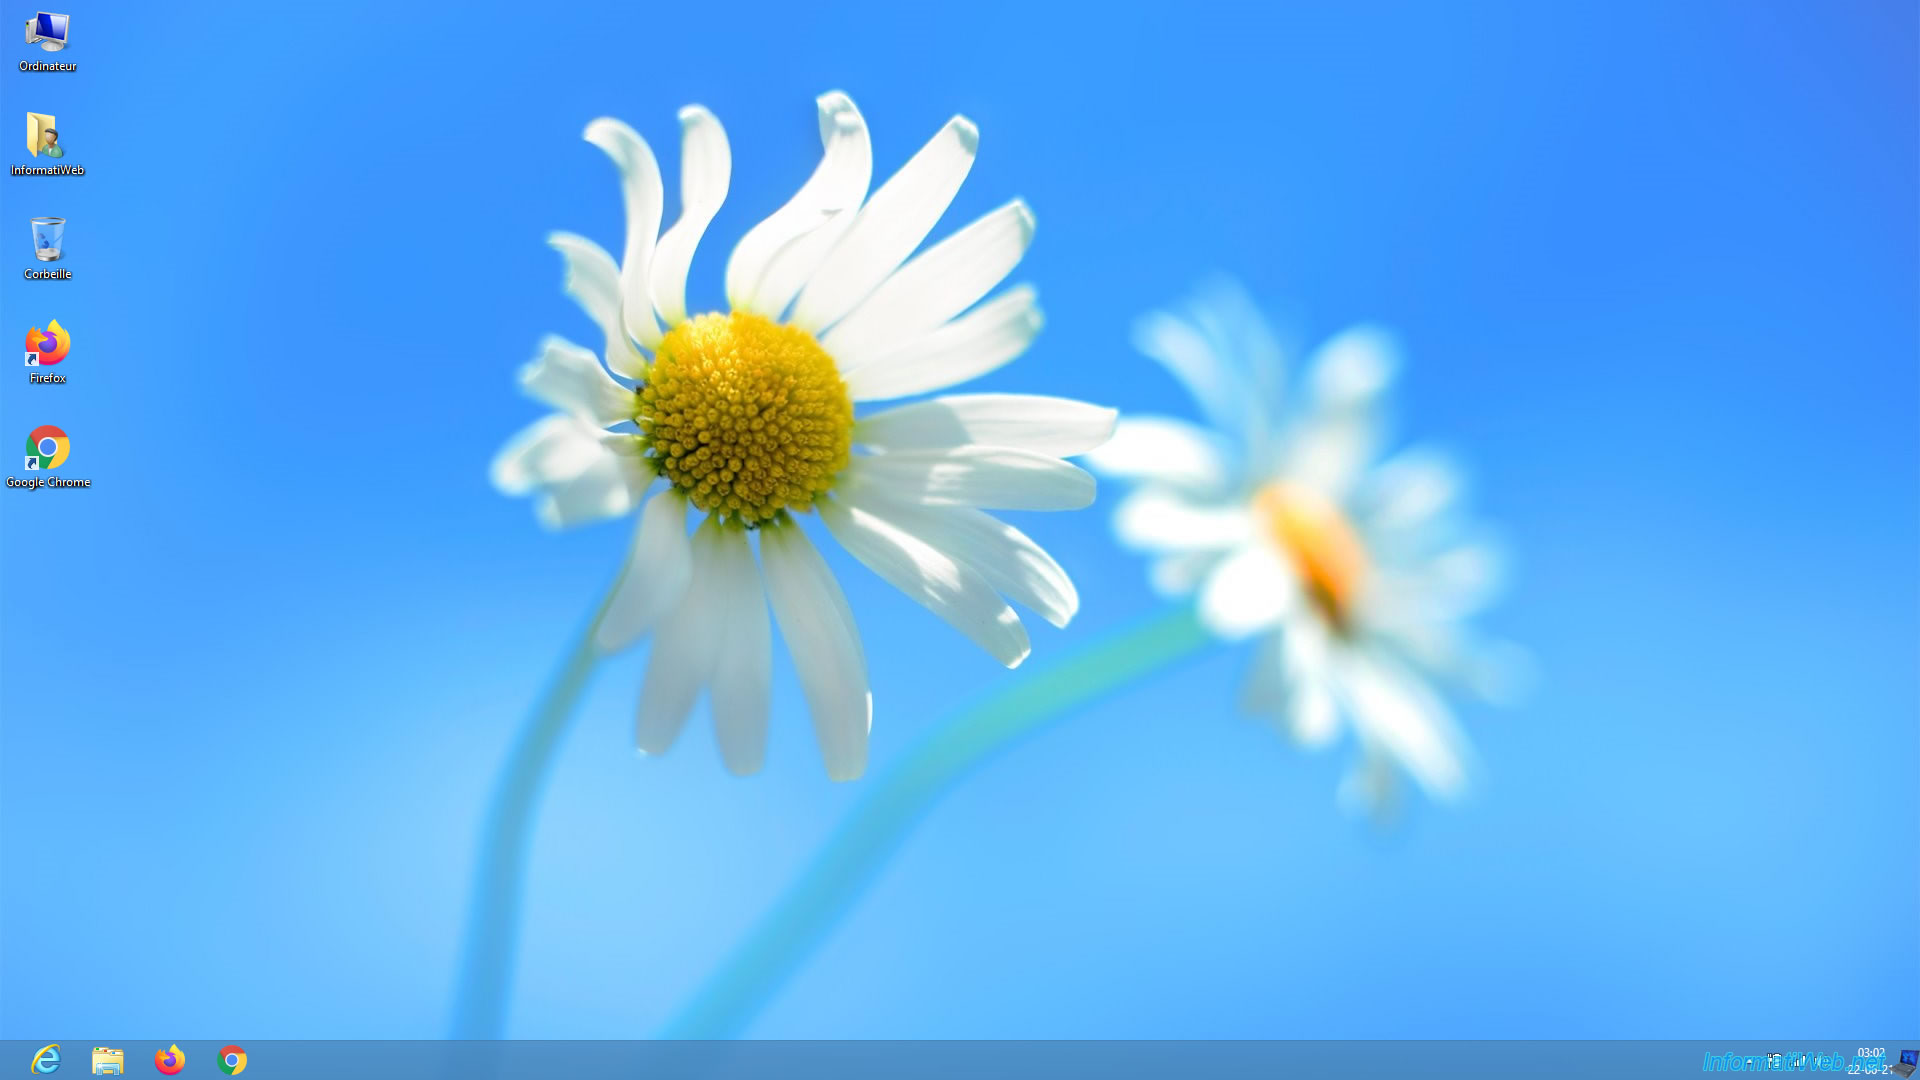
1. Laptop before restoration
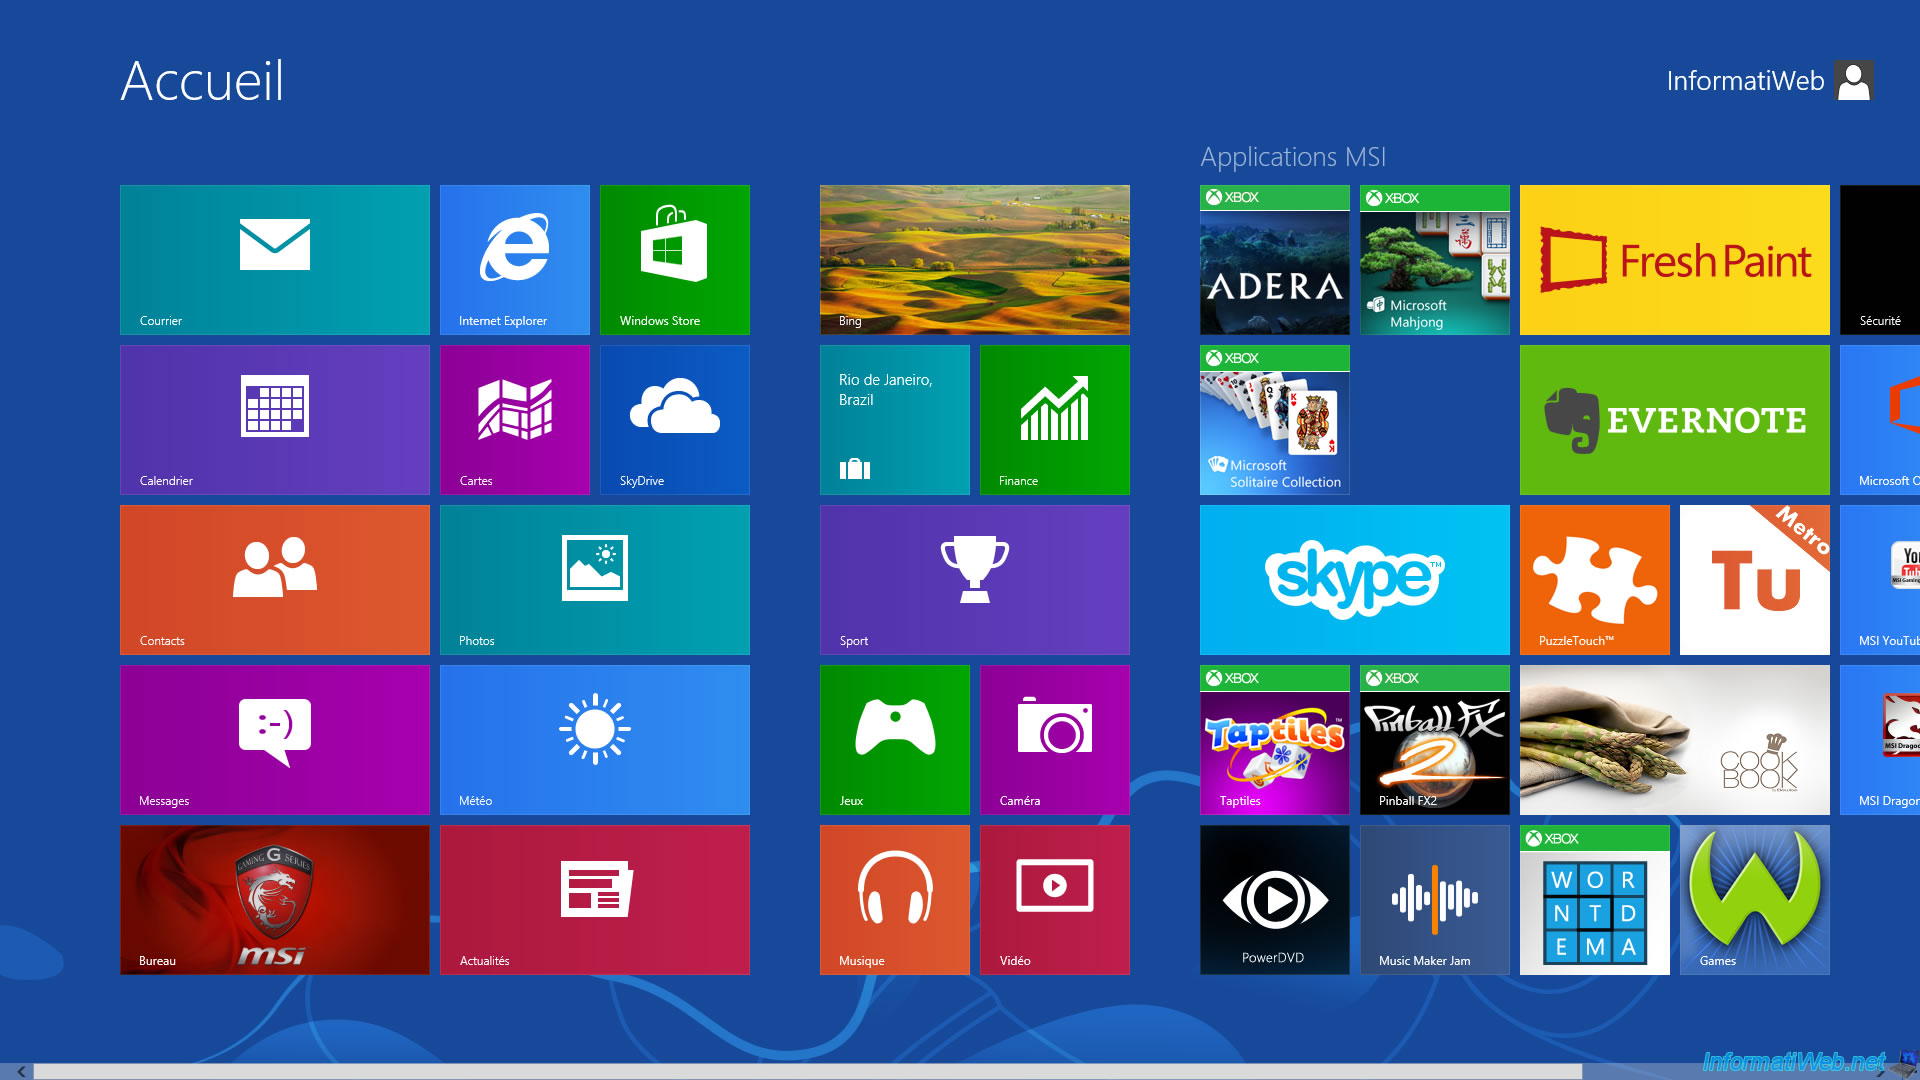
At present, this is what our MSI laptop PC looks like.
As you can see, we installed 2 web browsers (Firefox and Google Chrome) and we used a Windows 8 wallpaper.
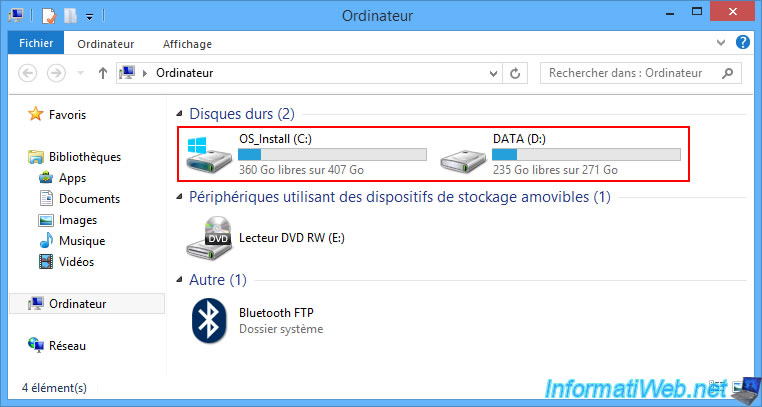
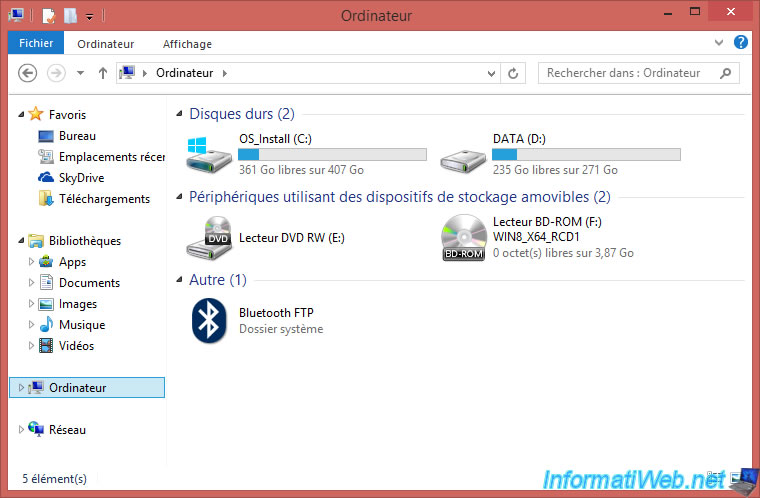
If we look at the partitions of our laptop, they are always those created by the manufacturer :
- OS_Install (C:) : this partition contains your installation of Windows 8, as well as the "My documents", Pictures, ... folders for each user.
WARNING : when you launch the restoration of Windows 8 using the recovery DVDs previously burned on DVDs, this partition will be completely erased.
If you still have personal data in the "My documents", Pictures, ... folders, you must transfer them to the "DATA (D:)" partition, on a USB key or an external hard drive before starting the restoration of Windows 8. - DATA (D:) : this partition exists by default, but it's empty when you turn on your MSI laptop for the first time since it's intended to contain your own data.
Everything in this partition will be kept during Windows 8 recovery ONLY IF you use "SYSTEM PARTITION RECOVERY" option of MSI's recovery system.
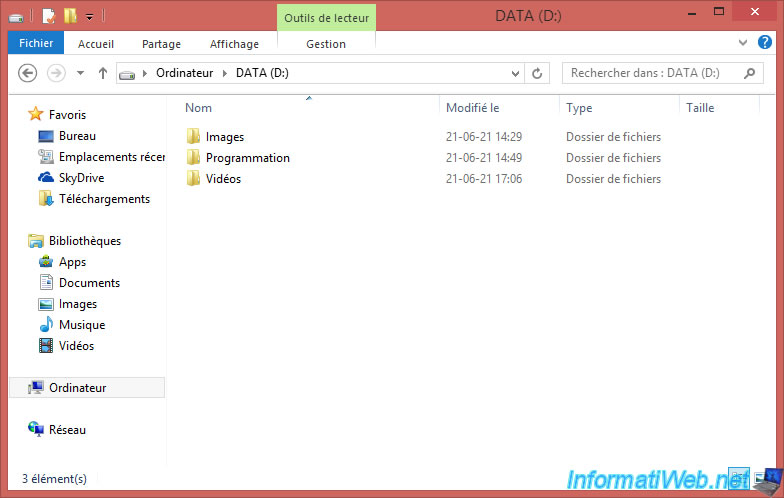
As you can see from the image below, our "DATA (D:)" partition contains 36 GB of personal data.
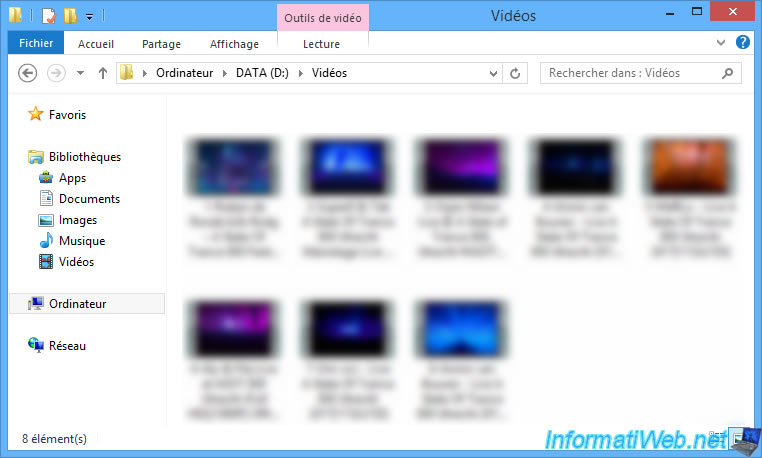
On this "DATA (D:)" partition, there are in our case many files, including videos.
2. Restoring Windows 8
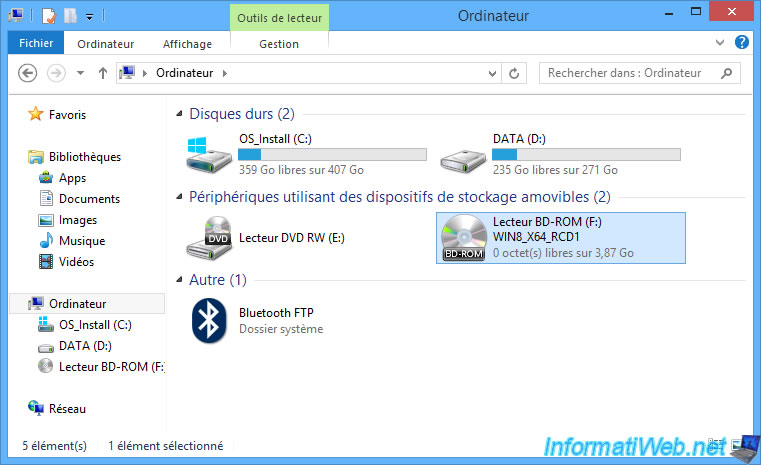
To restore your Windows 8 installation in the event of a problem with Windows, insert your 1st MSI recovery DVD and into your laptop and Windows will recognize it as "WIN8_X64_RCD1".
Note : if you wonder why there are 2 CD/DVD drives in the image below, it's simply because we used a somewhat special external CD/DVD drive (namely : Zalman ZM-VE300) .
But, that doesn't matter.
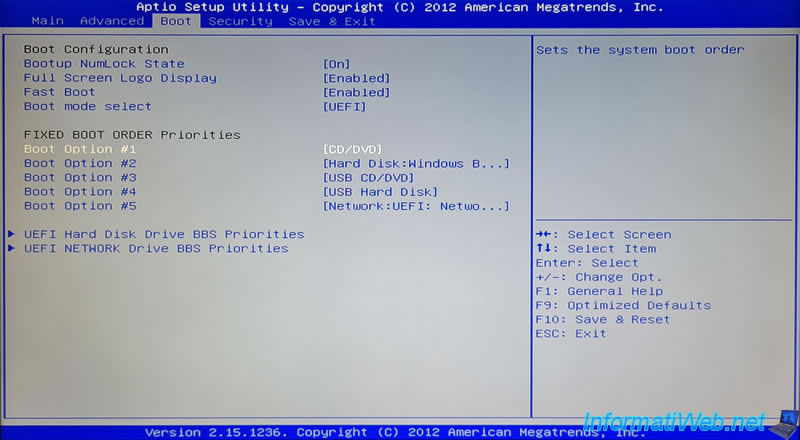
Configure your MSI laptop's BIOS to boot first on your CD/DVD drive.
If necessary, refer to our procedure : Configure the BIOS of your MSI laptop.
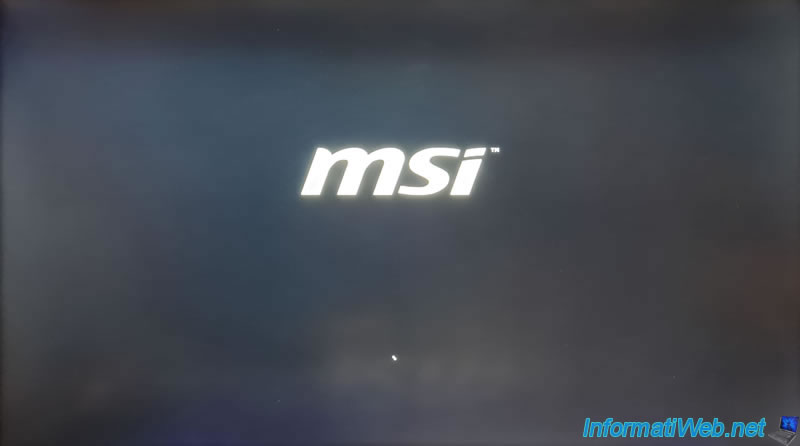
Then, restart your laptop and press any key when prompted.

Once you press a key, the MSI logo will appear.
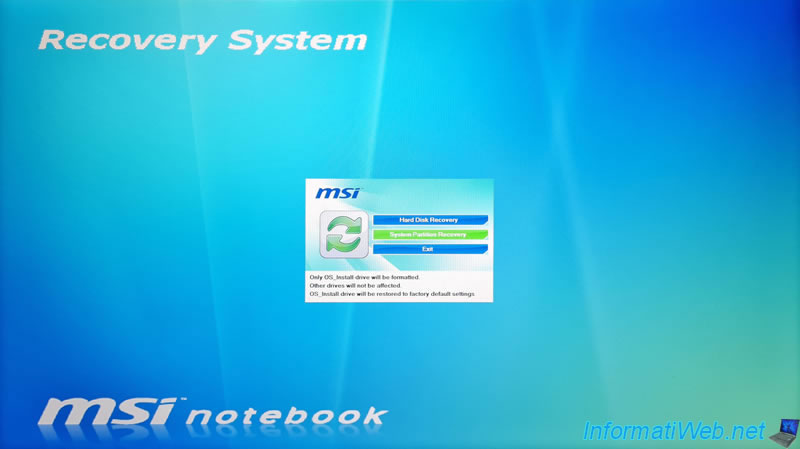
Then, you will come to MSI's Recovery System.
Warning : to restore only your Windows 8 installation WITHOUT DELETING your personal data stored in the "DATA (D:)" partition, you must CLICK ONLY on the "SYSTEM PARTITION RECOVERY" button.
Reminder : everything outside the "DATA (D:)" partition will therefore be erased and permanently lost. The "My Documents", "My Pictures", ... folders that most of you tend to use are in the "OS_Install (C:)" partition.
And more precisely, these are in the folder: C:\Users\[username on Windows]. So, these will also be deleted instantly once you click on "SYSTEM PARTITION RECOVERY" button.
If you haven't moved these data to the "DATA (D:)" partition yet, click the "Exit" button and do it now.
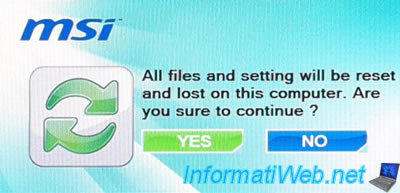
Once you are sure that you have backed up your data in the "DATA (D:)" partition, click on "System Partition Recovery" to erase the contents of the "OS_Install (C:)" partition and start restoring Windows 8 back to its factory state.
The "All files and settings will be reset and lost on this computer. Are you sure to continue ?" message appears.
Click Yes to confirm erasing the files on the "OS_Install (C:)" partition and resetting Windows 8 settings.
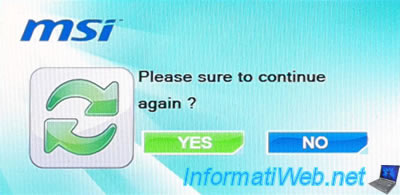
Confirm the Windows 8 recovery operation again by clicking Yes again.
The small MSI window disappears for a few seconds.

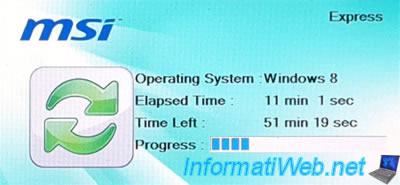
Then, this small window will reappear and Window 8 recovery begins.
Since you used the "SYSTEM PARTITION RECOVERY" option, the word "Express" is displayed at the top right.
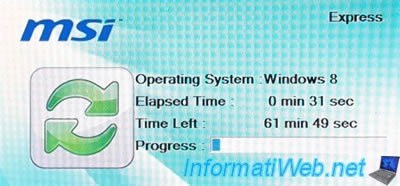
Wait while recovering Windows 8.
After Windows 8 recovery is complete, you will see this message :
Plain Text
Windows 8 Recovery is successful. Please press 'OK' and restart your system.
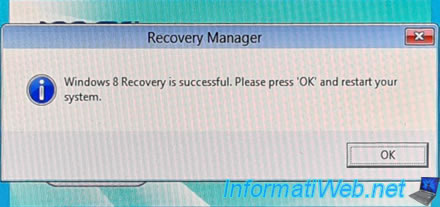
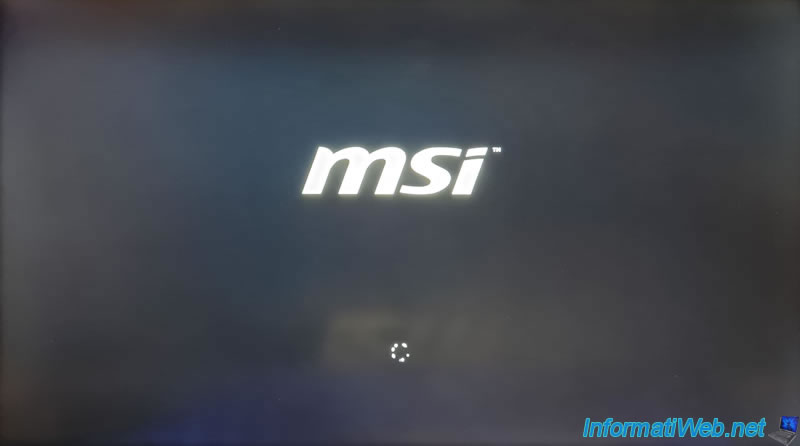
Your MSI laptop restarts and the MSI logo appears.
![]()
If you see this message appear, do nothing and wait a few seconds.
This will disappear on its own and is due to the presence of the recovery DVD in the CD/DVD drive of your MSI laptop.

A loading icon will appear.
Then, the "Getting devices ready" message will appear.

Then, the "Getting ready" message.

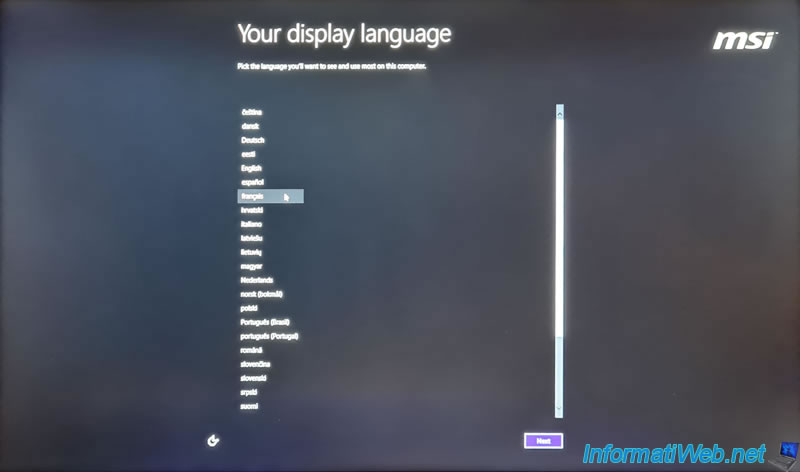
At some point, a "Your display language" screen will appear.
Click your language in the list and click Next.
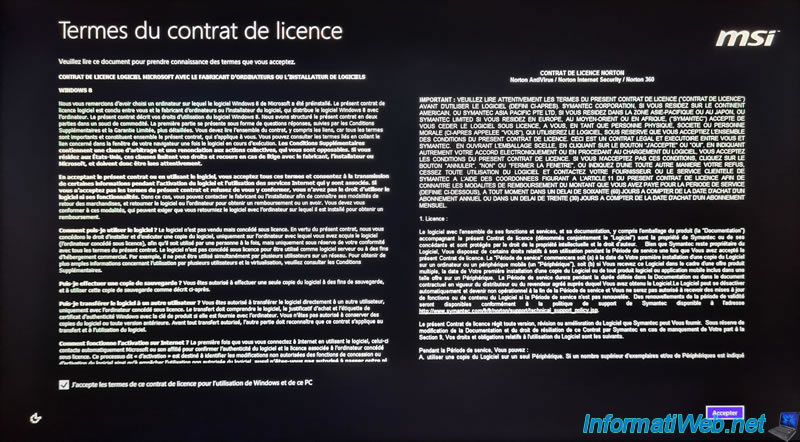
Then, the informations of Windows 8 and third-party software preinstalled by MSI will appear.
Check the box "I accept ..." and click on Accept.
Then, steps specific to the installation of Windows 8 will appear.
If necessary, refer to our tutorial : Format your computer and reinstall Windows 8 or 8.1.
Windows 8 installation continues.

3. Windows 8 installation restored to factory state
After Windows 8 installation is complete, you will land on the Windows 8 welcome screen.
To access the Windows 8 desktop, click on the red "Desktop" rectangle located at the bottom left of the screen.
As expected, your MSI laptop on Windows 8 has been restored to factory state with its pre-installed software, MSI wallpaper and even its drivers.
Your laptop is therefore ready for use.

As expected, the 36 GB of data we had stored in the "DATA (D:)" partition was retained.
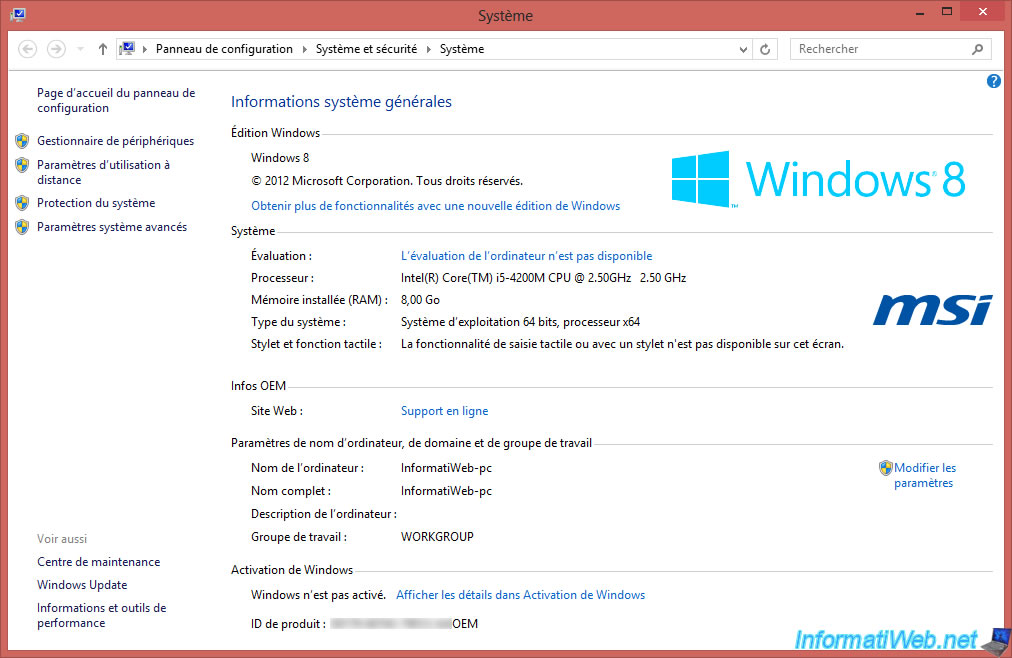
If you right-click "Properties" on "Computer", you can see that Windows 8 has been successfully reinstalled.
Note that for your Windows 8 license to be reactivated, you will need to connect your laptop to the Internet at least once. For the serial number of Windows 8, don't worry, it's already preconfigured in your laptop.
However, avoid restoring your Windows 8 installation every week if you want to avoid having problems with your Windows 8 license. This advice is also valid for other versions of Windows.
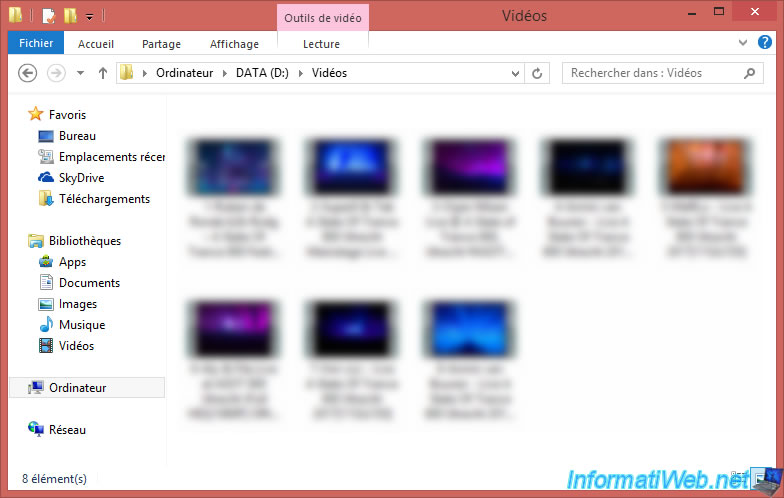
As expected, we still have our personal data in the "DATA (D:)" partition.
And the videos we had stored in this "DATA (D:)" partition were successfully preserved.
Share this tutorial
To see also
-

Others 1/17/2013
Adobe After Effect - Export a big animation in SWF
-

Others 10/31/2013
Improve Dreamweaver intellisense
-
Others 3/22/2014
Scan a document with any scanner
-

Others 10/4/2008
Use multiple versions of Mozilla Firefox at the same time
You must be logged in to post a comment